Community Tip - Visit the PTCooler (the community lounge) to get to know your fellow community members and check out some of Dale's Friday Humor posts! X
- Community
- Creo+ and Creo Parametric
- 3D Part & Assembly Design
- Creo Parametric 2.0, How do I use the identical di...
- Subscribe to RSS Feed
- Mark Topic as New
- Mark Topic as Read
- Float this Topic for Current User
- Bookmark
- Subscribe
- Mute
- Printer Friendly Page
Creo Parametric 2.0, How do I use the identical dimensioning scheme?
- Mark as New
- Bookmark
- Subscribe
- Mute
- Subscribe to RSS Feed
- Permalink
- Notify Moderator
Creo Parametric 2.0, How do I use the identical dimensioning scheme?
I am working my way through The Creo Parametric 2.0 Tutorial book and am having trouble getting started with the chapter 7 exercise.
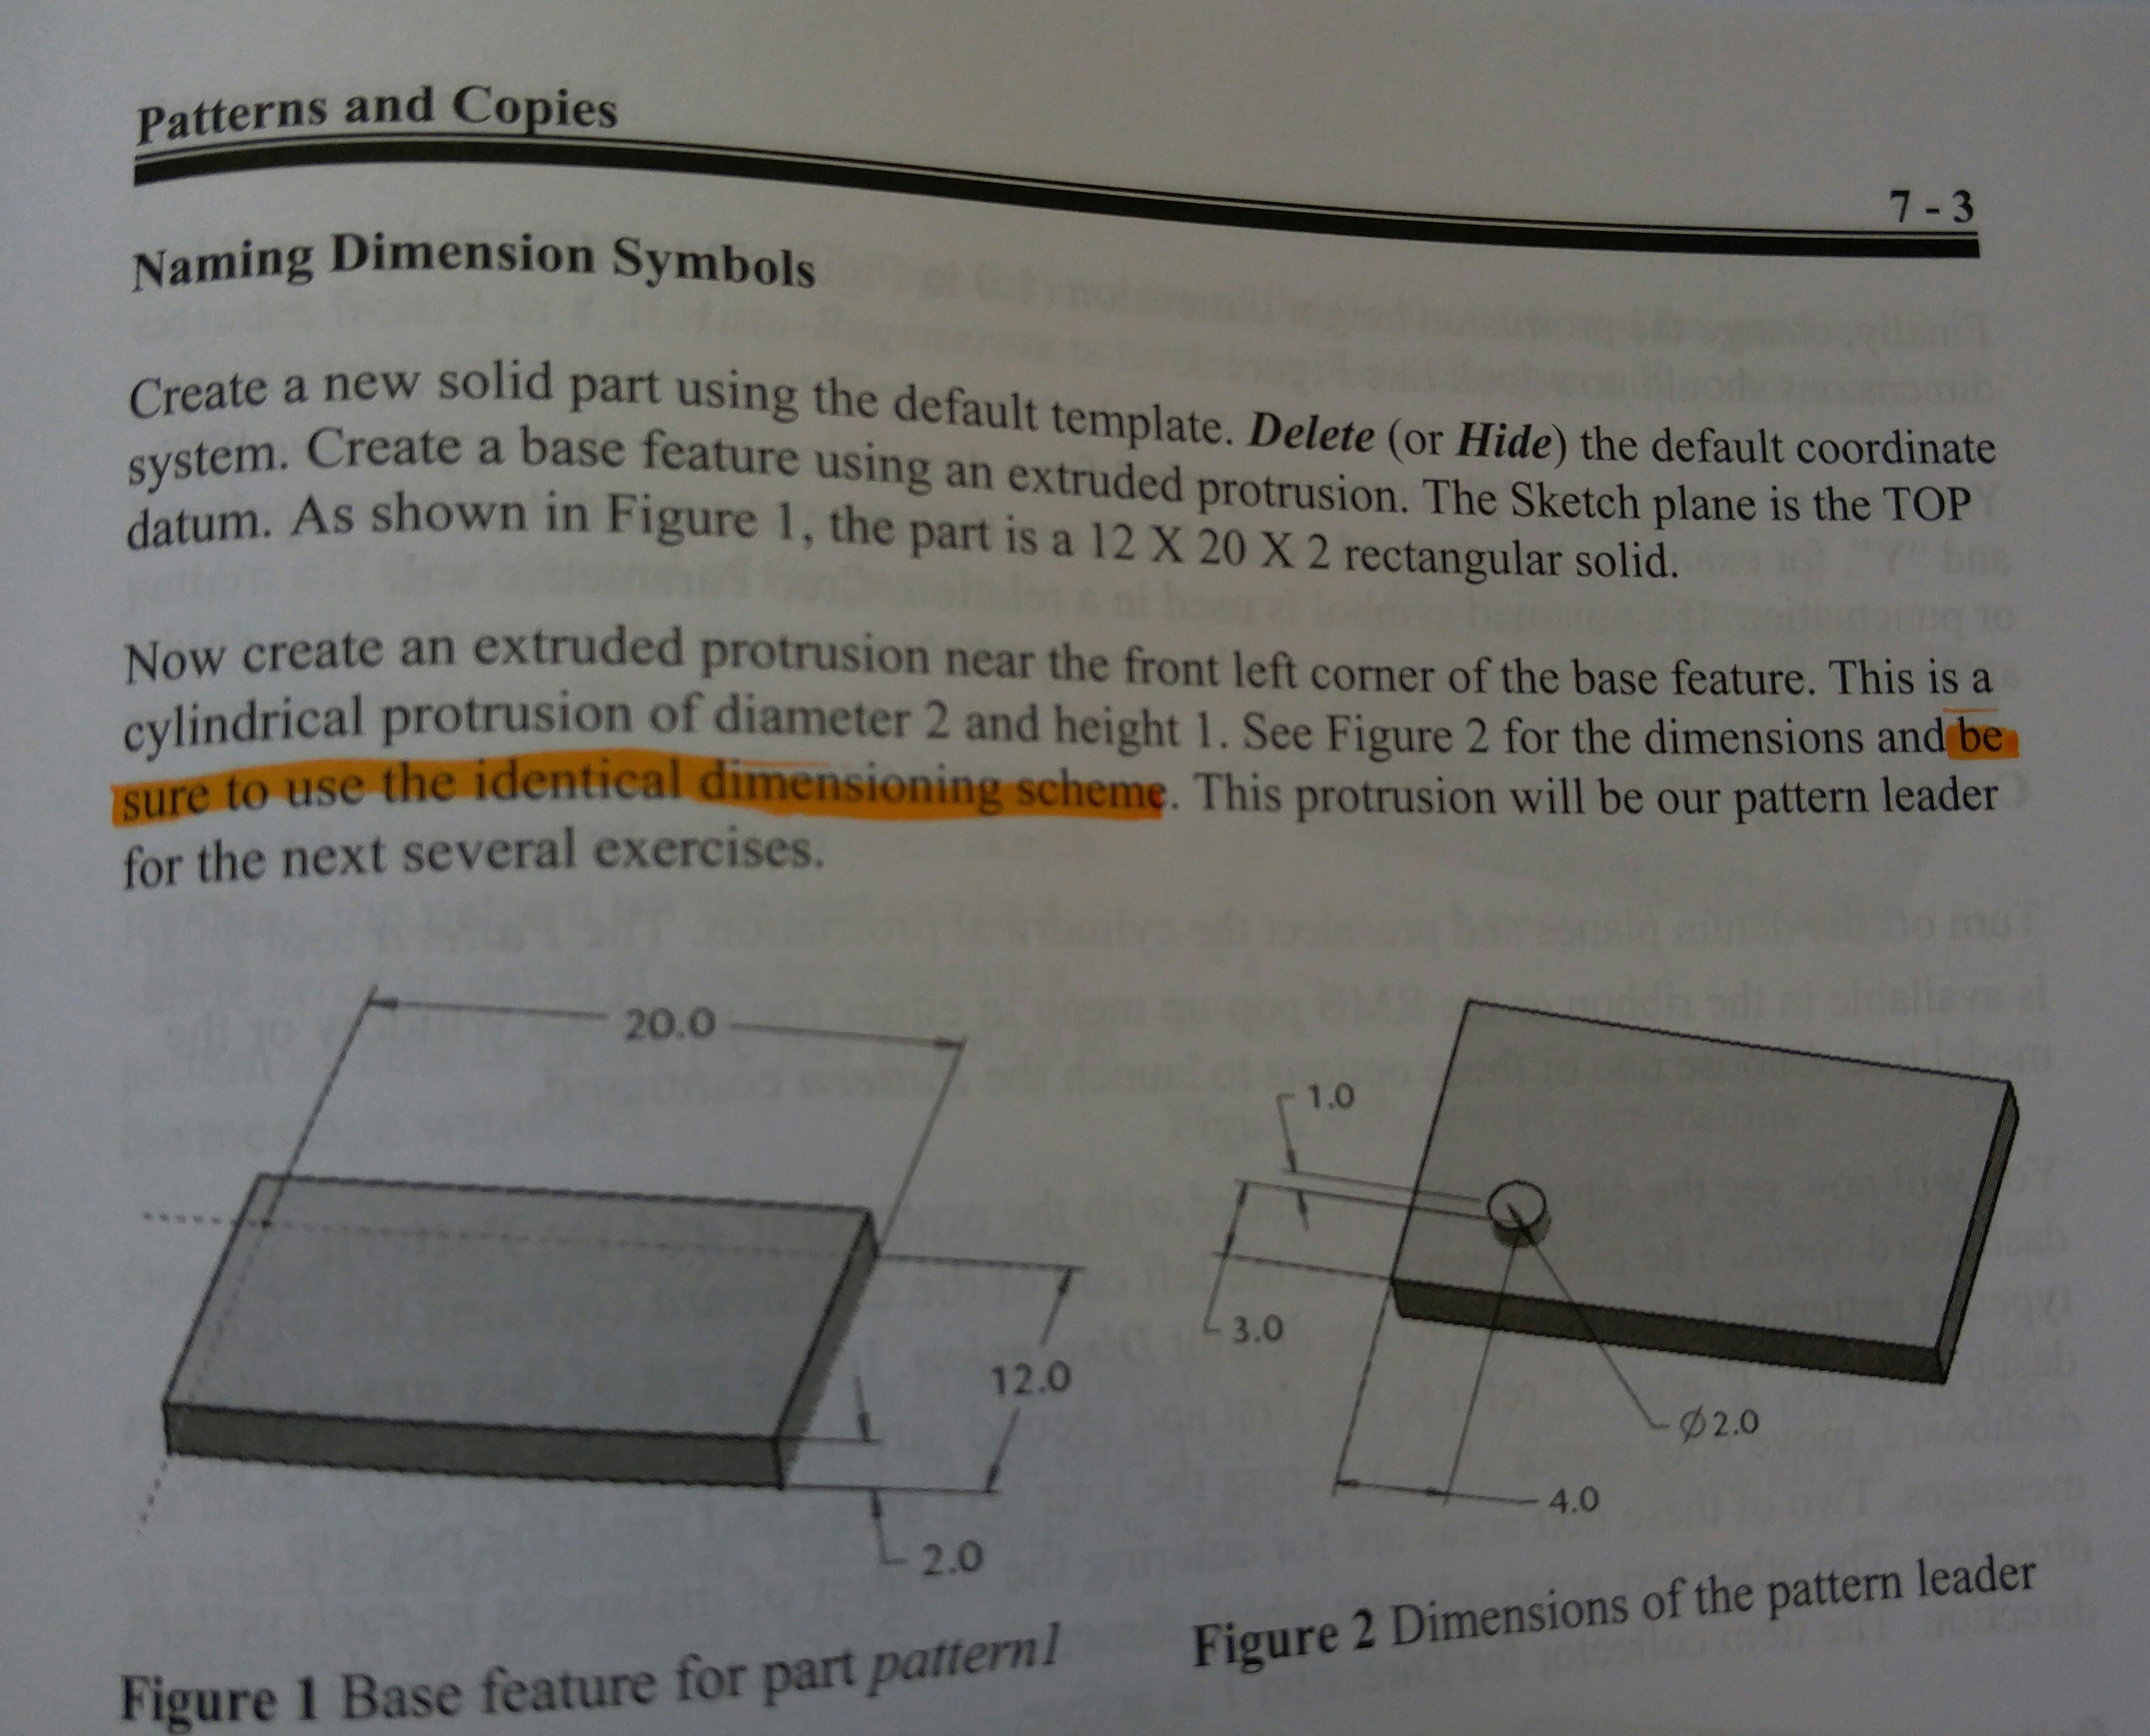
To begin the exercise you need to create an extruded protrusion that is 12 X 20 X 2 rectangular base. Then you need to extrude a protrusion near the front left corner of the base feature just created. This is a cylindrical protrusion of diameter 2 and height 1. The instructions then say to be sure to use the identical dimensioning scheme.
My Question:
How do I use the identical dimensioning scheme?
Purpose for Question:
The next step in the exercise is to click on the cylindrical protrusion and select in the Model ribbon {Model Intent}: Switch Symbols
However, the option of Switch Symbols is not displayed. But instead Switch Dimensions is shown.
Thanks for any help you can offer.
-Drew
This thread is inactive and closed by the PTC Community Management Team. If you would like to provide a reply and re-open this thread, please notify the moderator and reference the thread. You may also use "Start a topic" button to ask a new question. Please be sure to include what version of the PTC product you are using so another community member knowledgeable about your version may be able to assist.
- Labels:
-
Data Exchange
- Mark as New
- Bookmark
- Subscribe
- Mute
- Subscribe to RSS Feed
- Permalink
- Notify Moderator
Using identical dimensioning scheme means creating dimensions as they are created in figure 2. It has nothing to do with Switch Symbols/Dimensions.
I think you are not using Creo 2. The command name is changed to Switch Dimensions in Creo 3 but the function is the same as Switch Symbols in Creo 2. Just go ahead...![]()
- Mark as New
- Bookmark
- Subscribe
- Mute
- Subscribe to RSS Feed
- Permalink
- Notify Moderator
There is a very Good video is available in you tube , which explain identical , variable and general pattern
Please refer below
Creo Pattern Options - Speed vs. Power: EAC Tip of the Week - YouTube
- Mark as New
- Bookmark
- Subscribe
- Mute
- Subscribe to RSS Feed
- Permalink
- Notify Moderator
Thanks for the tip. However, the question was not about patterns.
- Mark as New
- Bookmark
- Subscribe
- Mute
- Subscribe to RSS Feed
- Permalink
- Notify Moderator
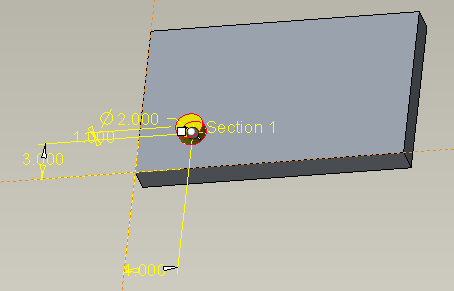
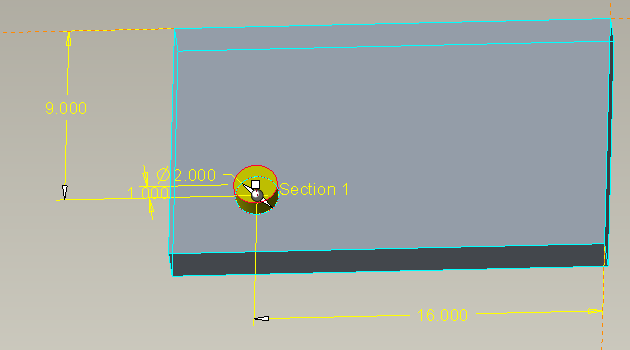
"identical dimensioning scheme" means that your model should have the same dimensions to the same features.
The 2 images below place the feature in the exact same location but they have different dimensioning schemes.


