
Turn on suggestions
Auto-suggest helps you quickly narrow down your search results by suggesting possible matches as you type.
Showing results for
Turn on suggestions
Auto-suggest helps you quickly narrow down your search results by suggesting possible matches as you type.
Showing results for
Community Tip - When posting, your subject should be specific and summarize your question. Here are some additional tips on asking a great question. X
- Community
- Creo+ and Creo Parametric
- 3D Part & Assembly Design
- Did You Know? PTC Creo 3.0: Intelligent Fastener E...
Options
- Subscribe to RSS Feed
- Mark Topic as New
- Mark Topic as Read
- Float this Topic for Current User
- Bookmark
- Subscribe
- Mute
- Printer Friendly Page
Did You Know? PTC Creo 3.0: Intelligent Fastener Extension Part 3
Mar 28, 2016
08:56 AM
- Mark as New
- Bookmark
- Subscribe
- Mute
- Subscribe to RSS Feed
- Permalink
- Notify Moderator
Mar 28, 2016
08:56 AM
Did You Know? PTC Creo 3.0: Intelligent Fastener Extension Part 3
In our first two blog posts about PTC Creo Intelligent Fastener Extension, we covered some of the advanced tutorials available on the PTC Creo Parametric Help Center. Today’s post will cover an advanced technical tip available in the PTC University Learning Exchange. Here, Jim Barrett-Smith, PTC Product Management Director, explains how to migrate legacy fasteners to the PTC Creo Intelligent Fastener Extension.
The quickest and easiest way to migrate legacy fasteners is to copy an existing standard from the out of the box library and paste them into a new custom folder. For example, under Local Disc (C:)>IFX Library>Screws there are three legacy fasteners. Under the load point of PTC>Creo3.0>M030>Common Files>afx>parts>scres_and_pins>screws, I’ve created a new folder called Jim. This is the location of my new custom library. Next, you should rename the files to suit your custom library. In this example, the file is renamed Jim_iso4017.dat. The mnu file should have the same name as the folder that contains it.
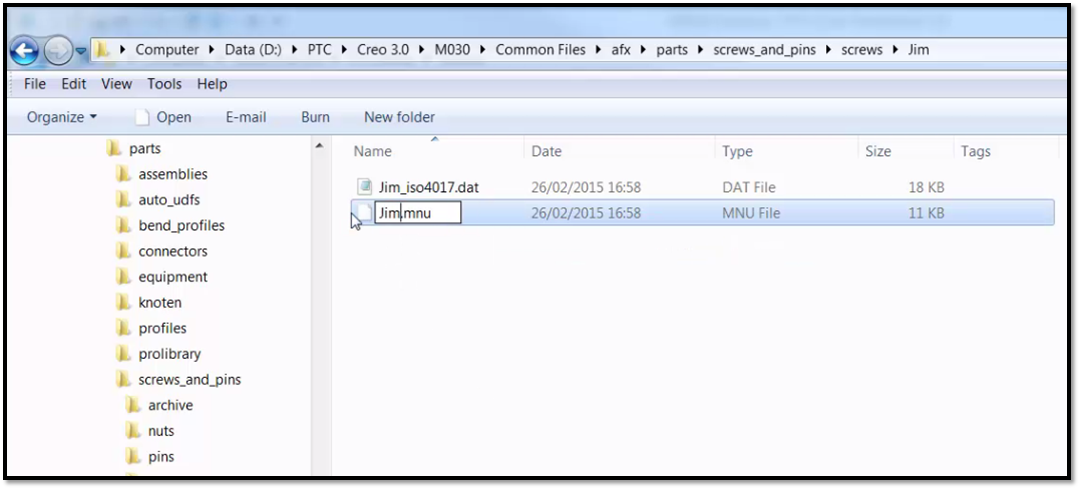
The .mnu file is renamed Jim.mnu to match the folder that contains it.
Next, right click the .mnu file and click TextPad to edit the .mnu file to suit your custom library. In this example, line 1 was changed from MM to Jim. Change line 4 to be the same name as the .dat file that was previously renamed, but with the extension .prt. Update the 5th line to be the English Tooltip and the 6th line to be a localized Tooltip. Next, remove all of the remaining content from the .mnu file.
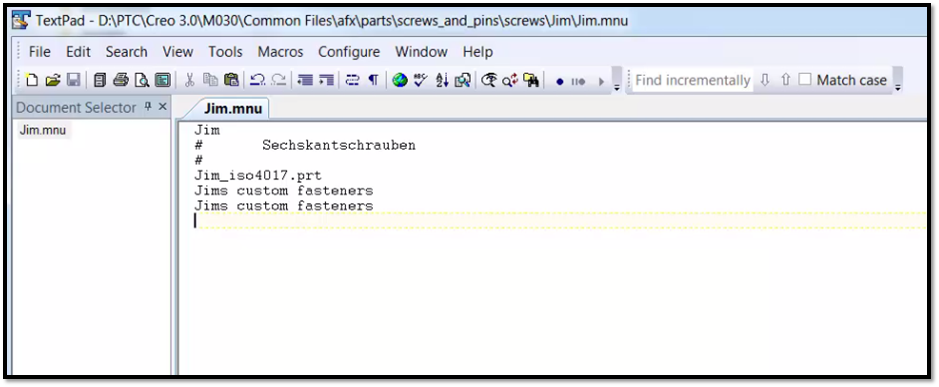 This example is English only, so the English text is copied to the 6th line.
Next, you’ll need to edit the .dat file. The .dat file lists all the items that are in your custom library. For this example, reuse the existing content and rename it to be the same as the .prt file. You can delete all excess content. If you do not want custom parameters, you can delete them as well.
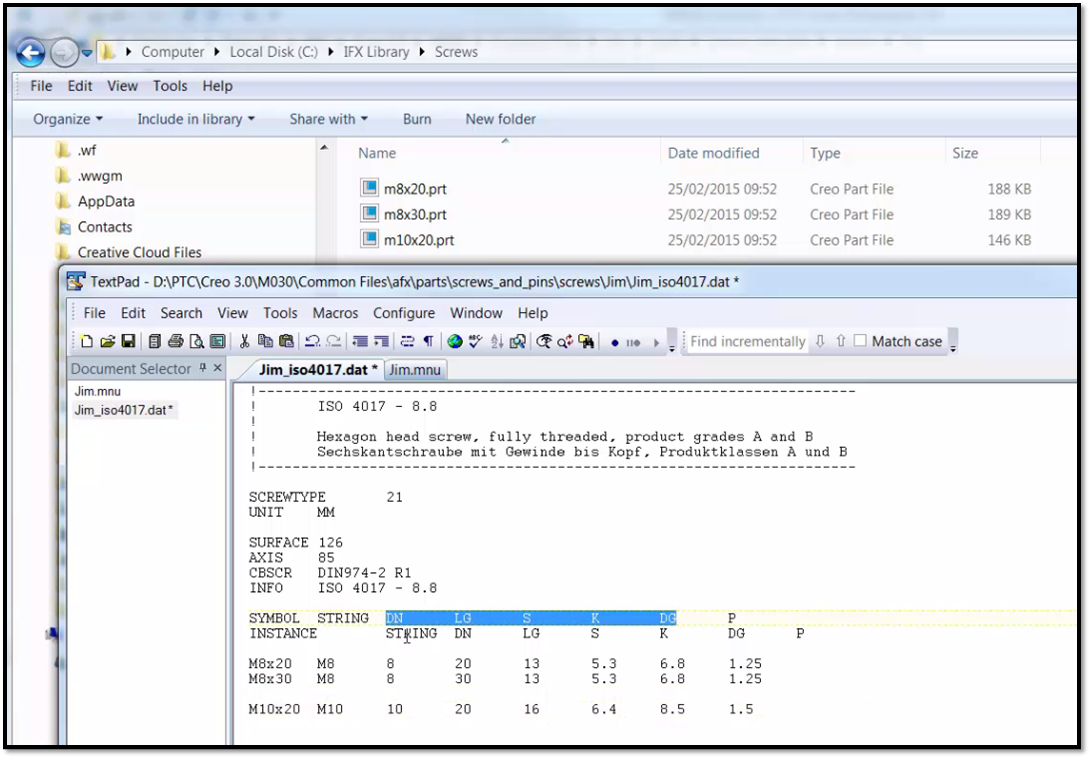
Note that the fields highlighted here are used for the preview in the IFX dialogue box.
The P in the previous picture is the pitch value. Note that the pitch value of the screw must match the pitch value of the associated nut. At the top, we have the Surface ID and the Axis ID of the fasteners. To identify the ID’s, set the configuration option show_selected_item_id to yes. Set the configuration option search_path to point to your custom library.
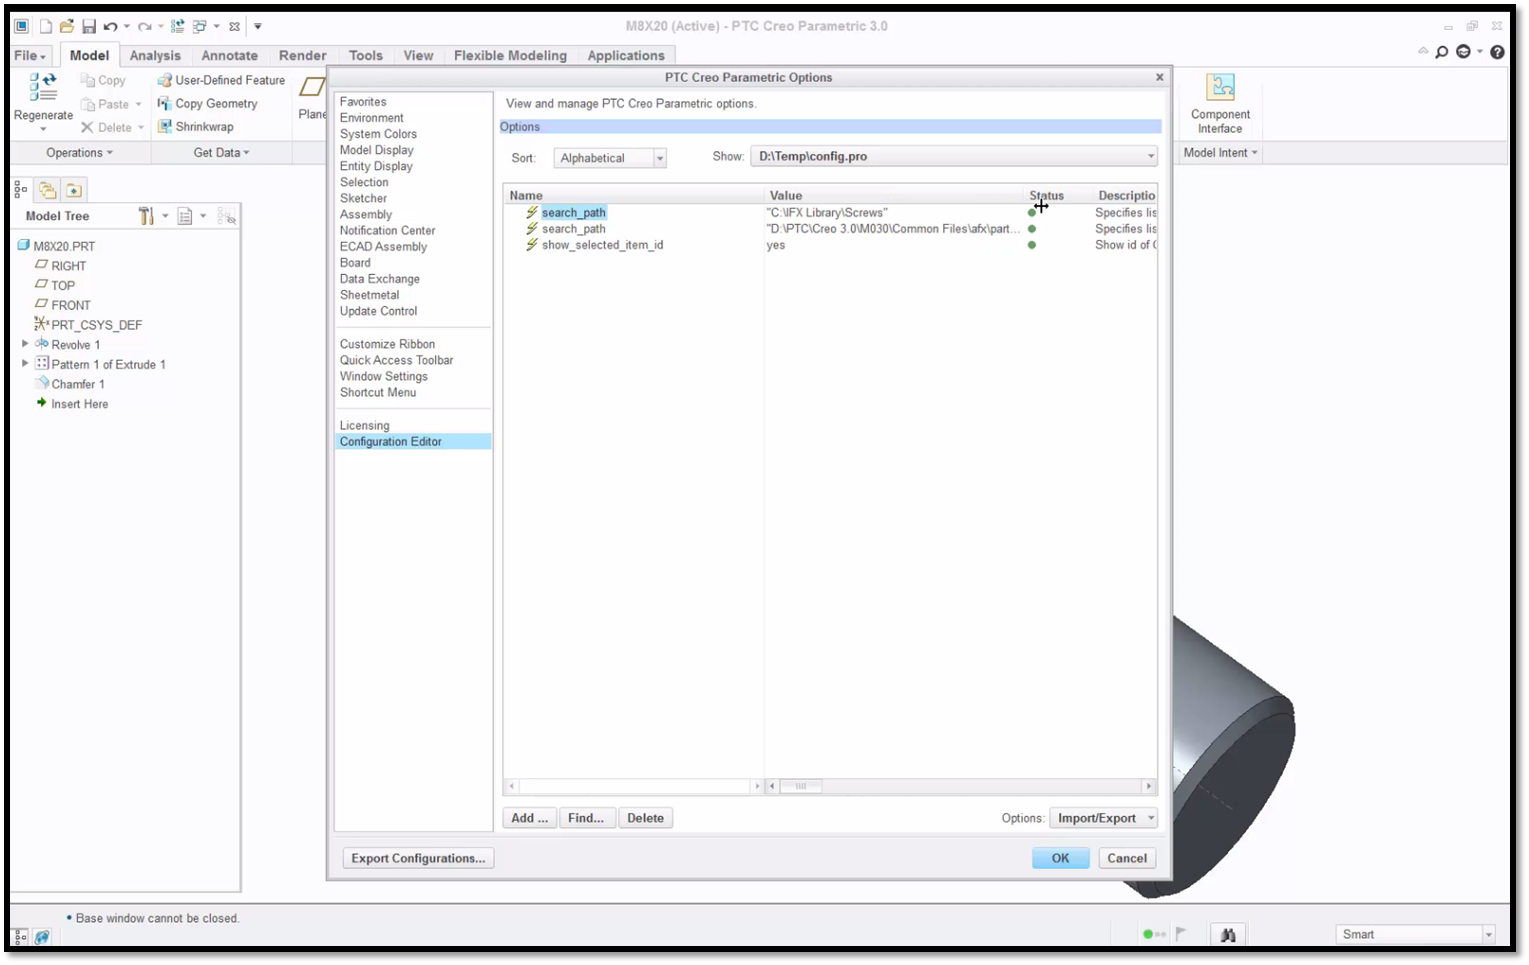
Notice the configuration settings in the Value column.
By hovering the cursor over the axis, you’ll see the ID of the axis is 96. And by hovering the cursor over the fastener head, you’ll see the ID is 61. Go back to the .dat file and update your Surface and Axis ID’s to match. In this example, the Surface ID is changed to 61 and the Axis ID is changed to 96. You’ll need to repeat this process for the other .prt files in the folder. You can reuse the CBSCR information and edit the Tooltip as well. Return to the screws folder and edit the screws menu. Tell it to look in your custom folder and add a Tooltip and localized Tooltip. Be sure to save the file before exiting.
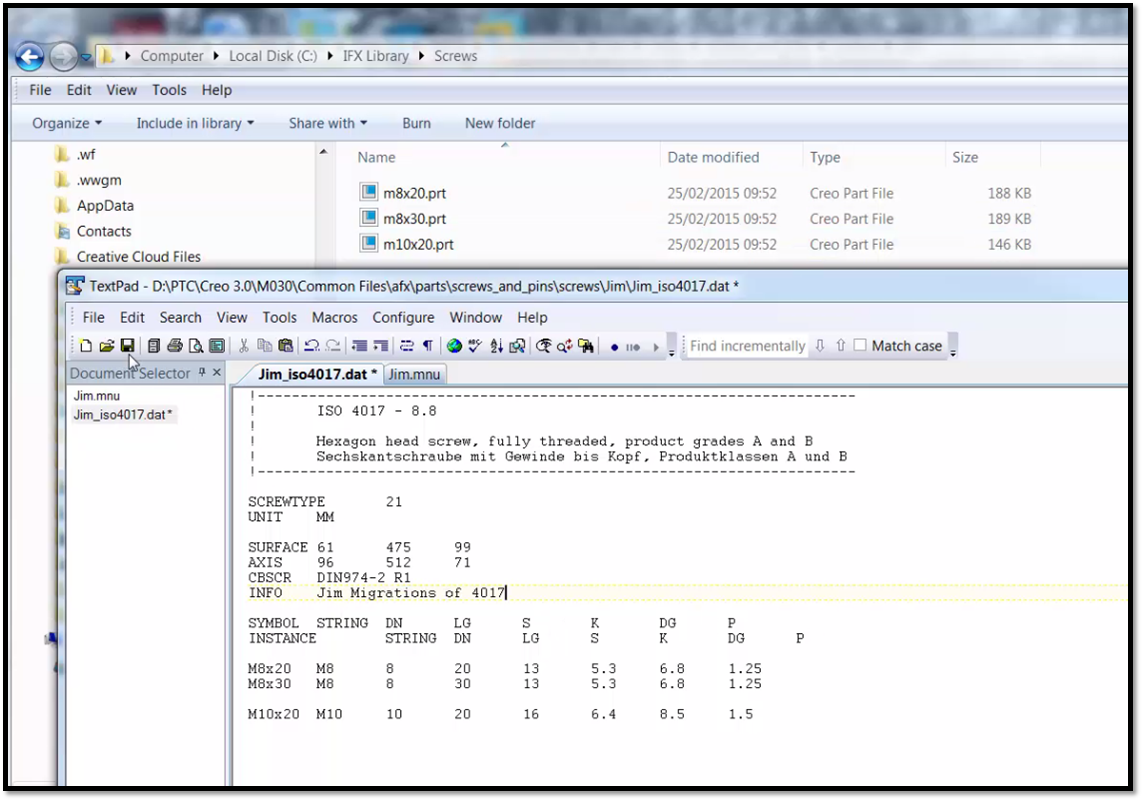
Here you can see the Surface ID’s of all three .prt files: 61, 475, and 99.
Lastly, restart PTC Creo and place the new fastener. In this example, you can see that under the Jim folder, there is a tool tip and the custom fastener is under the available screws. The thread and lengths that were created are also listed as available. Once you select OK, PTC Creo Intelligent Fastener Extension will assemble the legacy fastener.
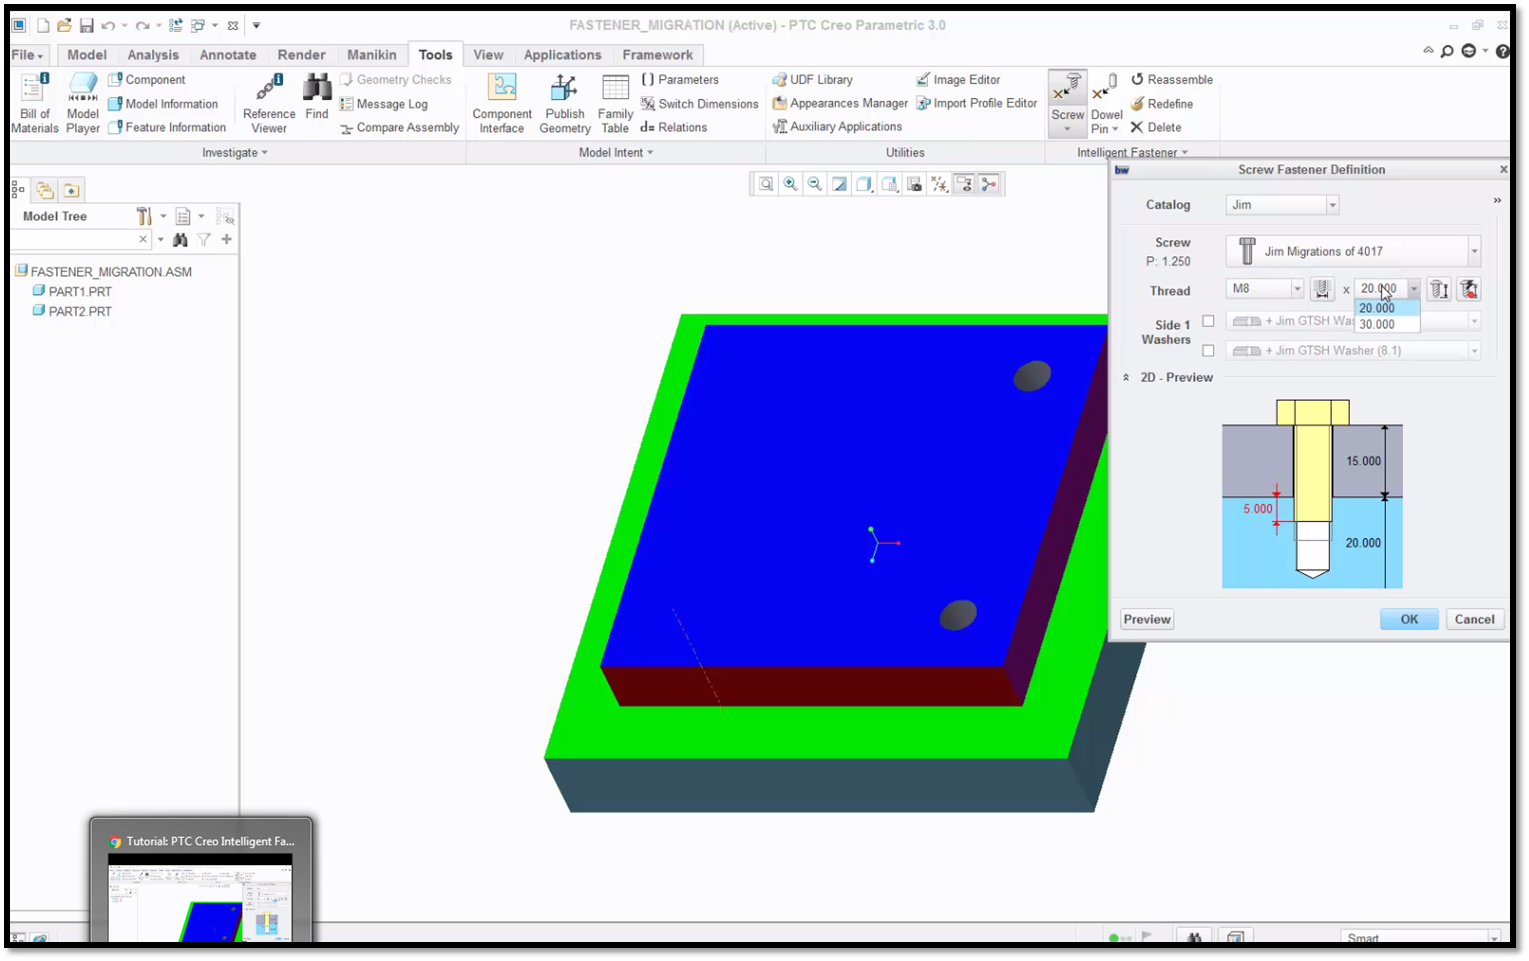
Click the drop down menus in the dialog box to ensure that all your fasteners are available.
In summary:
- Edit the screws menu to point to your custom folder.
- Copy an existing .mnu and .dat file from an existing standard out of the box to your custom folder.
- Change the .mnu file to point to your .dat file with the extension .prt.
- Update the .dat file to point to your legacy fasteners, with the Surface ID, Axis and other information.
- Restart PTC Creo and begin working.
To learn more about migrating legacy fasteners to PTC Creo Intelligent Fastener Extension, check out our video tutorial on the PTC Creo University Learning Exchange (“PTC Creo Intelligent Fastener – Migrating Legacy Fasteners to IFX”).
Stay tuned to our “Did You Know” blog series as we cover all of the exciting, new enhancements in PTC Creo 3.0.
Have some ideas about what PTC Creo product features you’d like to learn more about? Send me a message or leave a comment below and we’ll write up the best ideas from the community. Thanks for reading, looking forward to all of your feedback!
In case you missed it, see what’s new and check out our recent Did You Know posts covering PTC Creo 3.0 enhancements:
- Did You Know? PTC Creo 3.0: Intelligent Fastener Extension Part 2
- Did You Know? PTC Creo 3.0: Intelligent Fastener Extension Part 1
- Did You Know? Unite Technology
This thread is inactive and closed by the PTC Community Management Team. If you would like to provide a reply and re-open this thread, please notify the moderator and reference the thread. You may also use "Start a topic" button to ask a new question. Please be sure to include what version of the PTC product you are using so another community member knowledgeable about your version may be able to assist.
0 REPLIES 0
