
Turn on suggestions
Auto-suggest helps you quickly narrow down your search results by suggesting possible matches as you type.
Showing results for
Turn on suggestions
Auto-suggest helps you quickly narrow down your search results by suggesting possible matches as you type.
Showing results for
- Community
- Creo+ and Creo Parametric
- 3D Part & Assembly Design
- Milling multiple pockets with different depths
Options
- Subscribe to RSS Feed
- Mark Topic as New
- Mark Topic as Read
- Float this Topic for Current User
- Bookmark
- Subscribe
- Mute
- Printer Friendly Page
Milling multiple pockets with different depths
Jan 21, 2013
09:57 PM
- Mark as New
- Bookmark
- Subscribe
- Mute
- Subscribe to RSS Feed
- Permalink
- Notify Moderator
Jan 21, 2013
09:57 PM
Milling multiple pockets with different depths
I Am looking for a way to rough and finish pockets that have different depths. I am trying both mill volumes and windows. If there are pockets with different depths it wants to add a slice for every pocket that's deeper than the previous. Therefore I could have a pocket that is shallower than my step depth and it still wants to mill it in multiple slices. The same goes for finishing. If I just want to finish the floor it adds a lot of unwanted slices. Is there a way for pro to calculate slices for each individual pocket? Or do I have to create a separate sequence for each depth pocket. I am using creo 2 m030.
This thread is inactive and closed by the PTC Community Management Team. If you would like to provide a reply and re-open this thread, please notify the moderator and reference the thread. You may also use "Start a topic" button to ask a new question. Please be sure to include what version of the PTC product you are using so another community member knowledgeable about your version may be able to assist.
Solved! Go to Solution.
Labels:
- Labels:
-
Data Exchange
1 ACCEPTED SOLUTION
Accepted Solutions
Jan 22, 2013
09:36 AM
- Mark as New
- Bookmark
- Subscribe
- Mute
- Subscribe to RSS Feed
- Permalink
- Notify Moderator
Jan 22, 2013
09:36 AM
Jason,
I am not sure if there is a way to remove the extra slices for the roughing, But the finishing can be done fairly easily. there are several options for the finishing of multiple pockets. One way is to use the volume rough with the options set to the options in the pictures below. it will finish the flooors snd walls with cutter comp on.
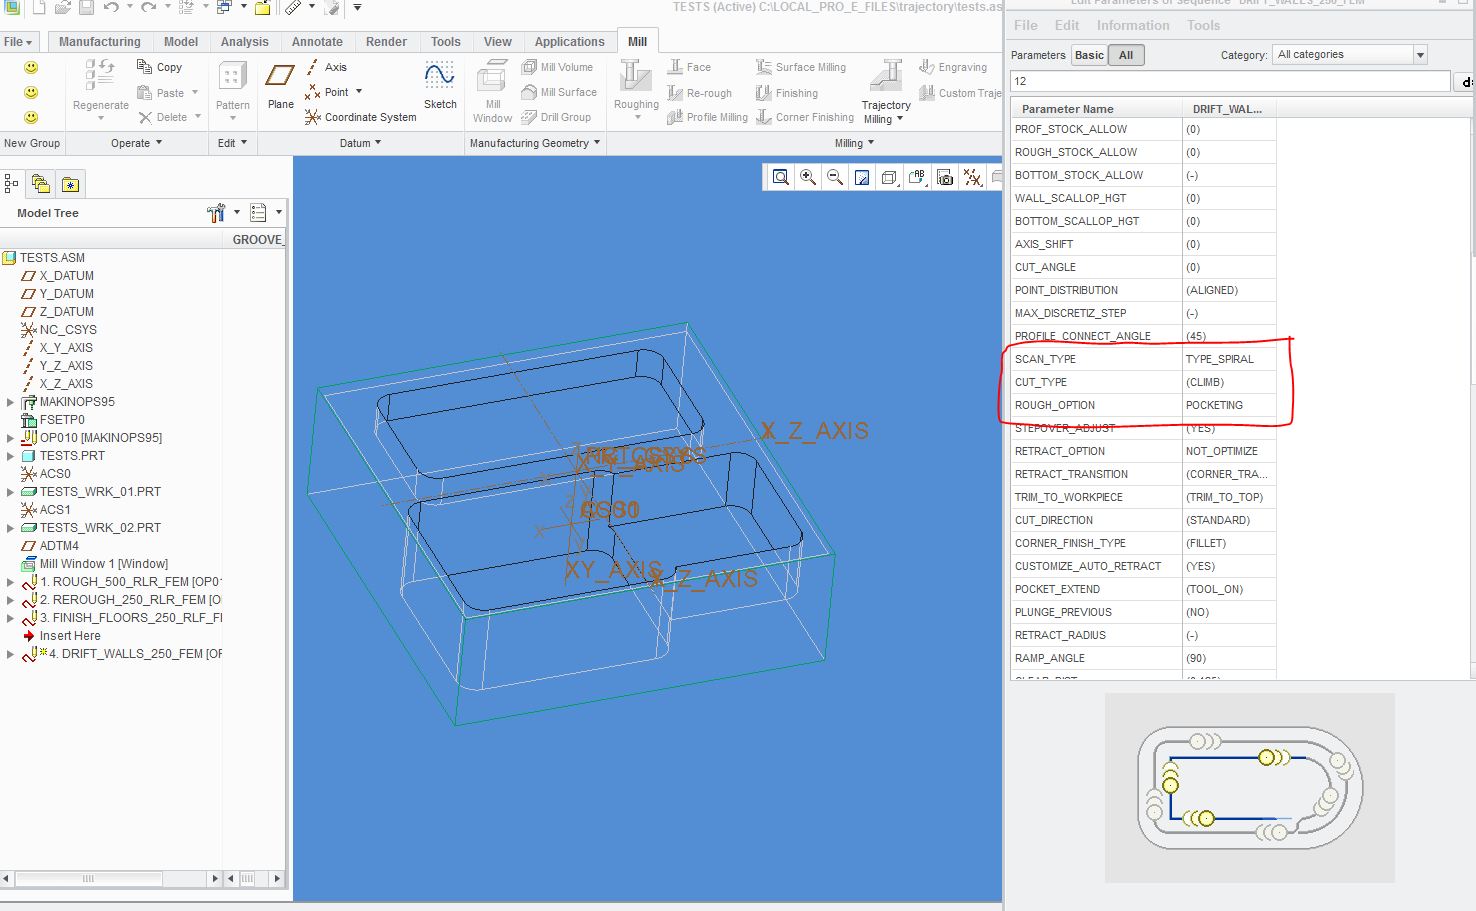
The way I like to do it is with 2 sequences. One sequence to finish the floor and stay off the walls and the second to finish the walls. Again using the volume rough and changing the parameters to spiral and faces only for the floorswith wall stock and no floor stock. The second sequence parameters would be follow hard walls and profile only.
7 REPLIES 7
Jan 22, 2013
09:21 AM
- Mark as New
- Bookmark
- Subscribe
- Mute
- Subscribe to RSS Feed
- Permalink
- Notify Moderator
Jan 22, 2013
09:37 AM
- Mark as New
- Bookmark
- Subscribe
- Mute
- Subscribe to RSS Feed
- Permalink
- Notify Moderator
Jan 22, 2013
09:37 AM
Yeah not alot of good choices for you this is what i would do. Roughing sequence and Finishing you have to have a defined workpiece (stock) but is all automatic
Jan 22, 2013
09:36 AM
- Mark as New
- Bookmark
- Subscribe
- Mute
- Subscribe to RSS Feed
- Permalink
- Notify Moderator
Jan 22, 2013
09:36 AM
Jason,
I am not sure if there is a way to remove the extra slices for the roughing, But the finishing can be done fairly easily. there are several options for the finishing of multiple pockets. One way is to use the volume rough with the options set to the options in the pictures below. it will finish the flooors snd walls with cutter comp on.
The way I like to do it is with 2 sequences. One sequence to finish the floor and stay off the walls and the second to finish the walls. Again using the volume rough and changing the parameters to spiral and faces only for the floorswith wall stock and no floor stock. The second sequence parameters would be follow hard walls and profile only.
Jan 22, 2013
10:23 AM
- Mark as New
- Bookmark
- Subscribe
- Mute
- Subscribe to RSS Feed
- Permalink
- Notify Moderator
Jan 22, 2013
10:23 AM
Thanks Steve and Nick,
I was able to get the finishing to work how I wanted it to. The roughing still takes extra slices, but i am using volume rough so maybe thats why. When I get some time I will have to try the roughing sequence. I need to start using roughing and finishing but I dont have time to play with it so for now its volume rough for roughing and finishing.
Jan 22, 2013
10:34 AM
- Mark as New
- Bookmark
- Subscribe
- Mute
- Subscribe to RSS Feed
- Permalink
- Notify Moderator
Jan 23, 2013
10:14 AM
- Mark as New
- Bookmark
- Subscribe
- Mute
- Subscribe to RSS Feed
- Permalink
- Notify Moderator
Jan 23, 2013
10:14 AM
Thanks for the file Nick!
Steve, I try to finish my parts the same way you suggested. Using the faces only option work great, but when I try and do profile only I still have the same problem.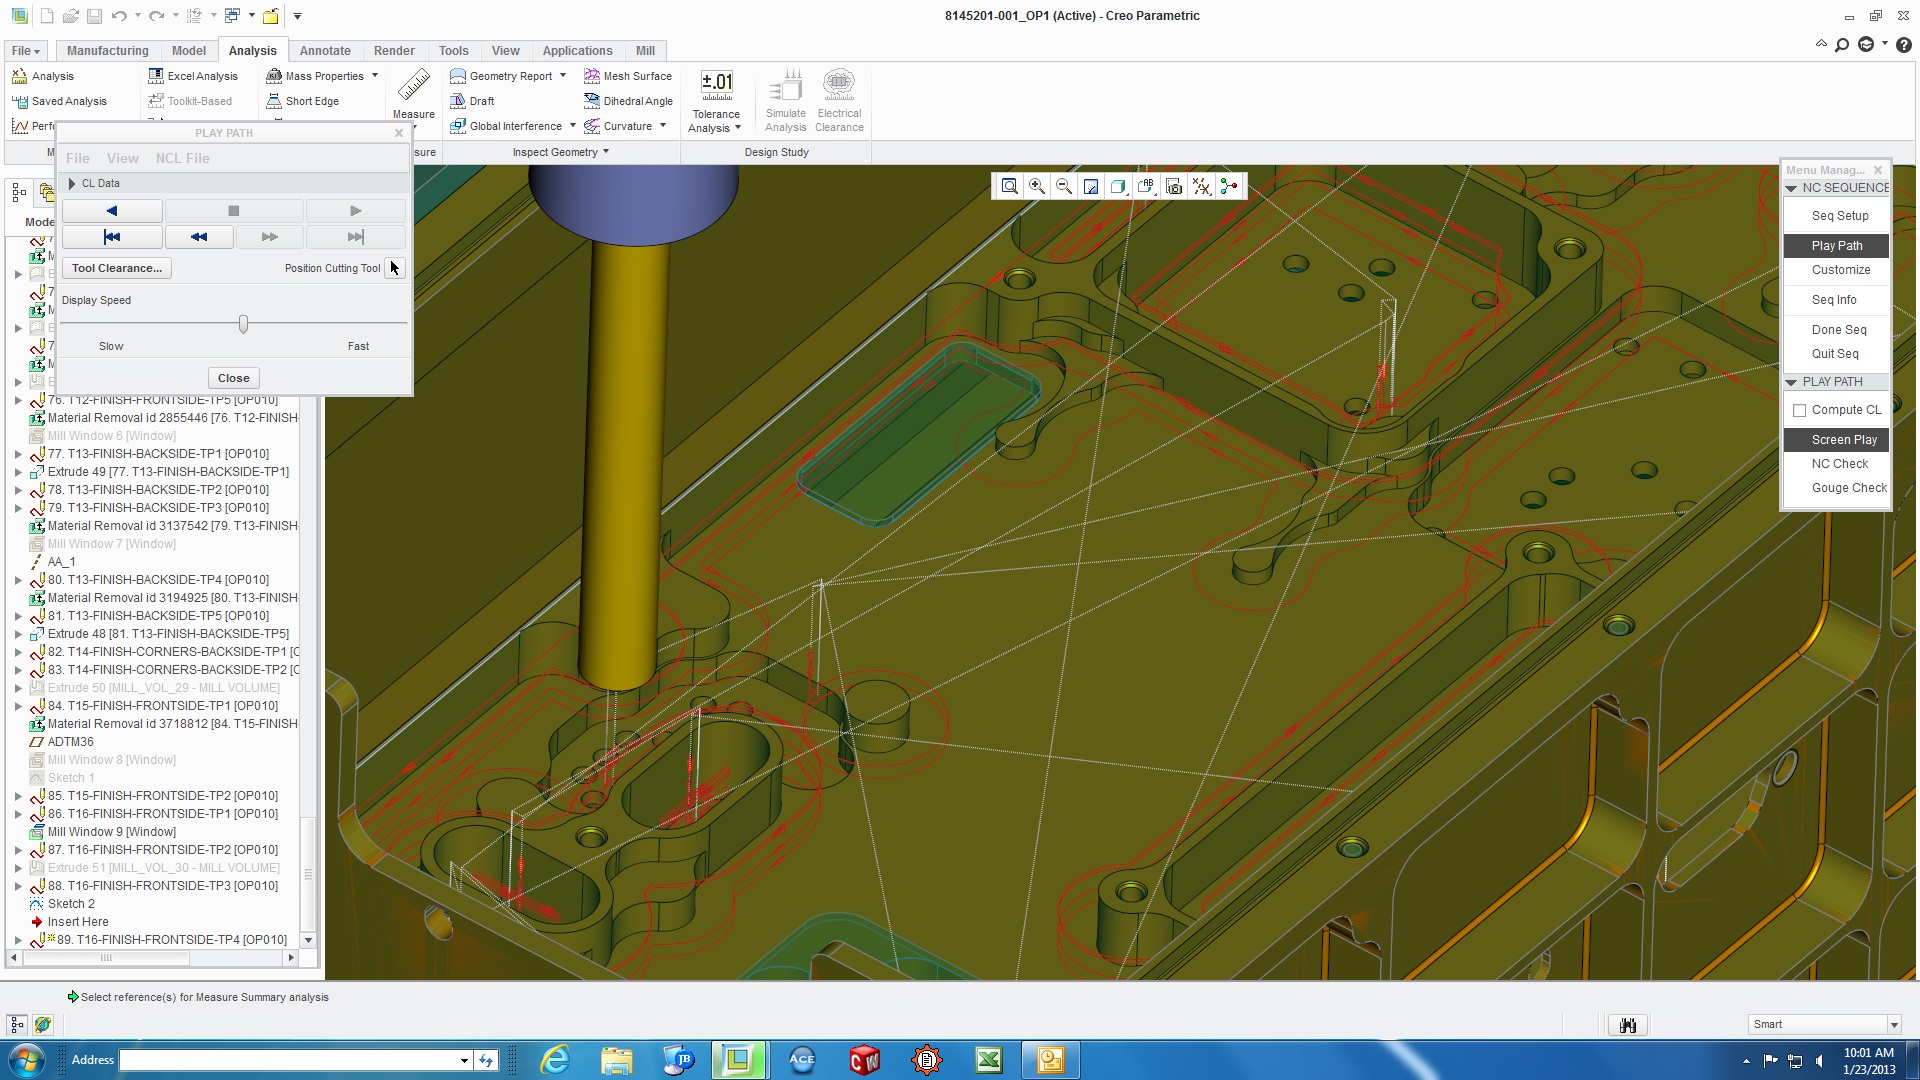
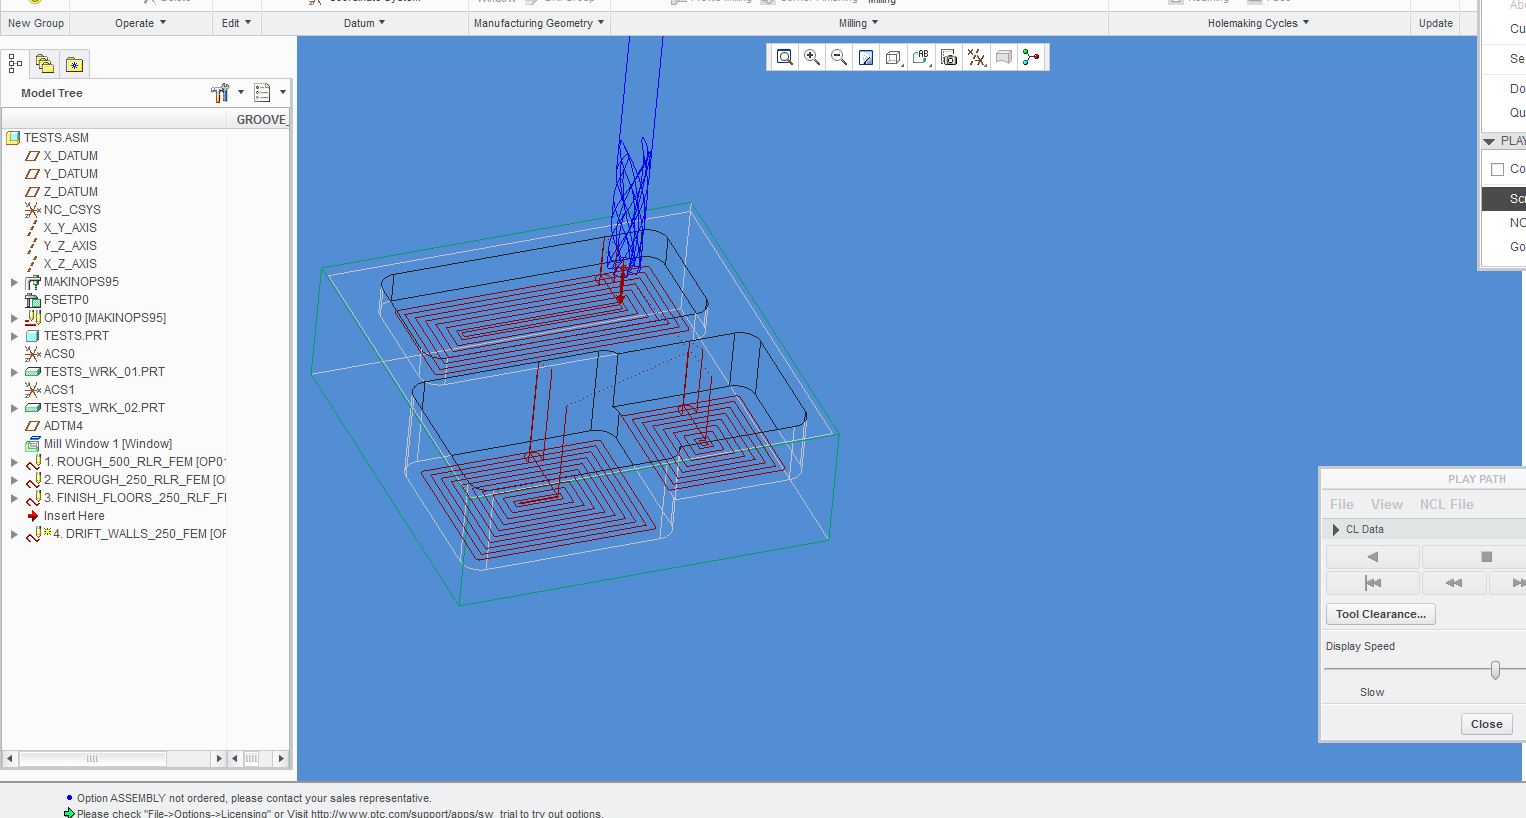
The outermost profile has the correct amount of slices since there are shelves with different z-levels around the outside. But the 2 oval pockets should be using the step depth. Instead they are creating an extra slice to match the outside profile. There are a couple other places in this sequence where it does the same thing. Volume Rough is what you see but I got the same result with finishing. The biggest problem with finishing is I can't find out how to get it to comp in and out on each profile. I machine a lot of housings that have a lot of different z-levels so getting this to work correctly could save me a lot of time compared to doing each profile individually.
Jan 23, 2013
10:39 AM
- Mark as New
- Bookmark
- Subscribe
- Mute
- Subscribe to RSS Feed
- Permalink
- Notify Moderator
Jan 23, 2013
10:39 AM
Jason,
That's a pretty complex part. Not sure you will be able to just get 1 profile pass around it for each Z level. What are the Parameters set to? Is that with them set to follow hard walls and profile only? What you can try is set them to spiral and pocketing with the Z depth set to the deepest pocket. That should finish each Z level floor and Profile. The problem might be that it will tray and go around the whole part profile at each level.
Iam not sure what the best option might be for what you are trying.
One thing I might consider trying is the finishing routine.I know you can separate out the floors and wall finishing or combine them. maybe experiment with that trying to get single profile passes for the walls. I haven't done much with that for straight wall finishing.
Steve
