Community Tip - You can subscribe to a forum, label or individual post and receive email notifications when someone posts a new topic or reply. Learn more! X
- Community
- Creo+ and Creo Parametric
- Manufacturing (CAM)
- Re: How to machine a back angle undercut with a ra...
- Subscribe to RSS Feed
- Mark Topic as New
- Mark Topic as Read
- Float this Topic for Current User
- Bookmark
- Subscribe
- Mute
- Printer Friendly Page
How to machine a back angle undercut with a radius keyway cutter
- Mark as New
- Bookmark
- Subscribe
- Mute
- Subscribe to RSS Feed
- Permalink
- Notify Moderator
How to machine a back angle undercut with a radius keyway cutter
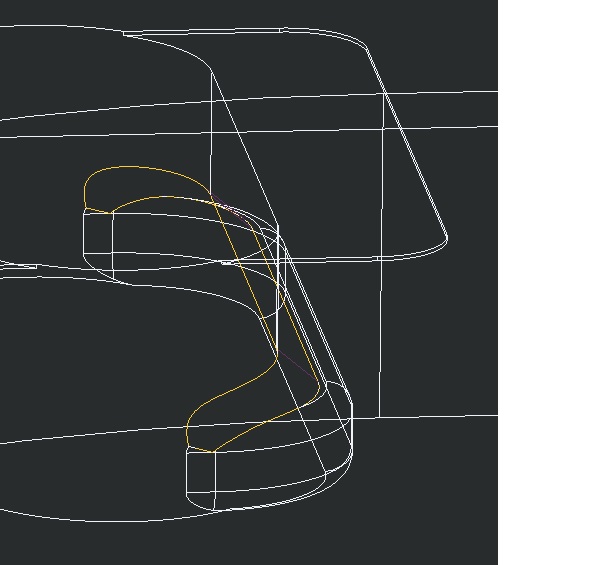
Good morning, I am working on a part that has a back angle that I am trying to machine with a .062" radius keyway cutter. I collected the surfaces but ProMan wont allow to use a key cutter for a surface sequence. I tried using profile but no luck. The feature I am trying to machine is the orange surface. Only other option is I am thinking to use is create individual curves at each .01" depth and do it the hard and manual way. There must be an easier way of doing undercut surfaces.
We are on Creo 3.0 M040.
Thanks.

This thread is inactive and closed by the PTC Community Management Team. If you would like to provide a reply and re-open this thread, please notify the moderator and reference the thread. You may also use "Start a topic" button to ask a new question. Please be sure to include what version of the PTC product you are using so another community member knowledgeable about your version may be able to assist.
Solved! Go to Solution.
- Labels:
-
General
Accepted Solutions
- Mark as New
- Bookmark
- Subscribe
- Mute
- Subscribe to RSS Feed
- Permalink
- Notify Moderator
Son,
I just did something similar with a profile cut but i made a surface copy of the cut and off set it several times to get it to work.
Here is the tool used.
play path of the first path
I just kept copying the step and changing the surface to the next deeper one and rename the sequence to create the undercut it worked quite well. Just make sure you have lead in and lead outs that don't violate the model.
Steve
- Mark as New
- Bookmark
- Subscribe
- Mute
- Subscribe to RSS Feed
- Permalink
- Notify Moderator
Steve, thanks. I was thinking that was what I was going to have to do but I was hoping for some easier solution. Oh well now I know the direction I will be trying to machine the part now.
On the sequences which type did you use for the cut? Also would you be able to upload your parameter for one of the sequence to see if I am missing any options.
Thanks.
- Mark as New
- Bookmark
- Subscribe
- Mute
- Subscribe to RSS Feed
- Permalink
- Notify Moderator
Son,
I used profile milling. Sometimes you have to get creative to get what you want with this software. Because the cut was round I was able to start on the axis and exit on axis so I didn't have cutter comp on but I suppose I could have if I needed to. This cut wasn't anything special just adding a cooling water channel to a hardened block for a core pin. I attached the mill parameter file that I used also.
hope this helps.
- Mark as New
- Bookmark
- Subscribe
- Mute
- Subscribe to RSS Feed
- Permalink
- Notify Moderator
Just tried using profile milling and that works also. Do not have to offset any surfaces and the back tip of the tool does a really good cut.
- Mark as New
- Bookmark
- Subscribe
- Mute
- Subscribe to RSS Feed
- Permalink
- Notify Moderator
Happy that it worked for you Son.
The reason I used stepped offsets on my cut was when it went around the radius it would then just plunge to the back of the water channel or the largest diameter. That is not what I wanted to do in hardened S7 so I created the stepped surfaces to take care if the problem. the copied surfaces were just of the largest diameter I couldn't copy the whole profile because my cutter wouldn't fit at the top then.
Steve


