Community Tip - If community subscription notifications are filling up your inbox you can set up a daily digest and get all your notifications in a single email. X
- Community
- PTC Education
- PTC Education Forum
- PTC Creo – Schools Configuration Guide
- Subscribe to RSS Feed
- Mark Topic as New
- Mark Topic as Read
- Float this Topic for Current User
- Bookmark
- Subscribe
- Mute
- Printer Friendly Page
PTC Creo – Schools Configuration Guide
- Mark as New
- Bookmark
- Subscribe
- Mute
- Subscribe to RSS Feed
- Permalink
- Notify Moderator
PTC Creo – Schools Configuration Guide
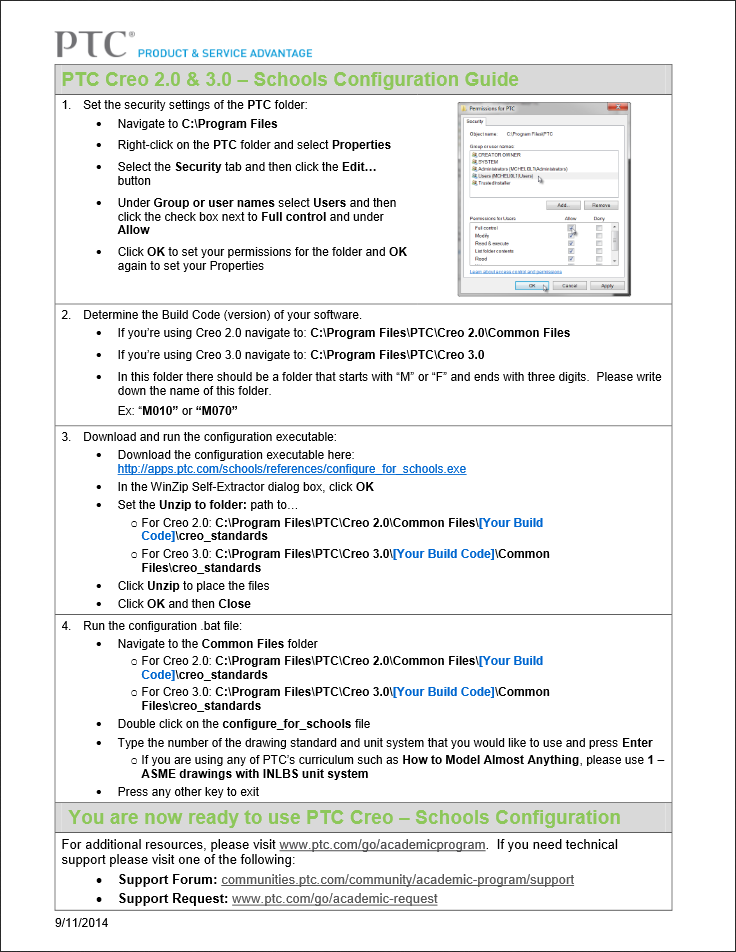
This document explains how to configure Creo with the "Schools" tab. This is a configuration of Creo that puts the most commonly used commands on the Schools tab for each Creo Parametric application. Its great for beginners becuase it simplifies the number of icons and commands to look at. Its great for experienced users because it lets you spend less time learning the interface and more time designing your robot.
This configuration also sets up standard file locations and some of the most frequently changed config.pro options to improve performance and usability.
Click on the image to download your own copy.
- Labels:
-
Other
- Mark as New
- Bookmark
- Subscribe
- Mute
- Subscribe to RSS Feed
- Permalink
- Notify Moderator
The one caveat I would add is that to follow this procedure, you have to have write-access to the installation directory for CREO. In some organizations (like many public schools) this can be a problem. In this case, it is possible to configure the program manually by loading both the .ui file and the .pro file manually from the options menu. Unfortunately, this needs to be done at the beginning of each session. (Technically, if the same student logged into the same machine they could "restore previous session", but in our lab they tend to sit at different computers each meeting).
The way I did it was to follow the official instructions (as posted by Scott above) on a computer I control. This extracts the necessary files, which I then copied to a folder on a USB thumbdrive (along with all the CREO files for the tutorial). I also wrote a procedure for my team to follow, which I'd be happy to share if there is interest.
Noa Rensing
FRC Team 2877 The Ligerbots


