
Turn on suggestions
Auto-suggest helps you quickly narrow down your search results by suggesting possible matches as you type.
Showing results for
Turn on suggestions
Auto-suggest helps you quickly narrow down your search results by suggesting possible matches as you type.
Showing results for
Community Tip - Did you get called away in the middle of writing a post? Don't worry you can find your unfinished post later in the Drafts section of your profile page. X
- Community
- Creo+ and Creo Parametric
- 3D Part & Assembly Design
- how to develop this?
Options
- Subscribe to RSS Feed
- Mark Topic as New
- Mark Topic as Read
- Float this Topic for Current User
- Bookmark
- Subscribe
- Mute
- Printer Friendly Page
how to develop this?
Jul 25, 2014
07:45 AM
- Mark as New
- Bookmark
- Subscribe
- Mute
- Subscribe to RSS Feed
- Permalink
- Notify Moderator
Jul 25, 2014
07:45 AM
how to develop this?
49 REPLIES 49
Jul 27, 2014
03:51 AM
- Mark as New
- Bookmark
- Subscribe
- Mute
- Subscribe to RSS Feed
- Permalink
- Notify Moderator
Jul 27, 2014
03:51 AM
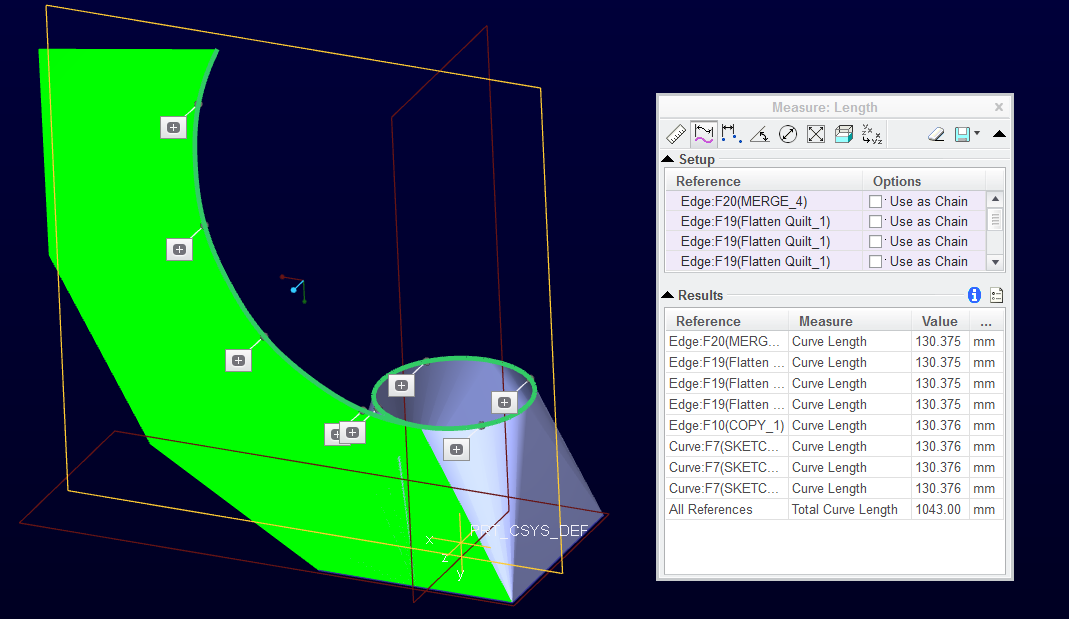
i made one more..i was able to flatten everything in one flatten quilt.
please have a look.
Jul 27, 2014
04:00 AM
- Mark as New
- Bookmark
- Subscribe
- Mute
- Subscribe to RSS Feed
- Permalink
- Notify Moderator
Jul 27, 2014
04:00 AM
Wow! Who'd-a-thunk 
Jul 27, 2014
04:05 AM
- Mark as New
- Bookmark
- Subscribe
- Mute
- Subscribe to RSS Feed
- Permalink
- Notify Moderator
Jul 27, 2014
04:05 AM
and one more i tried..instead of using extrude cut for the surface..i split the surface...it worked...
the result..of that one might not be exactly correct.
Jul 27, 2014
04:10 AM
- Mark as New
- Bookmark
- Subscribe
- Mute
- Subscribe to RSS Feed
- Permalink
- Notify Moderator
Jul 27, 2014
04:10 AM
I see that you have a small gap a the ends that allowed you to do this.
I cannot get split surface to be available. Doesn't that require the style feature? I have been using the trim.
Jul 27, 2014
04:15 AM
- Mark as New
- Bookmark
- Subscribe
- Mute
- Subscribe to RSS Feed
- Permalink
- Notify Moderator
Jul 27, 2014
04:15 AM
i think you use the flip arrow option in trim three times and it give split surface. the flip arrow option with icon..not the one in the graphics window
Jul 27, 2014
04:18 AM
- Mark as New
- Bookmark
- Subscribe
- Mute
- Subscribe to RSS Feed
- Permalink
- Notify Moderator
Jul 27, 2014
04:18 AM
Ah, yes... that doesn't work either 
Jul 27, 2014
04:22 AM
- Mark as New
- Bookmark
- Subscribe
- Mute
- Subscribe to RSS Feed
- Permalink
- Notify Moderator
Jul 27, 2014
04:22 AM
I guess this is correct too, depending on where you want the seam.
Of course, adding a fill at the other end is easy since it is a very easy to create triangle where the only variable is a value of 110 and the angle is the same as the others.
Jul 27, 2014
04:25 AM
- Mark as New
- Bookmark
- Subscribe
- Mute
- Subscribe to RSS Feed
- Permalink
- Notify Moderator
Jul 27, 2014
04:25 AM
i thnk i will agree with you on this one.
Jul 27, 2014
04:19 AM
- Mark as New
- Bookmark
- Subscribe
- Mute
- Subscribe to RSS Feed
- Permalink
- Notify Moderator
Jul 27, 2014
04:19 AM
sorry...i am wrong...it is trim only
Jul 27, 2014
04:20 AM
- Mark as New
- Bookmark
- Subscribe
- Mute
- Subscribe to RSS Feed
- Permalink
- Notify Moderator
Jul 27, 2014
04:20 AM
but the mesh shows split..surface..
Jul 27, 2014
04:25 AM
- Mark as New
- Bookmark
- Subscribe
- Mute
- Subscribe to RSS Feed
- Permalink
- Notify Moderator
Jul 27, 2014
04:25 AM
Yes, but the flatten quilt doesn't recognize it. Even in the new dialog, try selecting all 8 individual surface... it won't let you, even if the triangle is a separate surface all together.
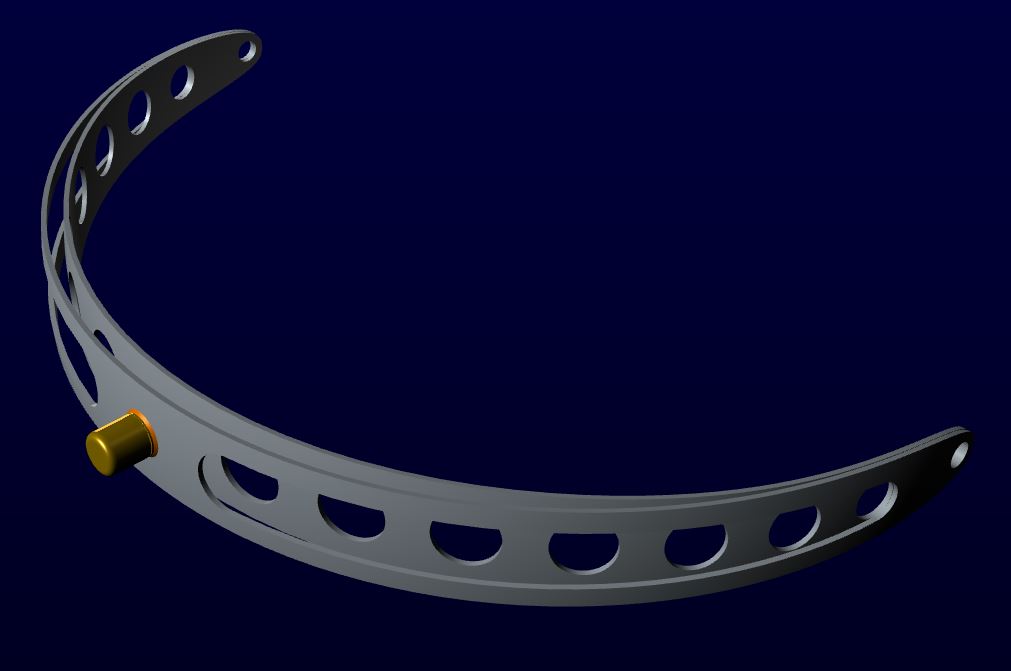
And then you have things like this where this is a piece of cake!
Jul 27, 2014
04:30 AM
- Mark as New
- Bookmark
- Subscribe
- Mute
- Subscribe to RSS Feed
- Permalink
- Notify Moderator
Jul 27, 2014
04:30 AM
the one i uploaded last was done on wildfire 4.0
Jul 27, 2014
04:45 AM
- Mark as New
- Bookmark
- Subscribe
- Mute
- Subscribe to RSS Feed
- Permalink
- Notify Moderator
Jul 27, 2014
04:45 AM
At least we learned how to make the correct pattern if not the easiest way. About as back-arswards as you can get.
And a quick way to split that up:
mirror the entire boundary blend
merge it choosing the option that removed the bad slopes
use remove surface and use "leave open" and "keep removed surfaces"
trim (split) the opposite triangle
place the flatten point ref on each slanted line where you "removed" the surface
And unfold each half ...again.
The removed surface becomes the filler for both the formed and unformed feature.
Jul 27, 2014
04:48 AM
- Mark as New
- Bookmark
- Subscribe
- Mute
- Subscribe to RSS Feed
- Permalink
- Notify Moderator
Jul 27, 2014
04:48 AM
yes you covered everything...it was pretty interesting for me.
Jul 27, 2014
04:50 AM
- Mark as New
- Bookmark
- Subscribe
- Mute
- Subscribe to RSS Feed
- Permalink
- Notify Moderator
Jul 27, 2014
04:50 AM
somehow i like proe even more now...
flatten quilt is not there in solidworks...no bend solid either.
Jul 27, 2014
01:05 PM
- Mark as New
- Bookmark
- Subscribe
- Mute
- Subscribe to RSS Feed
- Permalink
- Notify Moderator
Jul 27, 2014
01:05 PM
The flatten quilt is the underlying code for sheetmetal unfold. You get a sheetmetal package in SW that does unfold. I suspect they felt there was no need for surface flattening.
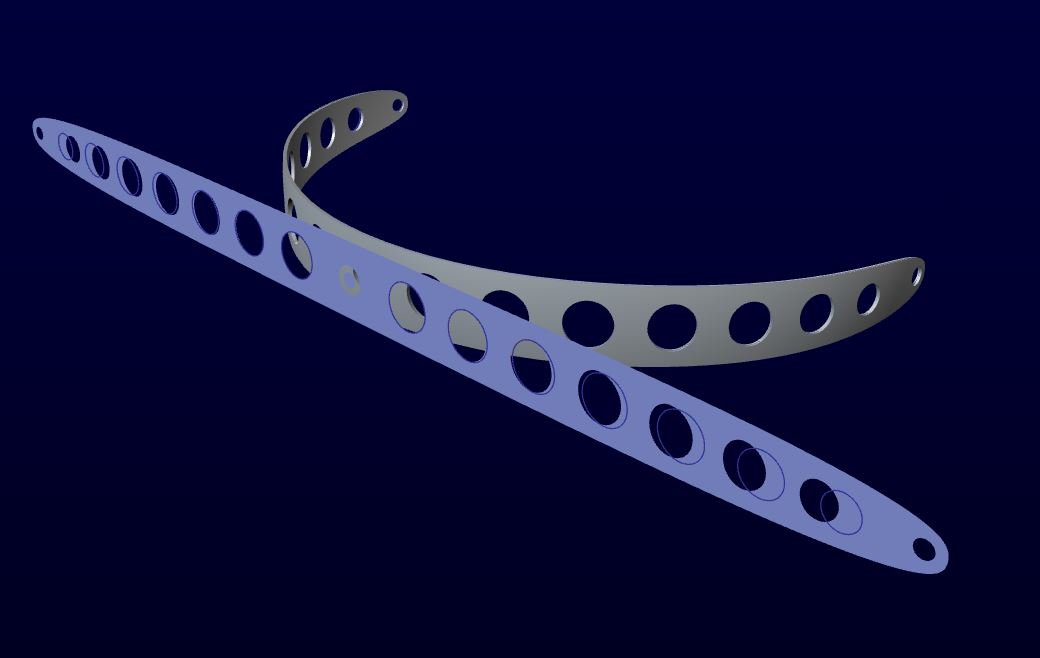
However, I have found occasion to need flatten quilt where sheetmetal fails. This has curvature in 2 directions so there was no other way to develop it. And the holes on the end had to remain on the spherical axis. Parts like this are formed in rollers and is still a fairly common shop practice.
Jul 27, 2014
08:23 PM
- Mark as New
- Bookmark
- Subscribe
- Mute
- Subscribe to RSS Feed
- Permalink
- Notify Moderator
Jul 27, 2014
08:23 PM
recently we had a drawing which was to be converted in solidworks, and we also needed its development.
it had nothing to do with sheetmetal.
so took a step file into proe..copied the surface and flattened it with flatten quilt and then took that flattened part back to solidworks.
Jul 28, 2014
06:55 AM
- Mark as New
- Bookmark
- Subscribe
- Mute
- Subscribe to RSS Feed
- Permalink
- Notify Moderator
Jul 28, 2014
06:55 AM
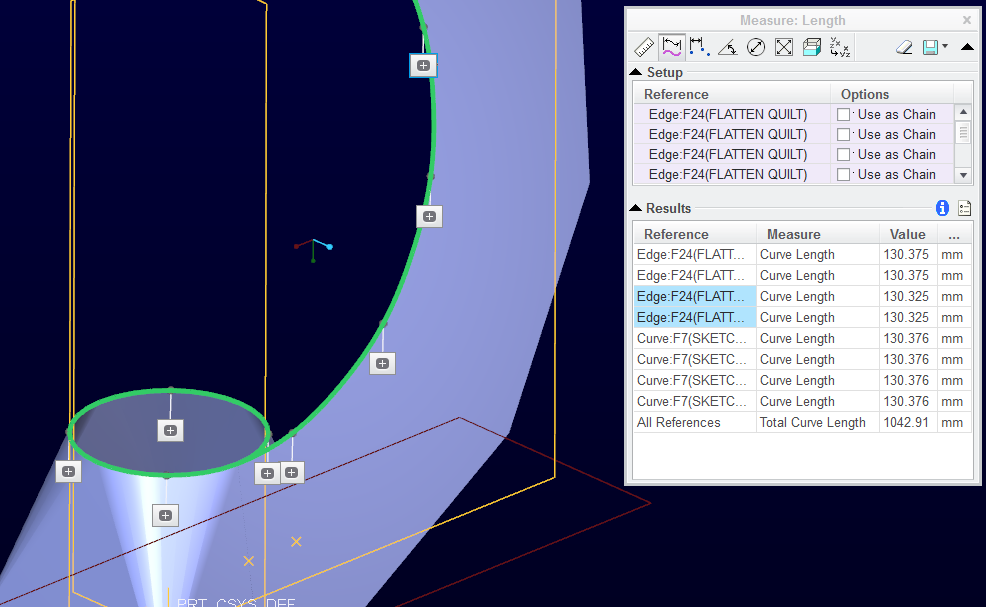
curve pattern on the circular flatten surface has a small error.
the last point does not end exactly lie at the end of the curve
Jul 28, 2014
11:20 AM
- Mark as New
- Bookmark
- Subscribe
- Mute
- Subscribe to RSS Feed
- Permalink
- Notify Moderator
Jul 28, 2014
11:20 AM
That is proabably the cumultative .001 error between the flat length and the original arc length.
Jul 29, 2014
05:05 AM
- Mark as New
- Bookmark
- Subscribe
- Mute
- Subscribe to RSS Feed
- Permalink
- Notify Moderator
Jul 29, 2014
05:05 AM
thankyou very much Antonius, you have helped a lot.
- « Previous
-
- 1
- 2
- Next »
