
Turn on suggestions
Auto-suggest helps you quickly narrow down your search results by suggesting possible matches as you type.
Showing results for
Please log in to access translation
Turn on suggestions
Auto-suggest helps you quickly narrow down your search results by suggesting possible matches as you type.
Showing results for
Community Tip - You can subscribe to a forum, label or individual post and receive email notifications when someone posts a new topic or reply. Learn more! X
- Community
- Creo+ and Creo Parametric
- 3D Part & Assembly Design
- Tutorial: Wave Washers w/ Radial Pattern
Translate the entire conversation x
Please log in to access translation
Options
- Subscribe to RSS Feed
- Mark Topic as New
- Mark Topic as Read
- Float this Topic for Current User
- Bookmark
- Subscribe
- Mute
- Printer Friendly Page
Tutorial: Wave Washers w/ Radial Pattern
Mar 11, 2013
12:34 AM
- Mark as New
- Bookmark
- Subscribe
- Mute
- Subscribe to RSS Feed
- Permalink
- Notify Moderator
Please log in to access translation
Mar 11, 2013
12:34 AM
Tutorial: Wave Washers w/ Radial Pattern
This challenge was presented here: Create wavy washer in Pro E 4.0
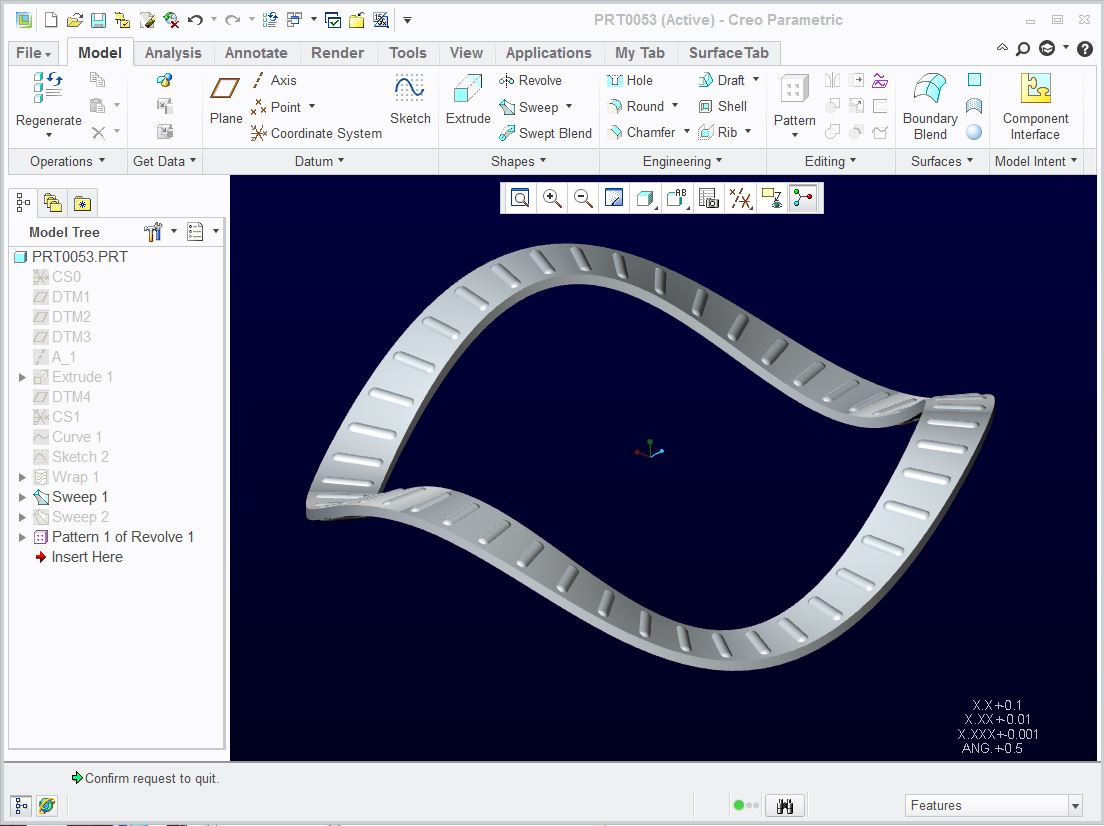
Geometry specifications used:
- 1" ID
- 1.25" OD
- .020" thick
- radial pin: .030" dia x .105" long, full R, both ends.
Features:
- Extrude cylinder for Wrap of sine wave.
- Datum curve from Equation
- Sweep solid body and patterning quilt (surface) from Wrap
- Revolve for radial patterned features
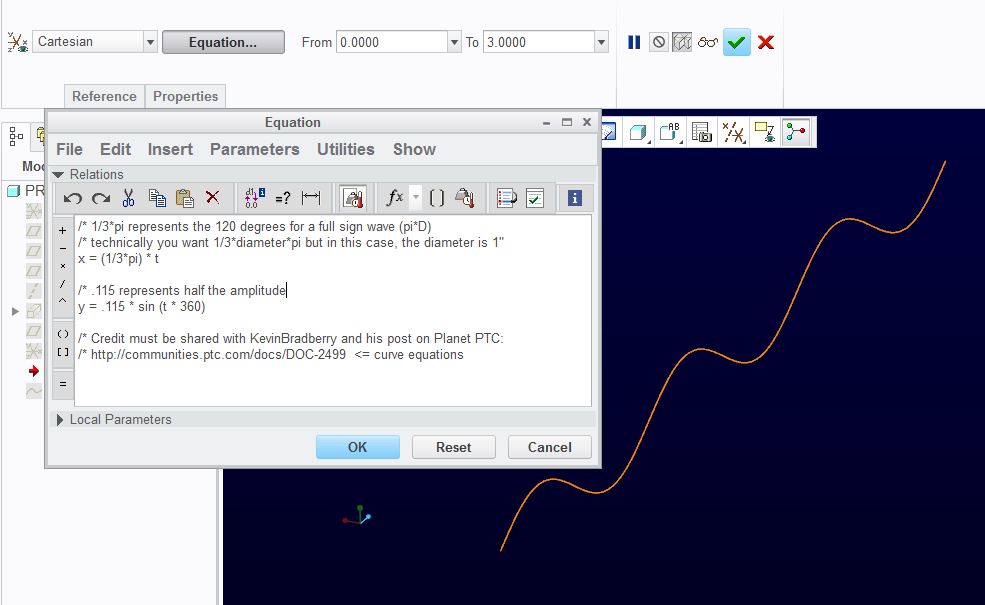
The sine wave was generated with the following curve equation. Also be sure to link to the very helpful document by Kevin Bradberry here:
Equations for Curves (and more)
The video walks through the features. There may be some subtleties that will go by quickly so use the pause. Also check the resolution of the YouTube and open in full window. Here is the link if that helps: http://www.youtube.com/watch?v=V9qom4sncLc
I will walk through the video below with timeline notations:
To start with, the file is an empty file with my custom config. Nothing should be special due to these settings. I simply prefer this color scheme.
0:09) 1st you see the cylinder created so I have something to wrap the sine wave onto. It is obviously a surface feature but a solid will work.
0:22) Creation of the sine-wave datum curve. This uses the newly created CSYS CS1.
1:01) Using a plane tangent to the cylinder, which is coincident to the Sine-wave datum curve, Project the datum curve into the sketch.
1:09) (IMPORTANT) Create a CSYS in the sketch! This is used for wrapping. Without it, the curve doesn't project onto the cylinder directly.
1:17) Wrap the sketch onto the cylinder.
1:31) The datum curve equation made sure the length was correct (three times 1/3rd the circumference).
1:51) Sweep the solid profile of the wavy washer; 1/8" wide, .02" thick centered about the sweep origin and to the outside of the cylinder.
2:17) A special Sweep surface for patterning the radial feature. This is a line the same width as the feature centered in the washer.
2:44) You can see the radial pattern here.
2:50) This pattern is "curve" based so this is the sketch for the pattern. Its diameter is 1.1"
2:51) The revolve feature for the pattern.
2:54) The section for the revolve feature.
3:12) Pattern definitions:
- "Curve" ...pattern type.
- "50 pattern members" ...equally distributed.
- "pattern sketch" ...intersect at the surface feature's inside edge.
- "use alternate origin" ...makes sure the pattern will follow without offset.
- "follow surface shape" ...be sure to pick the quilt to get the complete face. I could not select the whole face without creating this surface 1st.
- "follow surface direction"
- "follow curve direction"
4:16) Hide construction features.
4:38) Completed part!
The attached file is Creo 2.0.
Please feel free to clarify or comment on this document. I know there are likely a few simplifications that could be considered.
Enjoy!
This thread is inactive and closed by the PTC Community Management Team. If you would like to provide a reply and re-open this thread, please notify the moderator and reference the thread. You may also use "Start a topic" button to ask a new question. Please be sure to include what version of the PTC product you are using so another community member knowledgeable about your version may be able to assist.
Labels:
- Labels:
-
General
4 REPLIES 4
Mar 12, 2013
11:59 PM
- Mark as New
- Bookmark
- Subscribe
- Mute
- Subscribe to RSS Feed
- Permalink
- Notify Moderator
Please log in to access translation
Mar 12, 2013
11:59 PM
Persistence makes perfect. The equation for a cylindrical sine wave:
/* cylindrical version
r=1theta= t*360
z=.1*sin(t*(360*3))
/* cartesian versionx=1*cos(t*360 )
y=1*sin(t*360 )
z=.1*cos(t*(360*3))
PROBLEM! The "normal" to this curve plays havoc with a Sweep feature. Although the wrapped version is identical to the equation curve of the cylindrical sine wave, they act very differently when used in a Sweep feature. The assumed "normal" is not the same. This will become obvious when you define the section or interrogate the object that it creates. Awareness of this limitation will help you find alternative work-arounds.
If you follow the method defined in the video, your wave washer will come out accurate; "flat" and consistent in thickness.
Mar 16, 2013
04:57 PM
- Mark as New
- Bookmark
- Subscribe
- Mute
- Subscribe to RSS Feed
- Permalink
- Notify Moderator
Please log in to access translation
Mar 16, 2013
04:57 PM
I have an update on creating a wave washer that must be shared here. I found this on the knowledgebase and it uses the TRAJPAR making the core feature of this discussion much easier. The normal of the pattern is correct (planar to the base) and is easily variable:
This is still a variable section sweep (Sweep with VSS enabled) and the formula -must- be specified in the section feature, not just the part or sweep feature.
sd#=4*sin(trajpar*360*3) where 4 is the amplitude and 3 is the number of full sine waves.
The sweep trajectory sketch is a simple circle. In this case, the height dimension is is the variable.

And in honor of Frank, our trajpar expert: you can add a fun variable to the width, also using the trajpar option - add sd#=20+5*cos(trajpar*360*6) where 20 is the core width and the +5 is the variation. In this case, I have 6 "waves". Play with this to create some fun parts.

I have not tried to use this for the patterning outlined in the tutorial, but there is no reason this would not simplify creating the core feature.
Again, please feel free to add comments.
Mar 18, 2013
10:42 AM
- Mark as New
- Bookmark
- Subscribe
- Mute
- Subscribe to RSS Feed
- Permalink
- Notify Moderator
Please log in to access translation
Mar 18, 2013
10:42 AM
Nice! I had my headphones on, but there was no sound. What recording software do you use? I'd like to do that to teach my fellow employees here.
Thanks!
Mar 18, 2013
12:51 PM
- Mark as New
- Bookmark
- Subscribe
- Mute
- Subscribe to RSS Feed
- Permalink
- Notify Moderator
Please log in to access translation
Mar 18, 2013
12:51 PM
The free version of CAMSTUDIO. It takes a bit of work to set it up, but once installed and configured, it is quite nice.
Audio is off by default. You -really- don't want me rambling through these videos 


