Tunneling with ThingWorx and an Edge Device
Setting up the ThingWorx Server RemoteThing, ApplicationKey, and TunnelSubsystem
Tunneling from the ThingWorx platform to an Edge Device can be easily done with a few preparation steps on the platform side:
- Create an ApplicationKey entity on the ThingWorx server so that the EMS or SDK you are using can authenticate with the platform
- Create a RemoteThingWithTunnels or RemoteThingWithTunnelsAndFileTransfer Thing for the remote device to bind to
- Either ThingTemplate will work, the only difference is if you want to use any native file transfer capabilities that are provided by ThingWorx
- In the newly created Thing, on the General Information page, click on the drop-down menu next to Enable Tunneling and select Override - Enabled

- Go to the Configuration section under Entity Information on the right and click on the Add My Tunnel button

- The Tunnel Name is used to identify what tunnel to use in the RemoteAccessWidget you will bind to the tunnel
- The Host will remain 127.0.0.1 because this is from the perspective of where the vnc server is to the remote device
- In my example they are on the same device
- The Port value should be the Port that the server is listening on
- This is typically 5900, but my vnc server is running on port 5901 for this example
- The App URI can be cleared out because we do not need to reference that file
- Here is a link to a further explanation on what the App URI is for: ThingWorx Tunneling App URI's
- The # of Connections and Protocol can remain their default values unless you have a reason to change them
- Navigate back to Home and look for the TunnelSubsystem under the Subsystems page
- Click on the TunnelSubsystem
- Click on the Configuration option on the left
- Modify the Public host name used for tunnels field and the Public port used for tunnels field to the host and port of your ThingWorx server
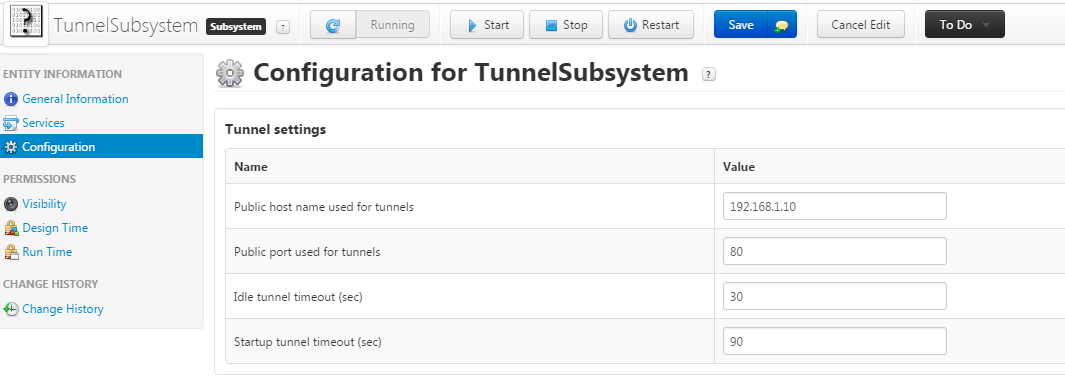
- Save and close the TunnelSubsystem
Configuring the Edge Device
For this example I'm going to keep it simple and set up an EMS (Edge MicroServer) instead of an SDK. This EMS will be on a totally separate device (an Ubuntu machine), while my ThingWorx server is on my local machine.
- Download the latest EMS onto a separate machine
- Configure the config.json file settings to match the server's host, port, and application key
- The tunnel block will be necessary to add as well, see below for an example of a working config.json file:
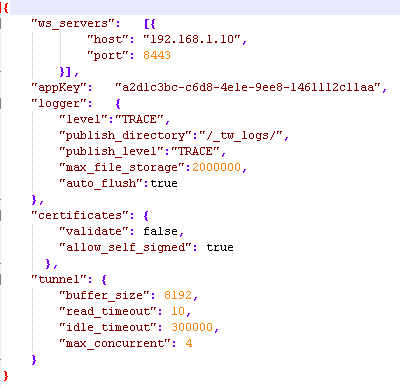
- The tunnel block will be necessary to add as well, see below for an example of a working config.json file:
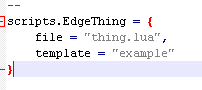
- Configure the config.lua file to match the name of the RemoteThingWithTunnels we created earlier; in this instance the name of my RemoteThing is EdgeThing:
- Run the EMS and LSR (Lua Script Resource)
- The LSR EdgeThing will bind automatically to the RemoteThingWithTunnels we created earlier
- To verify there is successful connection between the platform and EMS go to the EdgeThing's Properties page and check to see if the isConnected property is currently set to true
- If it's not, please refer to this Help Center section for further troubleshooting. There is a list of error codes here.
Installing a VNC Viewer and Server
The next series of steps talks about configuring a VNC Server on the EMS machine and a VNC Client on the computer you are using to connect to the server. For this example I will be using packages tightvncserver, xfce4, xfce4-goodies, and vnc4server on my Ubuntu machine that hosts the EMS, and I will be using the tightvnc viewer available for download here.
The following steps describe how to configure the Ubuntu machine so that it will be ready to accept vnc requests:
I want to note that I am specifically using a 64-bit Ubuntu 14.04 LTS OS
- Run the following commands:
- sudo apt-get update
- sudo apt-get install xfce4 xfce4-goodies tightvncserver
- Run the vncserver and you will be prompted to setup a password
- I used password to keep it simple, but you will want to use something relatively secure
- We will want to kill this instance right away so we can proceed with further configuration
- vncserver -kill :1
- Make a backup of the xstartup file in case things go awry
- mv ~/.vnc/xstartup ~/.vnc/xstartup.bak
- Create a new xstartup file to proceed with the setup
- nano ~/.vnc/xstartup
- Insert the following commands into the file, and they will be exercised every time the server starts or is restarted:
- #!/bin/bash
xrdb $HOME/.Xresources
startxfce4 & - The first command in the file tells the VNC's GUI framework to reference the .Xresources file, which is where a user can change vnc settings
- The second command launches the XFCE -- the graphical software
- #!/bin/bash
- Ensure that the xstartup file has executable privileges:
- sudo chmod +x ~/.vnc/xstartup
- Start the server back up with vncserver
For the machine that is being used to view the Mashup, install the tightvnc server from the link mentioned above. You should double-click the tightvnc-jviewer.jar file to run the viewer application now so it is up and ready for the Establishing a Tunnel section.
Creating the RemoteAccess Mashup
This next portion of the tutorial covers creating the Mashup that will be asked by any user who wants to remote into the Edge device.
- Go to Composer Home and open the Mashup menu option on the left side of the screen
- Add a new Static or Dynamic Mashup
- Drag-and-drop a RemoteAccessWidget onto the Mashup
- Click on the RemoteAccessWidget and modify the RemoteThingName, TunnelName, and AcceptSelfSignedCertificates properties for the connection
- The RemoteThingName is the name of the Edge Thing the remote device is bound to
- The TunnelName is the name of the tunnel we added to the Edge Thing in the Configuration screen
- The AcceptSelfSignedCertificates is only used when using an SSL connection with self signed certs
- View the Mashup and the RemoteAccess Widget should have a green plus sign on it if the connection from the EMS to platform is up and connected
Establishing a Tunnel
The following section is the last part of the process where we actually establish a tunnel between the client, platform, and remote device.
- Open the Mashup with the RemoteAccess Widget if you closed it
- Click on the RemoteAccess Widget to being the wsadapter.jnlp download
- Once that has completed click on the wsadapter.jnlp file to run it
- Keep in mind that there is a default 90 second timeout defined in the TunnelSubsystem that will render the wsadapter.jnlp file useless and you will have to download a new one if the connection is not established within that timeframe
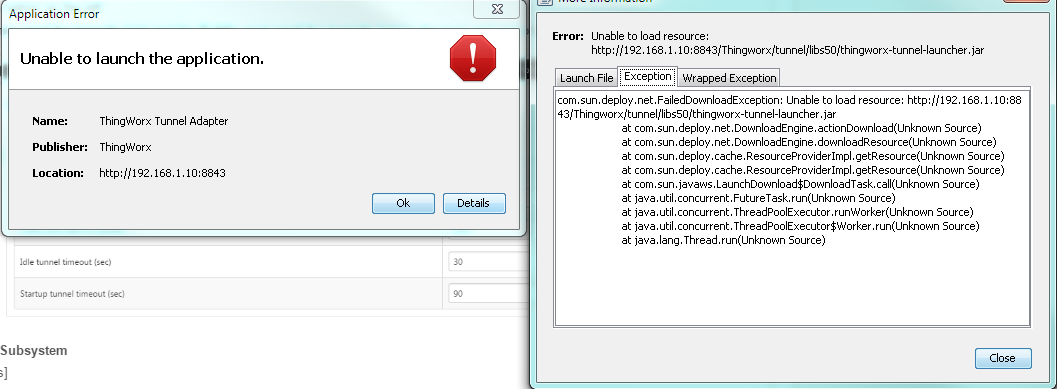
- If you receive the following error message you may need to reconfigure your TunnelSubsystem configuration options for your server because the thingworx-tunnel-launcher.jar was unable to be found at that address
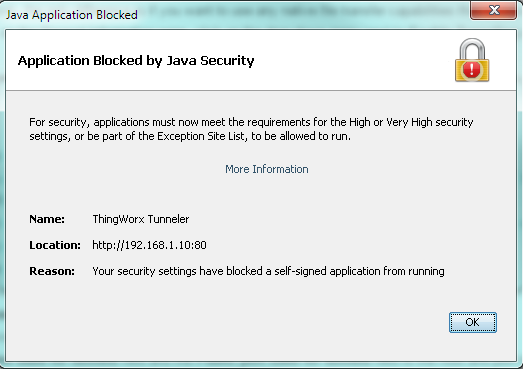
- If you receive the following error message after you will need to modify your security settings in your Java options. This is done by opening Configure Java, navigating to the Security tab, and then adding your ThingWorx server's IP and port to the site list via the Edit Site List... button
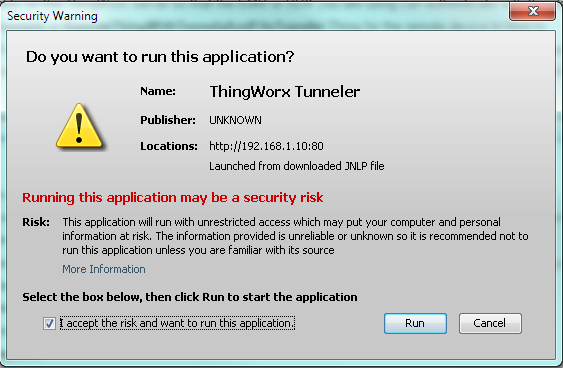
- You should have received a Security Warning message upon successfully finding the thingworx-tunnel-launcher.jar file that you will click the Run button on and check the I accept the risk and want to run this application
- A pop-up, like the following, will be seen and you know the tunnel is now open for tightvnc to connect through
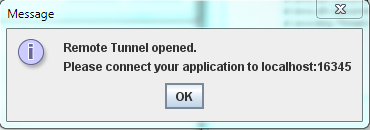
- Do not click OK, instead, please proceed to the next step. Clicking OK will close the tunnel if you have not connected to the EMS via the VNC Viewer yet.
- Open the tightvnc-jviewer.jar and type in the corresponding host and port that a vnc connection should be established to:
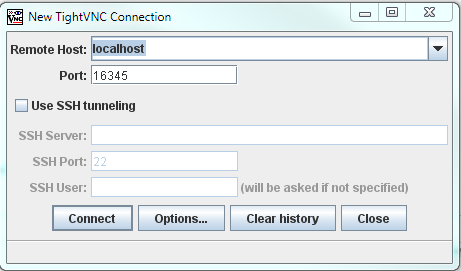
- localhost and port 16345 are used because we have already established a connection to the EMS and it is listening for a vnc connection on port 16345 -- per the ThingWorx pop-up we just saw
- Click Connect and a new window should appear showing the GUI environment of your Ubuntu server like below