Community Tip - New to the community? Learn how to post a question and get help from PTC and industry experts! X
- Community
- Creo+ and Creo Parametric
- 3D Part & Assembly Design
- Did You Know? New User Interface Makes It Easier t...
- Subscribe to RSS Feed
- Mark Topic as New
- Mark Topic as Read
- Float this Topic for Current User
- Bookmark
- Subscribe
- Mute
- Printer Friendly Page
Did You Know? New User Interface Makes It Easier to Interpret Results in PTC Creo Simulate
- Mark as New
- Bookmark
- Subscribe
- Mute
- Subscribe to RSS Feed
- Permalink
- Notify Moderator
Did You Know? New User Interface Makes It Easier to Interpret Results in PTC Creo Simulate
Recently, the Creo Simulate user interface that displays results was enhanced. Regardless of whether you are a new or advanced user, the new modern interface for results improves your ability to inspect your analysis, validate your design, or identify areas in your model that need improvement.
You can find these changes whether you’re working in in Creo Simulate or Creo Parametric. In this post, a PTC expert describes the UI enhancements.
Ribbon bar menus
The logically organized interface with commonly used tasks, sorted into application-specific ribbon bar tabs and groups, makes it easy to use, and for new users, easier to learn.
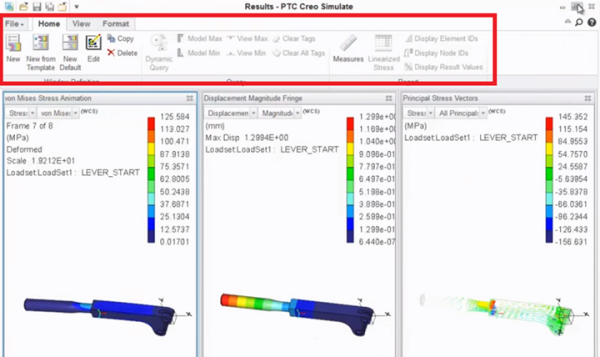
It is easy to find the actions you want to perform since tasks are sorted into application-specific ribbon tabs and groups, as shown in the red box.
Search for commands
Use Command Search to search for and see the location of commands. Click the magnifying glass icon in the top right corner of the application, and then type a command in the Command Search box. As you type, a list of commands that match your search criteria populate the command list. Place the cursor on a command in the list to see the command highlighted in the ribbon.
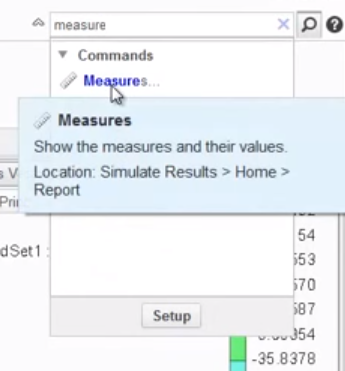
Use Command Search to search for and see the location of commands.
Commands are consolidated and added
New commands were added and other commands were consolidated to improve efficiency.
• With the Displacement Magnitude Fringe selected, click View > Continuous Tone to set the tone changes to continuous. You no longer need to edit the Results – PTC Creo Simulate window to define within the Results Window Definition dialog box.
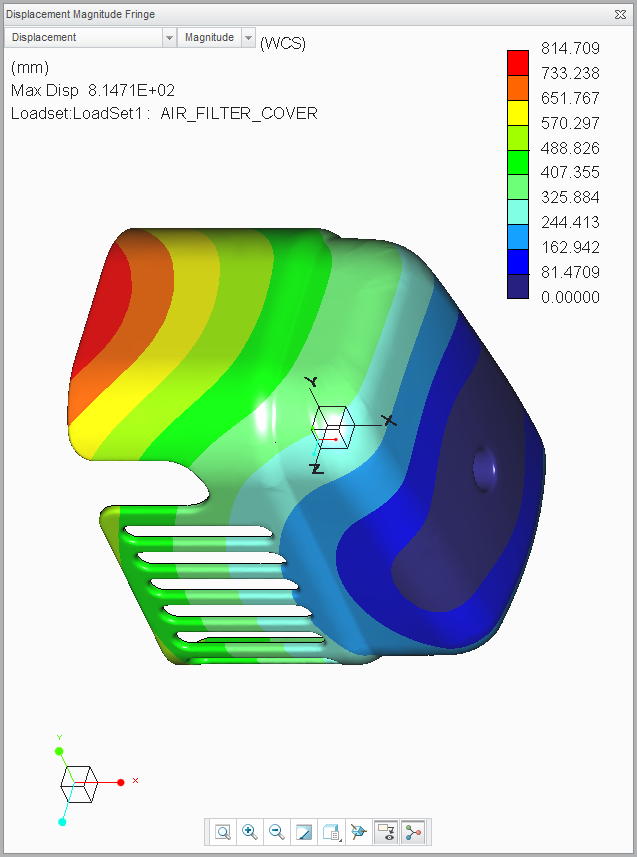
The tone changed to continuous.
• Under View, the Capping & Cutting Surfs group was added. Functionality was consolidated to a specific group where you can create a new capping or cutting surface and edit or delete a capping or cutting surface.
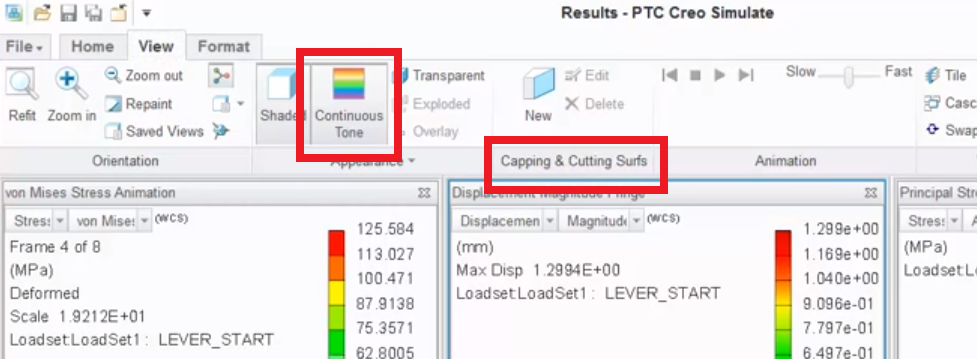
New/consolidated commands are highlighted in red.
Manage the window view
There are new ways to manage the window. Click Cascade to cascade the view. Click Hide to hide a view.
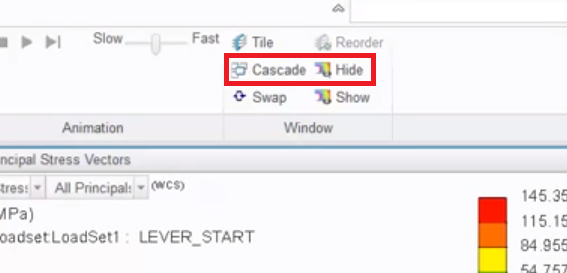
New ways to manage the window view are highlighted in red.
Manage the Graphics window
As you could previously, you can open multiple docked windows at the same time by clicking Show, and then selecting windows on the Display Result Window dialog box.
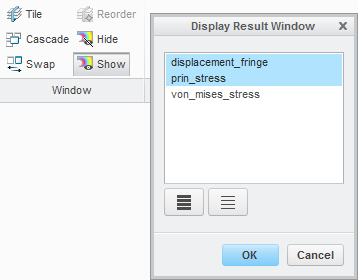
Although only one docked window can be active at one time, you can double-click a different window to easily activate it. The active window has a blue border and the Quick Access toolbar appears within it. This toolbar provides access to common commands, such as Refit, Repaint, and Named Views.
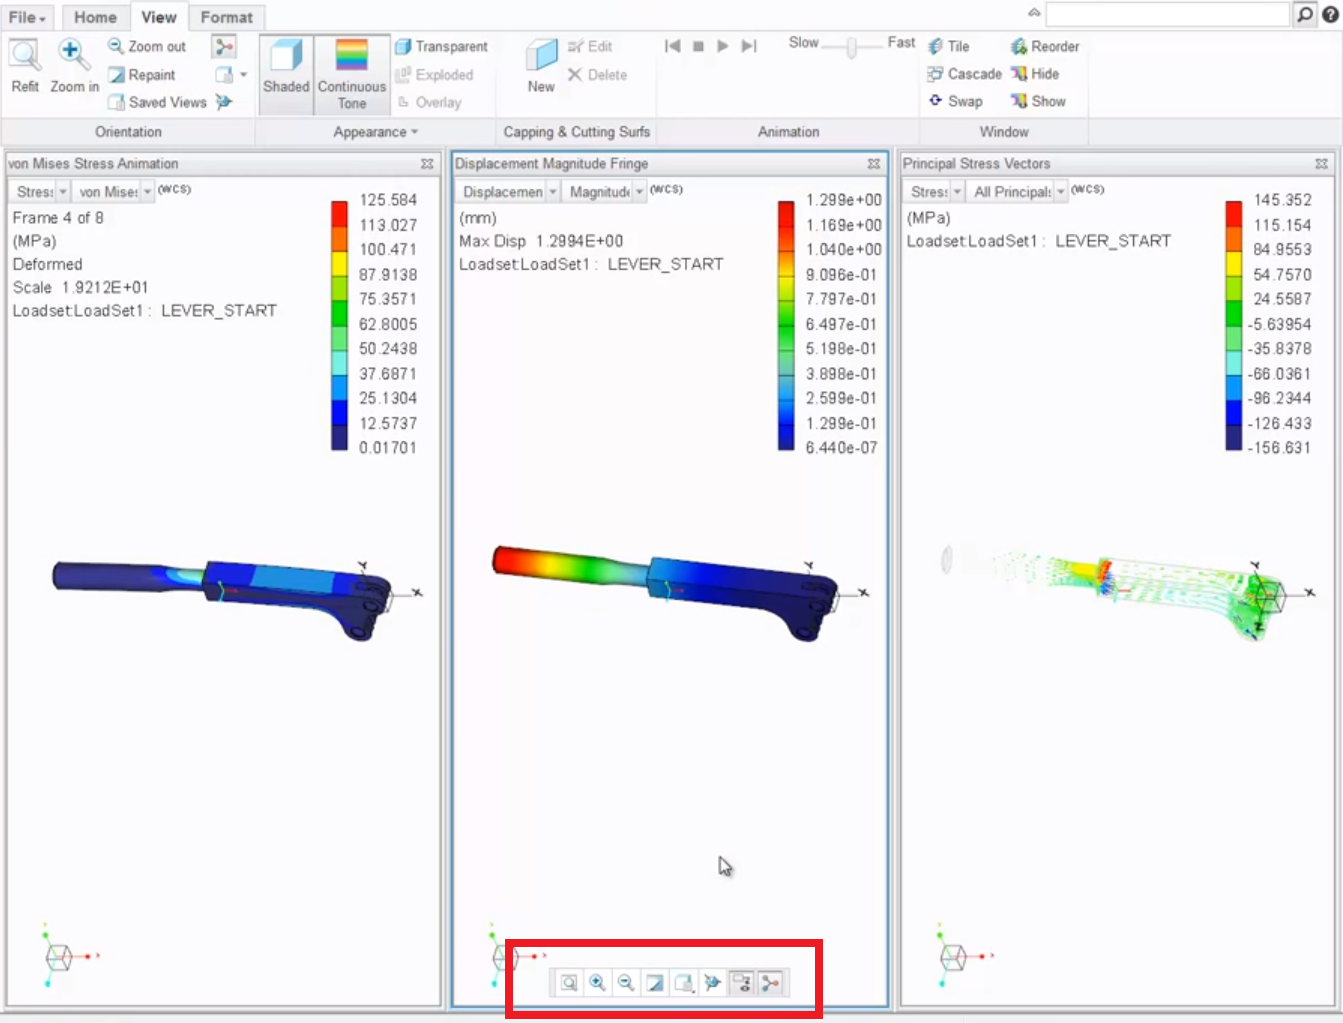
The active window has a blue border and the Quick Access toolbar appears within it (highlighted in red).
Additional commands available from shortcut menus
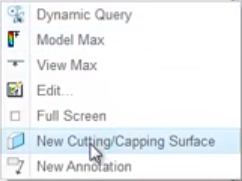
You can right-click in the active window to select commands from a pop-up menu (shown below), such as Model Max, New Cutting/Capping Surface, or Full Screen. This makes it easier and faster to perform tasks.
To watch a demonstration of these capabilities, check out our video tutorial (“New User Interface for Results in PTC Creo Simulate”).
Stay tuned to our “Did You Know” blog series as we cover all of the exciting, new enhancements in PTC Creo 3.0.
Have some ideas about what PTC Creo product features you’d like to learn more about? Send me a message or leave a comment below and we’ll write up the best ideas from the community. Thanks for reading, looking forward to all of your feedback!
This thread is inactive and closed by the PTC Community Management Team. If you would like to provide a reply and re-open this thread, please notify the moderator and reference the thread. You may also use "Start a topic" button to ask a new question. Please be sure to include what version of the PTC product you are using so another community member knowledgeable about your version may be able to assist.
- Labels:
-
Surfacing


