Community Tip - Learn all about PTC Community Badges. Engage with PTC and see how many you can earn! X
- Community
- Creo+ and Creo Parametric
- 3D Part & Assembly Design
- Re: Sheet metal Punch
- Subscribe to RSS Feed
- Mark Topic as New
- Mark Topic as Read
- Float this Topic for Current User
- Bookmark
- Subscribe
- Mute
- Printer Friendly Page
Sheet metal Punch
- Mark as New
- Bookmark
- Subscribe
- Mute
- Subscribe to RSS Feed
- Permalink
- Notify Moderator
Sheet metal Punch
Hello guys,
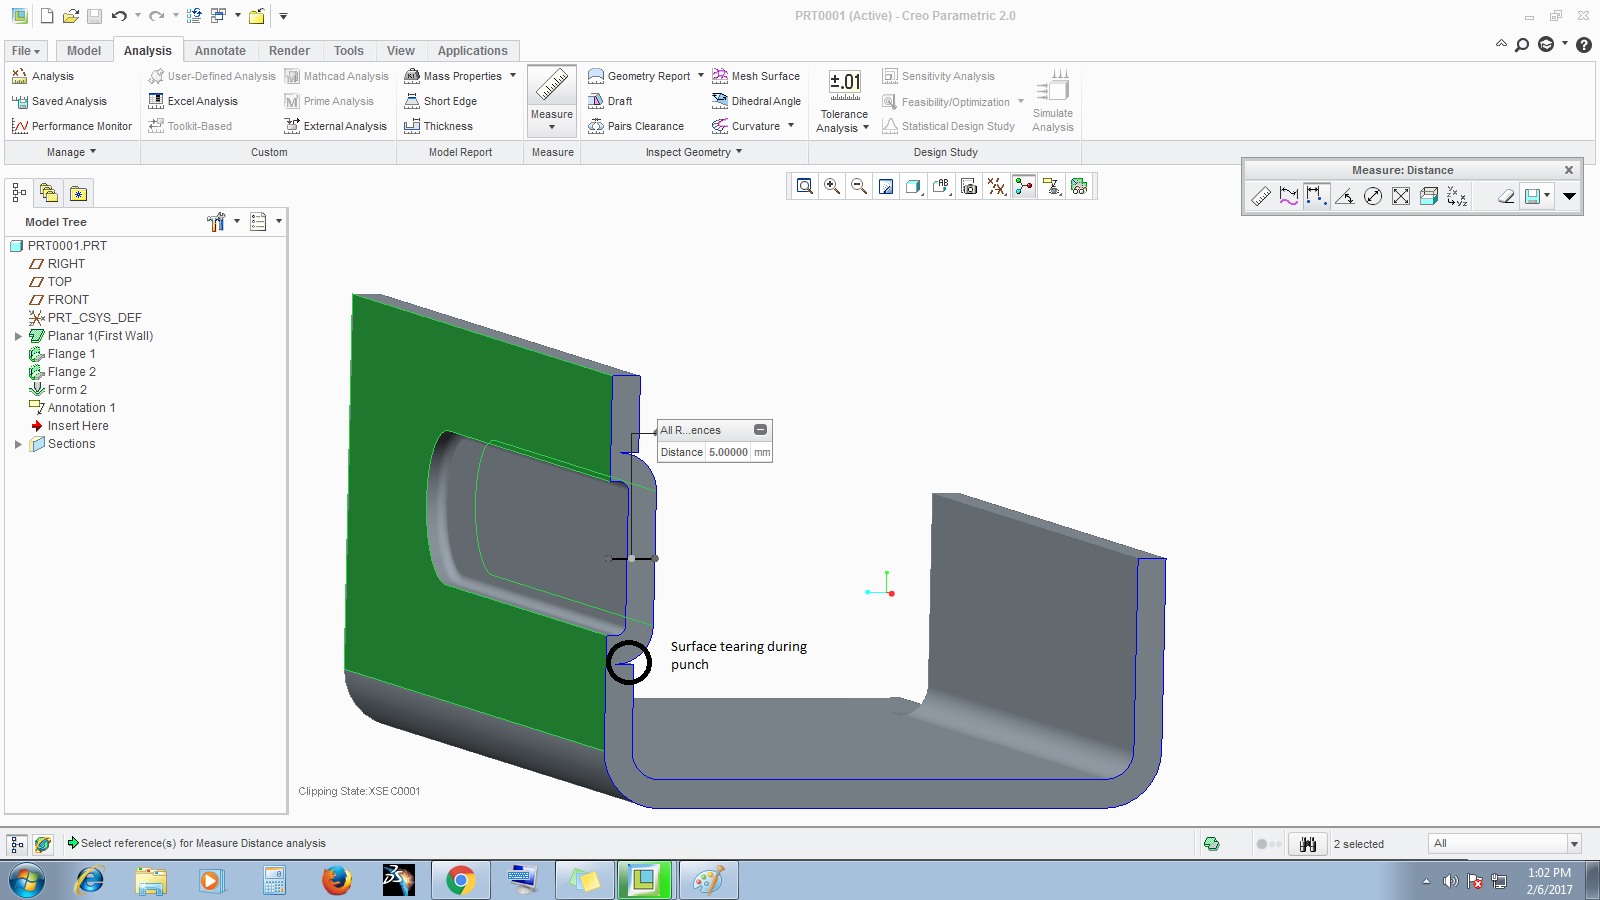
I have a query regarding punch in creo sheet metal. If you see the pic I attached there is a surface tear it shouldn't happen. I know it has got to do with the punch tool radius but I can't get it done my constraint is that the total thickness of the SM should be 5mm after punching the radius dimensions doesn't matter( The base wall is 3mm).
I don't know what I am missing here. any help is deeply appreciated.
Thank you
Babu
- Labels:
-
Surfacing
- Mark as New
- Bookmark
- Subscribe
- Mute
- Subscribe to RSS Feed
- Permalink
- Notify Moderator
I usually do by simple solid modeling eg. Extrude . It's simpler, faster and cleaner than sheet metal module.
Sheet metal module give me a lot of error and need attention to look at every features. I have to confirm that it take a right solution after I pressed regernated button.
- Mark as New
- Bookmark
- Subscribe
- Mute
- Subscribe to RSS Feed
- Permalink
- Notify Moderator
I don't delve into sheet metal much so I am far from experienced with it, but occasionally we need something made that is more complex than a simple box. I recently had a piece with a curved tab that would inexplicably shorten when the whole thing was flattened. By several inches. Maybe of some importance is the curved tab was a sketched feature? We could not resolve the "bug" and had to calculate material to add to the flat pattern.
- Mark as New
- Bookmark
- Subscribe
- Mute
- Subscribe to RSS Feed
- Permalink
- Notify Moderator
I worked with a company that did large sized tents, like 20 foot diameter, and used sheet metal to get the fabric flat patterns; didn't notice any shortening. How big were the parts you had problems with?
- Mark as New
- Bookmark
- Subscribe
- Mute
- Subscribe to RSS Feed
- Permalink
- Notify Moderator
Forgive me if I'm stating the trivial, but we have found that to get a good flat pattern for a contoured part that is to be made by forming sheet metal, we need to define the flat pattern with a surface at the middle "plane" of the part. In other words, at the mid thickness. If you go to the outer or convex side, the pattern is too big, use the inner or concave side and it's too small. It's a tricky problem.
- Mark as New
- Bookmark
- Subscribe
- Mute
- Subscribe to RSS Feed
- Permalink
- Notify Moderator
The setting of the K-factor is critical for getting the proper flat pattern developed length of a sheet metal part. You can usually get by with a .5, which is the mid-plane of the part thickness, but it may vary. Where I sued to work, we used .44, due to the process we used and the materials. Your thickness offset may vary.
Search the internet for a paper called "BendWorks - The fine art of Sheet Metal Bending"
- Mark as New
- Bookmark
- Subscribe
- Mute
- Subscribe to RSS Feed
- Permalink
- Notify Moderator
Hey, Ben.
So the K-factor is just if you're using the sheetmetal module, right? It's an empirical determined number, then? I'd think you'd have to base the factor on experience with a particular material, like titanium versus stainless steel versus aluminum. The most critical part of this stuff is having a sheetmetal fabricator you can rely on.
The parts I had so much fun with are actually sheet metal parts, but they can't be done in the sheetmetal module. They're complex contour (aircraft shape) parts, and although I always have another go at them when we get a major new version of Creo, "convert to sheetmetal" always fails. It's a pain, but they've worked out. I just really dislike having to base a part on a flattened quilt. Holes, for example, are not fun.
- Mark as New
- Bookmark
- Subscribe
- Mute
- Subscribe to RSS Feed
- Permalink
- Notify Moderator
One think to keep in mind is what type of shaped part the sheet metal module is designed to work with. It is designed for parts that are bent with a press brake type of operation. Rolling a part, like most aircraft surfaces or automotive surfaces is NOT the intended part type. Complex curved bends do not work well, either. If you are making boxes or parts with a single bend, the sheet metal package is great. Any part that has a variable thickness to the material will also not work. Deep draw dies, like for making beverage cans, utilize special software to account for the stretching of the material.
I had to make an NC program one time for drilling holes in an extruded curved T-section that changed the angle of the base leg as it rolled. We had to drill the piece before it was rolled. Lots of fun extracting the hole locations for the NC machine. It was not done with PTC software and I had to pull some strings to get their 'fishnet' code to get the point locations. The CAD vendor was owned by the aerospace company at the time and it was for their product so that made the pulling a little easier.
- Mark as New
- Bookmark
- Subscribe
- Mute
- Subscribe to RSS Feed
- Permalink
- Notify Moderator
Since it requires evaluating a complex strain field, I don't believe a simple sheet metal module will ever be handling general compound curvature perfectly. The strain field depends too much on the exact process steps chosen.
- Mark as New
- Bookmark
- Subscribe
- Mute
- Subscribe to RSS Feed
- Permalink
- Notify Moderator
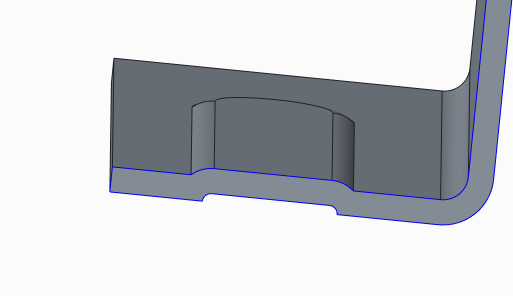
I had been to open the file
And I had been to define
I didn't know bacause

- Mark as New
- Bookmark
- Subscribe
- Mute
- Subscribe to RSS Feed
- Permalink
- Notify Moderator
I was able to correct my situation by changing one thing ATTAPON mentioned. I had previously created the curved geometry on my part using "flange". To fix it I simply used "extrude" instead and my flattened part appears correct now.
EDIT: Digging deeper, I suspect that my dev length dimension got changed to another value when I used "flange". When I changed it to the correct value, "flange" worked as well as "extrude". (So either way works correctly!)
To the original post, what about a solid model shelled out and then converted to sheet metal? Just an idea...


