
Turn on suggestions
Auto-suggest helps you quickly narrow down your search results by suggesting possible matches as you type.
Showing results for
Please log in to access translation
Turn on suggestions
Auto-suggest helps you quickly narrow down your search results by suggesting possible matches as you type.
Showing results for
Community Tip - Stay updated on what is happening on the PTC Community by subscribing to PTC Community Announcements. X
- Community
- Creo (Previous to May 2018)
- Creo Modeling Questions
- Re: Offsetting or Thickening
Translate the entire conversation x
Please log in to access translation
Options
- Subscribe to RSS Feed
- Mark Topic as New
- Mark Topic as Read
- Float this Topic for Current User
- Bookmark
- Subscribe
- Mute
- Printer Friendly Page
Offsetting or Thickening
May 29, 2012
11:12 AM
- Mark as New
- Bookmark
- Subscribe
- Mute
- Subscribe to RSS Feed
- Permalink
- Notify Moderator
Please log in to access translation
May 29, 2012
11:12 AM
Offsetting or Thickening
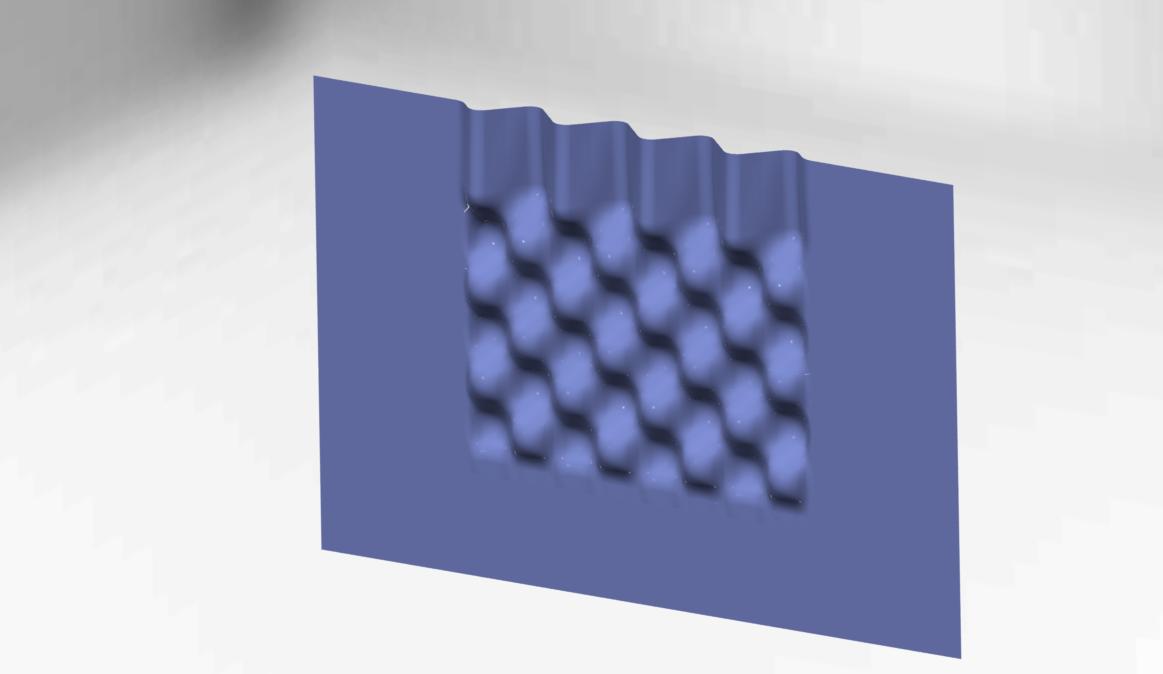
I need help offsetting or thickening this quilt. I have tried to do it several different ways. I usually get an error of some surfaces are self-intersecting. I need to offset the quilt by .015" in both directions for a total of .030".
7 REPLIES 7
May 29, 2012
11:40 AM
- Mark as New
- Bookmark
- Subscribe
- Mute
- Subscribe to RSS Feed
- Permalink
- Notify Moderator
Please log in to access translation
May 29, 2012
11:40 AM
I can't open the file. What version are you using?
May 29, 2012
12:03 PM
- Mark as New
- Bookmark
- Subscribe
- Mute
- Subscribe to RSS Feed
- Permalink
- Notify Moderator
Please log in to access translation
May 29, 2012
12:03 PM
Sorry, I am using creo 1.0
May 29, 2012
02:59 PM
- Mark as New
- Bookmark
- Subscribe
- Mute
- Subscribe to RSS Feed
- Permalink
- Notify Moderator
Please log in to access translation
May 29, 2012
02:59 PM
hi,
It's a pretty compound quilt.
Your problem is simple to analyze but the fix is not very simple. Well depending on how did you manage to create that surface.
The problem lies in that you have some very small surfaces in the quilt. Some that have 0.0005 inches in one direction and 0.0006 inches in the other direction. These would propably get burried if you tried to offset them that far.
Offset feature doesn't allow surfaces of a quilt to get burried so that is the reason why the offset feature fails at 0.015 inches.
And also to be able to edit or work with surfaces of a size like these you have to switch the accuracy of the model to absolute.
I've tried how far it can go and the offset already fails at 0.002 while using the Normal to Surface in option of the offset feature.
What is the tolerance for this part?
If you use Automatic Fit under Options tab then you can offset this qulit as far as 0.015 inches, maybe even further. It just takes a while to regen.
If you want to offset the surface in it's normal direction all you need to do is to recreate this whole compound surface starting from the ground with curves if you are able to do that. That would mean way too much work.
It looks like this surface comes from imported data. From a simple pretty compound surface that has been simplified by Creo during the import. Simplified into grade 3 surfaces in a pretty tight tolerance. So that's maybe why it has created all those tiny surfaces. But maybe I am all wrong there.
Actually I am able to offset the surface using normal to surface by 0.015 inches but only in one direction. In the other one the offset feature fails. So you could use Automatic Fit option for the other direction.
As you can see on the picture Automatic Fit type of offset isn't really that proportional as maybe you would like it to be so maybe Controled Fit option will do better for you.
Good luck
~Jakub
May 30, 2012
06:36 AM
- Mark as New
- Bookmark
- Subscribe
- Mute
- Subscribe to RSS Feed
- Permalink
- Notify Moderator
Please log in to access translation
May 30, 2012
06:36 AM
Let me start by saying thank you for looking at this for me.
The geometry was created using curves in both the x and y axis, the boundary blend tool was then applied. This quilt is going to be used to make a punch and die set for a sheet metal part. The finished part has a tolerance of +/- .005".
I was able to have some success cutting the bubble section down to only a couple of columns and then offsetting that. Creo would apply special handling and exclude the surfaces that did not work. The problem then is that I could not get the sections of offset/thickened geometry to merge.
I have also tried to construct the geometry with the original curves offset to the correct distance and then applying the boundary blend. With this approach I was able to offset one side but on the other the boundary blend tool would fail.
I have also tried to construct the geometry in inventor but was unable to construct the geometry properly and when I would import the quilt Inventor would run out of memory within one operation.
May 30, 2012
07:57 AM
- Mark as New
- Bookmark
- Subscribe
- Mute
- Subscribe to RSS Feed
- Permalink
- Notify Moderator
Please log in to access translation
May 30, 2012
07:57 AM
Hi Andrew,
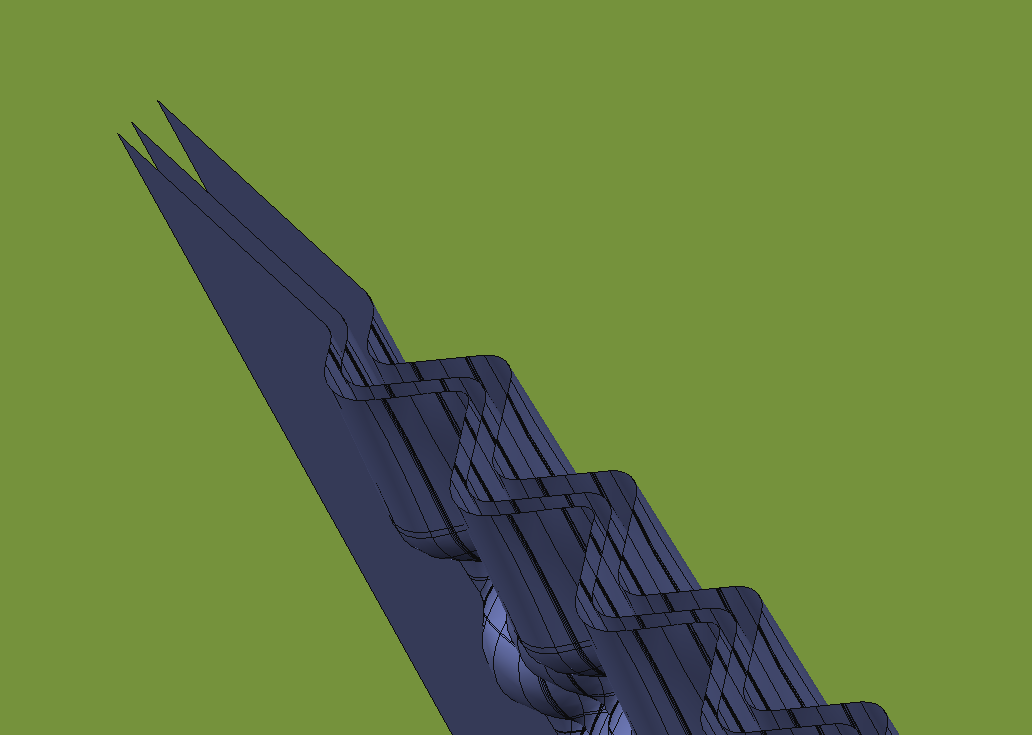
I see the continuity breaks in many places as a mojor problem (are they a result of the export or where they there before?) Also the surface seems far mor complex (in terms of numbers of quits) as neccessary.
What were your construction preliminaries for this?
May 30, 2012
08:18 AM
- Mark as New
- Bookmark
- Subscribe
- Mute
- Subscribe to RSS Feed
- Permalink
- Notify Moderator
Please log in to access translation
May 30, 2012
08:18 AM
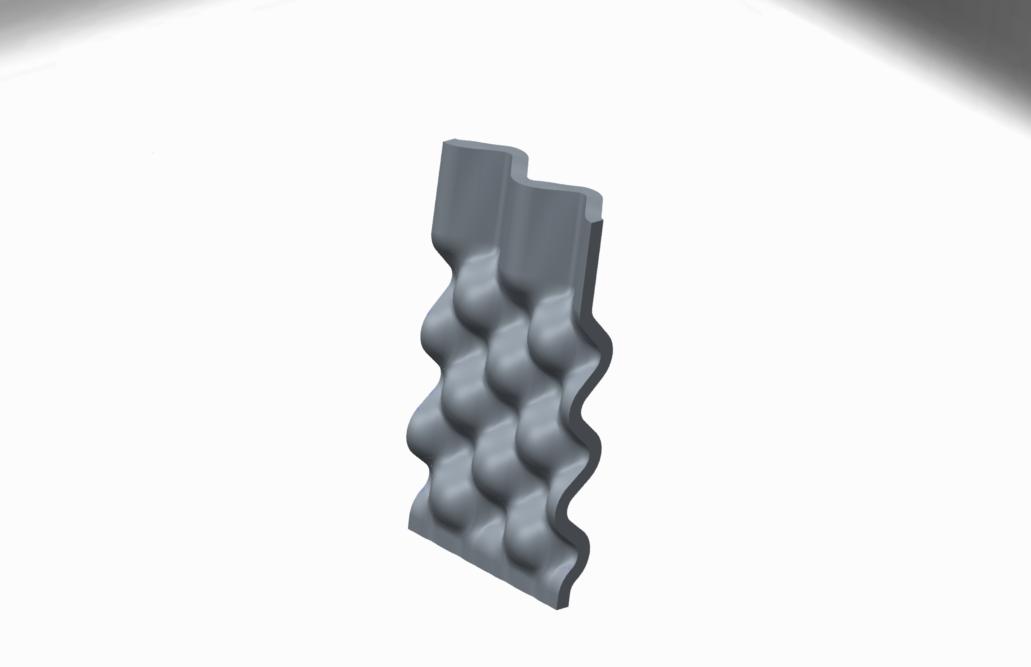
After creating the original quilt, I trimmed the quilt to eliminate any edge effects and then mirrored it merged until I constructed the proper geometry. this also eliminated many of the self-intersecting geometries.
Here is the original quilt after the edges have been trimmed.
May 30, 2012
12:02 PM
- Mark as New
- Bookmark
- Subscribe
- Mute
- Subscribe to RSS Feed
- Permalink
- Notify Moderator
Please log in to access translation
May 30, 2012
12:02 PM
hi Andrew,
The problem lies in the boundary blend and in the definition of all those sketched curves.
First you need same amount of segments in each U and V directions in your resulting surface. That means you have to split your sketched lines and curves into exactly the same amount of entities in each direction, even the straight border lines.
Then while in Boundary Blend tool you can use Control Points under RMB menu and define the rest of the inner curves that make the inner structure of the resulting quilt.
That way you eliminate all those tiny surfaces and you might be able to thicken the quilt the way you want to.
Bunch of work, the last two curves that make the straight end of the quilt cause a problem. So if you strictly wanna follow the exact shape of the curves then I recommend you to split/divide the sketches into more pieces.
Good luck
~Jakub
