Community Tip - Learn all about the Community Ranking System, a fun gamification element of the PTC Community. X
- Community
- Creo+ and Creo Parametric
- 3D Part & Assembly Design
- Re: Creating Flexibility Using Pro/Program
- Subscribe to RSS Feed
- Mark Topic as New
- Mark Topic as Read
- Float this Topic for Current User
- Bookmark
- Subscribe
- Mute
- Printer Friendly Page
Creating Flexibility Using Pro/Program
- Mark as New
- Bookmark
- Subscribe
- Mute
- Subscribe to RSS Feed
- Permalink
- Notify Moderator
Creating Flexibility Using Pro/Program
You can read the Desktop Product Focus of the Month here also authored by Ryan Butcher and you can also read the Enterprise Product Focus of the Month here and the Enterprise Tip of the Month here authored by Brian Muttonen.
| PTC Technical Specialists Newsletter - February 2011 |
Tip of the Month : Creating Flexibility Using Pro/Program |
|---|
Pro/Program can be used in a variety of ways. In this tip we will explore using it to create added flexibility to your designs. For basic information regarding the ProProgram functionality in Creo Elements Pro and getting started with Pro/Program follow this link.
Getting Started with Pro/Program
In this example we will demonstrate regenerating a bent model with a corner radius to a straight/linear model.


Step 1:
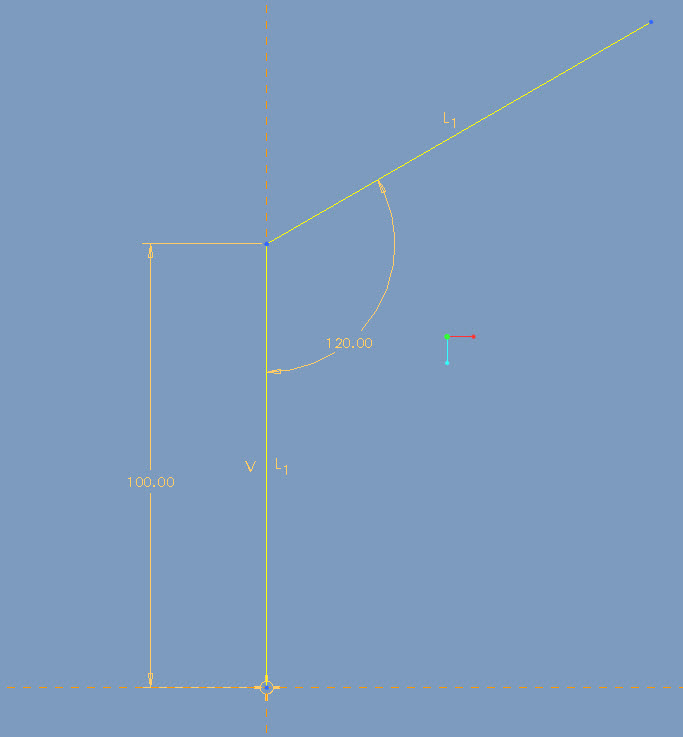
Create a sketch with 2 lines at an angle to each other.
Step 2:
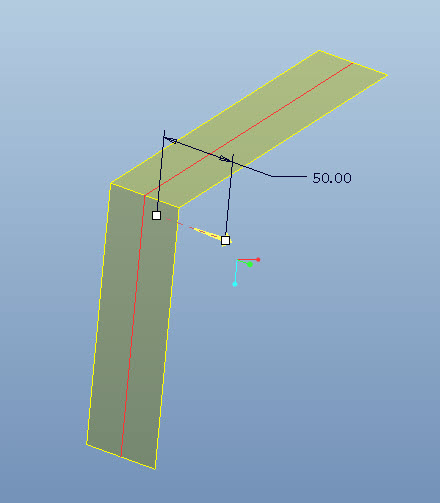
Extrude a Surface through the sketch.
Step 3:
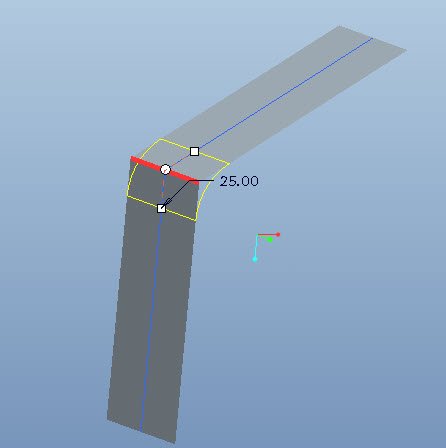
Create a Round on the corner of the surface.
Step 4:
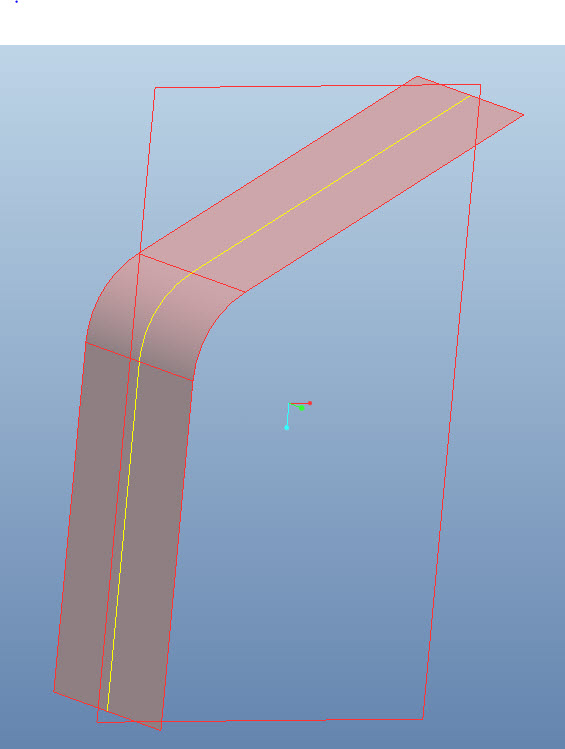
Create an Intersect curve referencing the datum plane and the extruded surface feature.
Step 5:
Hide the extruded surface and sweep the desired geometry along the Intersect created curve.
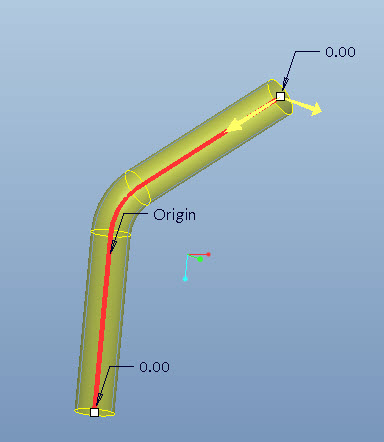
Step 6:
Editing the Program
- Choose Tools/Program/Edit Design.
- In the editer that the design list is opened in scroll down to the round feature that was created in the model.
- On the line above the “Add Feature” line, type “IF d3 < 179”. Note: (or the name of the angle dim on the first curve created in the process, if yours is not d3)
- Then, type “END IF” after the END ADD statement line for the round feature
This tells Creo to add the round feature if the angle is specified some value less than 179, otherwise don’t regenerate the round or remove it from the design. This results in creating the sweep feature along a straight trajectory.
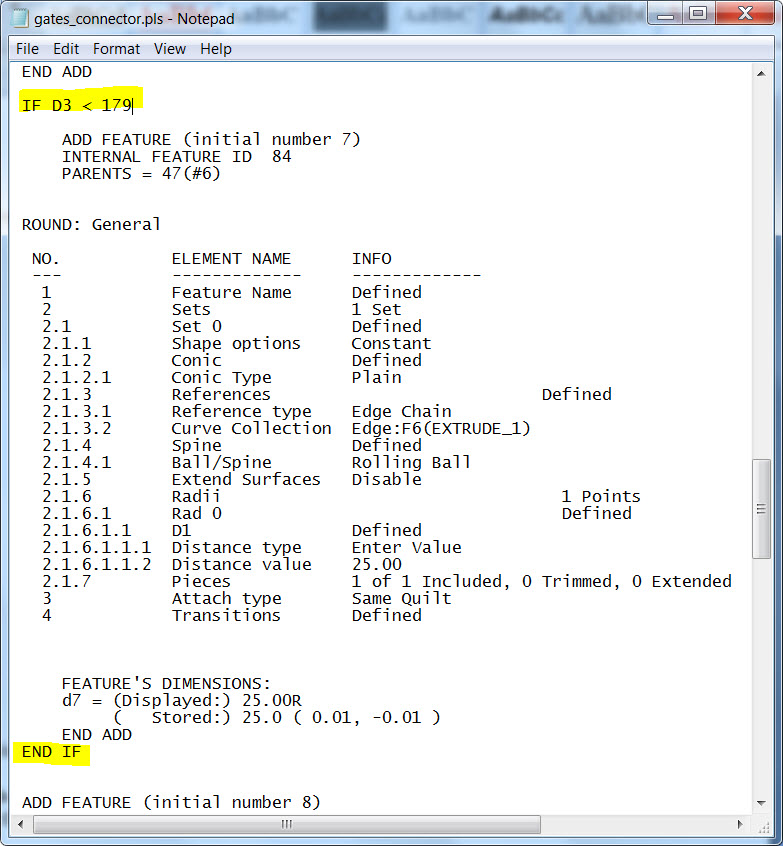
- Save and close the file from Notepad
- Answer “Yes” to incorporate the changes into the model
- TRY IT OUT! Change the angle dimension to 180.
This is one simple example for using Pro/Program to make your designs more flexible. See if you can extrapolate from here and use it in others ways.
You can read the Desktop Product Focus of the Month here also authored by Ryan Butcher and you can also read the Enterprise Product Focus of the Month here and the Enterprise Tip of the Month here authored by Brian Muttonen.
This thread is inactive and closed by the PTC Community Management Team. If you would like to provide a reply and re-open this thread, please notify the moderator and reference the thread. You may also use "Start a topic" button to ask a new question. Please be sure to include what version of the PTC product you are using so another community member knowledgeable about your version may be able to assist.
- Mark as New
- Bookmark
- Subscribe
- Mute
- Subscribe to RSS Feed
- Permalink
- Notify Moderator
Hey John,
Nice job on this. For readers who would like a 2 minute primer on Pro/Program, here's a video on PTC Universtiy's LearningExchange:
http://learningexchange.ptc.com/tutorials/view/141
Let me know what you think!


