Community Tip - Need to share some code when posting a question or reply? Make sure to use the "Insert code sample" menu option. Learn more! X
- Community
- Creo+ and Creo Parametric
- 3D Part & Assembly Design
- Re: Creating perfect circular dimple (cut) on a ci...
- Subscribe to RSS Feed
- Mark Topic as New
- Mark Topic as Read
- Float this Topic for Current User
- Bookmark
- Subscribe
- Mute
- Printer Friendly Page
Creating perfect circular dimple (cut) on a circular surface (ring)
- Mark as New
- Bookmark
- Subscribe
- Mute
- Subscribe to RSS Feed
- Permalink
- Notify Moderator
Creating perfect circular dimple (cut) on a circular surface (ring)
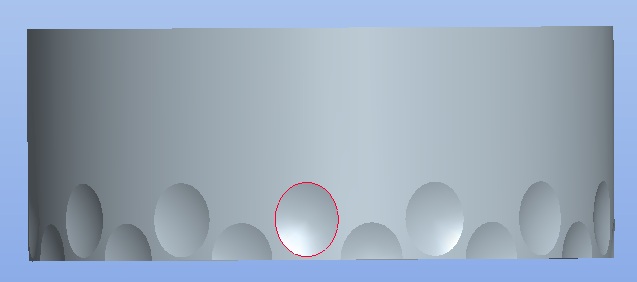
I have a ring and on the surface of that ring I am trying to create a perfect cicle dimple cut. The problem is that since the surface I'm trying to cut into is circular the round dimple turns into an oval. Is there any way to make this feature so that looking down on the ring, this dimple looks like a perfect circle? Here is a picture of the ovular dimple on the ring.

Hopefully I've explained myself.
Thanks
This thread is inactive and closed by the PTC Community Management Team. If you would like to provide a reply and re-open this thread, please notify the moderator and reference the thread. You may also use "Start a topic" button to ask a new question. Please be sure to include what version of the PTC product you are using so another community member knowledgeable about your version may be able to assist.
- Labels:
-
General
- Mark as New
- Bookmark
- Subscribe
- Mute
- Subscribe to RSS Feed
- Permalink
- Notify Moderator
I would think you could do the following:
1.) Extrude a cylindrical surface to represent the outer edge of the dimple that extends through the face of the ring.
2.) Use the intersect feature to create a curve where the cylindrical surface intersects the outside of the ring.
3.) Use the top edge of the surface, the intersect curve, and the center axis of the surface as references for a variable section sweep. Create the dimple surface using a conical shape.
4.) Copy and Move the surface
5.) Pattern as needed
6.) Solidify the initial moved copy
7.) Pattern the solidify
- Mark as New
- Bookmark
- Subscribe
- Mute
- Subscribe to RSS Feed
- Permalink
- Notify Moderator
I have created a part and uploaded it. You can download it here: http://communities.ptc.com/servlet/JiveServlet/downloadBody/3666-102-1-4658/pattern_dimple.prt.2.zip
You will need to drag the insert arrow back to the bottom of the feature tree. (The filesize is too large if the features are left resumed.)
- Mark as New
- Bookmark
- Subscribe
- Mute
- Subscribe to RSS Feed
- Permalink
- Notify Moderator
Screenshot
- Mark as New
- Bookmark
- Subscribe
- Mute
- Subscribe to RSS Feed
- Permalink
- Notify Moderator
You did pretty much the same as what I came up with. Created a sweep trajectory that helped control the "normal" and the 3D curve as a guide.
I was able to change yours to make that a solid cut. If you pattern that solid cut, it fails... it fails to vary the sweep (the bug I just reported)... but if you use Geometry pattern, it copies the feature faithfully.
I used the axis as a patterning direction. We will see what CS has to say about why the VSS fails patterns.
- Mark as New
- Bookmark
- Subscribe
- Mute
- Subscribe to RSS Feed
- Permalink
- Notify Moderator
I just figured out a better way to pattern this.
1.) Do a move copy by axis on the first surface by 20 degrees.
2.) Pattern this move copy 18 times. This creates the bottom row.
3.) Solidify (cut) the first suface.
4.) Pattern this solidify (reference pattern)
5.) Group the move copy pattern and the solidfy pattern.
6.) Do a move copy on this group two directions - .25" up and 10 degrees around.
7.) Pattern this latest move copy. Use both the .25" and the 10 degree dimensions for the 1st direction references.
- Mark as New
- Bookmark
- Subscribe
- Mute
- Subscribe to RSS Feed
- Permalink
- Notify Moderator
If you like that, give the "fill" pattern a try if your version supports that.
- Mark as New
- Bookmark
- Subscribe
- Mute
- Subscribe to RSS Feed
- Permalink
- Notify Moderator
Another classic video... Using the Fill region sketch to help match up the pattern on the backside of the cylinder. Note the omission of a overlapping black dots (actually done with a temporary "overwrap" to see them). The sketch relations guarantee perfect patterning all the way around. in essence, the pattern is duplicated in the sketch -unwrapped-.
Critical to making a lot of patterns work is to provide a "good" origin. If you don't do this, you get some unexplained results.
- Mark as New
- Bookmark
- Subscribe
- Mute
- Subscribe to RSS Feed
- Permalink
- Notify Moderator
How does the fill pattern work. It seems like a great idea but I've never been able to get it to work.
- Mark as New
- Bookmark
- Subscribe
- Mute
- Subscribe to RSS Feed
- Permalink
- Notify Moderator
A fill pattern requires a zone or region to be sketched. By default, it is a direct projection onto a surface but the option shown in the video uses the mapping onto a surface using a wrap concept (or quilt - merged surfaces).
You can offset the pattern from the edges of the region as well. Each of the provided patterns are controlled also with their internal parameters such as the 24.68... in the video.
Overlaps of the features can cause errors. When I got the dimples to perfectly overlap, I had several fail. That is why I "turned off" the black dots (now white dots). Since the black and white overlap in the video, you cannot see them all.
I don't know how the WF4 interface is or if you even have all the options I show in the video. But in general, this is how it works. Again, a key feature I often find to be a problem is the default sketch origin. I try to pick an origin in all cases just to be sure it follows what I need it to follow.
- Mark as New
- Bookmark
- Subscribe
- Mute
- Subscribe to RSS Feed
- Permalink
- Notify Moderator
I have never used the move copy feature. Is that available in wf 4 or creo pro 5?
- Mark as New
- Bookmark
- Subscribe
- Mute
- Subscribe to RSS Feed
- Permalink
- Notify Moderator
It's been around since at least wildfire (1.0)
- Mark as New
- Bookmark
- Subscribe
- Mute
- Subscribe to RSS Feed
- Permalink
- Notify Moderator
Yes... and it's been bad since Wildfire 1.0, too...
- Mark as New
- Bookmark
- Subscribe
- Mute
- Subscribe to RSS Feed
- Permalink
- Notify Moderator
Fortunately 2000i never had copy/paste so never grew to depend on it. Even today in Creo, I use copy/paste as a last resort... and only for the multi-transform capabilities; however, I am learning that even patterns -can- use multi-transforms.
- Mark as New
- Bookmark
- Subscribe
- Mute
- Subscribe to RSS Feed
- Permalink
- Notify Moderator
patterning is also a pain. I tried this but once I do the solidify (cut) and try to pattern that it doesn't give me the option.
- Mark as New
- Bookmark
- Subscribe
- Mute
- Subscribe to RSS Feed
- Permalink
- Notify Moderator
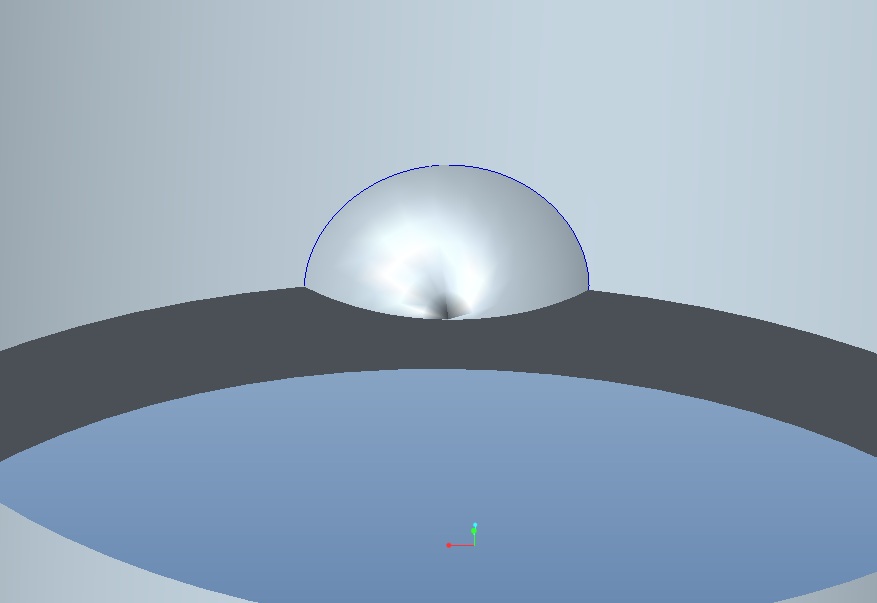
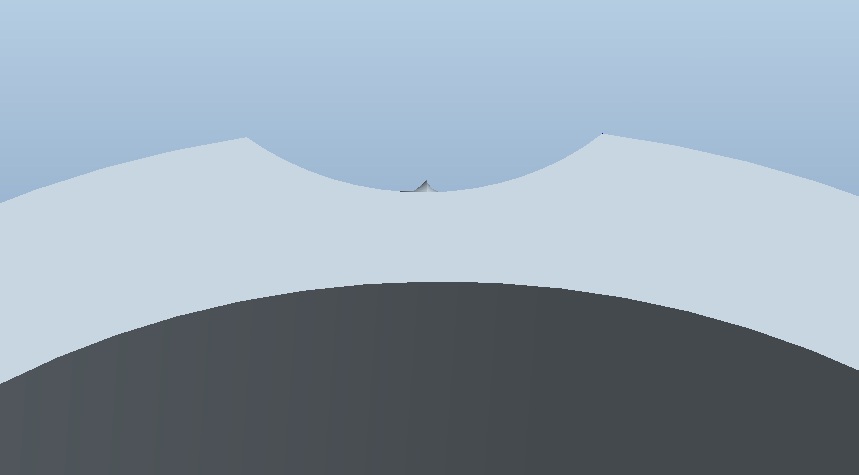
Wow, it so simple thank you. It was very simple to do but I'm getting some overlap in the bottom of my dimple I'm not quite sure how to remove. I've attached a couple images to show what I mean. Other than that, it looks exactly like what I was anticipating. Thank you very much, (and everybody else) for taking the time to help.


Any idea how to fix this small problem?
- Mark as New
- Bookmark
- Subscribe
- Mute
- Subscribe to RSS Feed
- Permalink
- Notify Moderator
Yes, you are having a problem with maintaining tangency at the bottom. Variable sections sweeps are a bit fussy about what you use as references.
This is what I ended up with for the section:
The only thing referenced is the two trajectory features and the section's default references. note the vertical constraints to the center of the arc and the implied centerline.
I am working on uploading a video to youtube on this (although in Creo 2)
- Mark as New
- Bookmark
- Subscribe
- Mute
- Subscribe to RSS Feed
- Permalink
- Notify Moderator
The video! ![]()
remember to use full screen and set to HD
edit: Creo 2 part attached.
- Mark as New
- Bookmark
- Subscribe
- Mute
- Subscribe to RSS Feed
- Permalink
- Notify Moderator
Man this is fabulous, if only I had something to reward you two with.
- Mark as New
- Bookmark
- Subscribe
- Mute
- Subscribe to RSS Feed
- Permalink
- Notify Moderator
I think we're chasing each other's tails. 🙂
- Mark as New
- Bookmark
- Subscribe
- Mute
- Subscribe to RSS Feed
- Permalink
- Notify Moderator
I'm on a mission to fill the queue of customer service ![]()
I want to know why so many patterns fail. This one is just one of many that simply do not behave. It is obvious that geometry pattern should behave better, but general (and default!) patterns fail miserably way too often.
- Mark as New
- Bookmark
- Subscribe
- Mute
- Subscribe to RSS Feed
- Permalink
- Notify Moderator
I guess that wasn't a big enough challenge for CS. The answer is that you have to group all the references before you pattern the sweep. In this case, the datum plane and the origin sketch had to be grouped with the Sweep. once grouped, the pattern worked correctly. A great argument for keeping sketches and datums internal.
- Mark as New
- Bookmark
- Subscribe
- Mute
- Subscribe to RSS Feed
- Permalink
- Notify Moderator
Makes sense. When patterning a feature the references all need to be valid at each location in the pattern. By patterning the references used you are insuring that they are always valid. The disadvantage is the very large number of features created and the extended regeneration time. Patterning just the geometry (either manually the way I did it or with the "geometry only" pattern option) is much more efficient.
- Mark as New
- Bookmark
- Subscribe
- Mute
- Subscribe to RSS Feed
- Permalink
- Notify Moderator
Yes with one exception... the "chain" from the project does not need to be part of the group.
- Mark as New
- Bookmark
- Subscribe
- Mute
- Subscribe to RSS Feed
- Permalink
- Notify Moderator
Ahh... that was a softball question. That's why they turned it around so quickly. Grouping the necessary datums controlling a feature to enable patterning is a very old (and necessary) trick. Hit them with something harder and they'll fold like a cheap suit. ![]()
- Mark as New
- Bookmark
- Subscribe
- Mute
- Subscribe to RSS Feed
- Permalink
- Notify Moderator
![]() yea.... I haven't got an answer to the second question yet: "...why doesn't the -chain- project feature get added to the group?".
yea.... I haven't got an answer to the second question yet: "...why doesn't the -chain- project feature get added to the group?".
- Mark as New
- Bookmark
- Subscribe
- Mute
- Subscribe to RSS Feed
- Permalink
- Notify Moderator
Not sure what your sketch looks like, but I'm making my arc (variable radius) perpendicular to the axis.
- Mark as New
- Bookmark
- Subscribe
- Mute
- Subscribe to RSS Feed
- Permalink
- Notify Moderator
I wonder if that's my problem my radius is fixed. It is indeed perpendicular to the axis though which I would think would eliminate the problem.
- Mark as New
- Bookmark
- Subscribe
- Mute
- Subscribe to RSS Feed
- Permalink
- Notify Moderator
Right, a variable section sweep means just that, "something has to give". So whatever is not "locked down" will vary. If the section is over-constrained for the variability, it reverts to a normal "fixed" section although it doesn't warn you about that.
You have an origin reference, but you also have chain references. These are "rails" for the geometry to follow. your objective is to make sure the geometry you describe in the sketch can "vary" along those rails.
VSS are very powerful although a bit touchy. We have had some very lively discussions on the subject which you are certainly welcome to search on.
- Mark as New
- Bookmark
- Subscribe
- Mute
- Subscribe to RSS Feed
- Permalink
- Notify Moderator
BTW: the file size has an interesting dependency. I learned recently that having high quality graphics levels increases you saved file size. I have 4-5meg files go to 50-100megs just by up'ing all the graphics quality settings (for beauty screenshots). when I save the file, it saves a "graphic rep" of the part in the part file.
I have added the following to config.pro
save_model_display wireframe
...but I don't know yet if this will solve the issue; shaded_lod is default.


