Community Tip - Need to share some code when posting a question or reply? Make sure to use the "Insert code sample" menu option. Learn more! X
- Community
- Creo+ and Creo Parametric
- 3D Part & Assembly Design
- Did You Know? Copying Subassemblies with Advanced ...
- Subscribe to RSS Feed
- Mark Topic as New
- Mark Topic as Read
- Float this Topic for Current User
- Bookmark
- Subscribe
- Mute
- Printer Friendly Page
Did You Know? Copying Subassemblies with Advanced Framework Extension
- Mark as New
- Bookmark
- Subscribe
- Mute
- Subscribe to RSS Feed
- Permalink
- Notify Moderator
Did You Know? Copying Subassemblies with Advanced Framework Extension
In Creo Parametric Advanced Framework Extension (AFX), after you have defined subassemblies, you can copy them to quickly build a structure.
In this post, a PTC expert describes how to copy a subassembly.
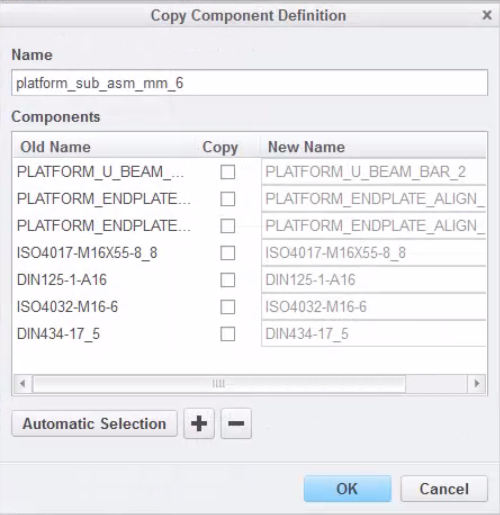
From the Framework ribbon bar menu, select Project Subassemblies. The Project Subassemblies dialog opens. Under the Assemble section, select the Copy icon. The Copy Component Definition dialog box opens, as shown below.

From this dialog box, you can type a new Name for the assembly, select the components that you want to copy, and type a New Name for one or more components. You can also click Automatic Selection to select only required parts and to exclude standard parts, such as screws and nuts. To select or remove components in the model window use the plus ![]() or minus
or minus ![]() buttons, and then select the component you want to add to or remove from the definition.
buttons, and then select the component you want to add to or remove from the definition.
After the definition is complete, the new subassembly can be built in like any other profile.

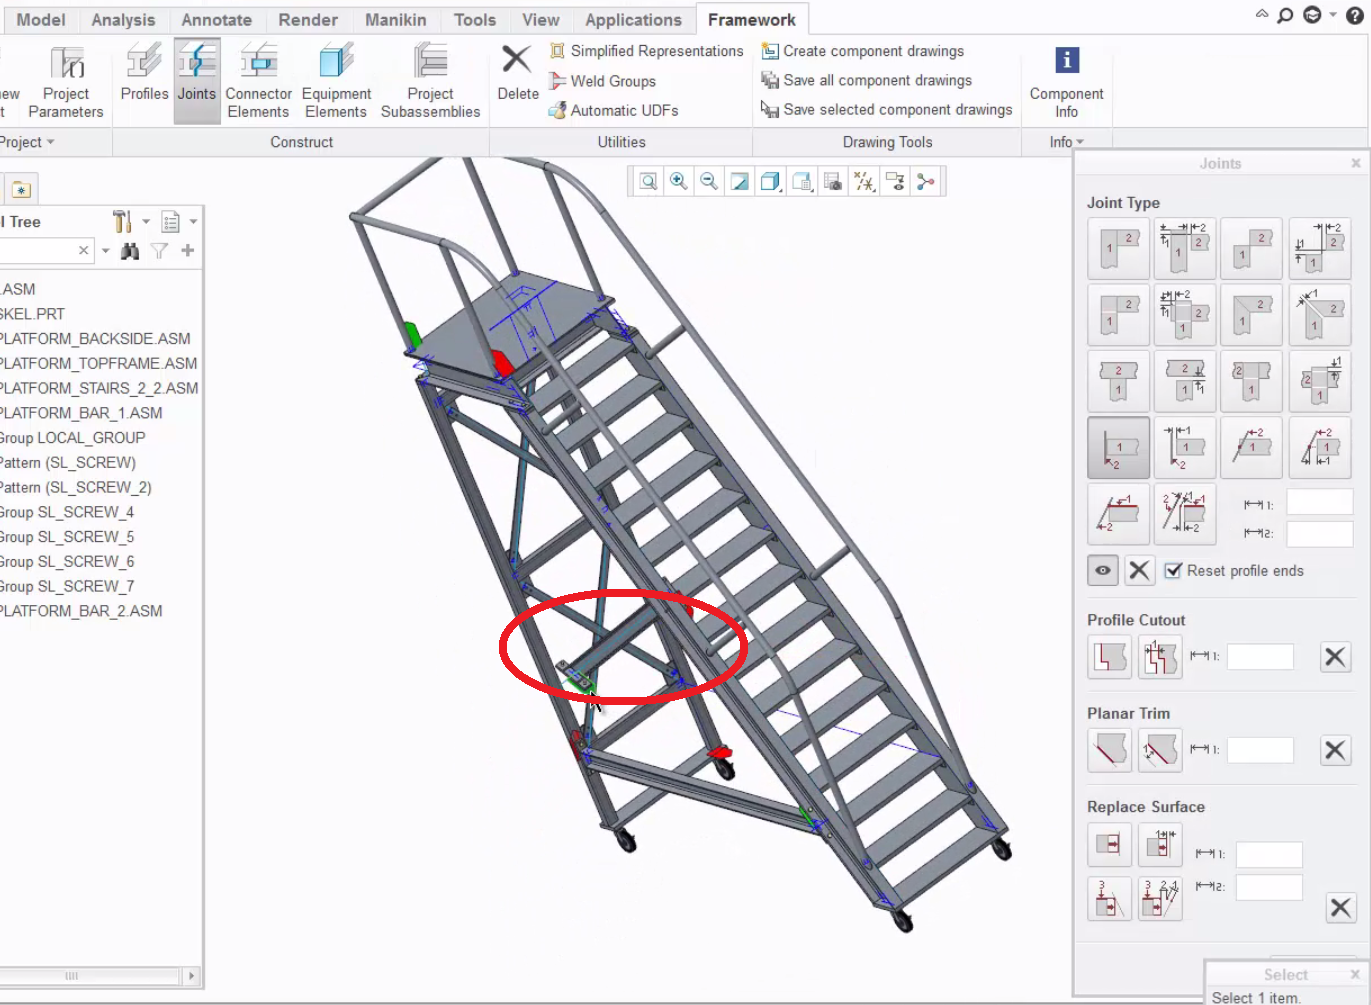
Image: In this example, the subassembly within the red circle was copied and added to the assembly.
To finish, the joint on the new subassembly needs to be adjusted. To do this, click Joints on the Framework ribbon bar menu, and then apply joints to adjust the new subassembly.

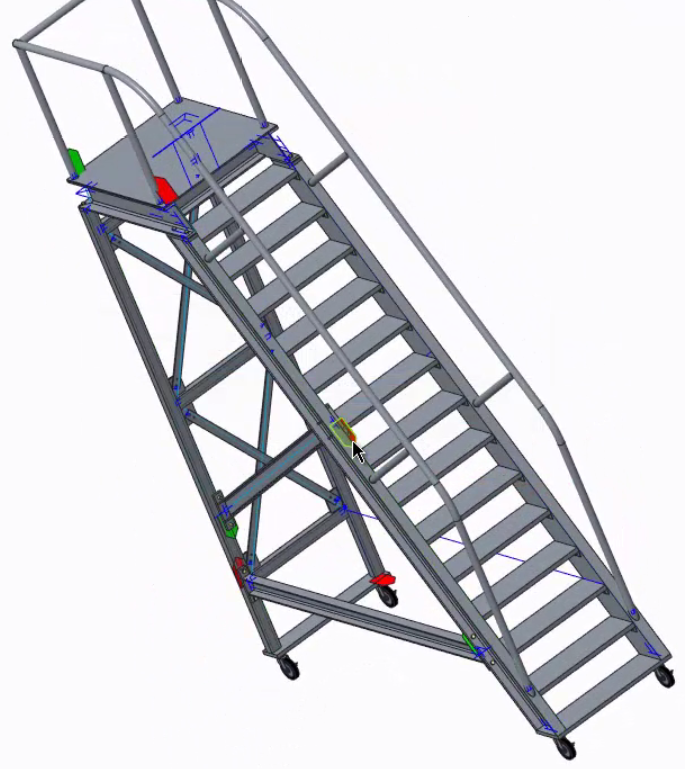
Image: The new subassembly no longer has a gap since the joint was adjusted.
To watch a demonstration of these steps, check out our video tutorial (“Copying Subassemblies is Easier in Advanced Framework Extension”).
Stay tuned to our “Did You Know” blog series as we cover all of the exciting, new enhancements in PTC Creo 3.0.
Have some ideas about what PTC Creo product features you’d like to learn more about? Send me a message or leave a comment below and we’ll write up the best ideas from the community. Thanks for reading, looking forward to all of your feedback!
This thread is inactive and closed by the PTC Community Management Team. If you would like to provide a reply and re-open this thread, please notify the moderator and reference the thread. You may also use "Start a topic" button to ask a new question. Please be sure to include what version of the PTC product you are using so another community member knowledgeable about your version may be able to assist.
- Labels:
-
(AFX)Struct_Framework


