

Did You Know? PTC Creo 3.0 Enhancements: Tangency Propagation in PTC Creo Flexible Modeling Extension
PTC Creo 3.0 is packed full of features and functionality that make your job easier. With PTC Creo Parametric Flexible Modeling Extension you get the ease of direct modeling combined with the control of parametric 3D CAD. This gives you the flexibility to update or redesign existing products more easily, without sacrificing the original design intent. Having the option to select and edit the geometry you want to change without reconstructing the model in any way is a huge time saver. In this post Don Breda, CAD Product Manager, explains how to use PTC Creo Parametric Flexible Modeling Extension for tangency propagation and control:
The PTC Creo Parametric Flexible Modeling Extension now supports the option to maintain tangent connections to adjacent geometry when you make geometric modifications to selected geometry. To begin, navigate to the Flexible Modeling tab and select the geometry that you plan to modify.
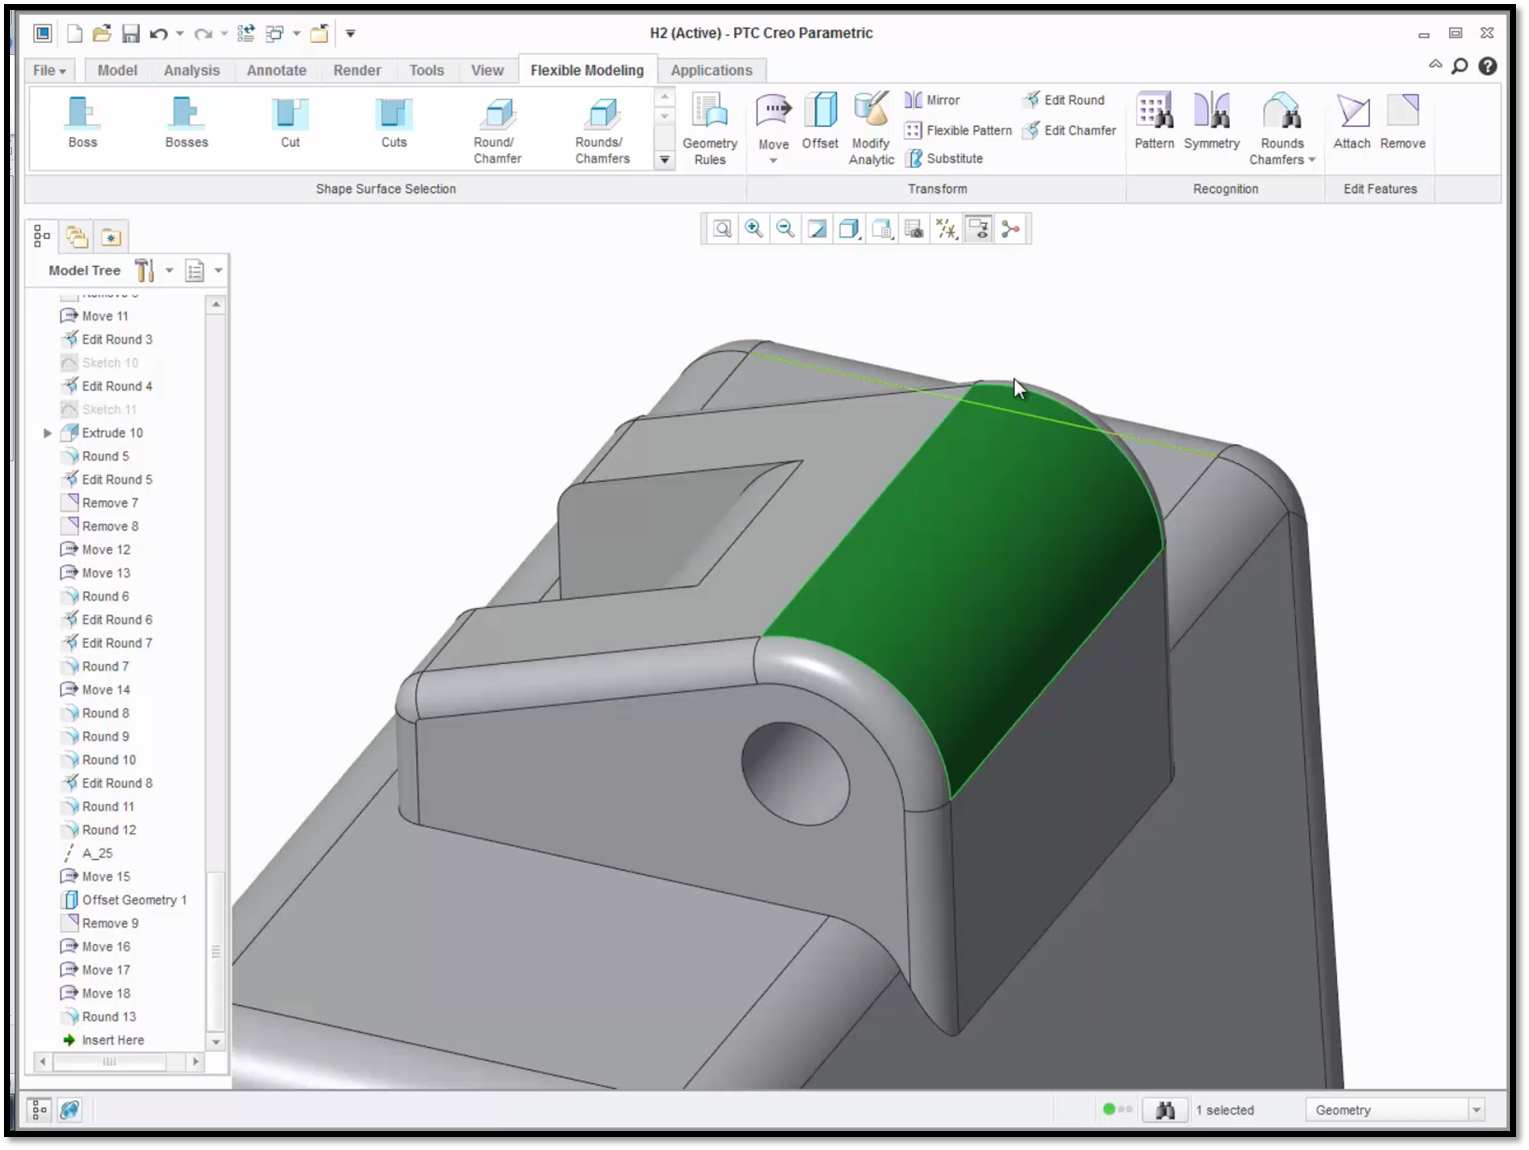
Here, you can see that our selected geometry appears in green.
After selecting the geometry that you plan to modify, you can select flexible modeling tools such as Move, Offset, Substitute, or Modify Analytic to connect with tangency to neighboring surfaces. For this example, we will use the Offset tool.
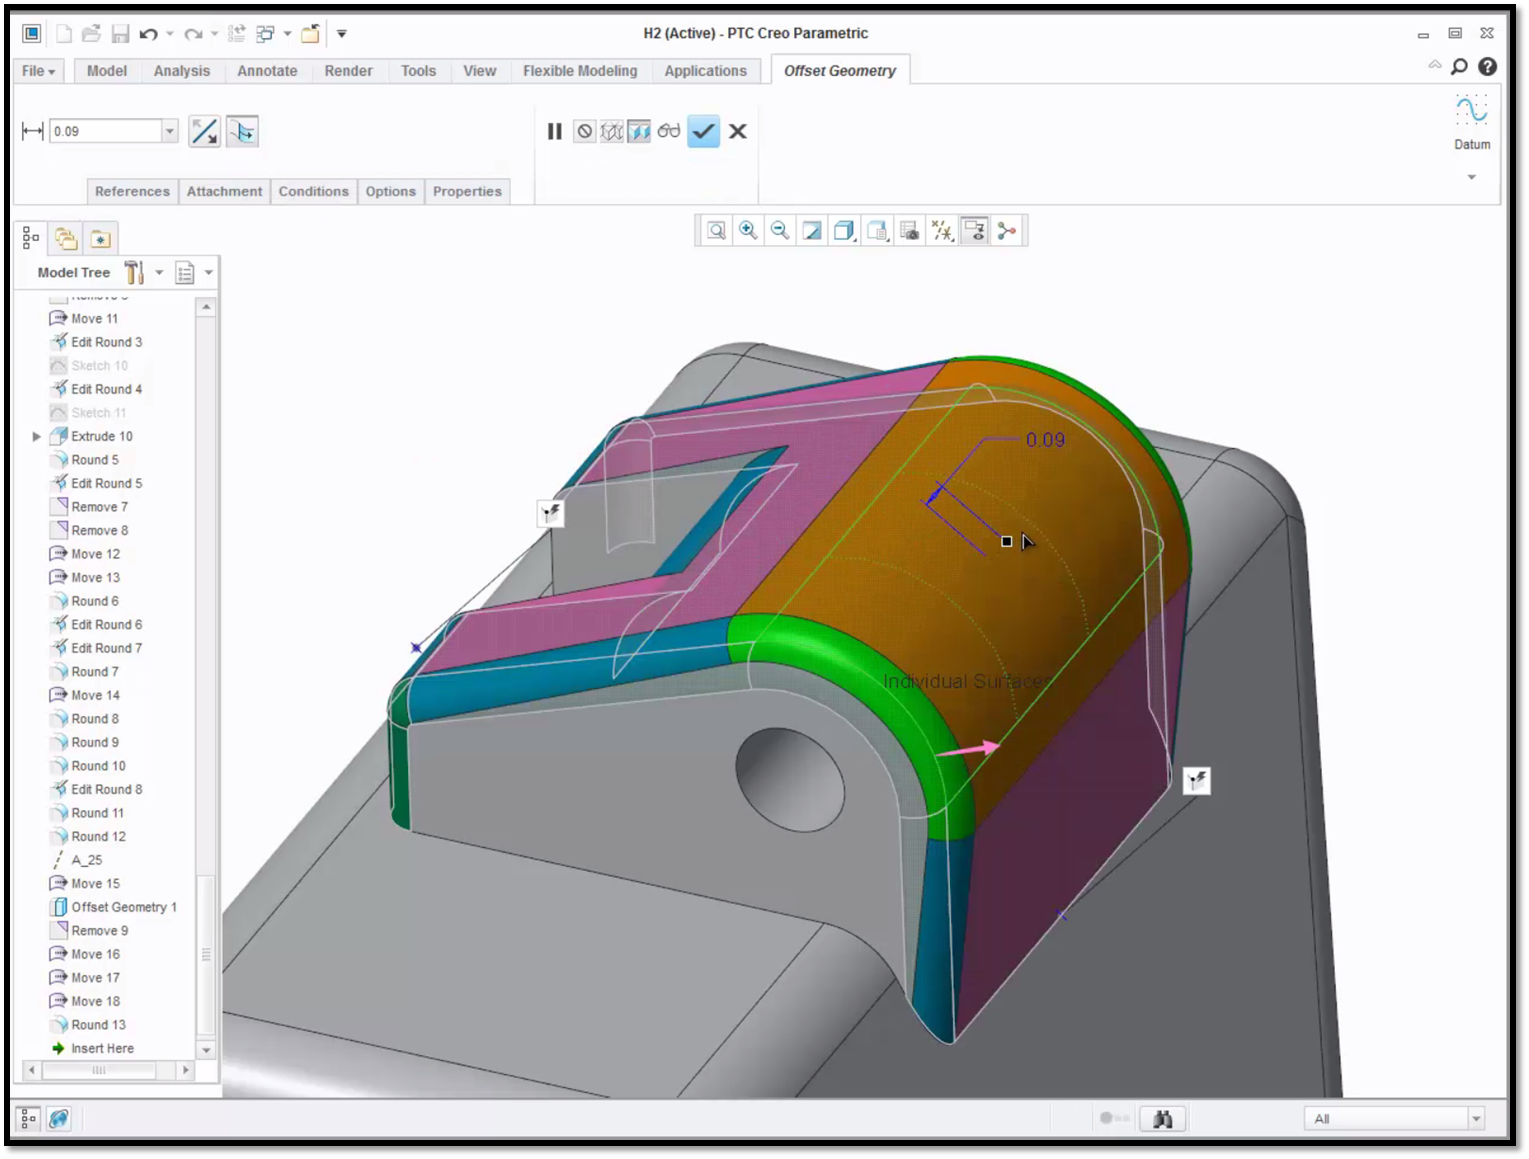
In this example, we selected the Offset tool.
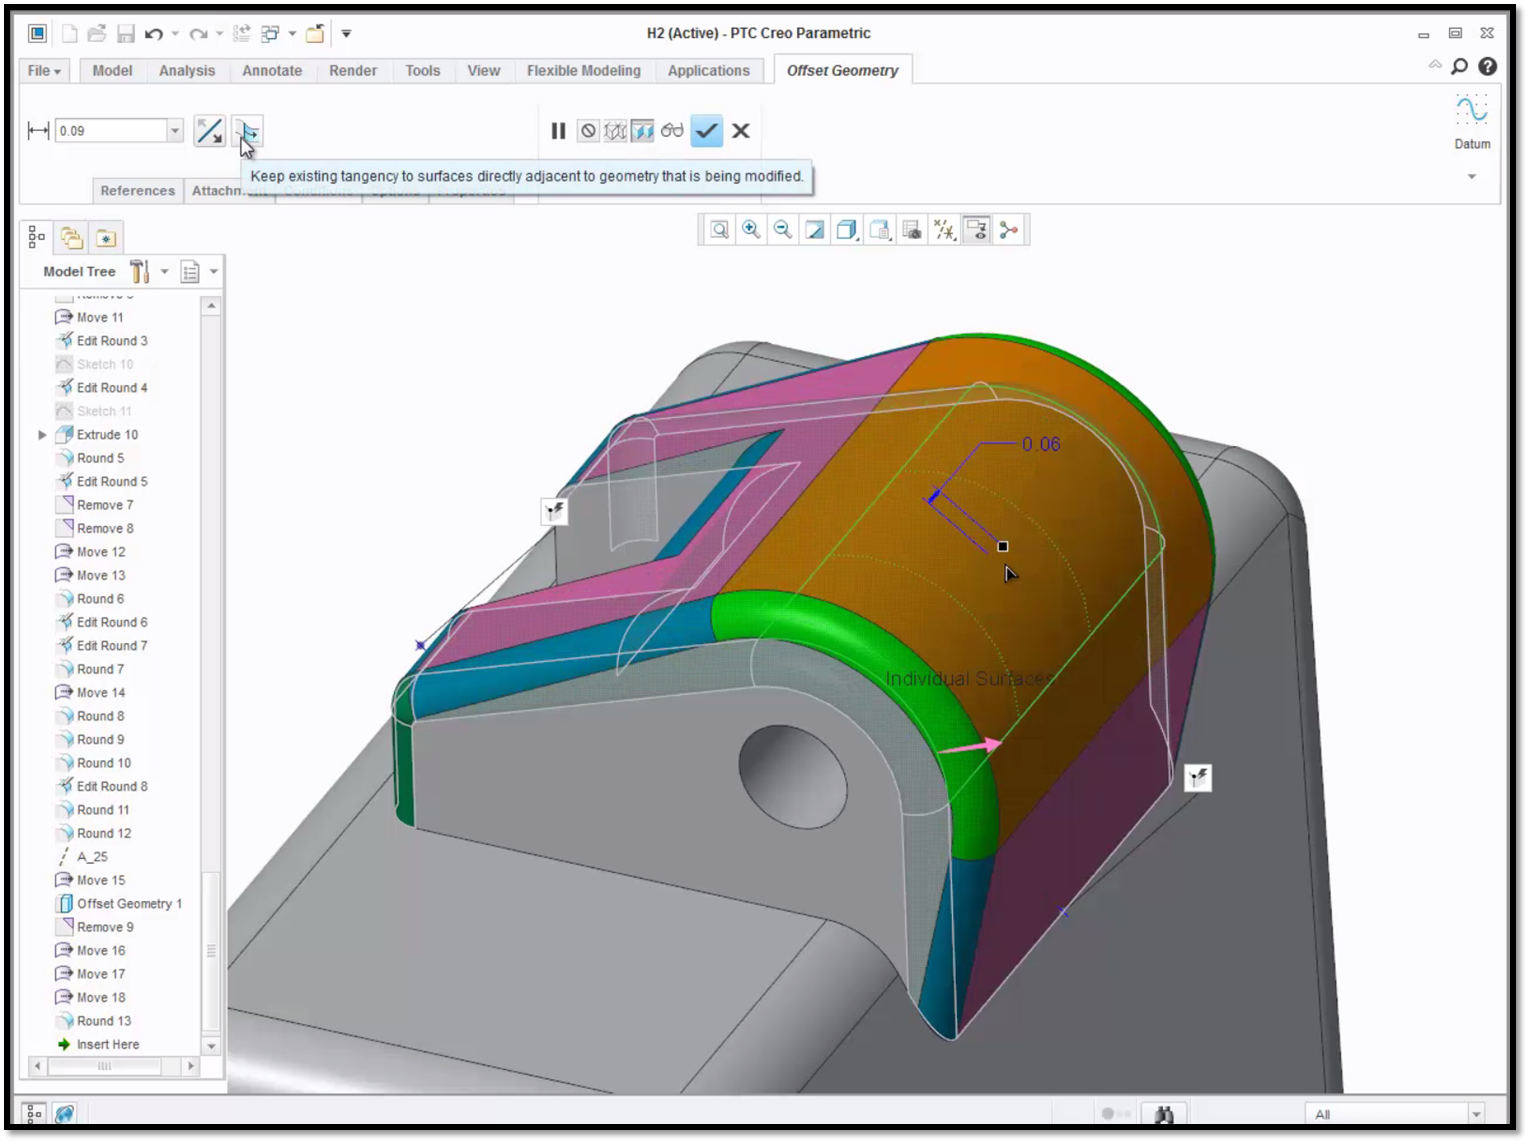
Within the Offset tool dashboard, select the icon with a curved surface and an arrow. This enables you to keep the existing tangency to surfaces directly adjacent to the geometry that is being modified. What this will mean is that the neighboring surfaces will be adjusted along with the primary surface to maintain the tangential connection.
Here you can see that the surfaces adjacent to the primary surface are highlighted.
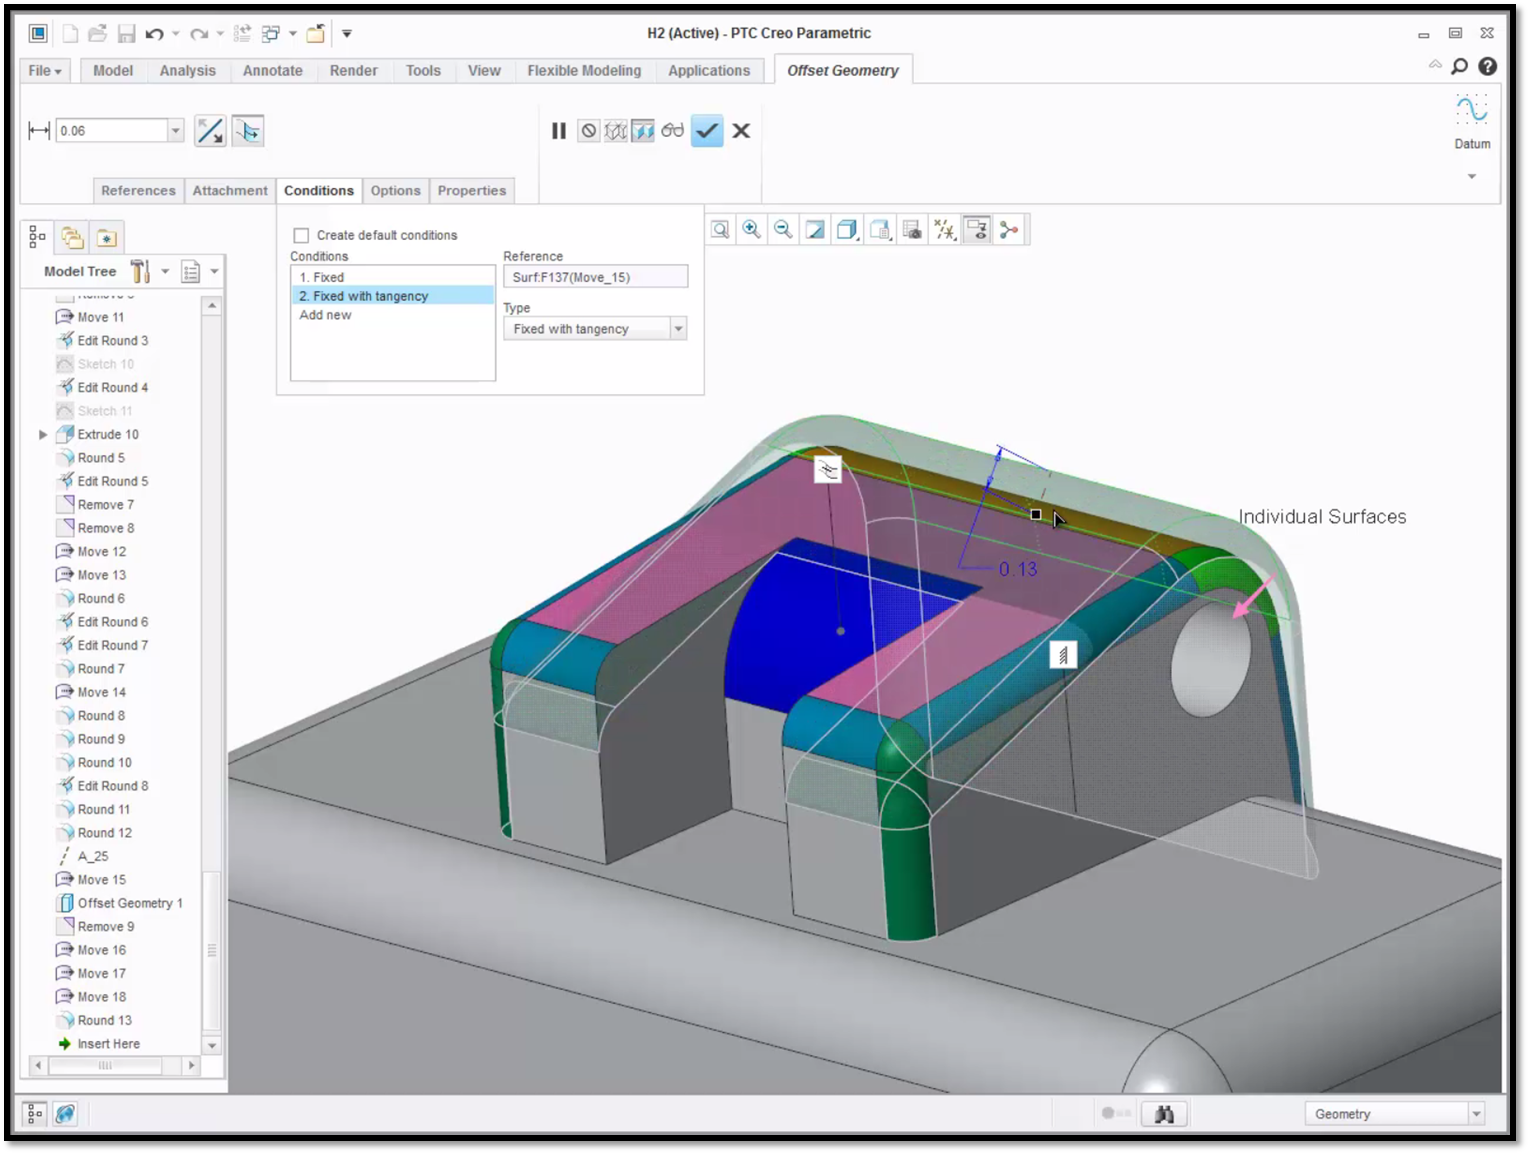
The system automatically applies some default connections to the neighboring geometry. You can also apply user defined conditions to control how it should be adjusted to accommodate the changes to the primary geometry. Navigate to the Conditions tab in the feature dashboard, and un-check the Create default conditions check box. You can create a user defined condition in the Conditions panel, or right click in the graphics window and select Add condition to open the Conditions dialogue box. You can select an edge as a Reference, select Fixed from the Applicable Conditions, and click OK. The new condition will appear in Conditions panel.
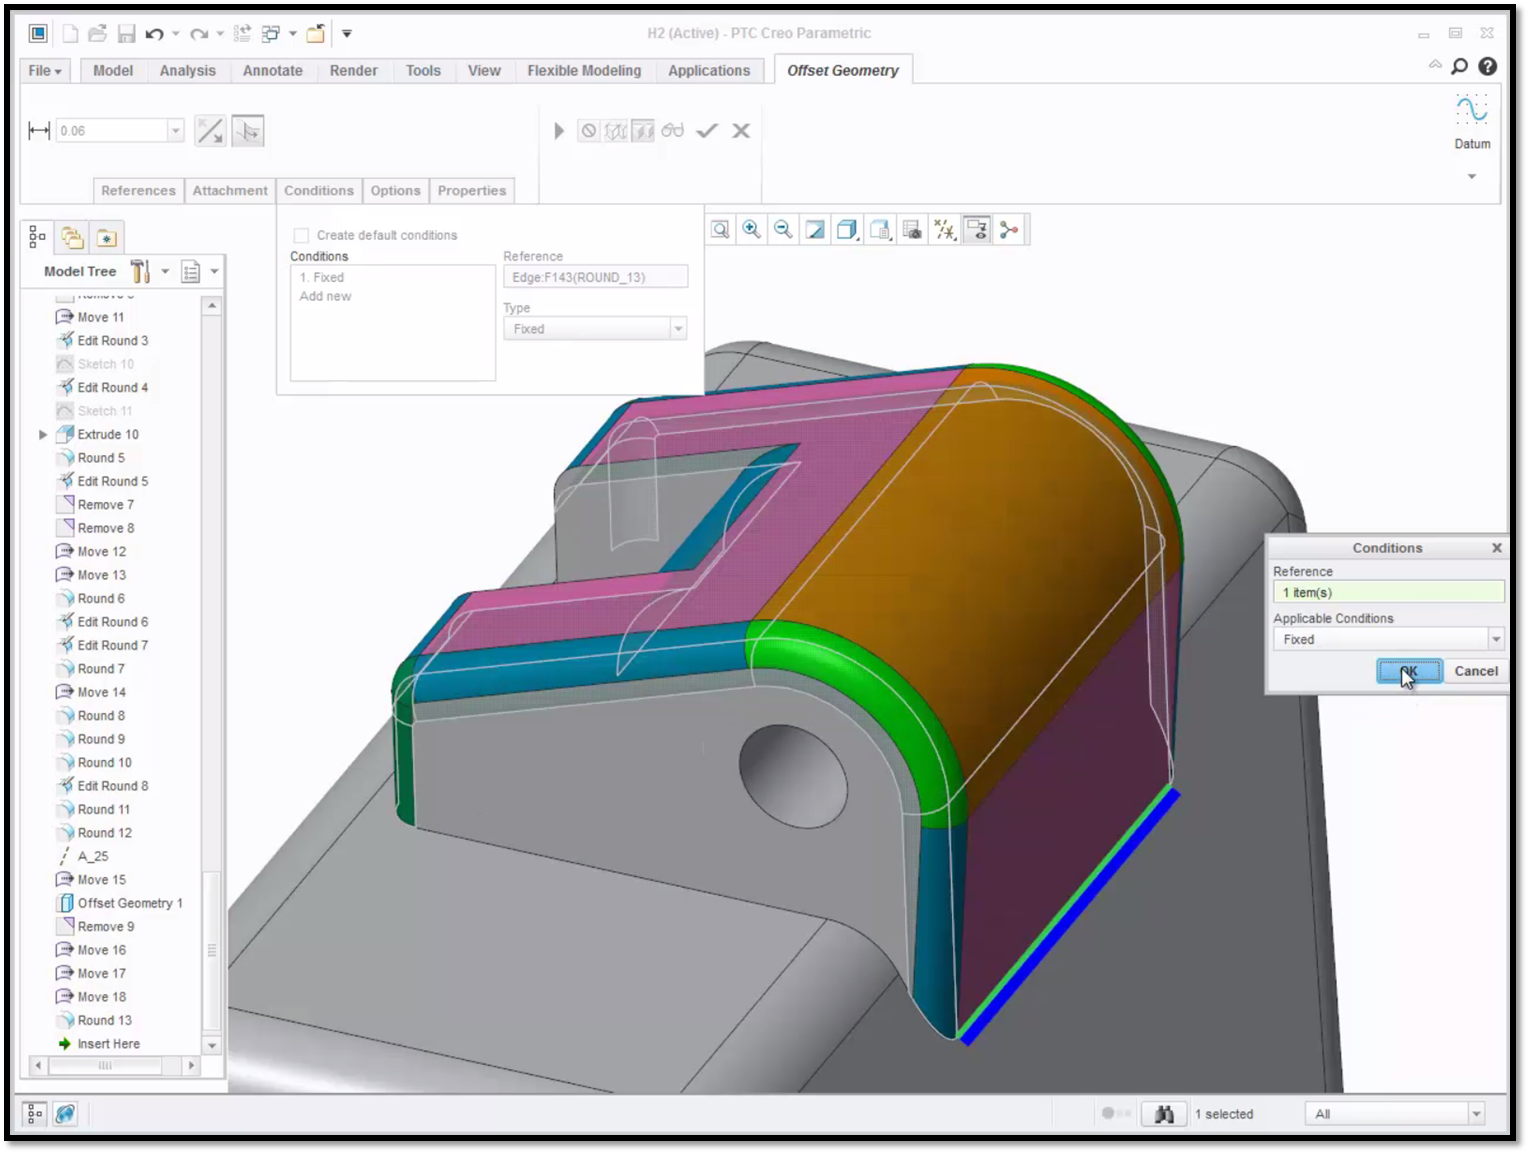
In this example the reference’s condition is set to Fixed.
You can fix surfaces, edges or axis, specify what tangencies should be maintained or lost, and maintain constant radii. User defined conditions can also be created by right clicking the applicable reference, and selecting from the Right Mouse Button menu. For example, you can right click on a cylindrical surface and select Fixed with Tangency to add a condition.
The ability to control the propagation of geometric edits to tangentially attached surfaces greatly enhances the power and flexibility of the PTC Creo Parametric Flexible Modeling Extension.
The selected surface remains fixed and connected with tangency as the surfaces are adjusted.
To learn more about tangency propagation and control in PTC Creo Flexible Modeling, check out our video tutorial on the PTC Creo University Learning Exchange (“Tangency Propagation and Control in PTC Creo Flexible Modeling”).
Stay tuned to our “Did You Know” blog series as we cover all of the exciting, new enhancements in PTC Creo 3.0.
For more in-depth product feature explanations, visit our Tech Tips area.
Have some ideas about what PTC Creo product features you’d like to learn more about? Send me a message or leave a comment below and we’ll write up the best ideas from the community. Thanks for reading, looking forward to all of your feedback!
In case you missed it, check out our recent Did You Know posts covering PTC Creo 3.0 enhancements:
- Did You Know? PTC Creo Advanced Assembly Extension: Concurrent Engineering
- Did You Know? Performing a Design Optimization in PTC Creo Simulate
- Fast Facts! Quick Tips for Using PTC Creo - Assembly Mode
This thread is inactive and closed by the PTC Community Management Team. If you would like to provide a reply and re-open this thread, please notify the moderator and reference the thread. You may also use "Start a topic" button to ask a new question. Please be sure to include what version of the PTC product you are using so another community member knowledgeable about your version may be able to assist.