Community Tip - You can change your system assigned username to something more personal in your community settings. X
- Community
- Creo+ and Creo Parametric
- 3D Part & Assembly Design
- Did You Know? Running a Static Analysis in Creo Si...
- Subscribe to RSS Feed
- Mark Topic as New
- Mark Topic as Read
- Float this Topic for Current User
- Bookmark
- Subscribe
- Mute
- Printer Friendly Page
Did You Know? Running a Static Analysis in Creo Simulate
- Mark as New
- Bookmark
- Subscribe
- Mute
- Subscribe to RSS Feed
- Permalink
- Notify Moderator
Did You Know? Running a Static Analysis in Creo Simulate
You spend countless hours meticulously designing a product. Nothing can ruin your reputation and nullify all of your hard work quite like prototype failure. By using Creo Simulate to mimic real real-world stresses on your model, you can analyze and validate the performance of your 3D virtual prototypes before you make the first part.
In this post, a PTC expert explains how to run a static analysis in Creo Simulate.
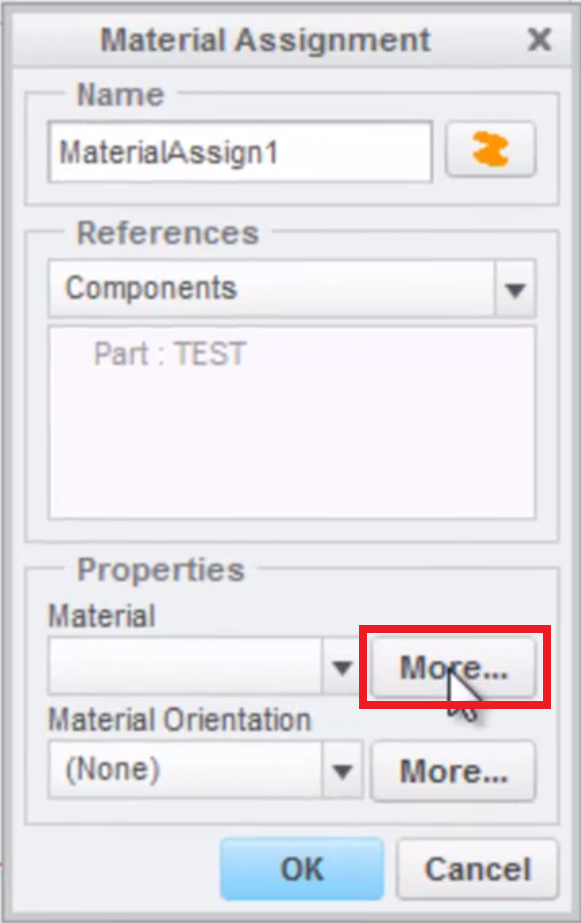
First, open the file you want to analyze. To do this, click Open and select the file on the File Open dialog box. Next, switch to Creo Simulate, then assign a material by clicking Material Assignment. The Material Assignment dialog box opens. In the Properties frame, click the More button next to the Materials list box. The Materials dialog box opens. Select a material, and then click the ![]() button, then OK.
button, then OK.

Click OK on the Material Assignment dialog box.

Next, you’ll apply constraints to your model. In the ribbon bar menu, click Displacement. The Constraint dialog box opens. On your model, select the end surfaces , and then click OK on the Constraint dialog.
Apply a load to the part. To do this, click Force/Moment from the ribbon bar menu. The Force/Moment Load dialog box opens. On your model, select the surface to which you want to apply the load. On the dialog box, make edits in the Force frame in order to apply a certain force to the surface. Click OK to apply the force.

A downward force was applied on this part.
In the ribbon bar menu, click Analyses and Studies. The Analyses and Design Studies dialog box opens. On the dialog, click File > New Static. The Static Analysis Definition dialog opens. Click OK. Then, on the Analyses and Design Studies dialog, click the green flag button to Start run. On the Question dialog, click Yes.
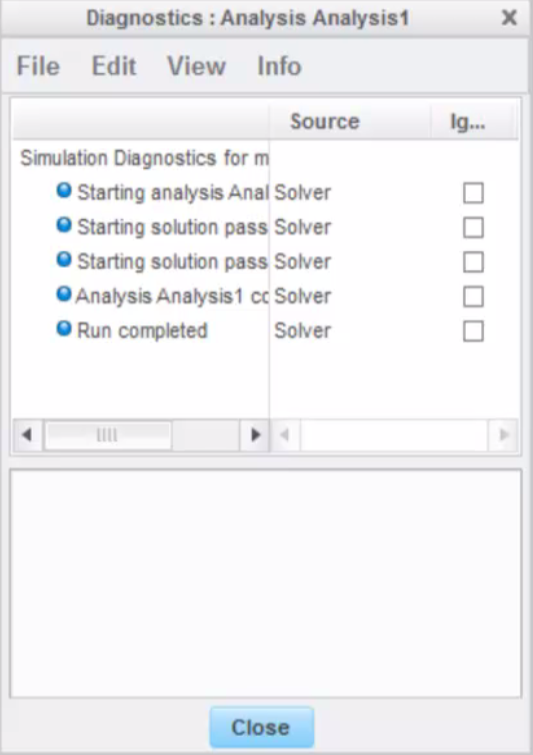
The Diagnostics: Analysis dialog (shown below) shows whether there were any errors in running the analysis. Review the results and then click Close on the dialog.

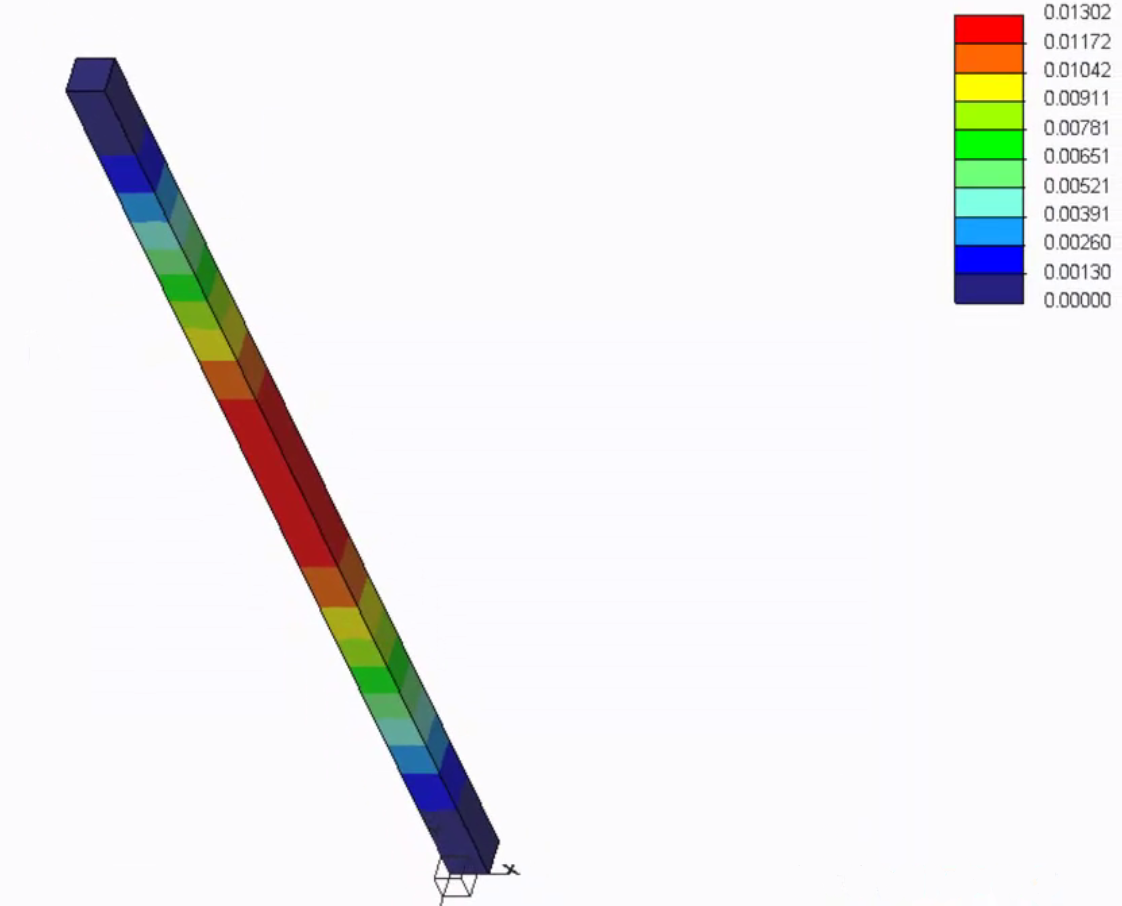
On the Analyses and Design Studies dialog, click the report icon  to Review results of a Design Study or Finite Element analysis. The Result Window Definition dialog opens. You can display Stress, Displacement or others in the Quantity tab. For this example, click Displacement, and then click the OK and Show button.

As expected, in this example, the middle of the beam was where it displaced the most. A color scale appears on the right side of the analysis, identifying the displacement range.
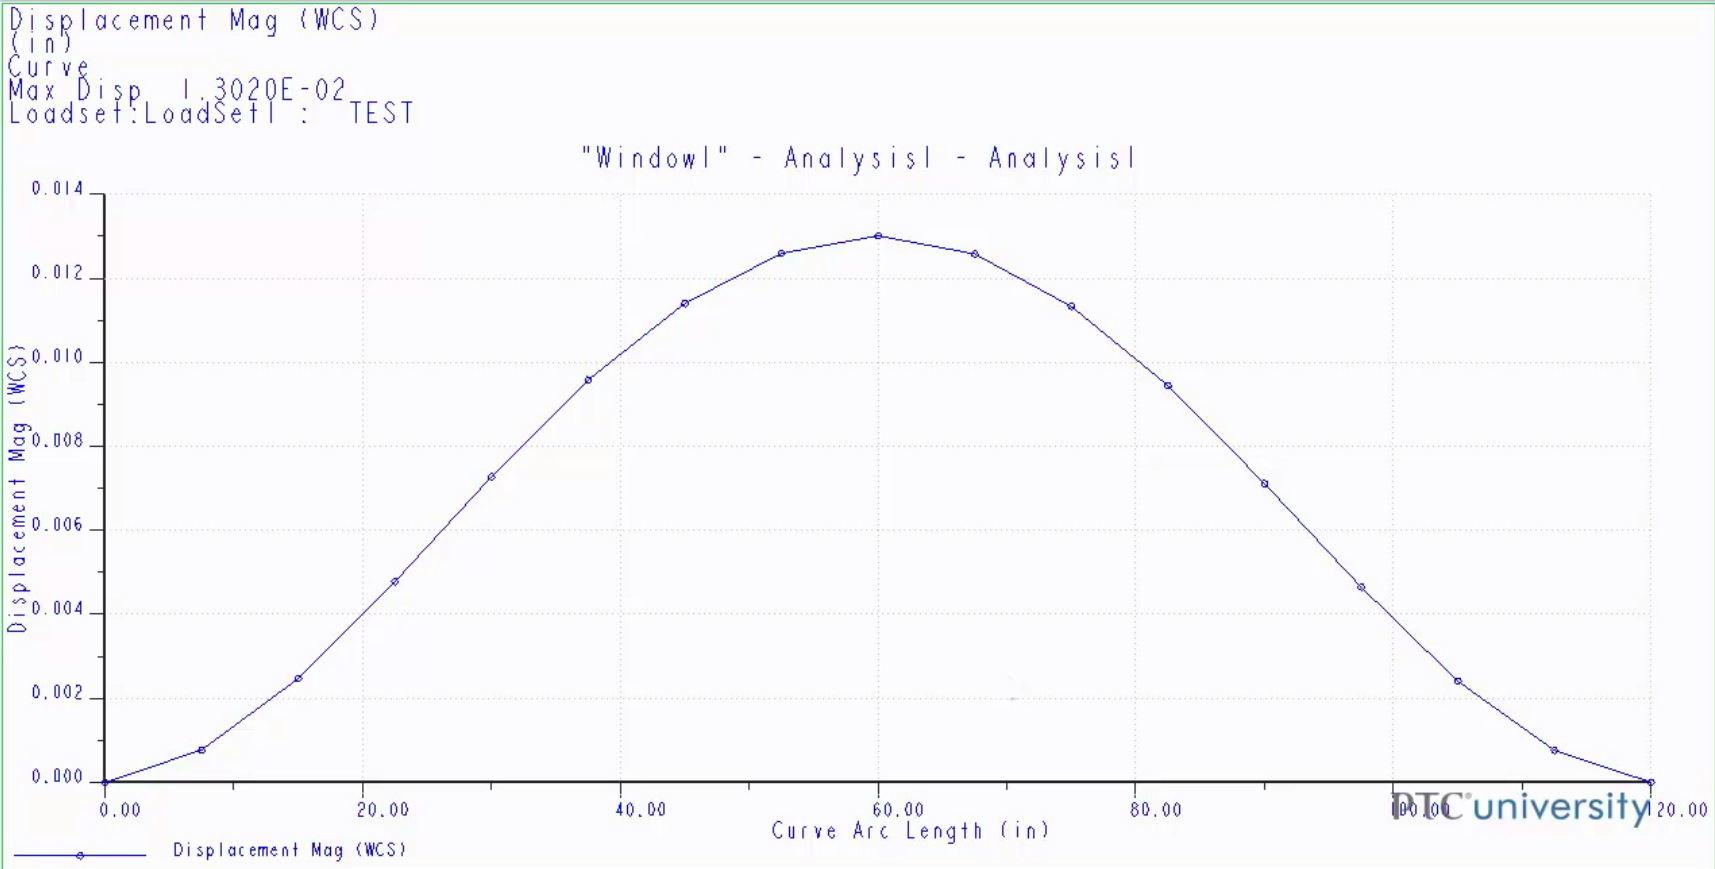
If you want to view the results as a graph, click the icon that looks like a paper and pencil to Edit the selected definition. The Result Window Definition dialog opens. Change the Display Type to Graph. In the Graph Location frame, click the cursor button to define the curve that you want to use as a measure. On your model, select the curve you want to measure. Click OK on the Select dialog. Click OK on the Information dialog. Click OK and Show on the Result Window Definition dialog.

The graph shows that the center of the beam has the most displacement
To watch a demonstration of these capabilities, check out our video tutorial (“Running a Static Analysis in PTC Creo Simulate”) on PTC University Learning Exchange. Note that you may need to register for access, if you have not already.
Stay tuned to our “Did You Know” blog series as we cover all of the exciting, new enhancements in PTC Creo 3.0.
Have some ideas about what PTC Creo product features you’d like to learn more about? Send me a message or leave a comment below and we’ll write up the best ideas from the community. Thanks for reading, looking forward to all of your feedback!
This thread is inactive and closed by the PTC Community Management Team. If you would like to provide a reply and re-open this thread, please notify the moderator and reference the thread. You may also use "Start a topic" button to ask a new question. Please be sure to include what version of the PTC product you are using so another community member knowledgeable about your version may be able to assist.
- Labels:
-
Surfacing


