Community Tip - Stay updated on what is happening on the PTC Community by subscribing to PTC Community Announcements. X
- Community
- Creo+ and Creo Parametric
- 3D Part & Assembly Design
- Re: How to move a leader from GTOL to dimension in...
- Subscribe to RSS Feed
- Mark Topic as New
- Mark Topic as Read
- Float this Topic for Current User
- Bookmark
- Subscribe
- Mute
- Printer Friendly Page
How to move a leader from GTOL to dimension in a dwg
- Mark as New
- Bookmark
- Subscribe
- Mute
- Subscribe to RSS Feed
- Permalink
- Notify Moderator
How to move a leader from GTOL to dimension in a dwg
Hey all,
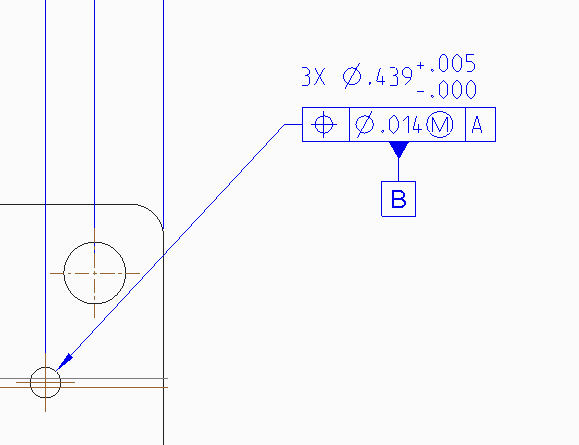
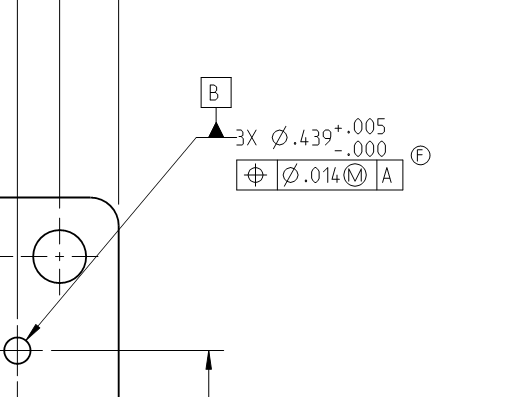
I am on Creo 2 and I am running into a problem where I am recreating a drawing and I can't seem to get the leader line to stick with the dimension, it always wants to go to the GTOL as soon as it is created. I beleive this is also the root cause to why I can't get my B datum in the right location.
I created the GTOL is a small assembly (2 pieces a base and weld nuts) then brought it into my drawing and regardless how many different ways I do it I still have the same result.
Any help would be appreciated!
Thanks
Sam
- Labels:
-
2D Drawing
- Mark as New
- Bookmark
- Subscribe
- Mute
- Subscribe to RSS Feed
- Permalink
- Notify Moderator
Hello Sam and welcome to the forum.
I share in your frustration. I just tried doing this exact thing and it wouldn't do it.
Really painful for something so basic and common.
The fact this is an assembly frustrates this even more.
I hope someone from PTC support will comment here with a "how too" best practices video.
Personally, I've had to give up on PTC's GD&T implementation.
- Mark as New
- Bookmark
- Subscribe
- Mute
- Subscribe to RSS Feed
- Permalink
- Notify Moderator
Creo, even in a part as ASME Y14.42 3D GD&T, is not allowing me to create the following example...

- Mark as New
- Bookmark
- Subscribe
- Mute
- Subscribe to RSS Feed
- Permalink
- Notify Moderator
It can do that one. But don't get me wrong, I'm not defending it.
- Mark as New
- Bookmark
- Subscribe
- Mute
- Subscribe to RSS Feed
- Permalink
- Notify Moderator
Per the original question. How did you get the leader to come from the dimension and not the GTOL box?
- Mark as New
- Bookmark
- Subscribe
- Mute
- Subscribe to RSS Feed
- Permalink
- Notify Moderator
I am creating a new assembly drawing that was built from new parts. The 2nd picture you see is of just the base plate. And I am getting the feeling that the leader behaves differently when you are doing GDT on a single part versus an assembly.
Also interesting to note when I go into my assembly model to apply the GTOL the leader is in the location that I want it (on the dimension) however when I show it in the drawing it does the opposite
- Mark as New
- Bookmark
- Subscribe
- Mute
- Subscribe to RSS Feed
- Permalink
- Notify Moderator
Try reloading your .dtl file for that drawing. It worked for me
- Mark as New
- Bookmark
- Subscribe
- Mute
- Subscribe to RSS Feed
- Permalink
- Notify Moderator
The problem is that PTC has a limited set of ways they do GD&T. When it comes to copying an old drawing or trying to make your GD&T look the way your company is used to seeing it, sometimes that conflicts with the limited ways that PTC offers.
I know Antonius got over the limitation by using symbols instead of the built in functionality. I got over also by accepting that sometimes I can't show it excatly how I want to show it but I choose one of PTCs limited ways and it is still fully to the standard and there is no chance for mis-interpretation.
Sorry it's not a real answer, but hopefully it will save you time and may give you a couple of ideas as to how to proceed.
Steve
- Mark as New
- Bookmark
- Subscribe
- Mute
- Subscribe to RSS Feed
- Permalink
- Notify Moderator
I am with Antonius. Symbolism over substance (that is not reliable).
- Mark as New
- Bookmark
- Subscribe
- Mute
- Subscribe to RSS Feed
- Permalink
- Notify Moderator
That's funny, I didn't realize I had done it the way the original question was asking for.
I simply added the GDT frame to be attached to the dimension in the definition box.
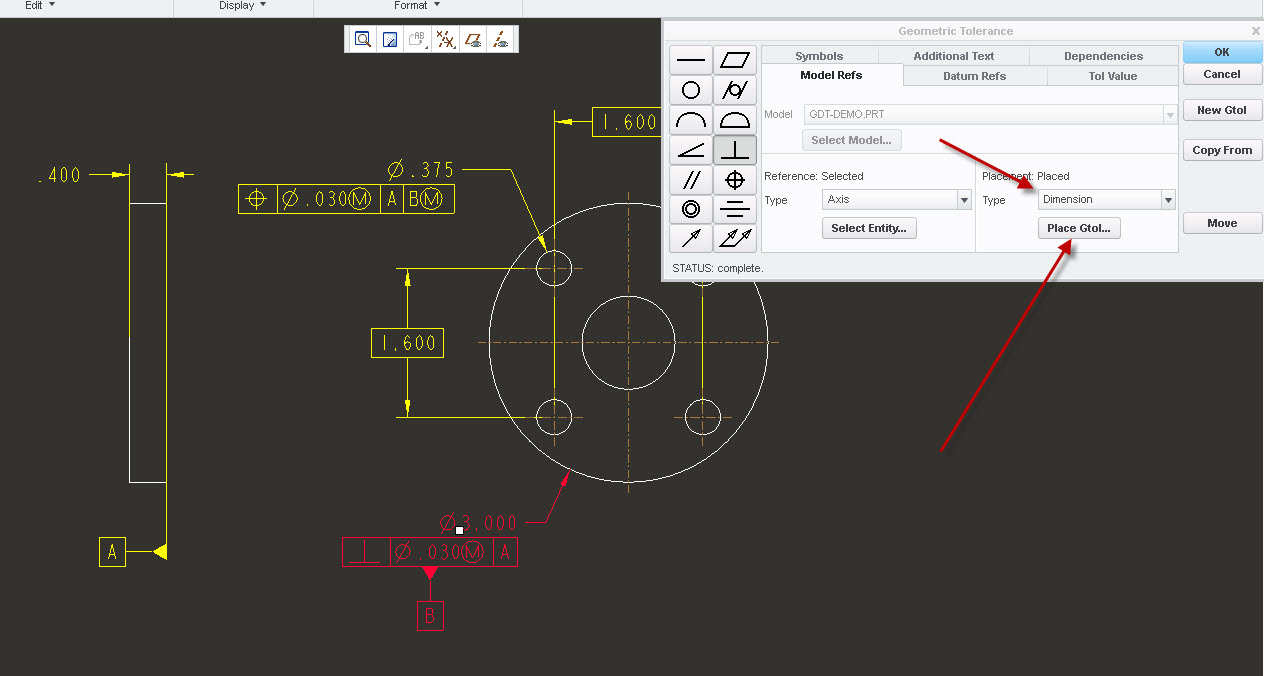
I have never seen Creo allow you to attach the "B" datum to the leader of a dimension as show in the original image though.
- Mark as New
- Bookmark
- Subscribe
- Mute
- Subscribe to RSS Feed
- Permalink
- Notify Moderator
I am coming to the conclusion that it will work when being applied to a single part but not to an assembly. But I do appreciate the instructions that you posted
- Mark as New
- Bookmark
- Subscribe
- Mute
- Subscribe to RSS Feed
- Permalink
- Notify Moderator
I can test it. Are these assembly features? Are you using created dimensions or shown dimensions?
- Mark as New
- Bookmark
- Subscribe
- Mute
- Subscribe to RSS Feed
- Permalink
- Notify Moderator
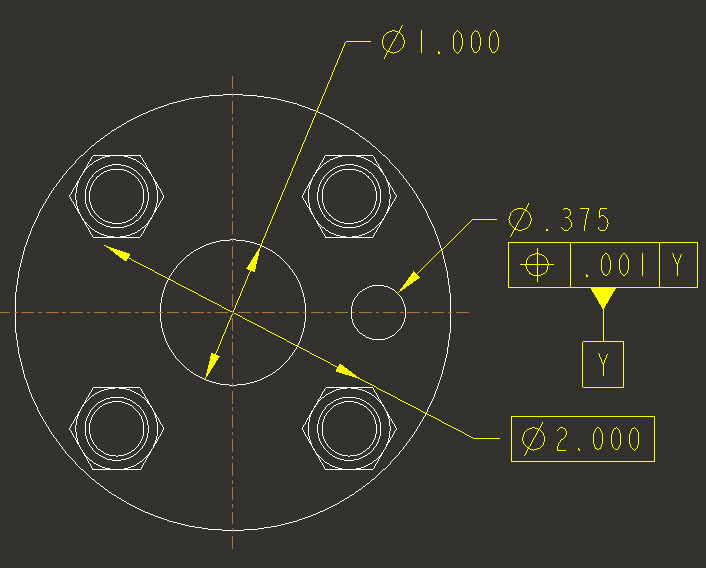
It seems to work on an assy also. It may be the dimension standard you have set in the drawing setup file. That can affect the way the GD&T attachments work.
- Mark as New
- Bookmark
- Subscribe
- Mute
- Subscribe to RSS Feed
- Permalink
- Notify Moderator
Creo 2.0 gives an error message when you try to tie a datum tag to a GTOL that is tied to the dimension and tells you to tie it to the dimension instead. When you do that, it shows the tag on the opposite side of the circle on the object. I am sure this is a config issue, but the documentation is so poor that it is nearly impossible to duplicate this.
I was trying to do this in the model in ASME Y14.42 mode.
- Mark as New
- Bookmark
- Subscribe
- Mute
- Subscribe to RSS Feed
- Permalink
- Notify Moderator
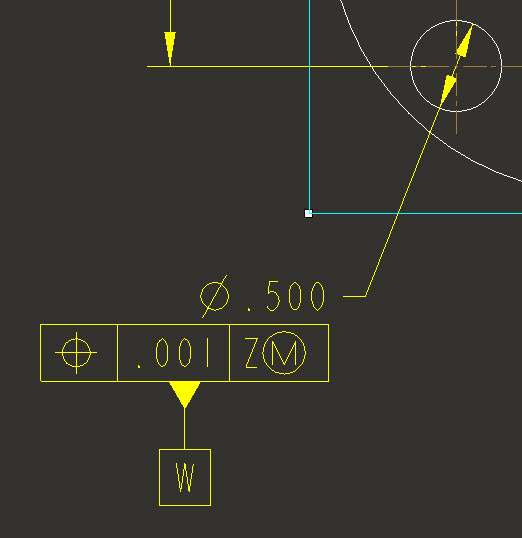
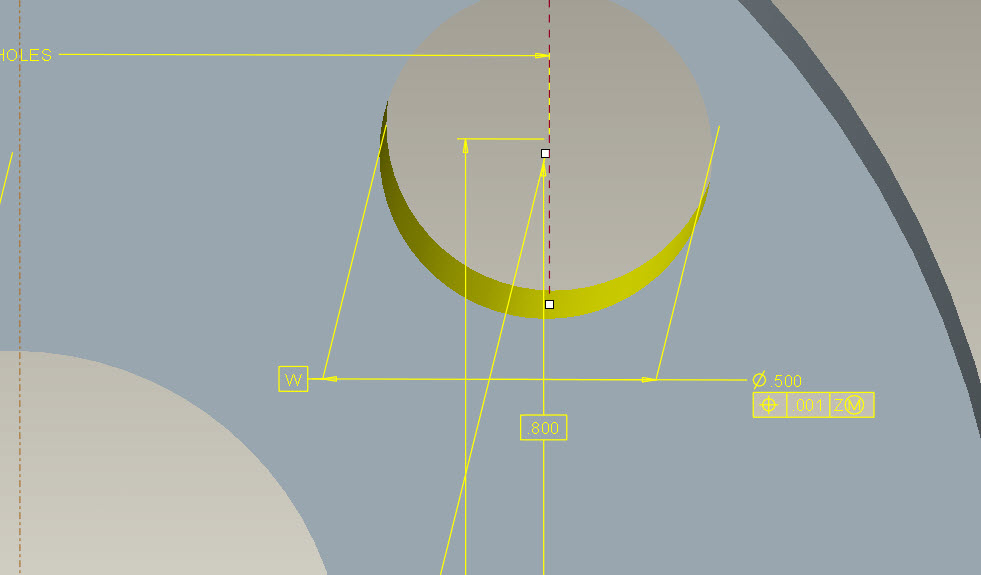
I'm in CREO 2 also. I avoid doing the GD&T in the model simply becuase that's added complication. I do it in the drawing, but make sure it's still referenced to the model, it's easier, in my opinion.
I also noticed that in the model it shows one way but will show it differently in the drawing.
The images below, I did the GD&T in the model, then I showed the dimension and annotations in the drawing, they do not show the same, even though they are the same
- Mark as New
- Bookmark
- Subscribe
- Mute
- Subscribe to RSS Feed
- Permalink
- Notify Moderator
AHA! So the datum tag is related to the dimension. Thanks for taking the time to clarify, Stephen.
- Mark as New
- Bookmark
- Subscribe
- Mute
- Subscribe to RSS Feed
- Permalink
- Notify Moderator
Yes, I missed stating that didn't I. It's really confusing to see it one way in the model and not know how it will translate to the drawing. That's why I apply my GD&T in the drawing. It's still in the model though. It just makes me a little less crazy.
Steve
- Mark as New
- Bookmark
- Subscribe
- Mute
- Subscribe to RSS Feed
- Permalink
- Notify Moderator
There are many times when I create the GTOL in the model and show it in the drawing just so I can switch symbols to get the GTOL ID. I then create a note and map the GTOL ID to it (and delete the actual GTOL). This way I get the GTOL frame made for me while still maintaining some associativity, but I have much more freedom with the note. This won't always work, and I don't know how it works with frames with a datum tag attached.
In the past I have needed to place a GTOL as a free note, but I couldn’t get it to move with its view (very annoying, it would constantly get lost). By using the method above I could relate the note to the view.
- Mark as New
- Bookmark
- Subscribe
- Mute
- Subscribe to RSS Feed
- Permalink
- Notify Moderator
Great tip, Kyle.
My bane is the flag connection at the end of the leader line of a dimension. I apply it free; relate to view, and sometimes relate to the feature (dimension).
It is now a habit so it is easier but I keep trying to find a way...
- Mark as New
- Bookmark
- Subscribe
- Mute
- Subscribe to RSS Feed
- Permalink
- Notify Moderator
File --> Prepare --> Drawing Properties --> Detail Option
In "Option", Find for "gtol_datums" , Set Value as "std_asme"


