1-Visitor
May 2, 2014
Question
Modelling an Elbow in Creo Parametric 2.0
- May 2, 2014
- 0 replies
- 2854 views

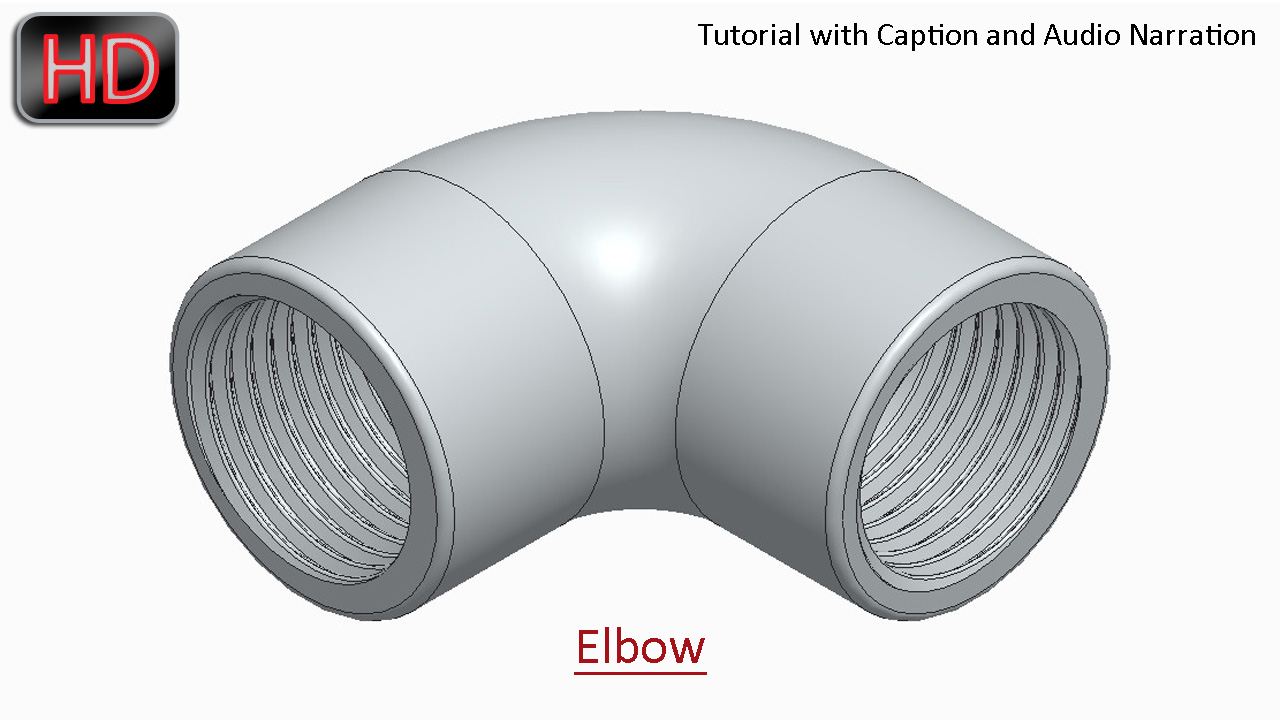
In this tutorial we will create an Elbow by utilizing part modelling capabilities of Creo Parametric 2.0
Viewers will be able to watch application of many part modelling tools like Sweep, Shell, Helical Sweep, Pattern and Round tool as well as 2D sketching techniques are also shown.
In cutting of threads I will utilize the same BSP Thread Profile that was shown a previous video by me..
Check the attachment for finished model file.
Transcription of Video
- Start a new part file from scratch with the default template and give it a name ‘Elbow’.
- Select the Top Datum plane and create a new sketch on this plane.
- Click the Sketch View icon to orient the sketching plane parallel to the screen.
- Clear the screen by closing the visibility of Datum Planes, Axis, Points, Spin centre, etc.
- Activate the line tool and draw the sketch as displayed.
- As soon as the lines are drawn the constraints are automatically applied.
- Change the dimension values as displayed.
- Activate the Circular Fillet tool and apply a fillet between these two lines.
- Fill the radius of the fillet.
- Select the dimensions and lock them.
- The sketch is complete so exit from the sketching mode.
- Activate the Sweep tool.
- Define the visible sketch as trajectory for the sweep.
- Flip the direction of the sweep.
- Click this icon to activate internal sketcher for creating the sweep cross section.
- Draw a circle at the end of trajectory and apply the dimensions as displayed.
- Click Ok to return to the Sweep tab.
- The preview of the feature is visible so click ok to execute the command.
- Change the colour of the model as per your wish.
- Activate the Shell tool.
- Select the surfaces of the model to be removed. Use ctrl key of your keyboard while selecting multiple surfaces.
- Specify the Shell thickness and execute the command.
- Save the model file.
- Open the visibility of datum planes and create a sketch over Top datum plane.
- First create a centerline in the sketch that will work as axis of revolution for the sweep.
- Take the project of the internal edge of the model.
- Delete this line.
- You can see a reference line still exists which will be used to create a new line for Helical sweep profile.
- Fill the dimension value which will be the length of thread.
- Exit from the sketching mode.
- Open the file named ‘BSP_Thread_Profile’.
- Here you can see a sketch profile of a British Standard Pipe Thread is drawn. The pitch of the profile is 1/14 inches which governs all the other dimensions by some relations.
- Copy this sketch profile.
- Now switch back to Elbow file.
- Activate the Helical Sweep tool.
- At present software prompts to select an open sketch to define Helix sweep profile so select this line.
- Fill the pitch value as displayed.
- Click this icon to create the sweep section or profile.
- Place a geometry point.
- Now paste the BSP Thread Profile that was copied earlier and which is still in the Windows Clipboard.
- As soon as you paste the sketch the move tool will activate.
- In the scale field fill the value 1.
- Rotate the profile by 90° in clock wise direction.
- Move the profile near to the geometry point and click Ok.
- Make some minor correction in the profile because in pasting it some constraints have gone missing.
- Again move the profile more near to the geometry point to apply some more constraints.
- Delete any constraint that gives error in placing new constraint.
- Now profile is properly positioned so exit the sketch.
- The preview of sweep is visible in the graphic window.
- Activate the remove material option and execute the command.
- Activate the shaded with edges option.
- Hide the visibility of visible sketch.
- Select the Helical sweep in the Model Tree and activate the Pattern Tool.
- Open the visibility of Coordinate System.
- Set Axis as the type of pattern.
- Select Y axis of Coordinate System as axis of rotation.
- Enter the number of members to be patterned.
- Define the Angle between the pattern members.
- Execute the command.
- Activate the Round Tool.
- Fill the radius of round.
- Select the edges and execute the command.
- The fully created model is in front of you.
- Switch between the Shading With Edges and Shading view.
- Save the model file.

