Community Tip - Visit the PTCooler (the community lounge) to get to know your fellow community members and check out some of Dale's Friday Humor posts! X
- Community
- Creo+ and Creo Parametric
- 3D Part & Assembly Design
- Re: Nonlinear Contact Analysis
- Subscribe to RSS Feed
- Mark Topic as New
- Mark Topic as Read
- Float this Topic for Current User
- Bookmark
- Subscribe
- Mute
- Printer Friendly Page
Nonlinear Contact Analysis
- Mark as New
- Bookmark
- Subscribe
- Mute
- Subscribe to RSS Feed
- Permalink
- Notify Moderator
Nonlinear Contact Analysis
I'm revisiting my analysis from my discussion "Large Deformation FEA". Though I received a lot of useful info, I'm still struggling to get accurate results.
Attached is the file I'm analyzing as a contact analysis assembly.
This screenshot captures most of the details (mapped mesh constraints, contact surfaces, total load at point, symmetry, displacement):
It also shows that this test failed with my given material properties. It will run with other material properties, but I haven't gotten anything close to real results.
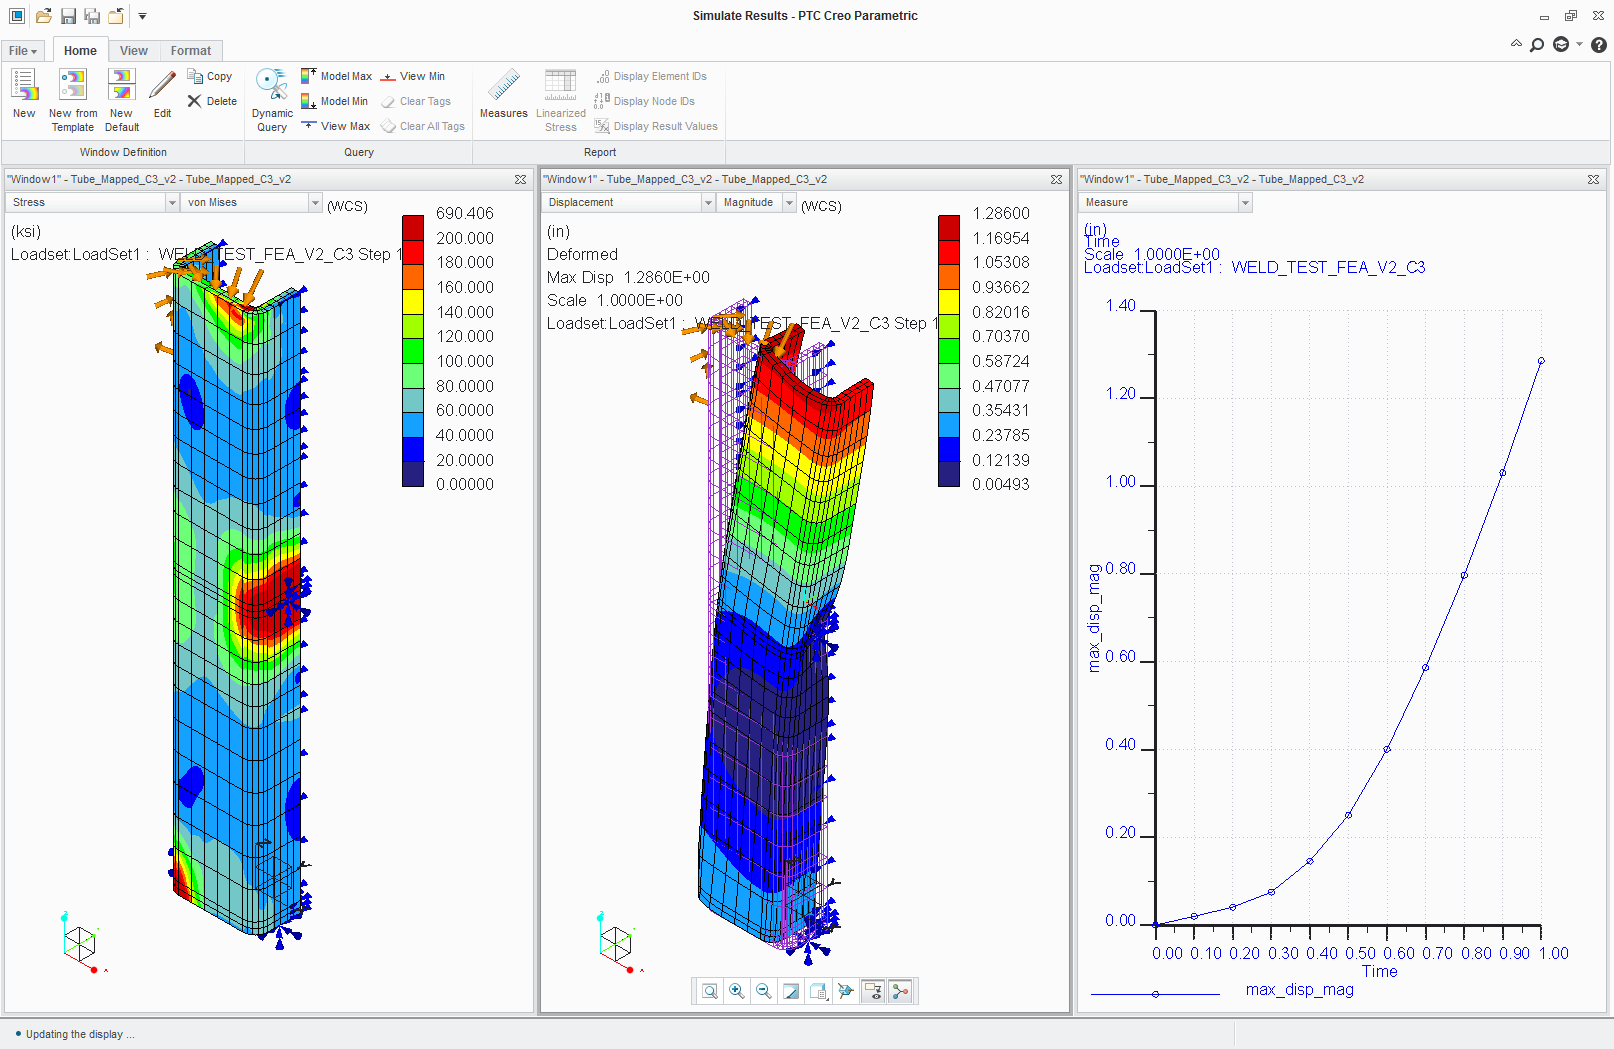
Also, when I run this analysis, I get odd results and it's still taking my computer a while to solve this with mapped mesh and only one part with nonlinear material properties:
I assume it's because my contact point at the top is sharp that it sees a little interference and then overcompensates.
Have you all seen issues like this?
Any suggestions would be greatly appreciated.
Thanks!
This thread is inactive and closed by the PTC Community Management Team. If you would like to provide a reply and re-open this thread, please notify the moderator and reference the thread. You may also use "Start a topic" button to ask a new question. Please be sure to include what version of the PTC product you are using so another community member knowledgeable about your version may be able to assist.
- Labels:
-
Assembly Design
- Mark as New
- Bookmark
- Subscribe
- Mute
- Subscribe to RSS Feed
- Permalink
- Notify Moderator
My $0.02 is to avoid including contact if you can given that you're doing a LDA. Contact with LD formulation is somewhat new to Simulate and isn't the most robust. Another issue with this model (when compared to your physical test results) is that you might need to account for a sharp change in the stiffness matrix with the snap through effect, which appears to be bugged at the moment.
I forgot to post this in your other thread, but I did make a more refined model where I removed the constraints that you were using to represent the tube and replaced with them spring elements and weighted-links. The model still needs more work (such as getting a better approximation of the contact area between the tube and the support).

- Mark as New
- Bookmark
- Subscribe
- Mute
- Subscribe to RSS Feed
- Permalink
- Notify Moderator
Thanks again, Shaun.
It seems like eventually I could get an accurate result with methods like you've done, with more fine tuning.
Looking at the bigger picture for me:
I'm using this 'simple' test in hopes of validating this software for more complex assemblies. Is this a realistic goal? Will I be able to achieve a strategic process of applying constraints, loads, idealizations, and material properties that will get me close (maybe +/- 20%) for nonlinear, large displacement assemblies?
- Mark as New
- Bookmark
- Subscribe
- Mute
- Subscribe to RSS Feed
- Permalink
- Notify Moderator
Hi Chris,
A quick look at the pictures and my £0.02 x $/£ exchange rate ...
Similar log file error to ones I have encountered which for me meant I 'ran out' of stress-strain curve; no more curve to work along as values are too high.
If you are to use contact, I would be tempted to bring the components into contact in the assy first. The initial large movement (zero stiffness gap), surfaces may 'miss/overshoot' and will make iteration look as if oscillates; taking much longer.
Again, if using contact, I would consider small rounds rather than square edges. Though this means more fun meshing and more contact interfaces; stresses/strains may be high but more 'sensible'.
Regards
Charles
- Mark as New
- Bookmark
- Subscribe
- Mute
- Subscribe to RSS Feed
- Permalink
- Notify Moderator
Thanks for the input, Charles.
I have the components of the assembly mated (edge to surface) so there are no gaps initially. I guess I assumed that when the program uses one of it's material laws, (linear, power, or exponential) that it would carry it out as high as needed, sometimes getting unreasonable strain values.
Your thought of using rounds rather than corners is very good. That makes sense that it could help for convergence and run time.
Thanks!
Chris
- Mark as New
- Bookmark
- Subscribe
- Mute
- Subscribe to RSS Feed
- Permalink
- Notify Moderator
Chris,
I think Creo will interpolate within but not extrapolate beyond UTS. Raising the UTS may get it to continue. The large resulting strains will require finer mesh and longer run times.
Can anyone form PTC tidy up this vague area of my understanding?
Thanks
Charles


