Turn on suggestions
Auto-suggest helps you quickly narrow down your search results by suggesting possible matches as you type.
Showing results for
Please log in to access translation
Turn on suggestions
Auto-suggest helps you quickly narrow down your search results by suggesting possible matches as you type.
Showing results for
Community Tip - New to the community? Learn how to post a question and get help from PTC and industry experts! X
- Community
- Creo+ and Creo Parametric
- 3D Part & Assembly Design
- Re: creating your own scenes
Translate the entire conversation x
Please log in to access translation
Options
- Subscribe to RSS Feed
- Mark Topic as New
- Mark Topic as Read
- Float this Topic for Current User
- Bookmark
- Subscribe
- Mute
- Printer Friendly Page
creating your own scenes
Sep 14, 2014
11:56 PM
- Mark as New
- Bookmark
- Subscribe
- Mute
- Subscribe to RSS Feed
- Permalink
- Notify Moderator
Please log in to access translation
Sep 14, 2014
11:56 PM
creating your own scenes
Hi All
Does anyone know how to add your own images to a scene file, to be used in scene in the render window.
I have had a look, but all the info I can find is how to save & copy an exsisting scene, not how to edit one with your own photos.
Thanks
This thread is inactive and closed by the PTC Community Management Team. If you would like to provide a reply and re-open this thread, please notify the moderator and reference the thread. You may also use "Start a topic" button to ask a new question. Please be sure to include what version of the PTC product you are using so another community member knowledgeable about your version may be able to assist.
Solved! Go to Solution.
Labels:
- Labels:
-
Rendering
ACCEPTED SOLUTION
Accepted Solutions
Sep 15, 2014
12:33 AM
- Mark as New
- Bookmark
- Subscribe
- Mute
- Subscribe to RSS Feed
- Permalink
- Notify Moderator
Please log in to access translation
11 REPLIES 11
Sep 15, 2014
12:23 AM
- Mark as New
- Bookmark
- Subscribe
- Mute
- Subscribe to RSS Feed
- Permalink
- Notify Moderator
Please log in to access translation
Sep 15, 2014
12:23 AM
It can be done. Click on the room image and it will open something similar tot he appearance manager. Then create a new appearance in the manager and apply a map image. Clumsy but functional.
Sep 15, 2014
12:33 AM
- Mark as New
- Bookmark
- Subscribe
- Mute
- Subscribe to RSS Feed
- Permalink
- Notify Moderator
Please log in to access translation
Sep 15, 2014
12:57 AM
- Mark as New
- Bookmark
- Subscribe
- Mute
- Subscribe to RSS Feed
- Permalink
- Notify Moderator
Please log in to access translation
Sep 15, 2014
12:57 AM
Thanks for the demo, I had tried to do that, but couldn't get it to work, I can see a few mistakes I was making when I did it, from your video, I got something usable now.
Sep 15, 2014
01:01 AM
- Mark as New
- Bookmark
- Subscribe
- Mute
- Subscribe to RSS Feed
- Permalink
- Notify Moderator
Please log in to access translation
Sep 15, 2014
01:01 AM
Not being able to edit the default maps is kind of strange. Glad you got it working.
The trouble I had with this is managing some of the brightness aspects. My images seem to always wash out in reflections and such. Not sure if that is something special in the images or the settings.
Sep 15, 2014
01:04 AM
- Mark as New
- Bookmark
- Subscribe
- Mute
- Subscribe to RSS Feed
- Permalink
- Notify Moderator
Please log in to access translation
Sep 15, 2014
01:04 AM
I will do some digging on the net tonight, must be a way to edit and create you own.
I will post back here if I find anything.
Sep 15, 2014
02:03 AM
- Mark as New
- Bookmark
- Subscribe
- Mute
- Subscribe to RSS Feed
- Permalink
- Notify Moderator
Please log in to access translation
Sep 15, 2014
02:03 AM
It is easy to make your own.
The trick is to create a new "material" so you can add your own image.
Getting them to be effective in the scene, that is a trick I haven't figured out.
Sep 15, 2014
07:25 PM
- Mark as New
- Bookmark
- Subscribe
- Mute
- Subscribe to RSS Feed
- Permalink
- Notify Moderator
Please log in to access translation
Sep 15, 2014
07:25 PM
yes, now I understand.
I had a look around online last night, I found this video on youtube " PTC Creo Render Tutorial - HDRI PhotoReal Rendering " it explained how to use HDRI images better.
I also found this thread that has a links to a lot of free HDRI resources, I took a screen shot of it.
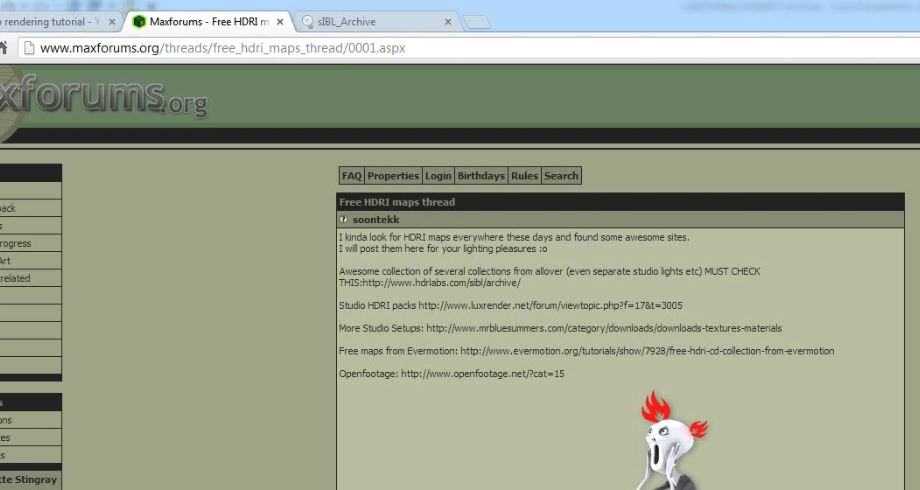
Ii have down loaded a lot of HDRI files last night, so I will play with them and see how I go.
Sep 15, 2014
08:06 PM
- Mark as New
- Bookmark
- Subscribe
- Mute
- Subscribe to RSS Feed
- Permalink
- Notify Moderator
Please log in to access translation
Sep 15, 2014
08:06 PM
I still can't get the ceiling right, may need a seperate photo of just the ceiling, but this is my 1st go using a HDRI image of an old factory I downloaded last night.
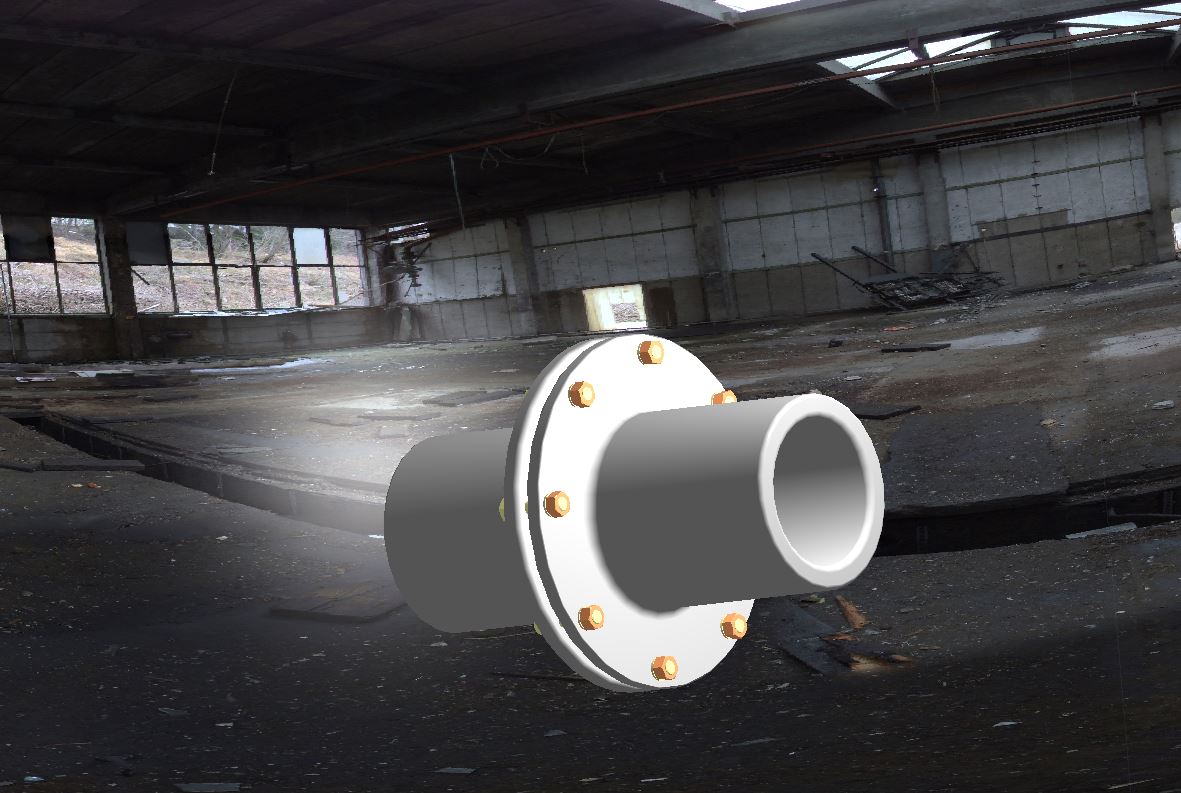
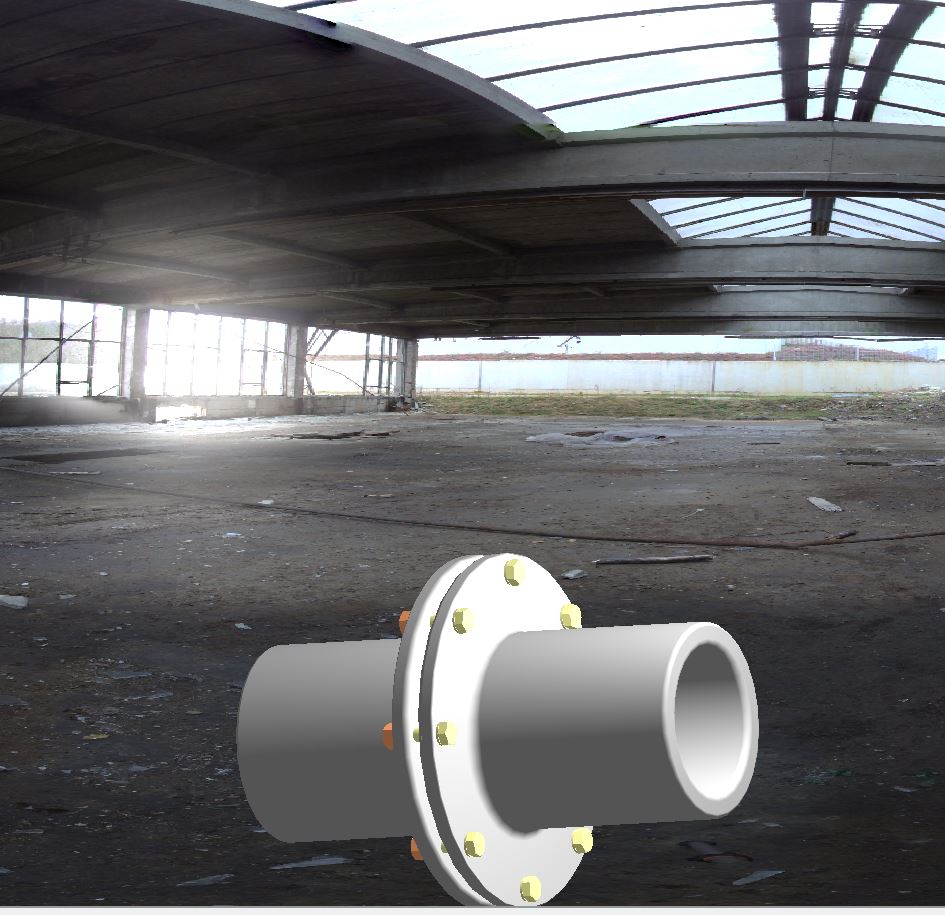
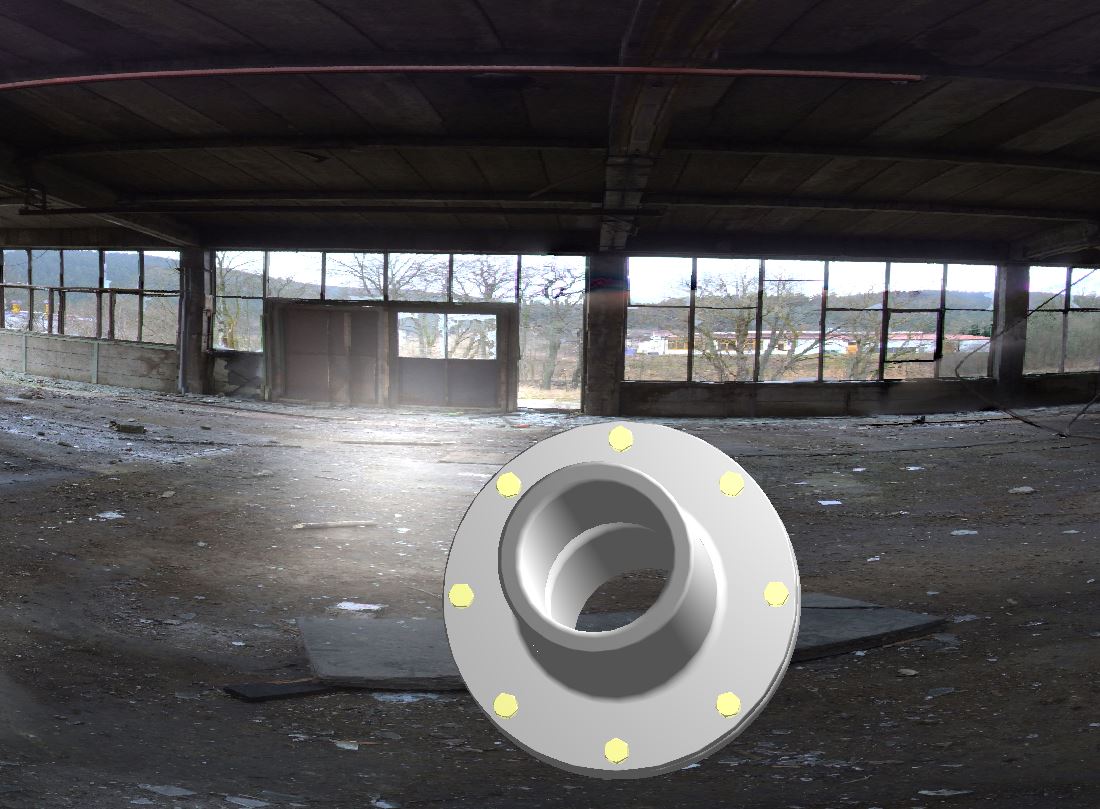
You add the image to the appearance, then select each scene, then you go back to each scene and select the appearance again and adjust the position of each one.
the floor worrked ok and the walls as well, but just couldn't fit the ceiling better.
Sep 15, 2014
08:50 PM
- Mark as New
- Bookmark
- Subscribe
- Mute
- Subscribe to RSS Feed
- Permalink
- Notify Moderator
Please log in to access translation
Sep 15, 2014
08:50 PM
I'd say you did pretty darn well 
Sep 15, 2014
11:04 PM
- Mark as New
- Bookmark
- Subscribe
- Mute
- Subscribe to RSS Feed
- Permalink
- Notify Moderator
Please log in to access translation
Sep 15, 2014
11:04 PM
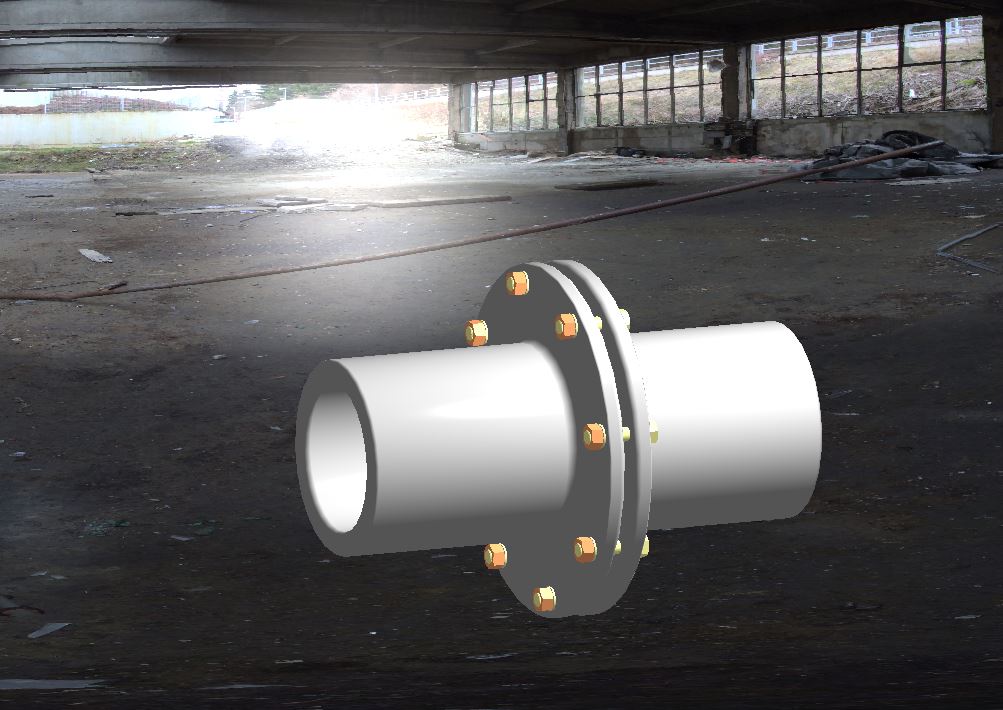
This is even easier
I am testing Creo 3.0 F000 at the moment for the rest of the office, you now can do this.
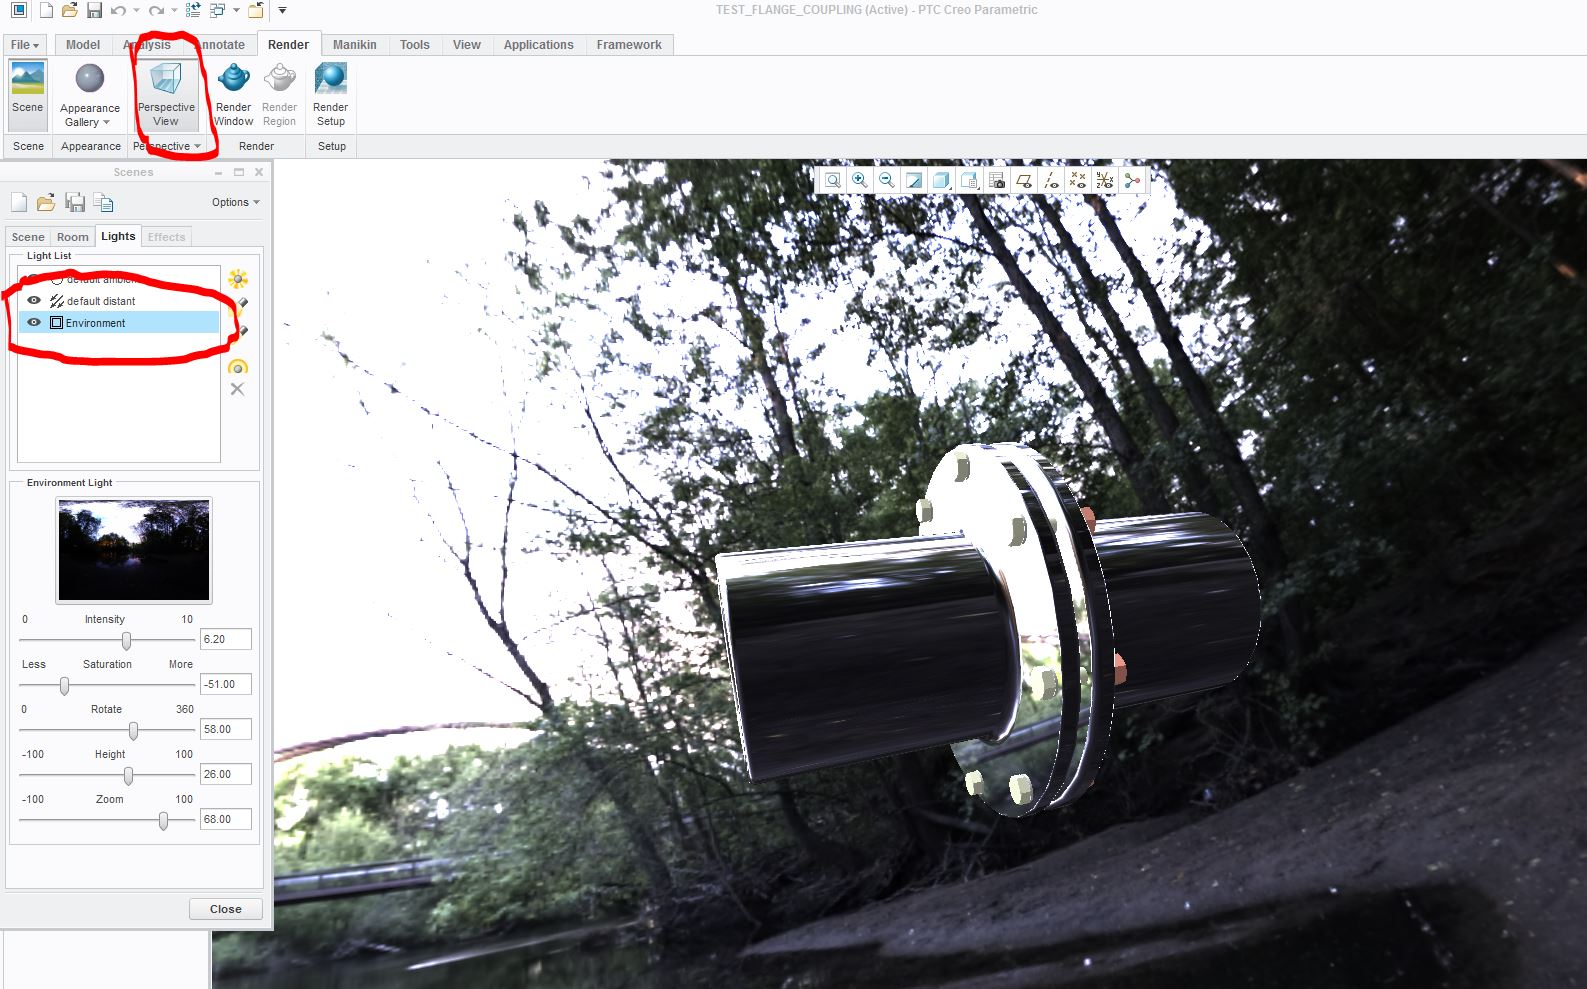
by just using the envoironmental light and HDRI, then click perpective, you have a 360 degree sphere image.
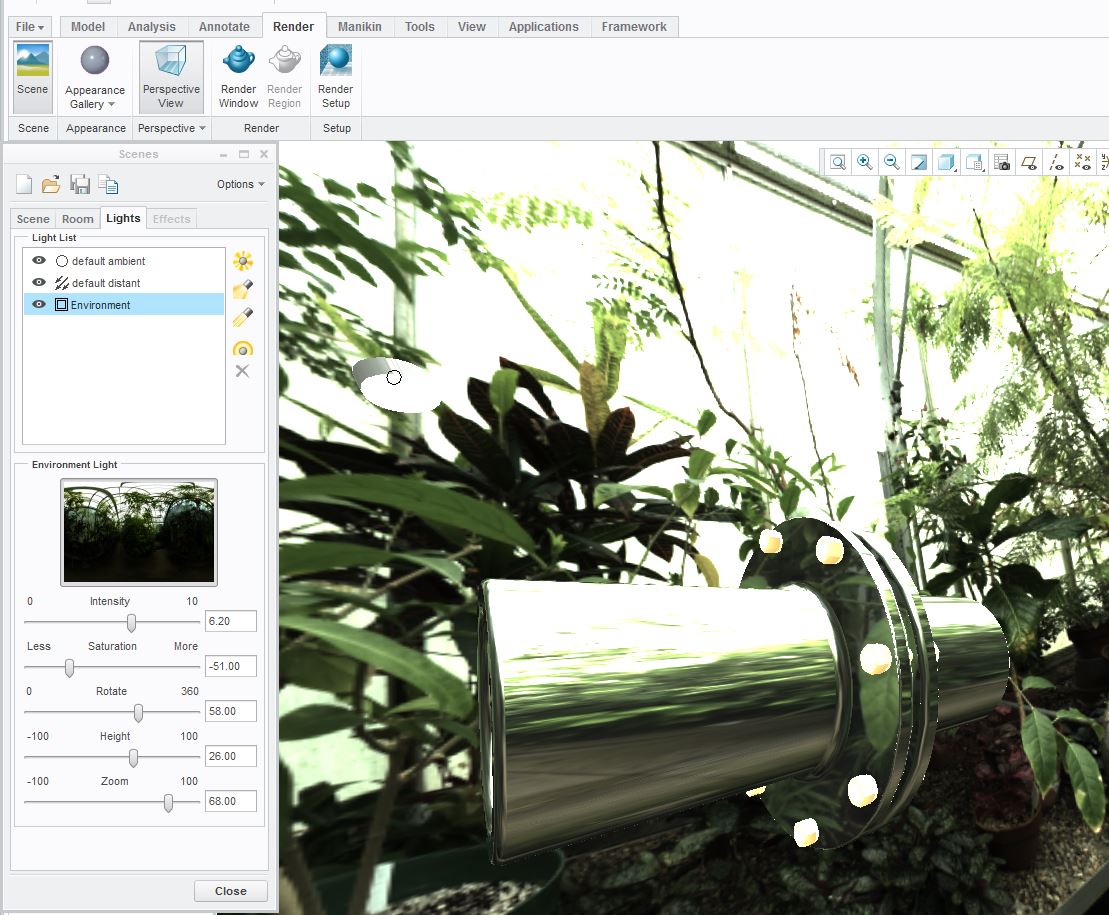
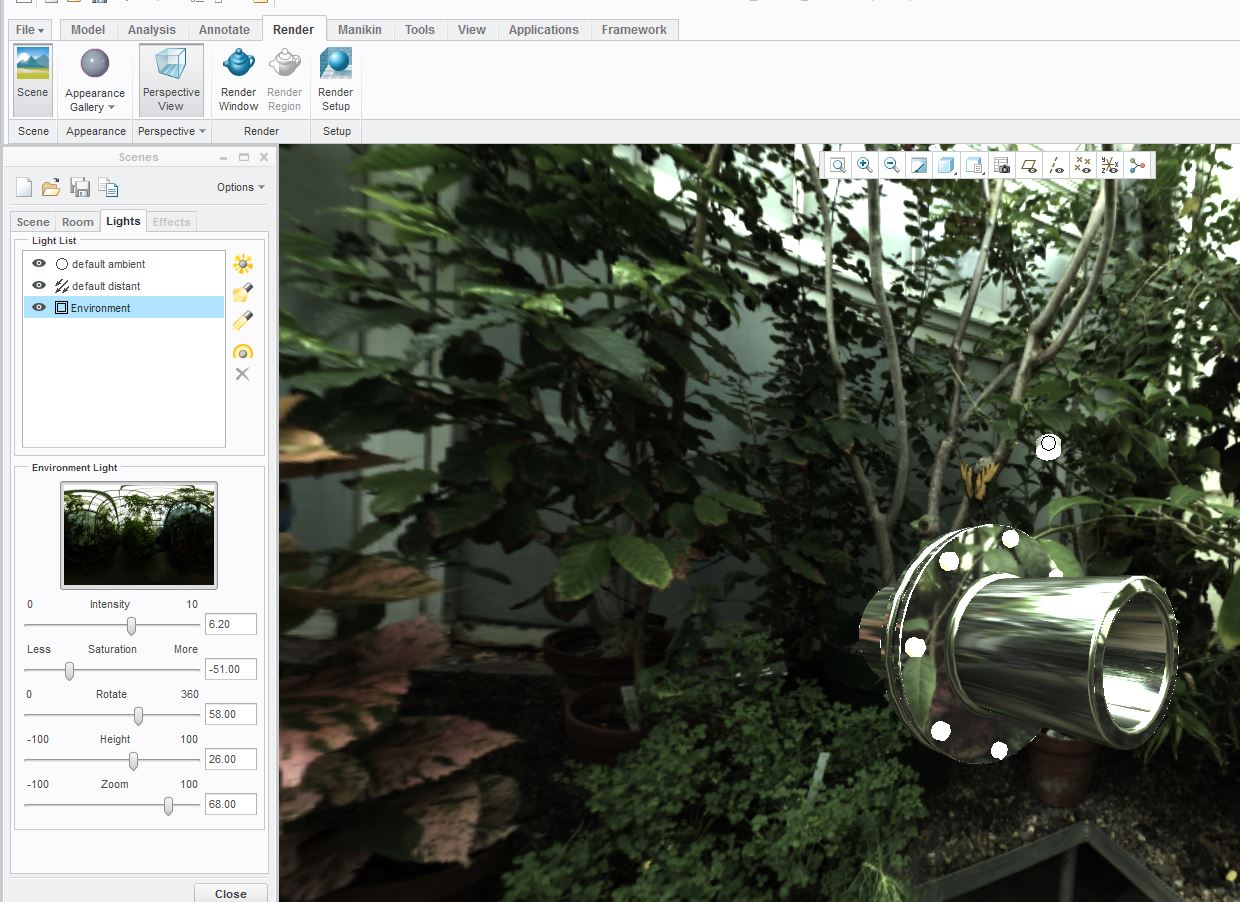
These images are not rendered , this is creo 3.0 new photo realistic appearnces, you can close the render window and it still remains, and can be rotated a full 360 degree sphere.
No need to set up a scene
Sep 15, 2014
11:07 PM
- Mark as New
- Bookmark
- Subscribe
- Mute
- Subscribe to RSS Feed
- Permalink
- Notify Moderator
Please log in to access translation
Sep 15, 2014
11:07 PM
I have also created an animated.gif file of what can be done with HDRI images as an envoirnmental light