Community Tip - You can subscribe to a forum, label or individual post and receive email notifications when someone posts a new topic or reply. Learn more! X
- Community
- Creo+ and Creo Parametric
- 3D Part & Assembly Design
- Re: pattern using rotate and distance
- Subscribe to RSS Feed
- Mark Topic as New
- Mark Topic as Read
- Float this Topic for Current User
- Bookmark
- Subscribe
- Mute
- Printer Friendly Page
pattern using rotate and distance
- Mark as New
- Bookmark
- Subscribe
- Mute
- Subscribe to RSS Feed
- Permalink
- Notify Moderator
pattern using rotate and distance
I must be getting tired.
How do I get this pattern to work?
The 1st element is rotation, and the second is a linear translation at the rotated position.
Seems elemental, but I cannot seem to figure out the UI to make this work.
thanks in advance
This thread is inactive and closed by the PTC Community Management Team. If you would like to provide a reply and re-open this thread, please notify the moderator and reference the thread. You may also use "Start a topic" button to ask a new question. Please be sure to include what version of the PTC product you are using so another community member knowledgeable about your version may be able to assist.
Solved! Go to Solution.
- Labels:
-
General
Accepted Solutions
- Mark as New
- Bookmark
- Subscribe
- Mute
- Subscribe to RSS Feed
- Permalink
- Notify Moderator
I got it to work. Seems relation driven dimensions cannot be used the Direction 1, or certain other types of dimensions. It just ignores the entry rather than providing a warning! Bad form ![]()
This is an axial rotation pattern where Direction 1 is d127, which is a vertical dimension from the datum to the long horizontal line. The increment is total:offset*(#:pattern-1)/(#:pattern/2)
- Mark as New
- Bookmark
- Subscribe
- Mute
- Subscribe to RSS Feed
- Permalink
- Notify Moderator
cool! but, more time consuming?
Or is there detail there you aren't showing us?
- Mark as New
- Bookmark
- Subscribe
- Mute
- Subscribe to RSS Feed
- Permalink
- Notify Moderator
Matt, this is only a simplistic model of what I am trying to do. In the mnore complex version, I am running into all kinds of limitations including wrong origins and not being able to correct for them and models not tilting or not rotating. Really frustrating!
I am trying to mimic this interpolation of a gear hob. This requires moving the pattern across the surface of the pitch diameter while tilting it.

- Mark as New
- Bookmark
- Subscribe
- Mute
- Subscribe to RSS Feed
- Permalink
- Notify Moderator
This has taken DAYS to reach. But I have to ask, is 98% accuracy sufficient for you?
2 of 100 patterns flipped. Don't ask me why other than the fact I am still on M040.
Can someone open the attached file in M090 or later and tell me if the error still exists?
As to the trick to make this work, the initial patterned sketch is perfectly balanced, symmetrical about the origin. This creates a reproducible path for a pattern using "reference". The hob profile is a DXF import into a part file only to avoid additional errors from a constrained sketch.
One thing that came up on many occasions is that you could not provide an alternate pattern origin if you use both rotational and linear distance values in the pattern. Using reference patterns would pick the center of the object rather than follow the reference pattern from -its- origin.
And in case you are wondering, my intent here is to understand the undercuts and the actual geometry at the trough of the teeth (the geometry of the dedendum) as the tooth count increases.
I also tried an involute curve to drive the pattern. That was grossly inaccurate presumably due to database precision of curve equations.
I am trying to automate this and I should now have a better understanding of what this will take.
The good thing is that the tool is the same for all "Module 1" profiles, so all I need to automate it the origin offset and the two pattern values (angle and distance). However, this 98% accuracy business is seriously lacking. If this is true in later versions, I will report it to PTC support.
I know M040 has some serious pattering bugs.
- Mark as New
- Bookmark
- Subscribe
- Mute
- Subscribe to RSS Feed
- Permalink
- Notify Moderator
Seems to be the same on m100
- Mark as New
- Bookmark
- Subscribe
- Mute
- Subscribe to RSS Feed
- Permalink
- Notify Moderator
Thanks Matt. I will report this.
- Mark as New
- Bookmark
- Subscribe
- Mute
- Subscribe to RSS Feed
- Permalink
- Notify Moderator
Wouldn't you know it... now the support portal is down ![]()
- Mark as New
- Bookmark
- Subscribe
- Mute
- Subscribe to RSS Feed
- Permalink
- Notify Moderator
Small reward ![]()

- Mark as New
- Bookmark
- Subscribe
- Mute
- Subscribe to RSS Feed
- Permalink
- Notify Moderator
Attached is an updated version of the file with relations tied tot he sketch pattern. I had to correct some math.
It is stable to 50 copies and fails at 100. I have submitted a support case.
I also added points to the original pattern to show the original pattern is not reversing.
The red arrow shows that the wrap is correct... 90 degrees exactly and symetrical.
Again, Creo 2.0 full version attached.
- Mark as New
- Bookmark
- Subscribe
- Mute
- Subscribe to RSS Feed
- Permalink
- Notify Moderator
What is driving the count? it says 51 but it is grayed out.
- Mark as New
- Bookmark
- Subscribe
- Mute
- Subscribe to RSS Feed
- Permalink
- Notify Moderator
Open relations and select "feature" and click on the 1st pattern. You have to turn on features in Tree filters.
- Mark as New
- Bookmark
- Subscribe
- Mute
- Subscribe to RSS Feed
- Permalink
- Notify Moderator
Changed it to 100. I am not sure if you meant fail (like the picture) or fail a regen (redlight).
- Mark as New
- Bookmark
- Subscribe
- Mute
- Subscribe to RSS Feed
- Permalink
- Notify Moderator
Right, failed like the picture. It doesn't report an error in this case. ...which means I am making progress ![]()
I already got a call back from support and in M110 and Creo 3.0 it is still failing. A similar support case that generated an SPR said this was fixed in M090. Now they will be looking at it again.
- Mark as New
- Bookmark
- Subscribe
- Mute
- Subscribe to RSS Feed
- Permalink
- Notify Moderator
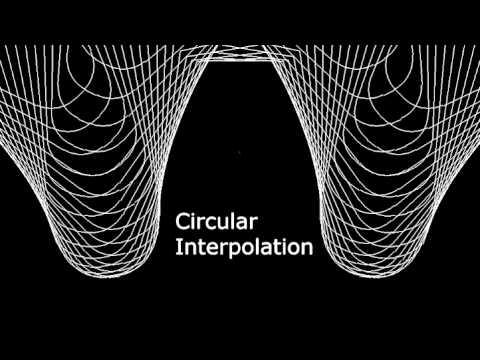
The video needs some work but here you go. Fully managed with one entry in relations for a Module 1, 20 degree pressure angle metric gear tooth.
I solved the reversing issue with a patterned copy of the hob profile at 180 degrees. I also made the hob from a part file (not imported) and driving the workpiece diameter through an assembly parameter.
Combine this with a true involute curve equation and you have a great underlay for the dedendum profile. I drove this down to 5 teeth and jumped to 50. No problem.
Creo 2.0 full version attached
- Mark as New
- Bookmark
- Subscribe
- Mute
- Subscribe to RSS Feed
- Permalink
- Notify Moderator
Cool, so was any of that a work-around? Or careful planning? (or both?) lol.
- Mark as New
- Bookmark
- Subscribe
- Mute
- Subscribe to RSS Feed
- Permalink
- Notify Moderator
It is only an official work around if the feature exists but fails to function in the conventional manner.
In this case, it is a developed function using sticks and stones.
...but no animal were injured in the effort.
Here is an output of many hours of work on this... (click on the image)

Below is the Cartesian curve for the involute...
r=(root diameter/2)
ang=t*90
s=(pi*r*t)/2
xc=r*cos(ang)
yc=r*sin(ang)
x=xc+(s*sin(ang))
y=yc-(s*cos(ang))
z=0
Getting the rotation of the involute in the same location as the dedendum guide is a little bit of a trick but relations will help there.
What I really wonder is if the manufacting module can do this as it is done in the shop. Can you take a hob shape and cylinder and cut this shape with ease, or does it just follow a predefined feature?
- Mark as New
- Bookmark
- Subscribe
- Mute
- Subscribe to RSS Feed
- Permalink
- Notify Moderator
SPR 2227780 has been filed with R&D regarding pattern failures.


