Community Tip - Learn all about PTC Community Badges. Engage with PTC and see how many you can earn! X
- Community
- Creo+ and Creo Parametric
- Creo Parametric Tips
- Did You Know? Creating Spiral Geometry with TRAJPA...
- Subscribe to RSS Feed
- Mark as New
- Mark as Read
- Bookmark
- Subscribe
- Printer Friendly Page
- Notify Moderator
Did You Know? Creating Spiral Geometry with TRAJPAR
When you need to create complex geometric and non-geometric shapes that vary in dimension along the length of any given path, you can use the trajpar parameter to represent a trajectory path in Creo. Its value ranges from 0 to 1, with 0 representing the beginning of the trajectory, and 1 representing the trajectory end. It is used as the independent variable in a relation.
In this post, a PTC expert explains how to build a specific type of spiral geometry using a variable section sweep and the trajpar parameter.
In this example, we’ll build a heater coil. As shown below, we already have a number of parameters set up to define and control the number of revolutions and cycles.
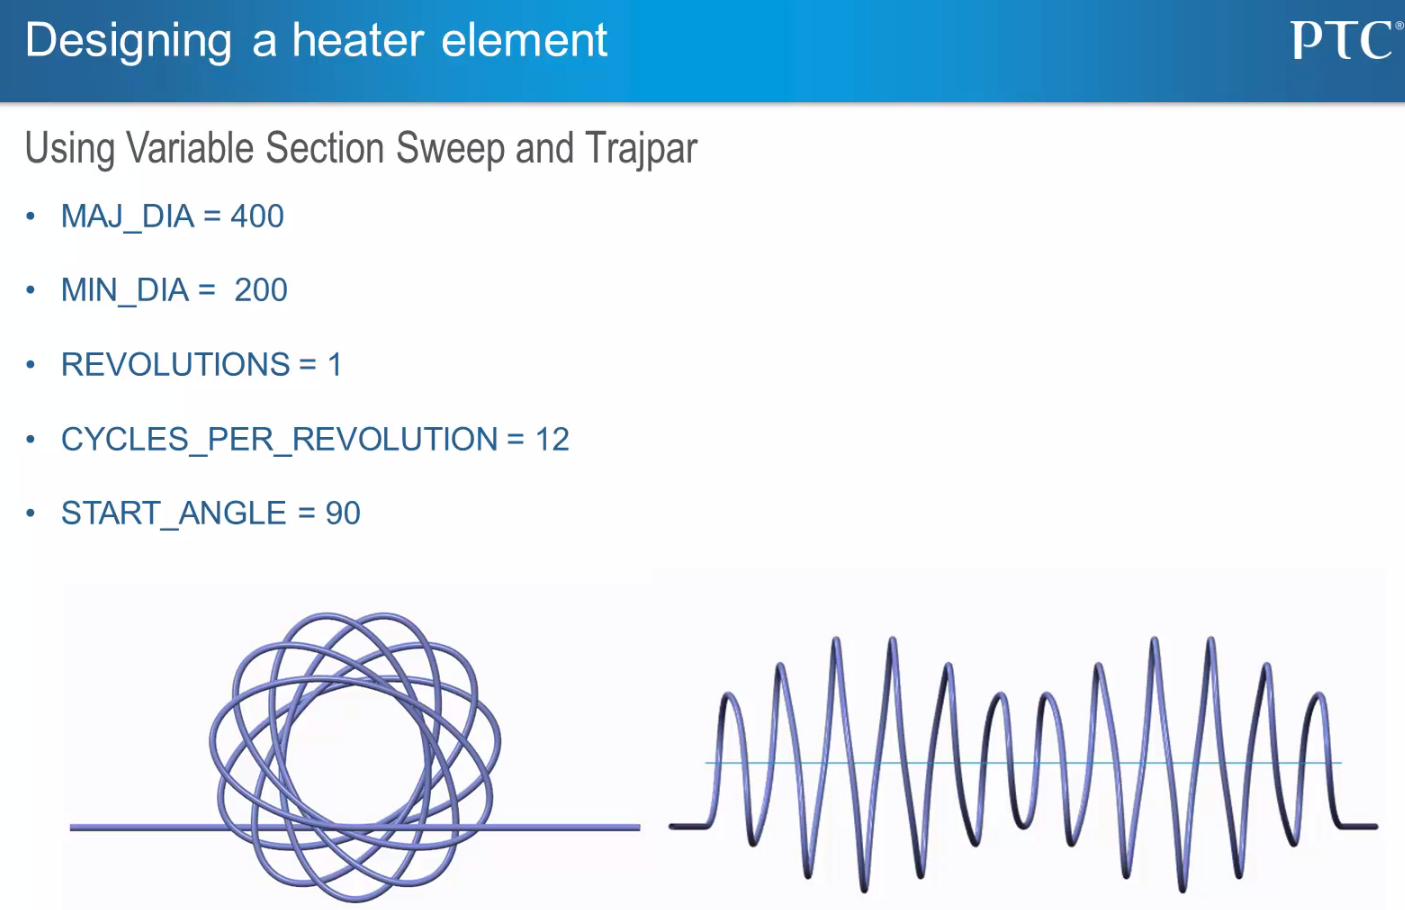
The trajpar parameter is useful for designing this heater coil.
To build the coil, we need to define a curve or edge representing the trajectory that the pipe will follow. In this example, we already have a curve created defining the trajectory for the spiral geometry.
Select the icon that allows you to create a Sweep. Then, click Ellipse. Draw the ellipse and set the minimum and maximum diameter by the parameters. Along the length of the trajectory, we want the ellipse to rotate. To do this, click Rotate Resize, and then drag the ellipse to rotate it. By rotating the ellipse in Sketcher, we now have a dimension that can be controlled. We’re going to add a relation to the parameter that controls the angle along the length of the trajectory. To do this, select Tools > Relations. The Relations dialog opens.
Using a parameter called trajpar, which returns a value between 0 and 1 along the length of the trajectory, we can tell the geometry to rotate. We want it to rotate a given number of revolutions. Multiplying trajpar by 360 results in a full revolution. We can then multiply that value by the parameter controlling the number of revolutions. After we enter our calculations on the Relations dialog, click OK. Then, select Sketch > OK. This results in a revolving ellipse, as shown below.
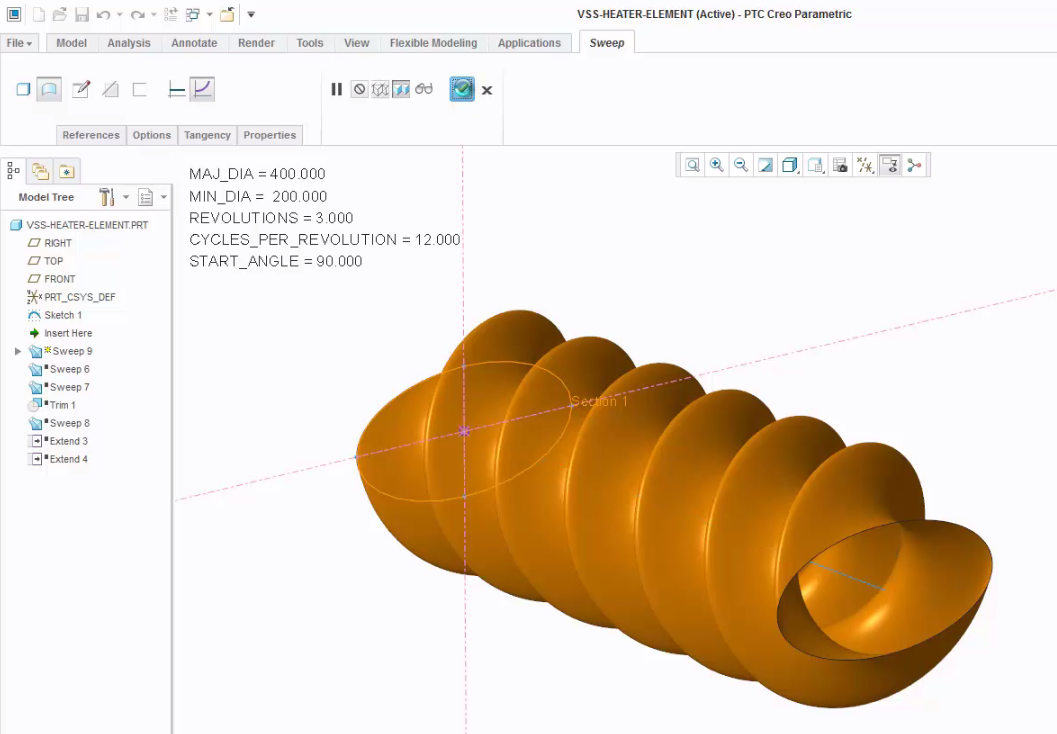
The first step in designing the heater coil is to create a revolving ellipse.
Next, we’ll define geometry that will intersect the shape to create the actual final trajectory. To do this, select Sweep, and then select the icon that allows you to create a surface sweep, and also select the icon that allows you to create a section whose size and shape can vary along the sweep. On the model, right-click and select Sketch. To do this, we need to create a second surface variable section sweep. This time, we’ll create a straight line with an angle value. To do this, right-click and select Line Chain. Draw the angle, select Normal, and set an angle value.
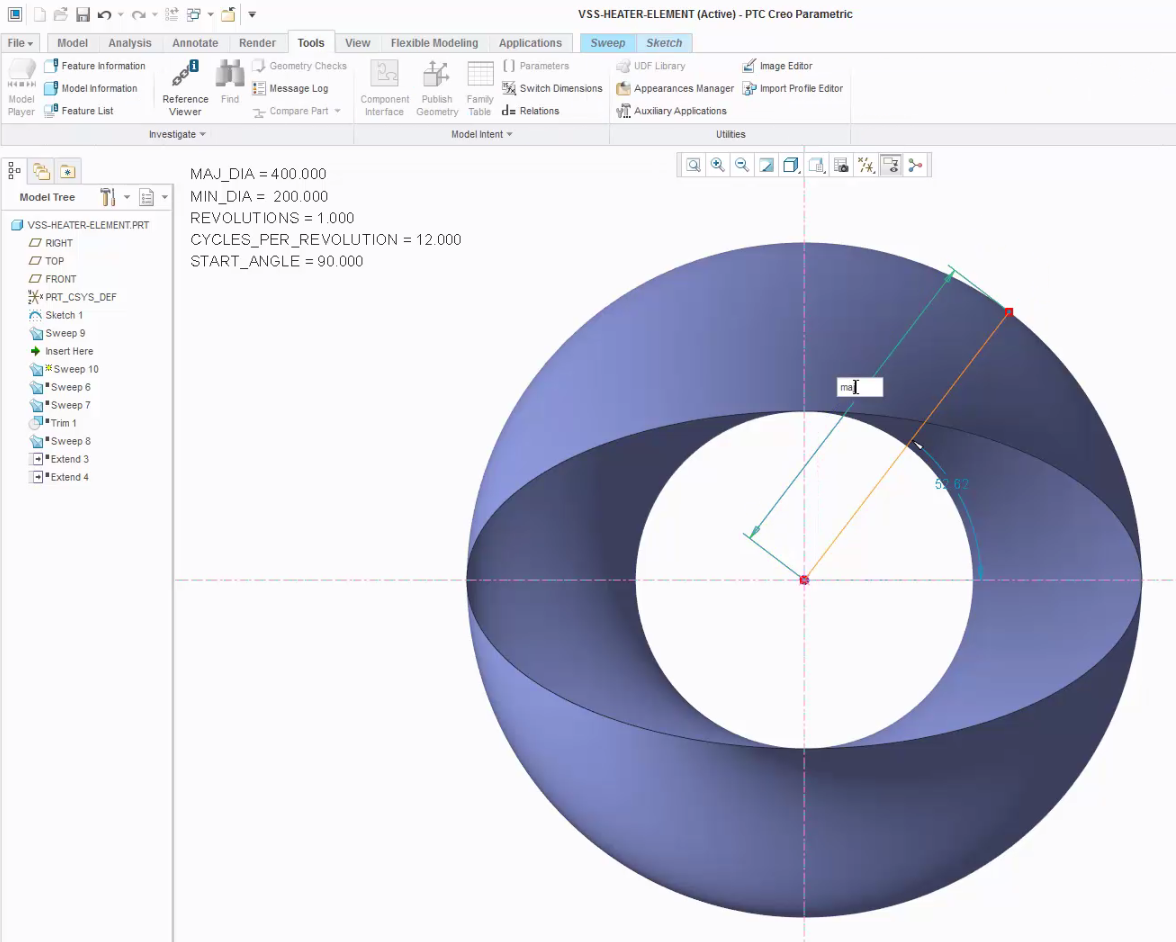
Create a second surface variable section sweep.
This angle is also driven by trajpar. So, again, we multiply trajpar by 360 for a full revolution, and then we multiply that by the number of revolutions. Finally, we multiply the value by the number of cycles per revolution. Again, after we enter the formula on the Relations dialog, and click OK. By clicking Sketch > OK, the new geometry is generated, as shown below.
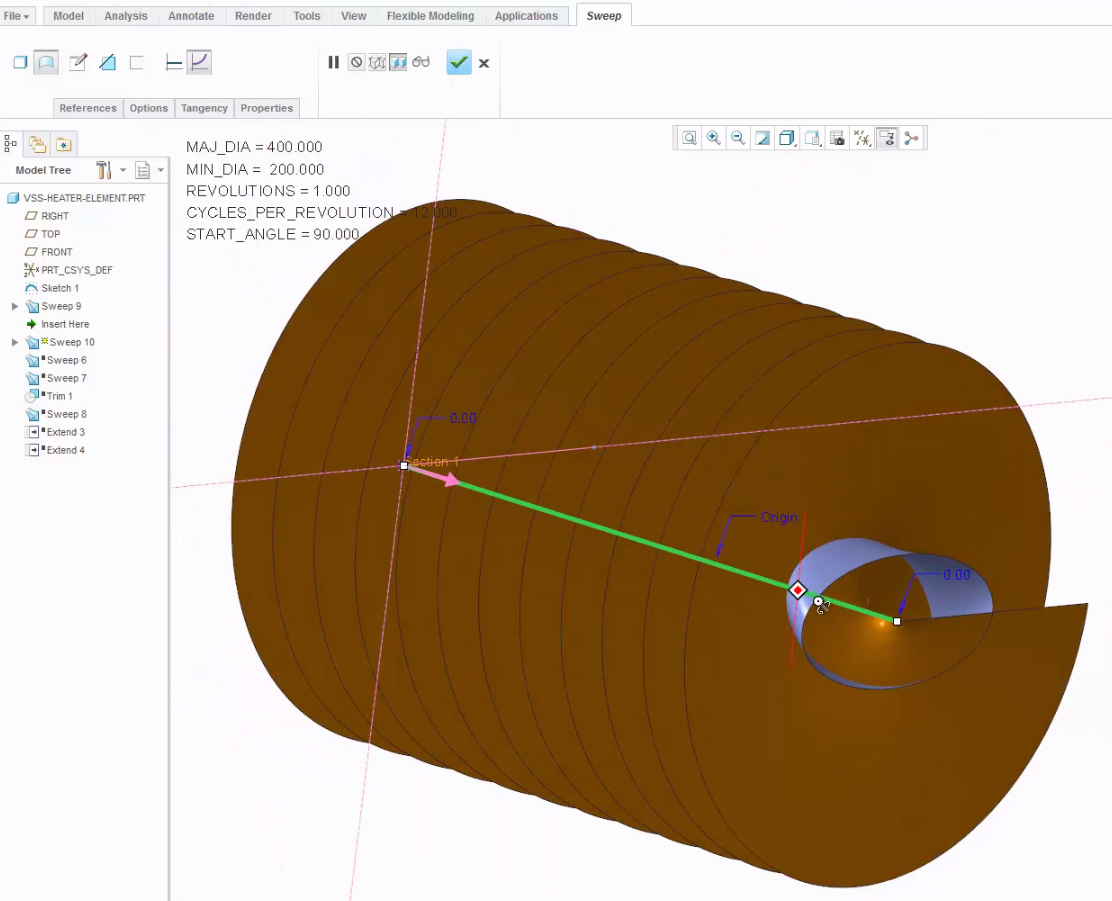
This produces a second surface that can be trimmed by the first.
Trim the second surface by the first. The result of the trim is a tangent chain representing the final geometry. Then, a sweep can be performed on the surface and the tube diameter can be applied. The resulting pipe chain appears below.
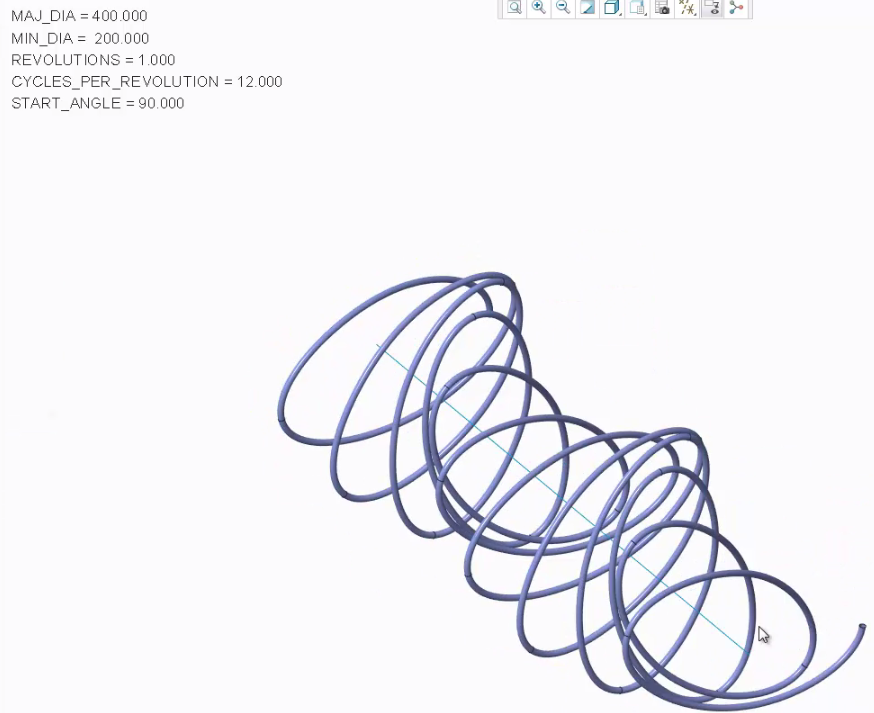
Pipe chain after a sweep is on the surface and the tube diameter is applied..
To learn more about spiral geometry check out our video tutorial (“Using TRAJPAR to Create Spiral Geometry”).
We hope you’ve enjoyed our “Did You Know” series, covering enhancements in PTC Creo 3.0. In just a few weeks, we’ll begin a new series based on the hundreds of enhancements available in Creo 4.0.

