
Turn on suggestions
Auto-suggest helps you quickly narrow down your search results by suggesting possible matches as you type.
Showing results for
Please log in to access translation
Turn on suggestions
Auto-suggest helps you quickly narrow down your search results by suggesting possible matches as you type.
Showing results for
- Community
- ThingWorx
- ThingWorx Developers
- Re: Leveraging Popup Mashup Functionality (Grid Ed...
Translate the entire conversation x
Please log in to access translation
Options
- Subscribe to RSS Feed
- Mark Topic as New
- Mark Topic as Read
- Float this Topic for Current User
- Bookmark
- Subscribe
- Mute
- Printer Friendly Page
Leveraging Popup Mashup Functionality (Grid Editing Example)
Nov 02, 2015
09:19 AM
- Mark as New
- Bookmark
- Subscribe
- Mute
- Subscribe to RSS Feed
- Permalink
- Notify Moderator
Please log in to access translation
Nov 02, 2015
09:19 AM
Leveraging Popup Mashup Functionality (Grid Editing Example)
When I started to learn ThingWorx and deep dived into mashup development, I wondered how to create popups from base mashups and exchange information between the main mashup and its corresponding popup. I scoured the ThingWorx site and couldn’t easily determine how to do this, so I figured others would find a post about this topic helpful.
We are going review the creation and usage of popups by stepping through the creation of a common use case scenario which is creating and editing grid records. Keep in mind though that this can be extended to be used for things such as prompting users to act before completing a task and providing warning messages that critical actions are not reversible and other interactive popups.
For this example, we are going to use the sql server AdventureWorks database to add and edit records within the HumanResources.Deparment table please refer to Microsoft site for instructions on how to download and install this database.
So let’s get started:
1. Create a new thing that uses the Database template and name it AdventureWorks2008
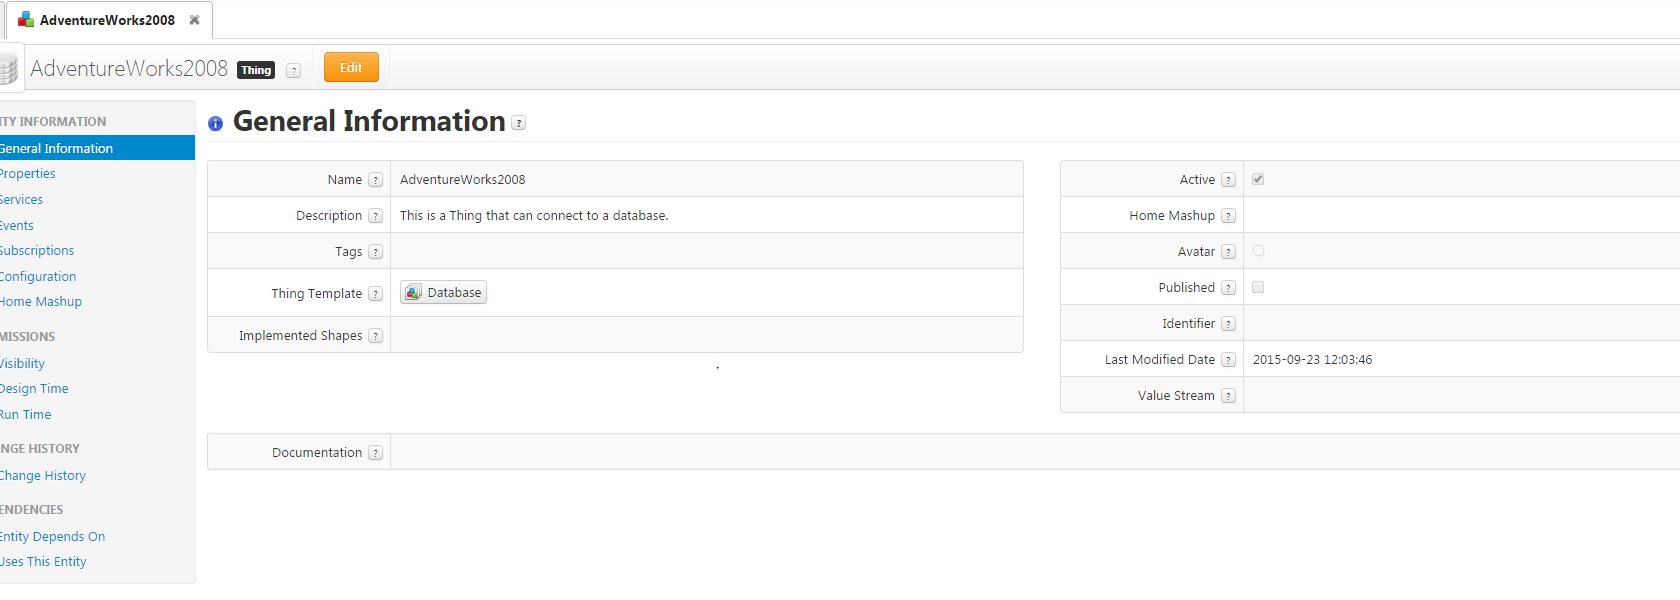
2. Create a new thing that uses the Database template and name it AdventureWorks2008 and press Save
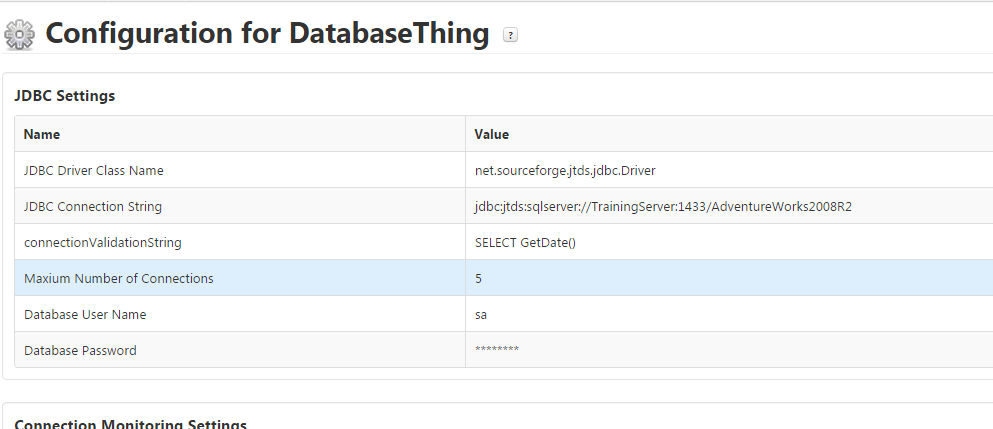
3. Go to the configuration tab on the AdventureWorks2008 Thing and configure the JDBC settings
a. Please reference the post https://community.thingworx.com/message/4170#4170 for more details about configuring this tab
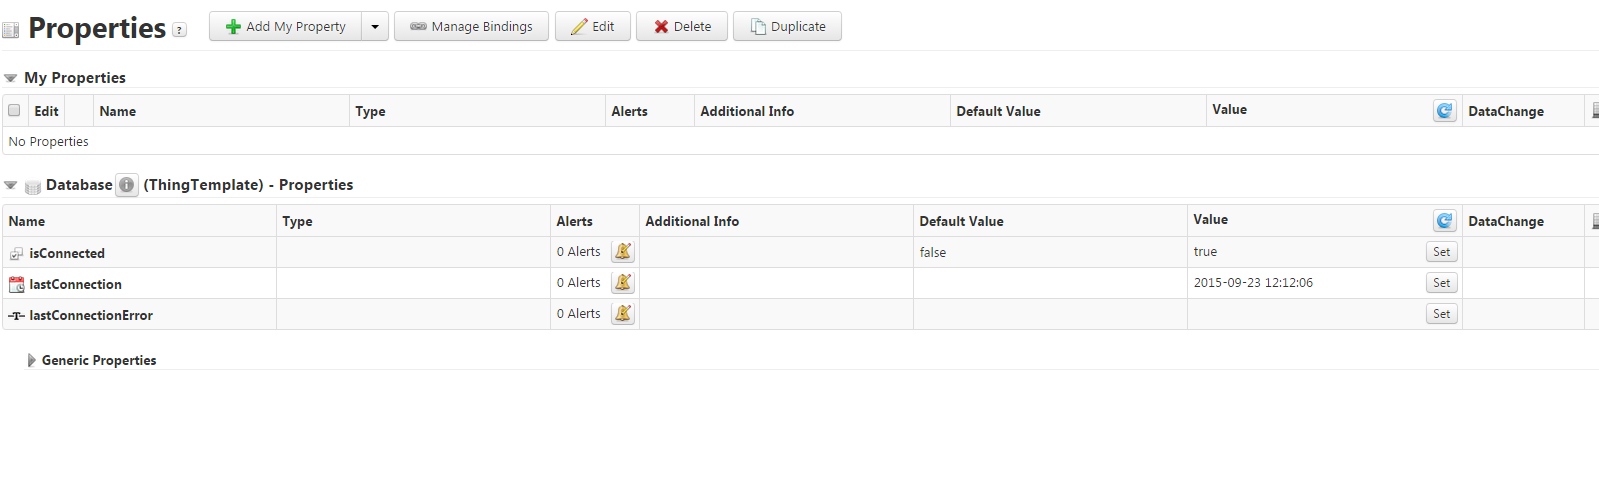
4. Press Save and go to the properties page and press the refresh arrow on the value column. Is Connected’s value should be set to true.
5. Go to the service tab and now we are going to create 3 services
6. Create a service called RetrieveDepartments
Script: SELECT * FROM HumanResources.Department
BaseType: INFOTABLE
Script Type: SQL (Query)
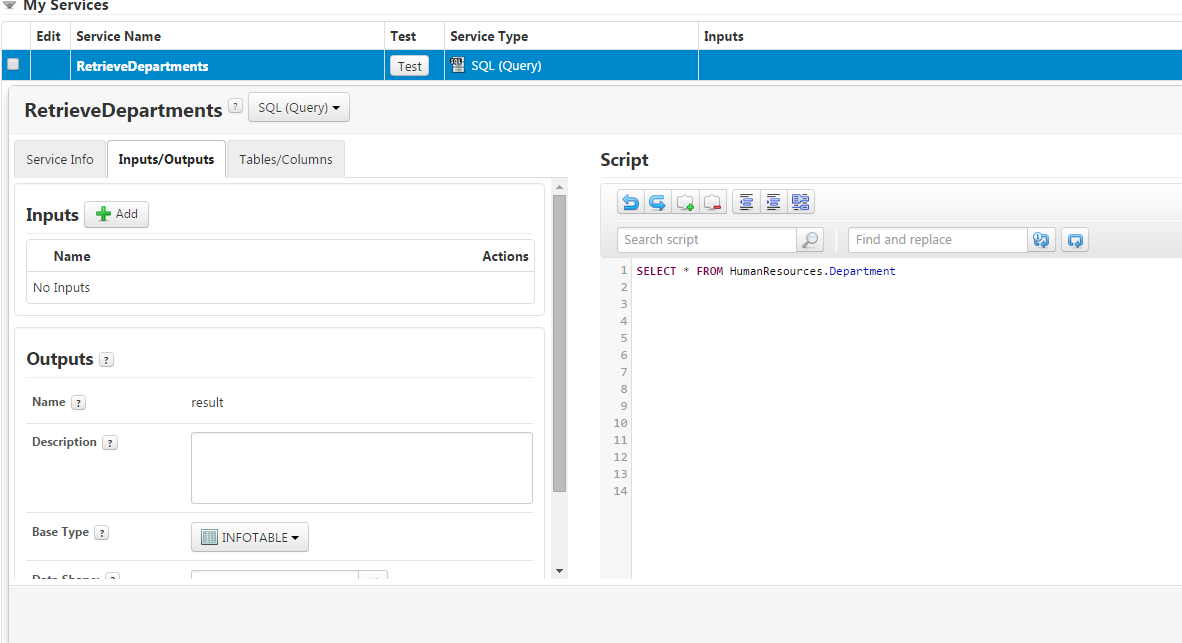
Now Save the service and then re-edit the service and press the Test button
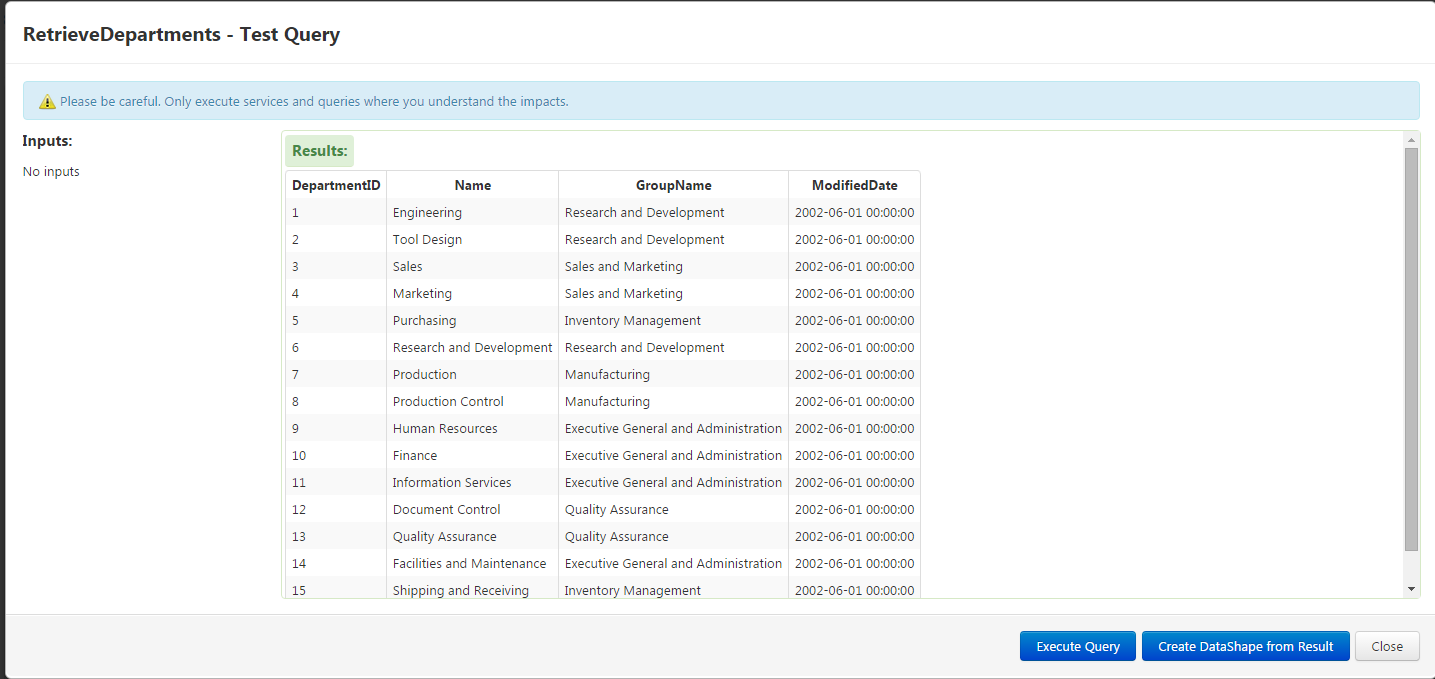
Press the Create DataShape from Result button and the new datashape thing will be created, name it dsDepartments
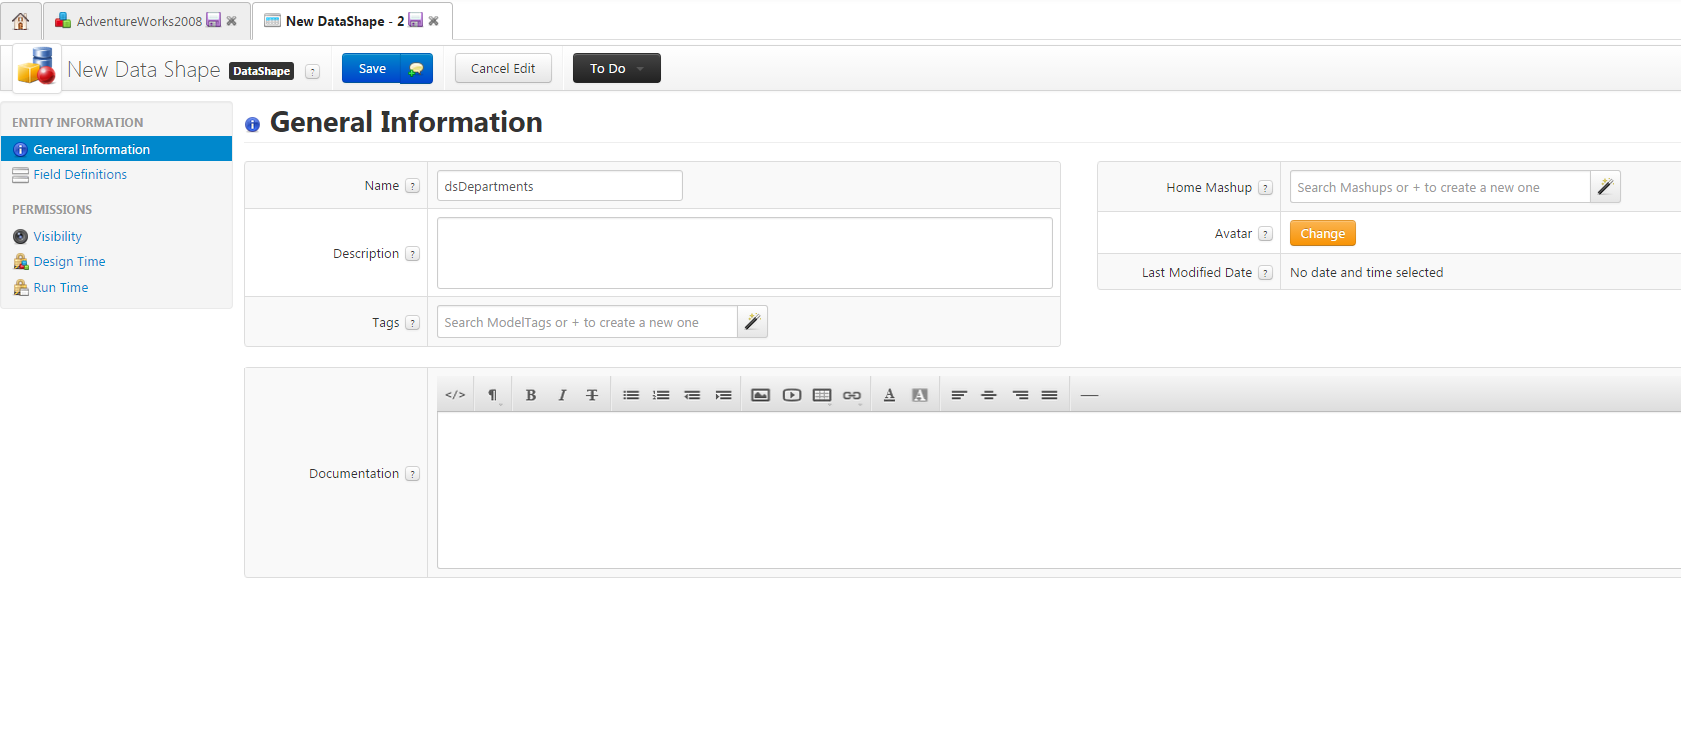
Now press the Save button and close the dsDepartments. Press done on the RetrieveDepartments service.
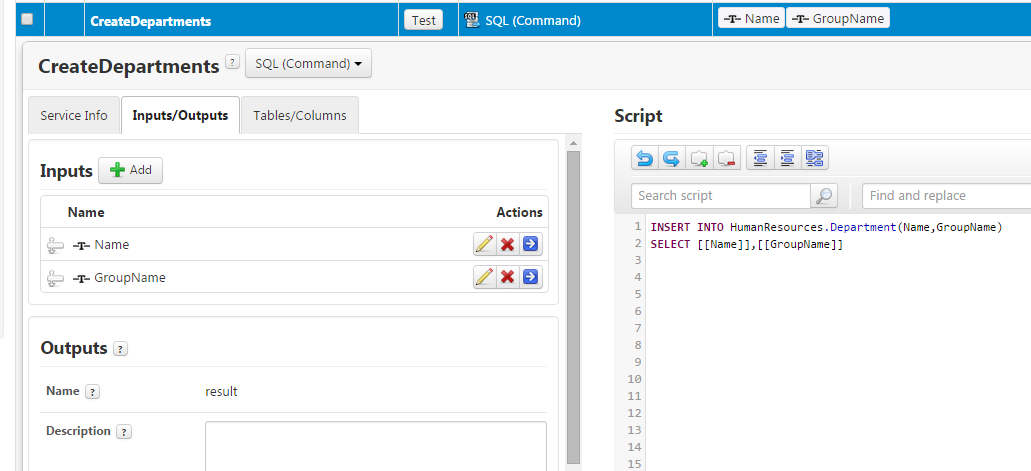
7. Create a service called CreateDepartments
Select the RetrieveDepartments service and press the Duplicate button and change the name from RetrieveDepartmentsDuplicate to CreateDepartments.
Change the Script Type to SQL (Command) from SQL (Query)
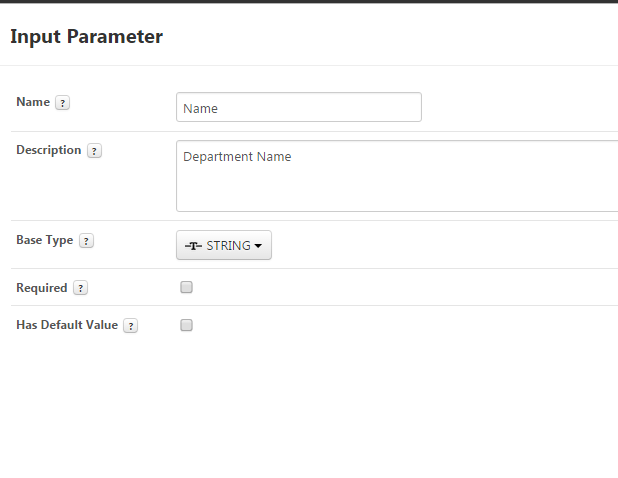
Go to the Inputs/Outputs tab and create 2 inputs
Name: Name
Description: Department Name
Base Type: STRING
Required: true
Has Default value: false
Name: Group Name
Description: Department Group Name
Base Type: STRING
Required: true
Has Default value: false
Fill in the following information for the script
Script: INSERT INTO HumanResources.Department(Name,GroupName)
SELECT [[Name]],[[GroupName]]
BaseType: INFOTABLE
Script Type: SQL (Command)
Now save the service
8. Create a Service called EditDepartments
Select the CreateDepartments service and press the Duplicate button and change the name from CreateDepartmentsDuplicate to EditDepartments.
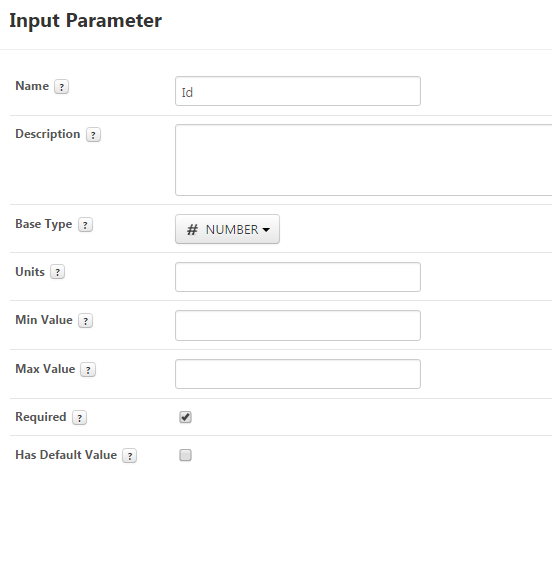
Go to the Inputs/Outputs tab and create and add a new input
Name: Id
Description: Department Id
Base Type: NUMBER
Required: true
Has Default value: false
Fill in the following information for the script
Script: Update HumanResources.Department
SET Name = [[Name]],GroupName = [[GroupName]]
WHERE DepartmentId = [[Id]]
BaseType: INFOTABLE
Script Type: SQL (Command)

Now save the service
9. Create a new Employee Thing
Set the Thing Template to Generic and set the name to Employees and press Save
10. Create a service on the Employees Thing called RetrieveDepartments
Script:
var scriptName = "RetrieveDepartments";
var resultMessage = undefined;
try
{
// result: INFOTABLE dataShape: dsDepartments
var dtDepartments = Things["AdventureWorks2008"].RetrieveDepartments();
}
catch (err)
{
resultMessage = err;
logger.error("error while loading " + scriptName + " on " + me.name + ": " + resultMessage);
}
result = dtDepartments;
BaseType: INFOTABLE
Script Type: Local (Javascript)
DataShape: dsDepartments
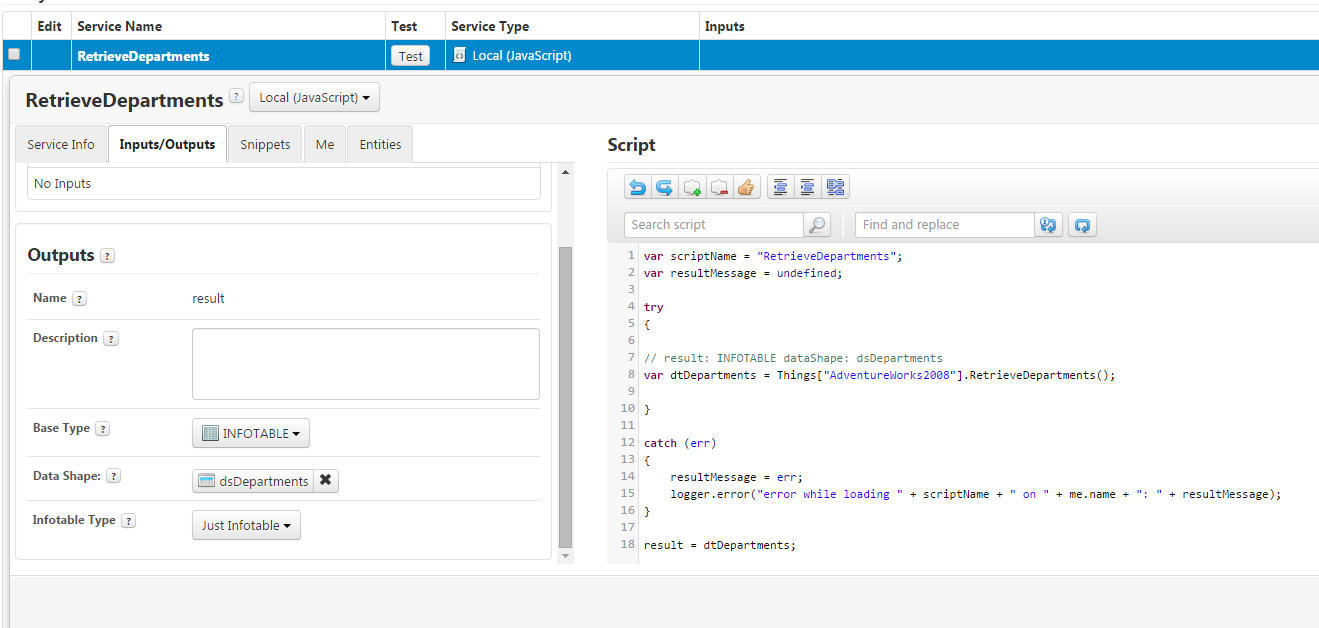
Now save the service and test it to verify you return data.
11. Create a service on the Employees Thing called CreateDepartments
Script:
var scriptName = "CreateDepartments";
var resultMessage = undefined;
try
{
var params = {
GroupName: GroupName,
Name: Name
};
// result: NUMBER
var result = Things["AdventureWorks2008"].CreateDepartments(params);
resultMessage = "success"
}
catch (err)
{
resultMessage = err;
logger.error("error while loading " + scriptName + " on " + me.name + ": " + resultMessage);
}
result = resultMessage;
BaseType: STRING
Script Type: Local (Javascript)
Inputs:
GroupName (STRING)
Name (STRING)
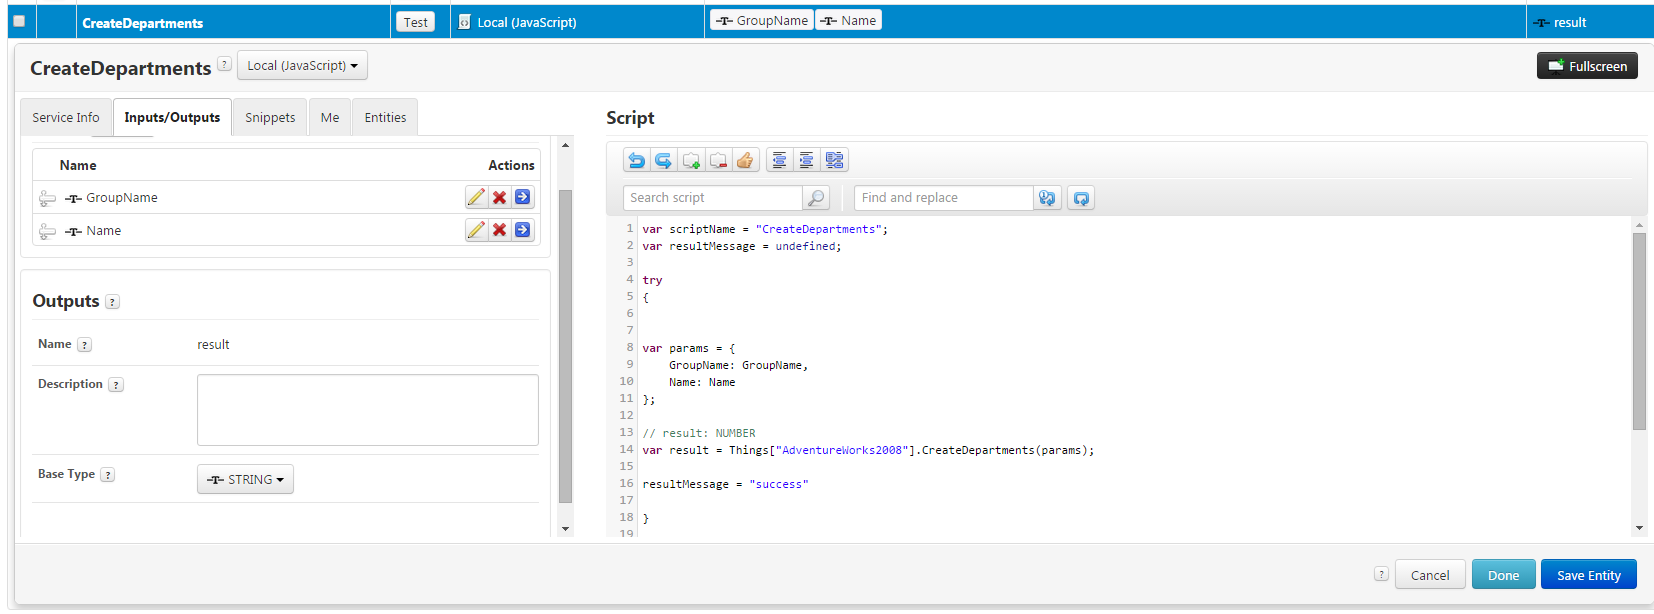
Now save the service.
12. Create a service on the Employees Thing called EditDepartments
Script:
var scriptName = "EditDepartments";
var resultMessage = undefined;
try
{
var params = {
GroupName: GroupName,
Id:Id,
Name: Name
};
// result: NUMBER
var result = Things["AdventureWorks2008"].EditDepartments(params);
resultMessage = "success"
}
catch (err)
{
resultMessage = err;
logger.error("error while loading " + scriptName + " on " + me.name + ": " + resultMessage);
}
result = resultMessage;
BaseType: STRING
Script Type: Local (Javascript)
Inputs:
GroupName (STRING)
Name (STRING)
Id (INTEGER)
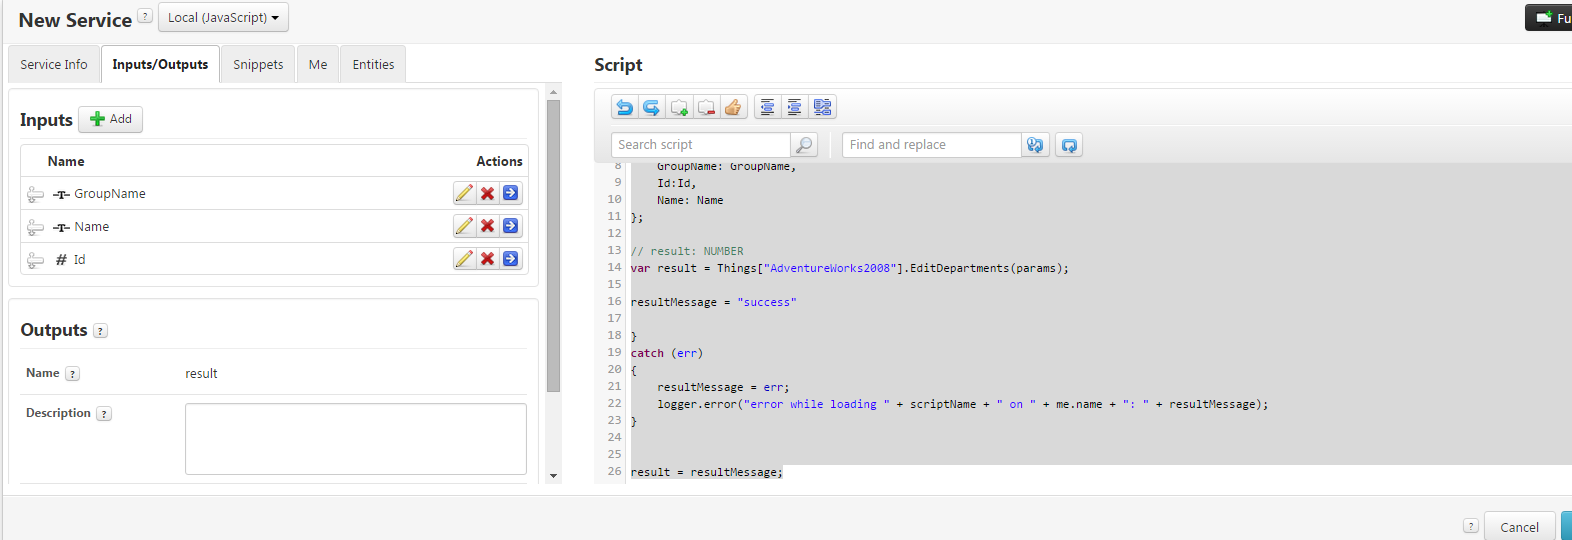
Now save the service.
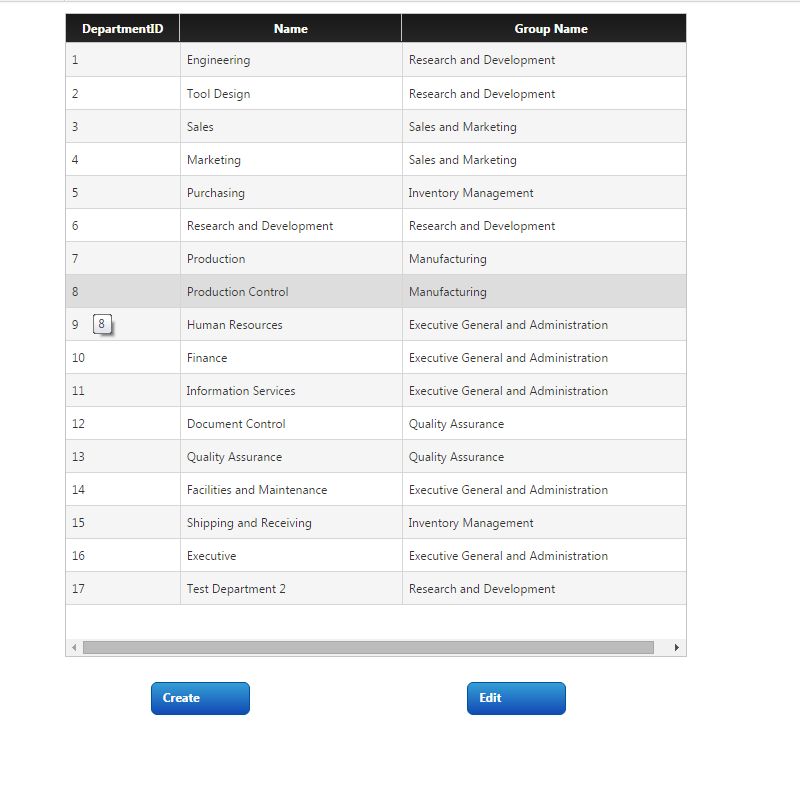
13. Create a Mashup called DepartmentMaintenance and add a grid and two navigation links to the mashup.

14. Label the navigation buttons Create and Edit
15. Add in the Data from the RetrieveDepartments services that we just created and check the Mashup Loaded? Box for the service (will load this data when the screen loads).
16. Link the RetrieveDepartments service to the grid and display DepartmentId, Name, GroupId
17. Create a New static mashup that is popup sized called CreateEditDepartmentPopup
18. Add 2 textboxes and 2 buttons (stacked) on to the CreateEditDepartmentPopup
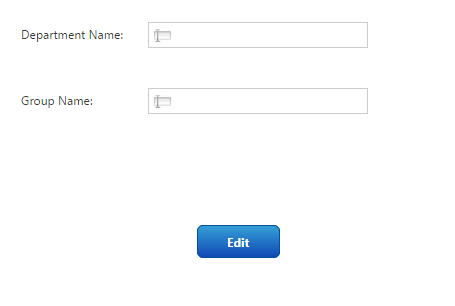
19. Label the text boxes DepartmentName: and GroupName: and label the buttons Edit and Create
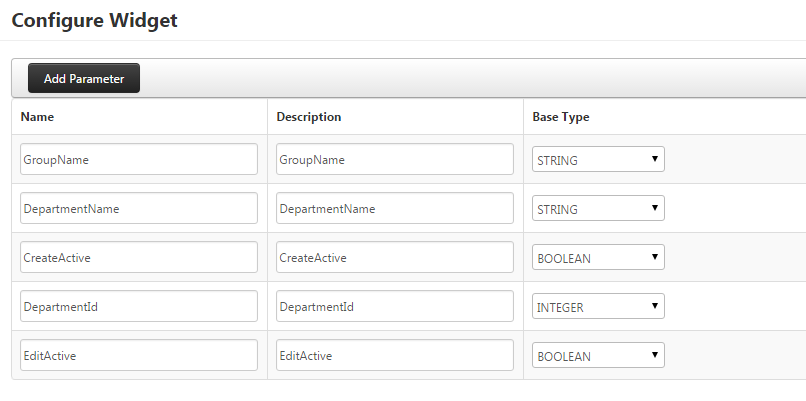
20. Create 5 Mashup Parameters for CreateEditDepartmentPopup
a. GroupName (STRING)
b. DepartmentName (STRING)
c. CreateActive (BOOLEAN)
d. DepartmentId (INTEGER)
e. EditActive (STRING)
21. Link the GroupName Mashup Parameter to the GroupName textbox
22. Link the DepartmentName Mashup Parameter to the DepartmentName textbox
23. Link the CreateActive Mashup Parameter to the Visible parameter on the Create button
24. Link the EditActive Mashup Parameter to the Visible parameter on the Edit button
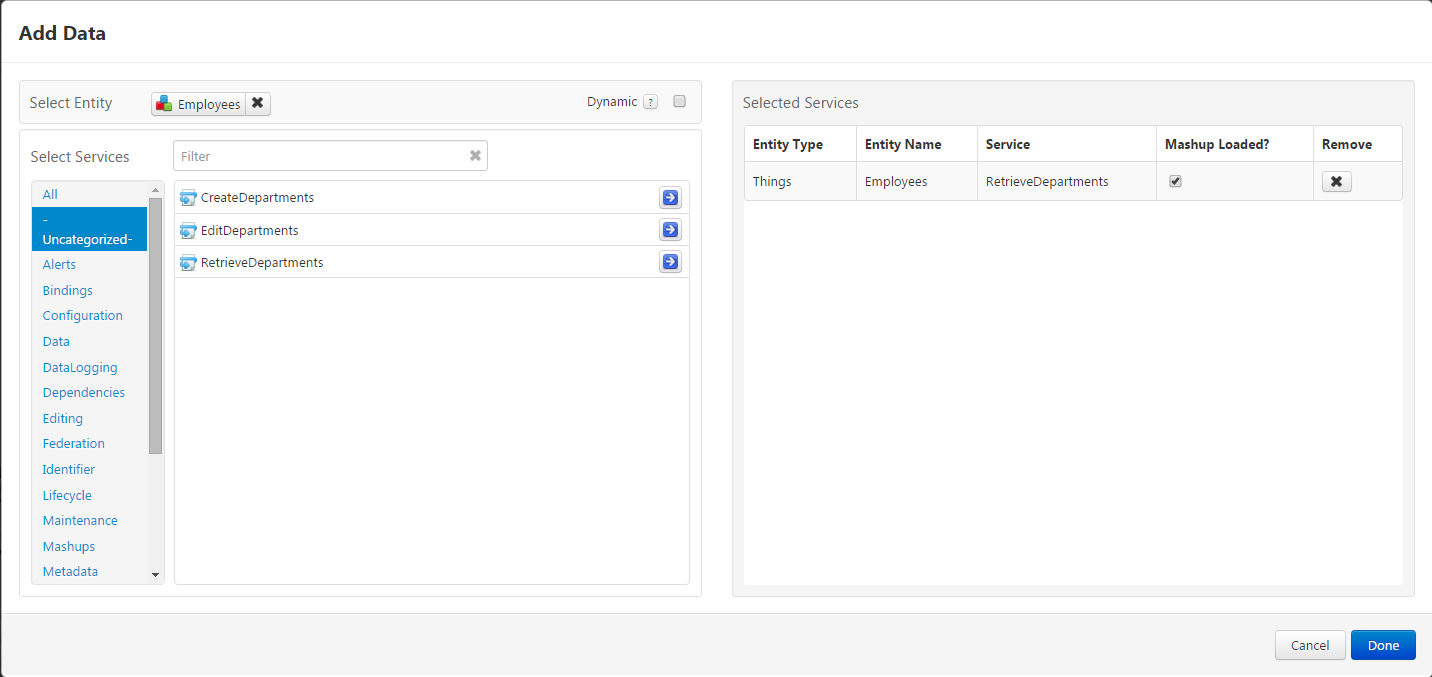
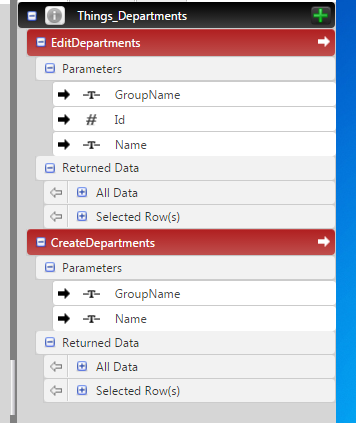
25. Add in two Services from the Departments Things
a. EditDepartments
b. CreateDepartments
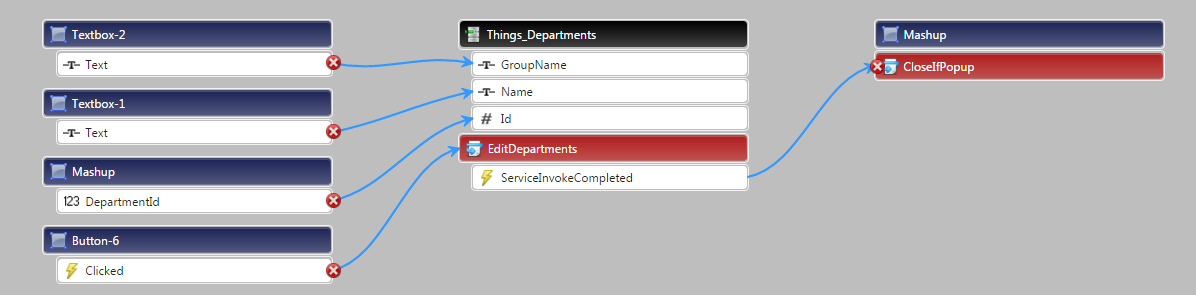
26. Link the Textbox Text for GroupName to the GroupName Parameter for EditDepartments
27. Link the Textbox Text for GroupName to the GroupName Parameter for CreateDepartments
28. Link the Textbox Text for DepartmentName to the Name Parameter for EditDepartment
29. Link the Textbox Text for DepartmentName to the Name Parameter for CreateDepartments
30. Link the Mashup Parameter DepartmentId to Id Parameter for EditDepartments
31. Link the Clicked Event from the Create Button to CreateDepartments Service
32. Link the Clicked Event from the Edit Button to EditDepartments Service
33. Link the CreateDepartments Service’s ServiceInvokeCompleted Action to the CloseIfPopup Mashup Parameter

34. Link the EditDepartments Service’s ServiceInvokeCompleted Action to the CloseIfPopup Mashup Parameter
35. Go back to the DepartmentMaintenance Mashup
36. Select the Create Navigation Link
a. Set MashupName to CreateEditDepartmentPopup
b. Set TargetWindow to ModalPopup
c. Set ShowClosedButton to Checked
d. Set PopupScaling to Off
e. Set Alignment to CenterAligned
37. After setting the MashupName you will see that the Mashup Parameters you created above are now available to configure for the Create Navigation Link
a. Set CreateActive to Checked
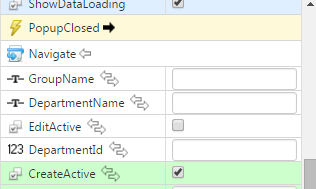

38. Link the PopupClosed for the Create Navigation Link to RetrieveDepartments so that it refreshes the grid after the popup closes
39. Select the Edit Navigation Link
a. Set MashupName to CreateEditDepartmentPopup
b. Set TargetWindow to ModalPopup
c. Set ShowClosedButton to Checked
d. Set PopupScaling to Off
e. Set Alignment to CenterAligned
40. After setting the MashupName you will see that the Mashup Parameters you created above are now available to configure for the Edit Navigation Link
a. Set EditActive to Checked
b. Link GroupName to the RetrieveDepartments Selected Row(s) field GroupName
c. Link DepartementName to the RetrieveDepartments Selected Row(s) field Name
d. Link DepartmentId to the RetrieveDepartments Selected Row(s) field DepartmentId
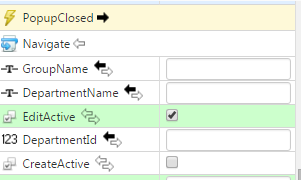
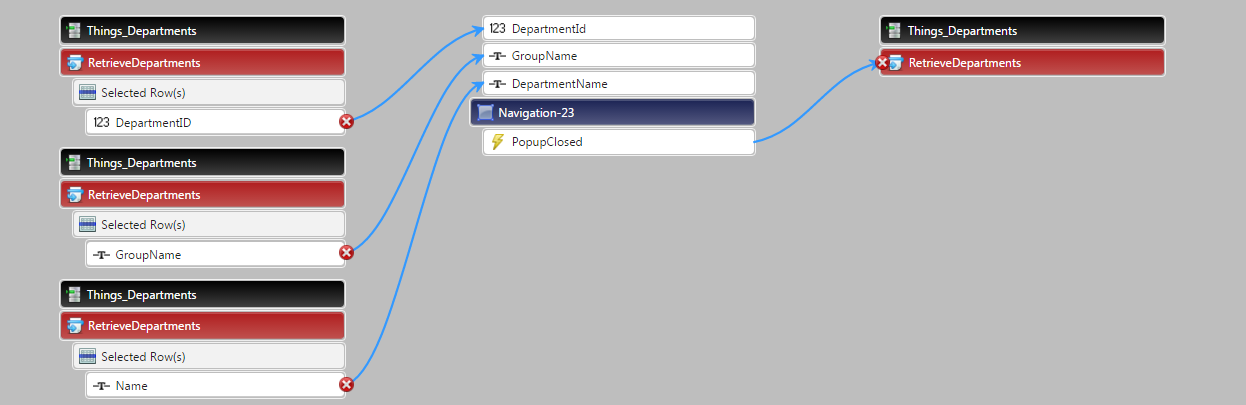
41. Link the PopupClosed for the Edit Navigation Link to RetrieveDepartments so that it refreshes the grid after the popup closes
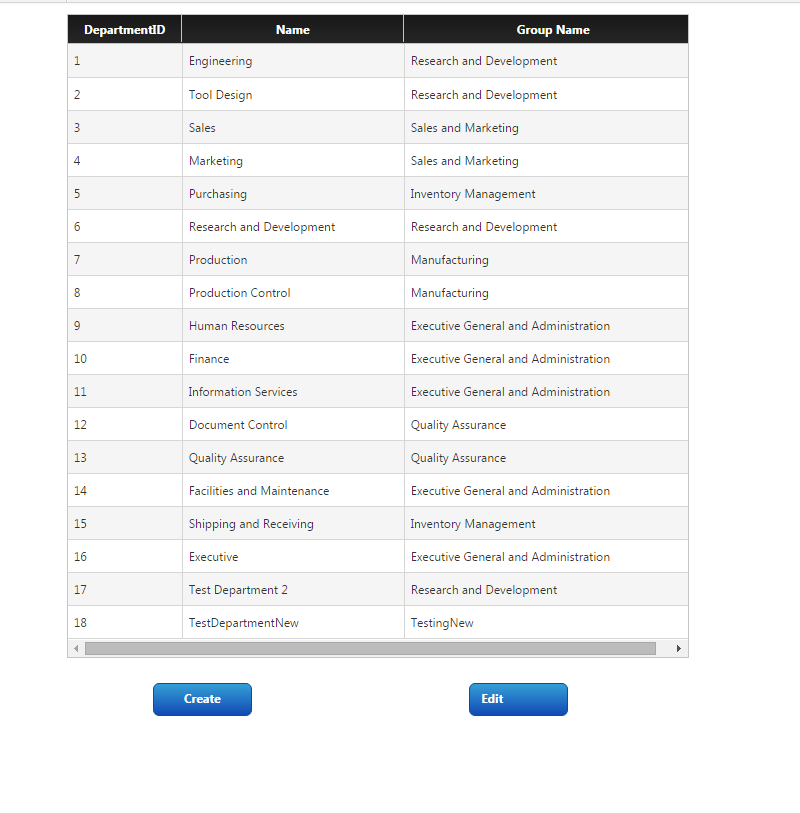
42. Now view the DepartmentMaintenance Mashup in runtime
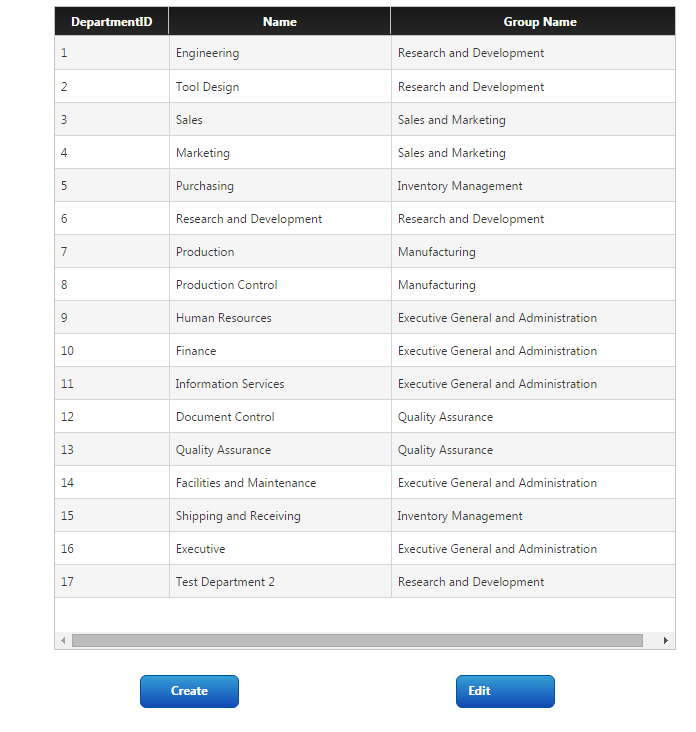
43. Press the Create button and a popp with empty fields should be displayed
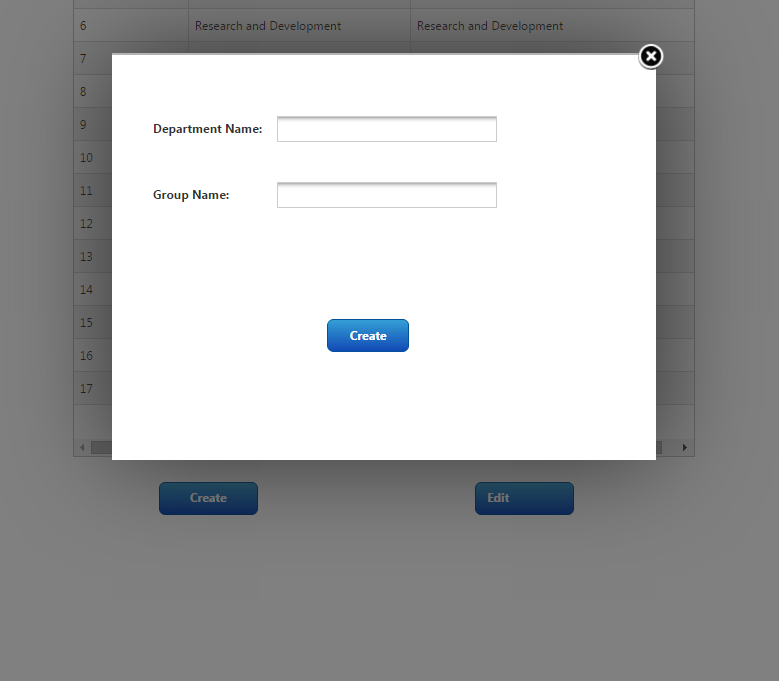
44. Set Department Name and GroupName and press Create
a. Department Name: TestDepartment
b. Group Name: Testing
45. The popup should close and the grid should be refreshed
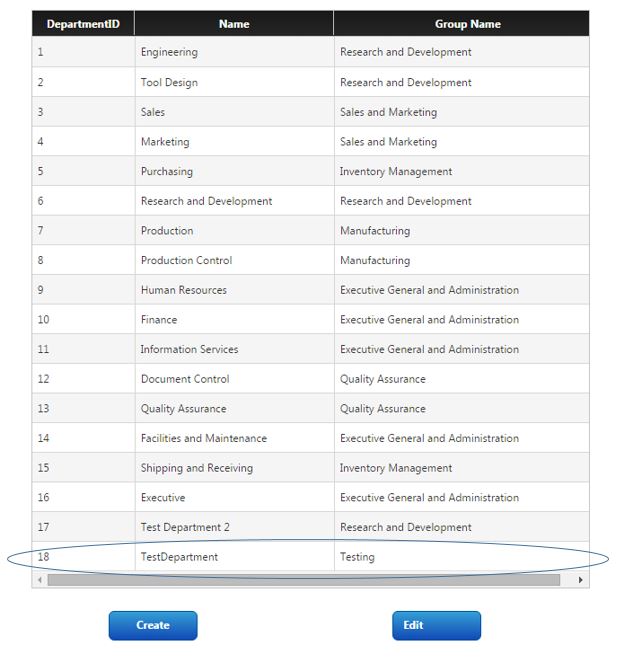
46. Note that if required, you could add logic to disable the button if values are not filled in for DepartmentName & GroupName, or do validation when the create button on the popup is pressed
47. Select the record you just created from the grid, for the screenshot above, that is the row that is circled
a. Note that, if required, you could create a service that will disable the button unless a row has been selected from the grid
48. To test the edit function, with the row selected from the previous step, press the edit button and a popup with the selected Department Name and Group Name should be displayed

49. Change the Department Name and GroupName and press Edit
a. Department Name: TestDepartmentNew
b. Group Name: TestingNew
50. The popup should close and the grid should be refreshed
51. Note that, similar to the other functions, you could add logic to disable the Edit button if values are not filled in for DepartmentName & GroupName, or do validation when the Edit button on the popup is pressed
Hopefully, this exercise in creating popups from base mashups and exchanging information between the main mashup and its corresponding popup was easy to follow and gave you a few extra tools to enable the creation of useful applications.
4 REPLIES 4
Feb 15, 2016
01:51 AM
- Mark as New
- Bookmark
- Subscribe
- Mute
- Subscribe to RSS Feed
- Permalink
- Notify Moderator
Please log in to access translation
Feb 15, 2016
01:51 AM
Nice Demo for biginers.
Aug 11, 2016
10:50 AM
- Mark as New
- Bookmark
- Subscribe
- Mute
- Subscribe to RSS Feed
- Permalink
- Notify Moderator
Please log in to access translation
Aug 11, 2016
10:50 AM
I am not able to see how to commit/ save after i add a parameter to mashup. How to do this ?
Thanks
Sep 01, 2016
10:59 AM
- Mark as New
- Bookmark
- Subscribe
- Mute
- Subscribe to RSS Feed
- Permalink
- Notify Moderator
Please log in to access translation
Sep 01, 2016
10:59 AM
I'm not 100% clear on what you are asking, you can hit the done button on the add parameters when you are done building them out. Then you map data to the parameters using the services or widget outputs. Let me know if this doesn't answer your question.
Jul 09, 2018
01:58 PM
- Mark as New
- Bookmark
- Subscribe
- Mute
- Subscribe to RSS Feed
- Permalink
- Notify Moderator
Please log in to access translation
Jul 09, 2018
01:58 PM
Hello keriw,
I really appreciate your time for making this article. It's really helpful.
I haven't done sql querying before in ThingWorx
I am doing something similar to your post. I have my data tables in MySql DB(configured in my Thing and the connection is working), with some demo data in it. I want to call a particular data table on the mashup, so that the fields(ROWS) of that particular datatable can be displayed as an grid.
I am wondering if I can create a service in the my Thing as a javaScript service(Where I can hardcore all the sql associations with the tables inner join, self join etc) and pass it as an sql string. i.e, declare another service as <<sqlQuery>>
Please share your thoughts.
Thanks.


