Community Tip - You can Bookmark boards, posts or articles that you'd like to access again easily! X
- Community
- Creo+ and Creo Parametric
- 3D Part & Assembly Design
- Re: BASIC QUESTION: How to "anchor" a note/ when c...
- Subscribe to RSS Feed
- Mark Topic as New
- Mark Topic as Read
- Float this Topic for Current User
- Bookmark
- Subscribe
- Mute
- Printer Friendly Page
BASIC QUESTION: How to "anchor" a note/ when changing a dimension/snap line/etc. it moves "randomly"
- Mark as New
- Bookmark
- Subscribe
- Mute
- Subscribe to RSS Feed
- Permalink
- Notify Moderator
BASIC QUESTION: How to "anchor" a note/ when changing a dimension/snap line/etc. it moves "randomly"
Hi,
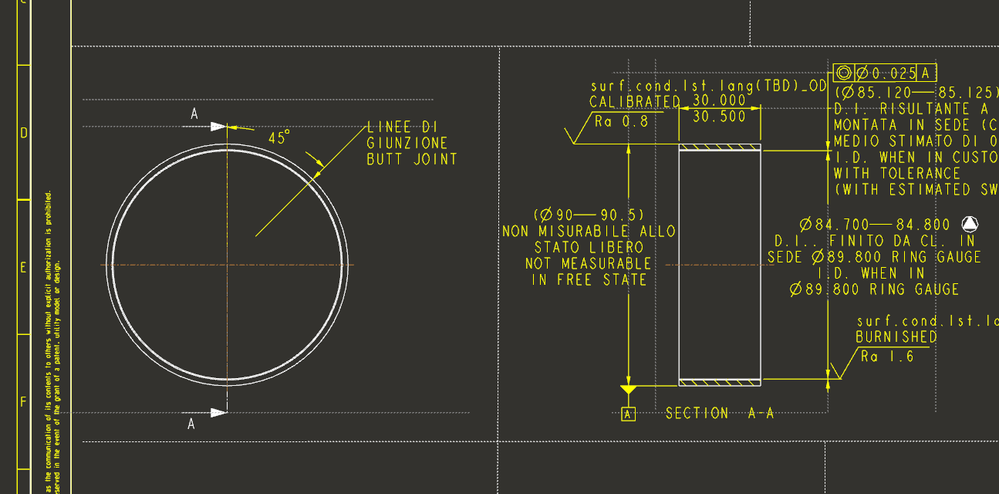
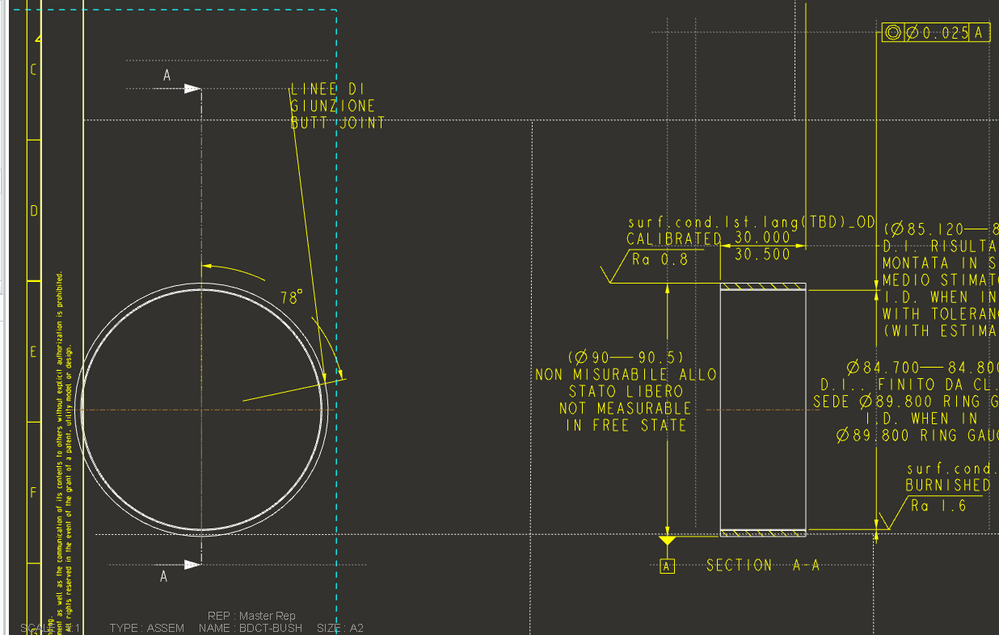
I have a small problem: the position of my note attached to an aperture of an angle it moves "randomly" when changing the value of the angle. Is there a method or a tip to keep it "fixed"?
See my example bellow: when the angle becomes 78deg instead of initially 45 deg, the notes goes way up along with the snap line attached to the view boundary without reason...
Thanks,
Nic.
- Labels:
-
2D Drawing
- Mark as New
- Bookmark
- Subscribe
- Mute
- Subscribe to RSS Feed
- Permalink
- Notify Moderator
Try changing the size of the datum planes to match the size of the part. Otherwise they can change size automatically and this changes the extents of the part; the view defaults to part extents. The snap lines are tied to the view extents and you have dimensions placed by snap lines.
- Mark as New
- Bookmark
- Subscribe
- Mute
- Subscribe to RSS Feed
- Permalink
- Notify Moderator
How is that angle created?
If the angle is from a datum plane, create a snap line with an "Offset Object" of 0 on that datum plane, then attach your note to that snap line.
- Mark as New
- Bookmark
- Subscribe
- Mute
- Subscribe to RSS Feed
- Permalink
- Notify Moderator
When the angle is 105deg, all becomes like this (see the attachment). Observe the dimension line on the right view: what does that dimension (of the width) has to do with a plane??
- Mark as New
- Bookmark
- Subscribe
- Mute
- Subscribe to RSS Feed
- Permalink
- Notify Moderator
Your note is snapped to the snapline at the top of your view (which also holds the section marker D-D)
- Mark as New
- Bookmark
- Subscribe
- Mute
- Subscribe to RSS Feed
- Permalink
- Notify Moderator
As for the dimensions going whack...your can snap the end of the extension line of the dimension to a snap line.
- Mark as New
- Bookmark
- Subscribe
- Mute
- Subscribe to RSS Feed
- Permalink
- Notify Moderator
Creo resizes planes to match the part extents unless the plane is set to a particular size or to match some piece of geometry. All planes can be affected.
- Mark as New
- Bookmark
- Subscribe
- Mute
- Subscribe to RSS Feed
- Permalink
- Notify Moderator
As others commented in this thread, the problem is that your note text is anchored to a snap-line which in turn is related to the edge of the drawing view. The problem stems from the fact that the view boundaries are not all that reliable and they will shift when model geometry extents change (and there are lots of reasons for this - one of them is that your datum plane size will change depending on its angle...)
Please try to utilize the various work-around suggestions posted and report back so we can all learn:
1) manually size the datum plane (edit its definition->activate the "Display" tab->Adjust outline checkbox). Once the size is manually specified, the datum plane size will stay fixed.
2) change the visible area of the drawing view such that it is a "partial view" (anchored by a stable reference point). This should keep the snap-lines in place...
3) add to your model a sketch or a datum plane then in the drawing create a snap-line relative to this curve or datum plane (with 0 offset) - then anchor your dimension to this snap-line. This seems very tedious.
4) what if you simply un-snapped your note text from this bothersome snap line?
- Mark as New
- Bookmark
- Subscribe
- Mute
- Subscribe to RSS Feed
- Permalink
- Notify Moderator
Okay. i tried all four solutions. As you can see, the problem is not only the note, but the whole geometry, in all views. As you can see on the right view, the roughness symbol moves a lot, the dimension lines, the notes... Everything moves around a lot. I mean, A LOT!!
One: there are too many planes to redefine them one by one. Is there a solution to modify them automaticaly?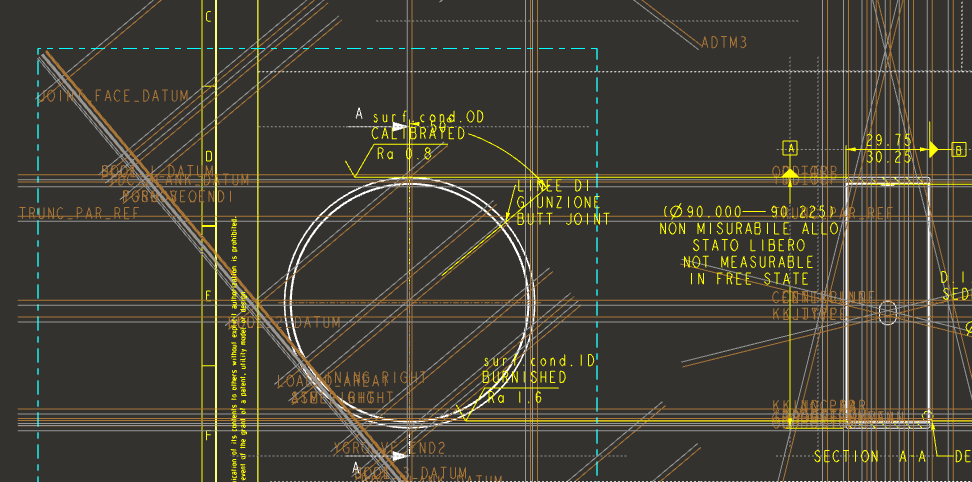
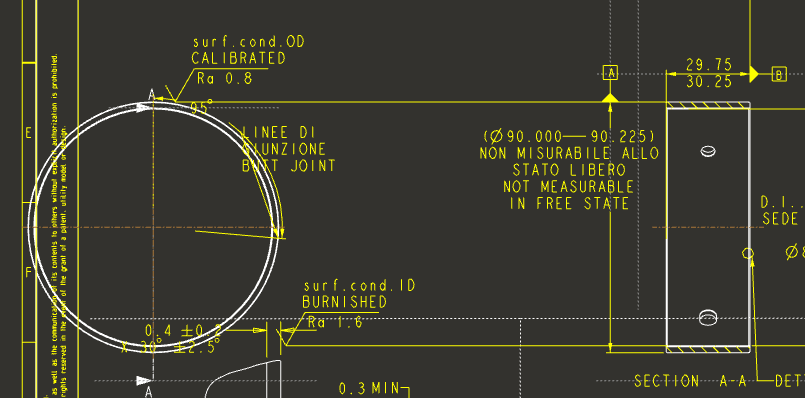
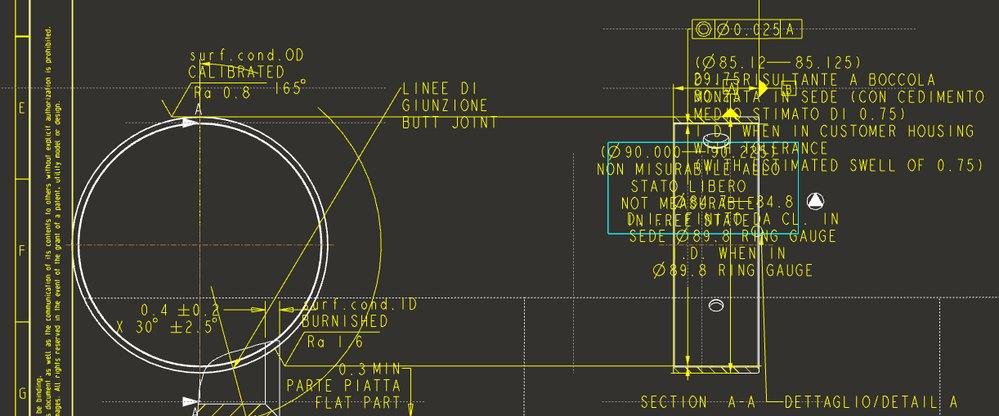
Four: still the right view...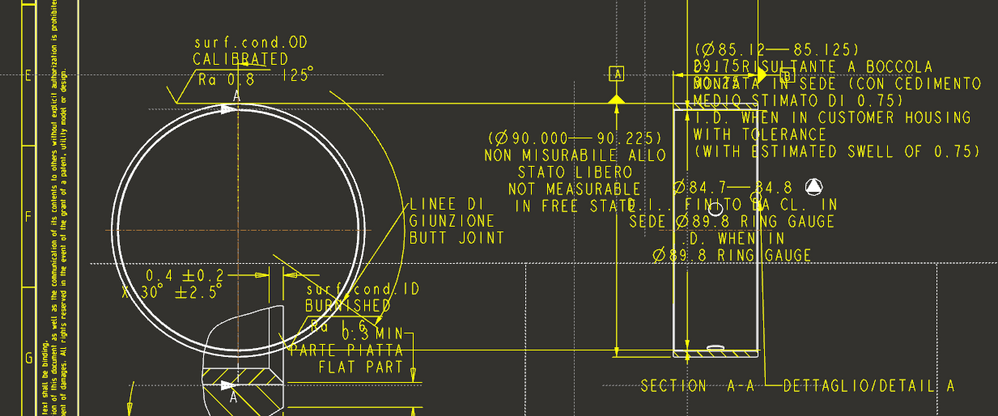
- Mark as New
- Bookmark
- Subscribe
- Mute
- Subscribe to RSS Feed
- Permalink
- Notify Moderator
I think you can achieve what you want by setting up some drawing sketcher geometry (parametrically!) that consists of a radial line through your tube wall. You can then add a tangent leader note, and set the attachment point to the endpoint of the sketched line. It only seems to be possible to attach tangent/normal leader notes to endpoints of drawing sketch entities, not to part geometry or part sketches (although you can 'use edge' in the drawing sketcher to get around this).

