Community Tip - Your Friends List is a way to easily have access to the community members that you interact with the most! X
- Community
- Creo+ and Creo Parametric
- 3D Part & Assembly Design
- Re: Creo Sheetmetal Unbend Feature Failure
- Subscribe to RSS Feed
- Mark Topic as New
- Mark Topic as Read
- Float this Topic for Current User
- Bookmark
- Subscribe
- Mute
- Printer Friendly Page
Creo Sheetmetal Unbend Feature Failure
- Mark as New
- Bookmark
- Subscribe
- Mute
- Subscribe to RSS Feed
- Permalink
- Notify Moderator
Creo Sheetmetal Unbend Feature Failure
Hi,
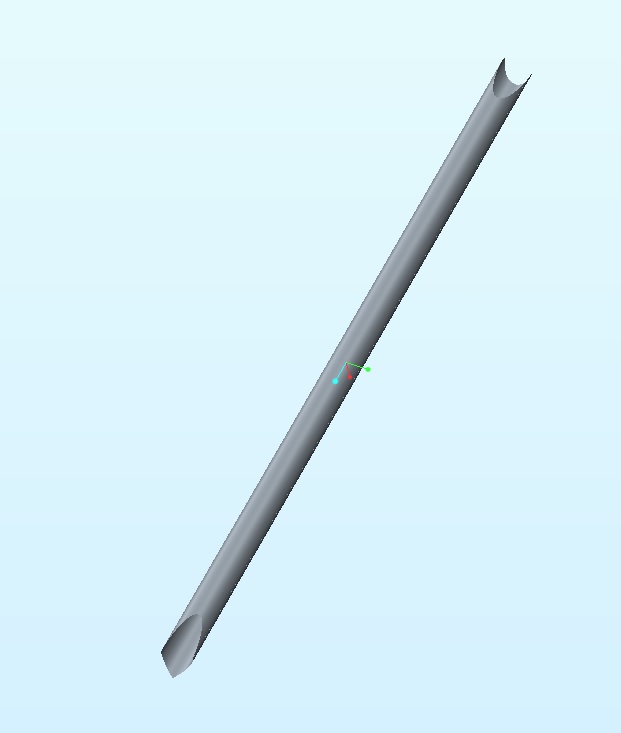
We are trying to unroll tubes from a chassis created in the AFX extension in order to produce templates for tube notching. The way we do this is by opening up the part for the tube and operations>Resume all to unsupress the flat pattern ID. This works for some of our tubes but fails for others. Does anyone know why this occurs? For example:
1) Rolled
2) Unrolled
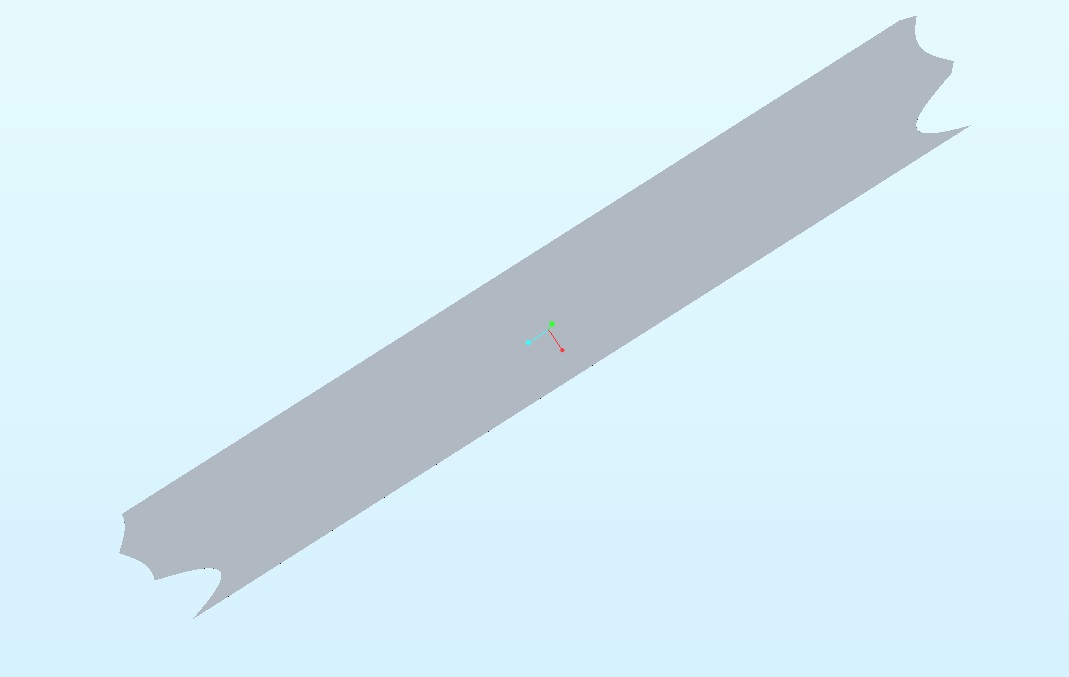
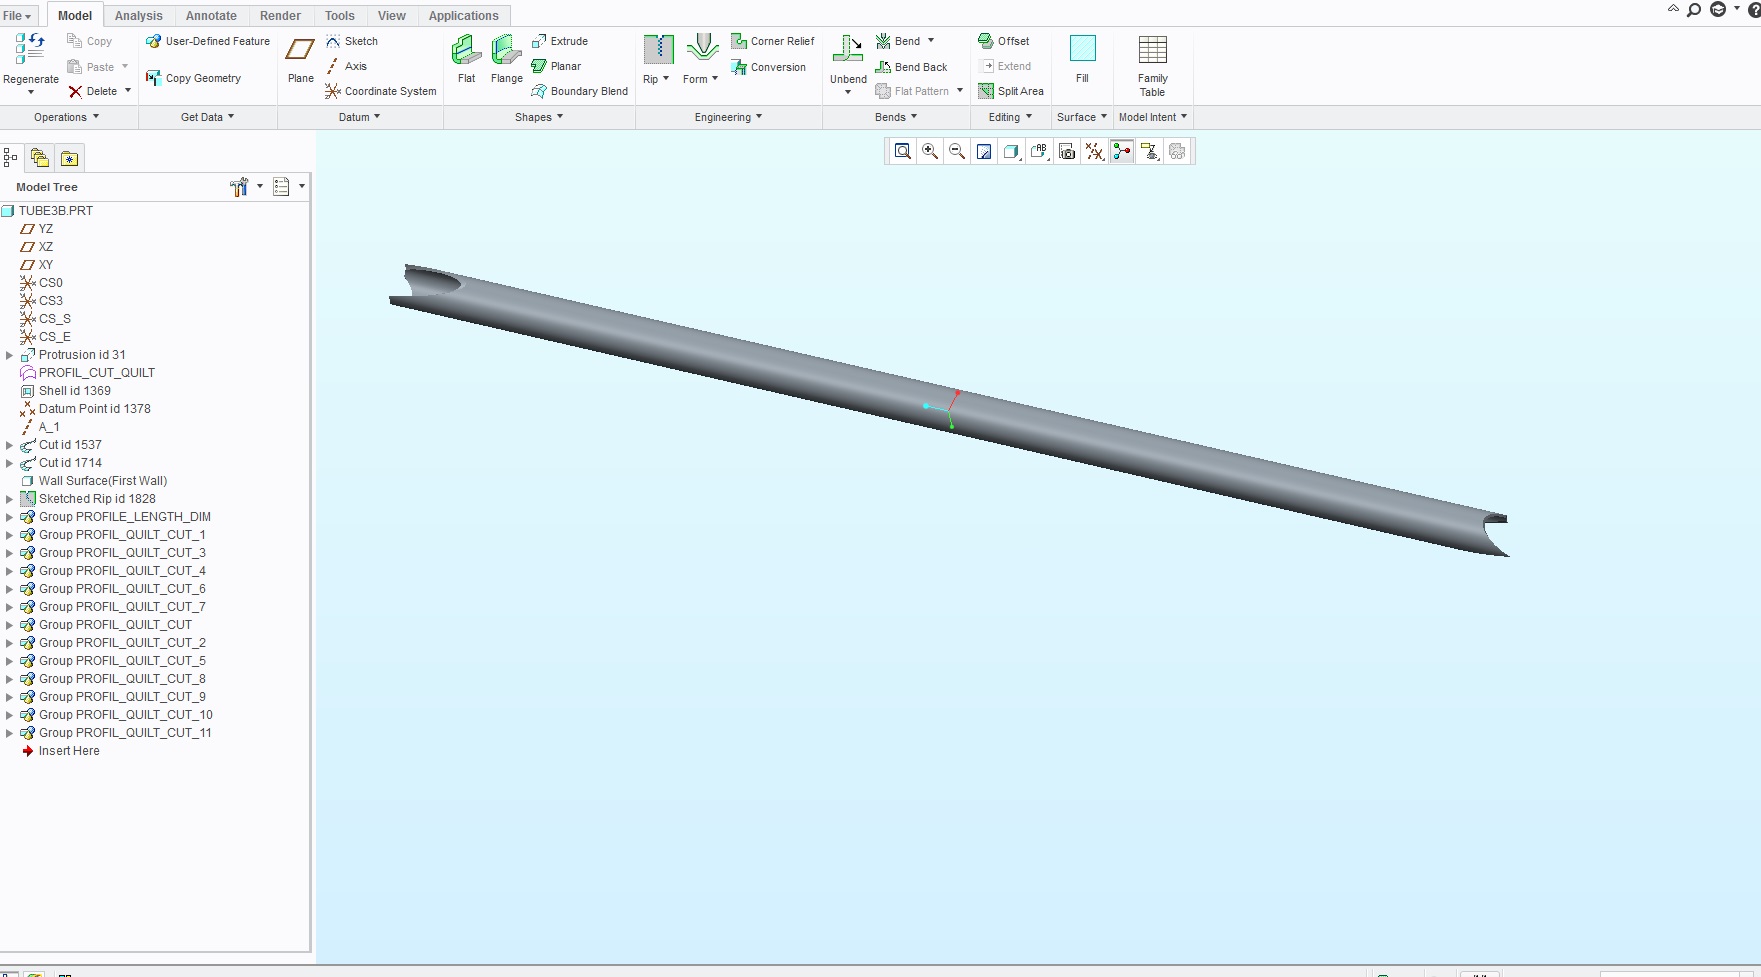
This works for the tube above but fails for the tube below. Flat does not regenerate when unsupressed.
1) rolled
2) Failure to unroll
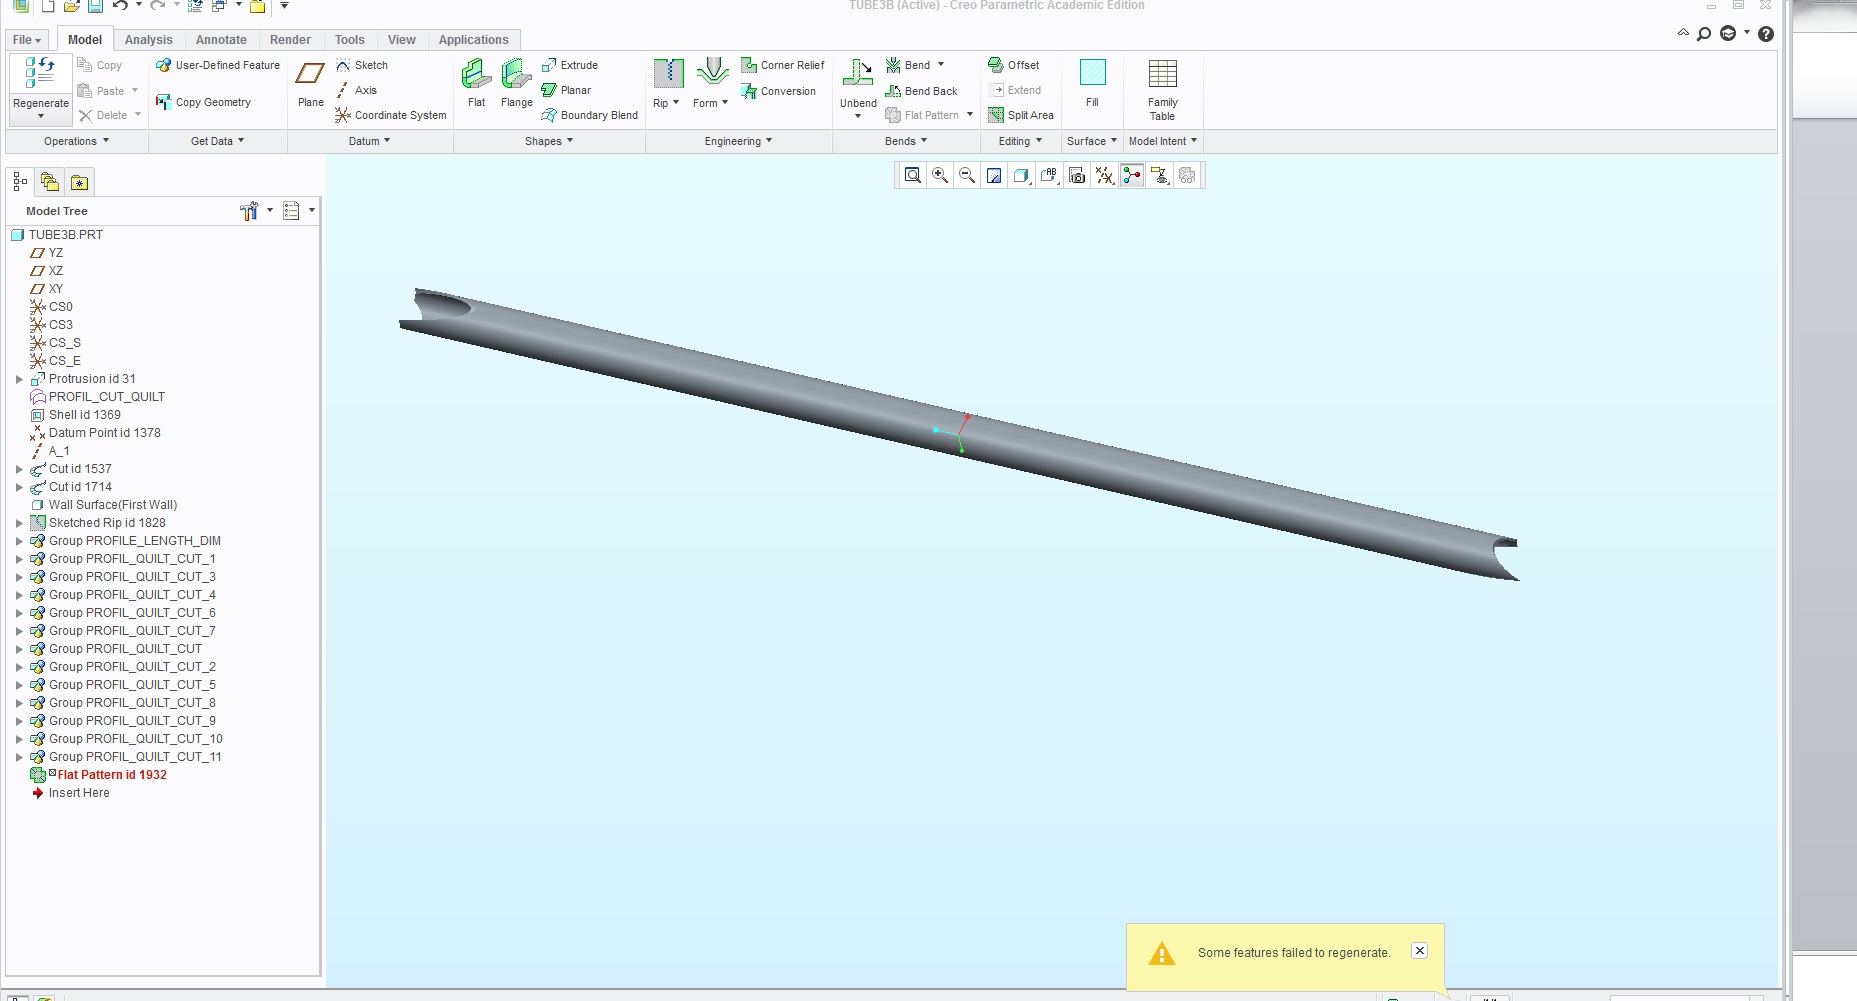
So the question stands What would allow one tube to display the flat when unsupressed but cause the flat to fail when unsupressed for another. Both of the tubes have multiple profile cutouts in each end. Looking to resolve this as soon as possible.
Thank You
Hafeez
This thread is inactive and closed by the PTC Community Management Team. If you would like to provide a reply and re-open this thread, please notify the moderator and reference the thread. You may also use "Start a topic" button to ask a new question. Please be sure to include what version of the PTC product you are using so another community member knowledgeable about your version may be able to assist.
- Labels:
-
(AFX)Struct_Framework
- Mark as New
- Bookmark
- Subscribe
- Mute
- Subscribe to RSS Feed
- Permalink
- Notify Moderator
Flat patterns can be very fussy. You need to go in and redefine the flat pattern and see if you can find the error.
I tend to use the bend and bend back more often for simple operations such as this.
- Mark as New
- Bookmark
- Subscribe
- Mute
- Subscribe to RSS Feed
- Permalink
- Notify Moderator
I haven't been able to do any of this properly. I can't bend back any of the tubes (ones where the unsupressed flat pattern regenerated and ones where it didn't). Also I can't get sketched rips to work on any of the tubes, including the ones where the flat pattern already exist. To do a sketched rip you just sketch a line along the outside of the tube if i'm not mistaken? Are their any video tutorials on this?
- Mark as New
- Bookmark
- Subscribe
- Mute
- Subscribe to RSS Feed
- Permalink
- Notify Moderator
That is my experience as well, Hafeez. I find it absolutely frustrating to try to use the advanced features where rip rarely does what I want it to do. However, some people can really shine with the package because they have learned exactly what to do and what order to do them in. I have gotten better, but I reserve sheetmetal for only simple fabrications.
I am going to suggest you want to start your tubes from a revolve (1st feature) that you know you can "unbend". Next "bend back" and create your cuts. Be very aware on which side you want the feature to intersect and be consistent. As you you add new cuts, be sure to test the Unbend just on a temporary basis by deleting or undo-ing the feature. As long as it will unbend, it should be able to flat pattern as well. You might have to turn off the bend relief features in the options dialog.
Are you actually forming the tubes and welding the seams or is there another reason you want to see the flat pattern?
- Mark as New
- Bookmark
- Subscribe
- Mute
- Subscribe to RSS Feed
- Permalink
- Notify Moderator
When I look back at your first images, you are revolving some of your cuts where the edge if the metal is not "square". This is a machining process that causes angled edges in the flat pattern.
Where and extrude cut takes forming into consideration
Therefore, you want to be very coginzant of the operation you ware planning to use. You may even need both operations to leave the additional material in case you need to machine features at the mill rather than the flat fabrication.
As for ripping a seam in the 1st feature (revolve), the sketched rip goes long the thickness of the material (intuative, huh!)...
So the unbend as the next feature is of the basic raw material. I turned off the relief option.
I can test the unbend at any point:
- Mark as New
- Bookmark
- Subscribe
- Mute
- Subscribe to RSS Feed
- Permalink
- Notify Moderator
Hi Antonius. I suspect you have all the answers and that I'm just not being explicit enough in explaining why we're using this.
We're building a chassis for a student electric vehicle deisgn competition. Creo touted the framework tool as something that could be very useful for rapid chassis prototype design. Instead of making sweeps, revolves etc, we just had to select a tube profile and the two points in the frame that we wanted to draw a tube between. Modeling the frame has now become as simple as point and click. However you can only select from the given allotment of tube diameters and thicknesses found in Creo. If the pipe you want isn't there, your almost out of luck. There are 2 options from there. 1) go into creo files and edit the related files so your tube dimensions (diameter and thickness) appear in Creo or just use a sheetmetal pipe which allows you to manually enter outer diameter and thickness. We chose this second method which is why sheetmetal is involved
The result was this (ignore the flattened tubes -more on that below)
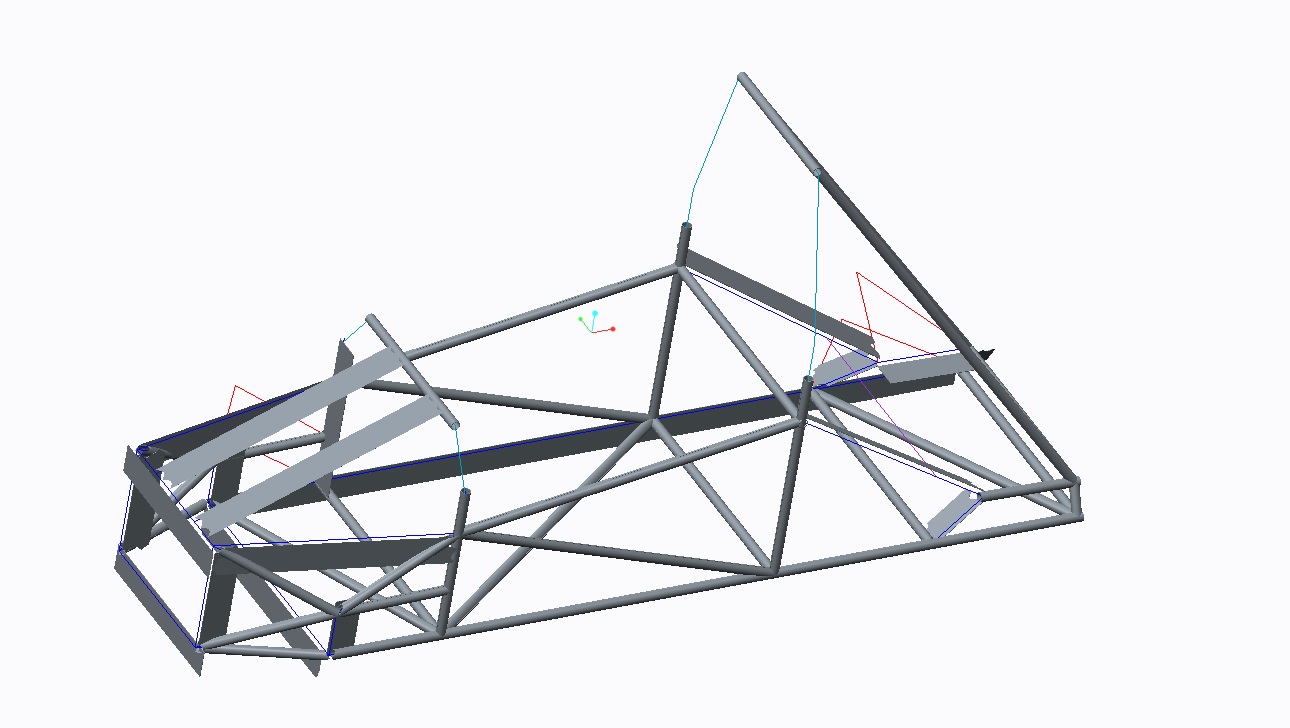
Now once all the tubes are created, we use the profile cutout feature to make cutouts in the tube such as is neccesary for them to be joined in the real world. The reason we turn everything into a flat is because that's related to how we will prepare the tube to be welded. We unsupress the existing flat pattern (which doesn't always work) and this makea 1:1 scale drawing as such.
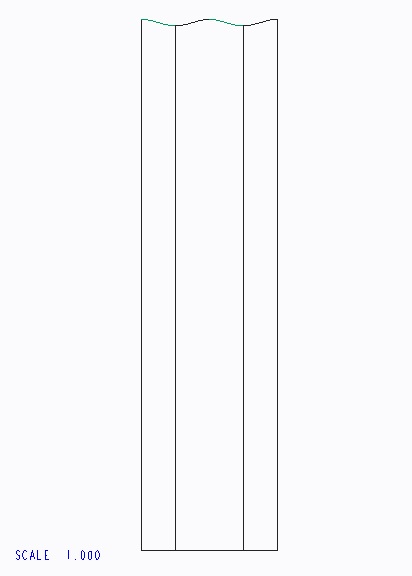
This is printed on regular paper and wrapped around the real tube. Then we use verious machining methods to make the end profile of the tube match the paper cutout that was wrapped around it. IF we did this for all tubes. We could dry fit all the tubes together and it would be a perfect fit. The problem like you mentioned is with unwrapping/unrolling/flattening the sheet metal tube. In that picture of the chassis I included above you can see all the flattened tubes (regenerated) and all of the regular tubes (flat did not regenerate).
- Mark as New
- Bookmark
- Subscribe
- Mute
- Subscribe to RSS Feed
- Permalink
- Notify Moderator
Thank you for the detailed explanation, Hafeez. Now I understand what you are dealing with. This is certainly not something PTC would have considered in making the framework extension.
I am certain there are work-arounds that would help make unfoldable patterns. Have you looked into merge functions? Scribing edges (curves) onto full tubes that -do- unfold?
One thing I can see as being problematic. You are wrapping the full OD of the tube while the sheet metal package takes into account the k-factor (stretch and crush.). I may suggest looking into offsetting the outer face (by 0) and flattening the quilt as an alternative. This may be more accurate unless you have already dealt with this in the k-factor settings.
To flatten quilt, you need to convert to a part (operations>convert to part)...
Select the surface of 1/2 the tube and use offset (surface) by zero. Do the same to the other side 1/2 of the tube.
Next place datum popints at the end of the surface. The use the Flatten Quilt feature under surfaces. You select one surface and then select the point. ON approving the feature, it should create a flat surface of the wrapped surface. Repeat for the other half.
- Mark as New
- Bookmark
- Subscribe
- Mute
- Subscribe to RSS Feed
- Permalink
- Notify Moderator
If it could flatten as sheet metal, changing the k-factor to 0 would move the neutral plane to the green surface. That should be on the outside. If it isn't then change it to 1.
.
- Mark as New
- Bookmark
- Subscribe
- Mute
- Subscribe to RSS Feed
- Permalink
- Notify Moderator
It might be worthwhile to look into Pepakura Designer.
"Pepakura Designer 3 is a shareware product. The fee for a license keycode is US$38.
The save and export functions are disabled until you enter the keycode. All other functions work without limitation in the shareware version. If you enjoy Pepakura Designer and want to use it to its fullest extent, please buy a license keycode once you have confirmed that Pepakura Designer runs on your PC without any trouble."
I also keep thinking about somehow using field points - put a circle around the tube, create a dimension along the tube to the tube end, and use that to generate a field point that could produce a graph to drive a 2D curve. But I think there are some disconnects in doing that - for example, how can field point data be used as a graph basis? So it's back to suggesting Pepakura Designer, which has as it's only purpose, to flatten things.
- Mark as New
- Bookmark
- Subscribe
- Mute
- Subscribe to RSS Feed
- Permalink
- Notify Moderator
Try changing the part accuracy, possibly to absolute accuracy so that it matches across all the parts in the assembly.
- Mark as New
- Bookmark
- Subscribe
- Mute
- Subscribe to RSS Feed
- Permalink
- Notify Moderator
You can add custom profiles to AFX by following this. I did this to add lumber to mine so i could build a reloading workbench.
Title | How to add custom profile / beams to Expert Framework Extension (EFX) |
Description |
|
Applies To |
|
Cause | |
Resolution | Currently this procedure supports for straight beams only.
User can rename the custom_start_beam to your custom directory, make a .gif picture which shows the beam-x-section, copy and rename the file custom_start_beam.txt file if the beam has different sizes copy and modify sel_list.txt.
|


