- Community
- Creo+ and Creo Parametric
- 3D Part & Assembly Design
- Did You Know? Filling Loops on a Part Mold
- Subscribe to RSS Feed
- Mark Topic as New
- Mark Topic as Read
- Float this Topic for Current User
- Bookmark
- Subscribe
- Mute
- Printer Friendly Page
Did You Know? Filling Loops on a Part Mold
- Mark as New
- Bookmark
- Subscribe
- Mute
- Subscribe to RSS Feed
- Permalink
- Notify Moderator
Did You Know? Filling Loops on a Part Mold
If you’re working with a reference part in mold assembly that contains holes, you need to cap them before you split the mold.
In this post, a PTC expert describes how to cap the holes in Creo 3.0.
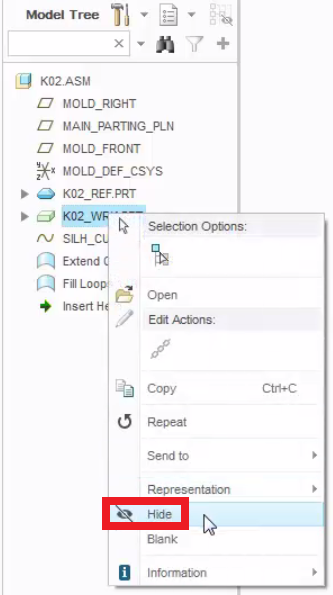
First, hide the workpiece so you can collect surfaces on the reference part efficiently. To do this, in the Model Tree, right-click the workpiece and from the pop-up menu, click Hide.

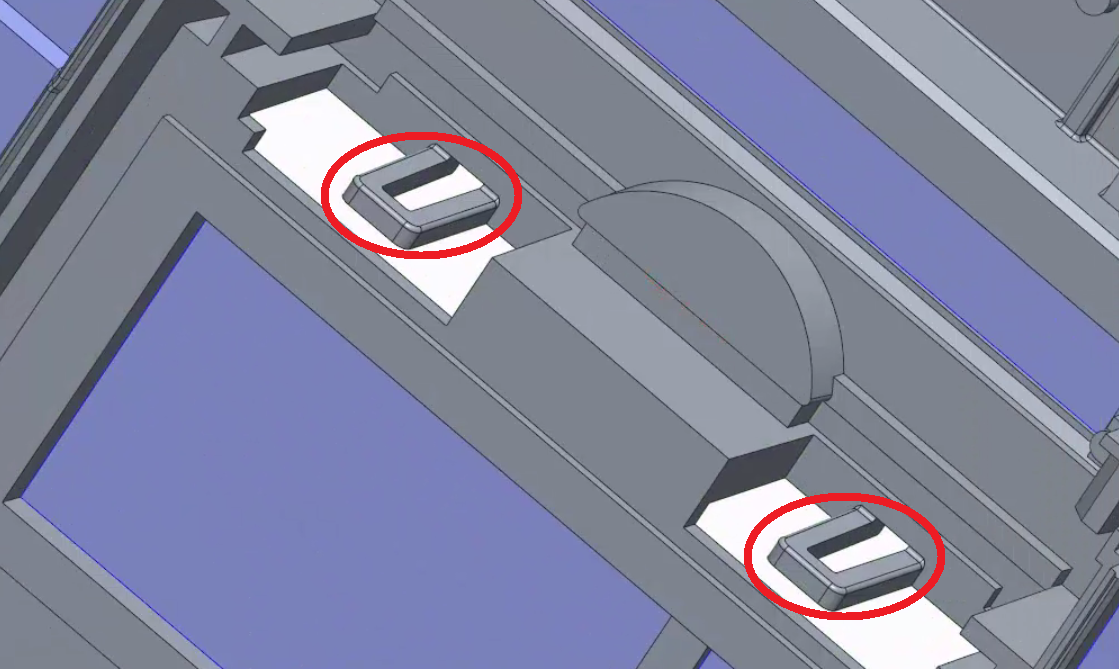
Next, on the reference part, locate the holes that need to be capped.

Image: The holes within the red circles need to be capped in order to split the mold.
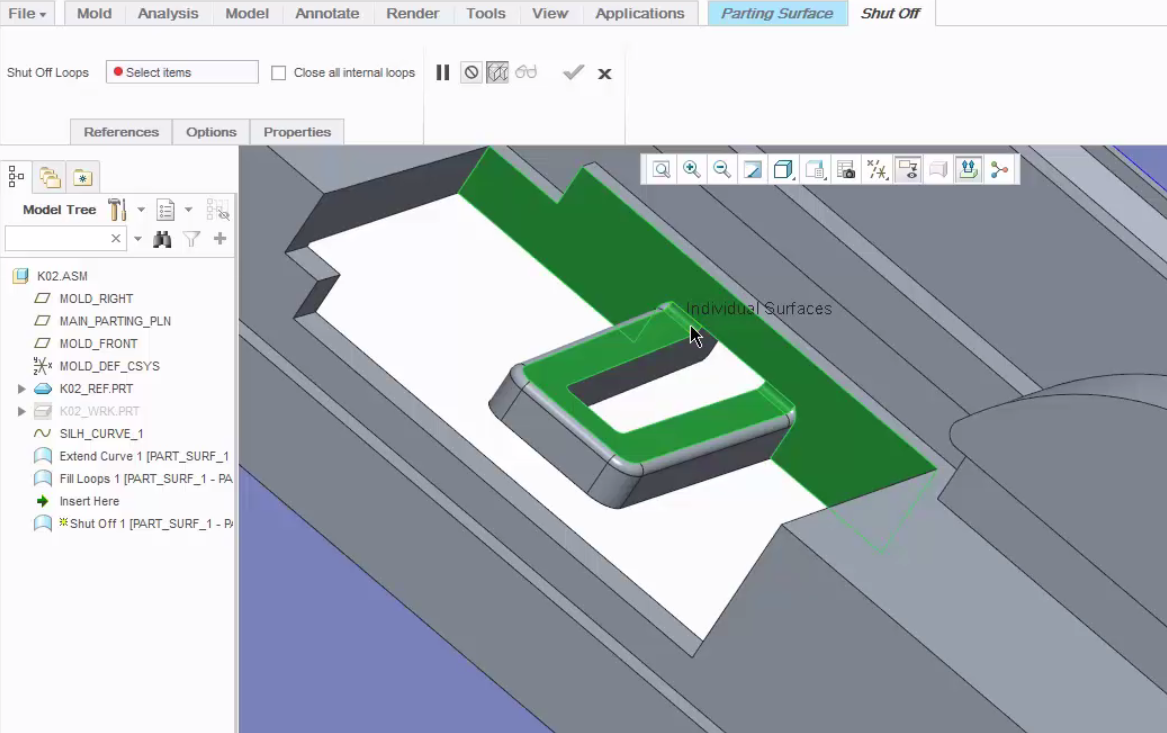
On the Parting Surface tab, click Shut Off. Then select individual surfaces around the hole(s).

Image: Select the surfaces around the hole.
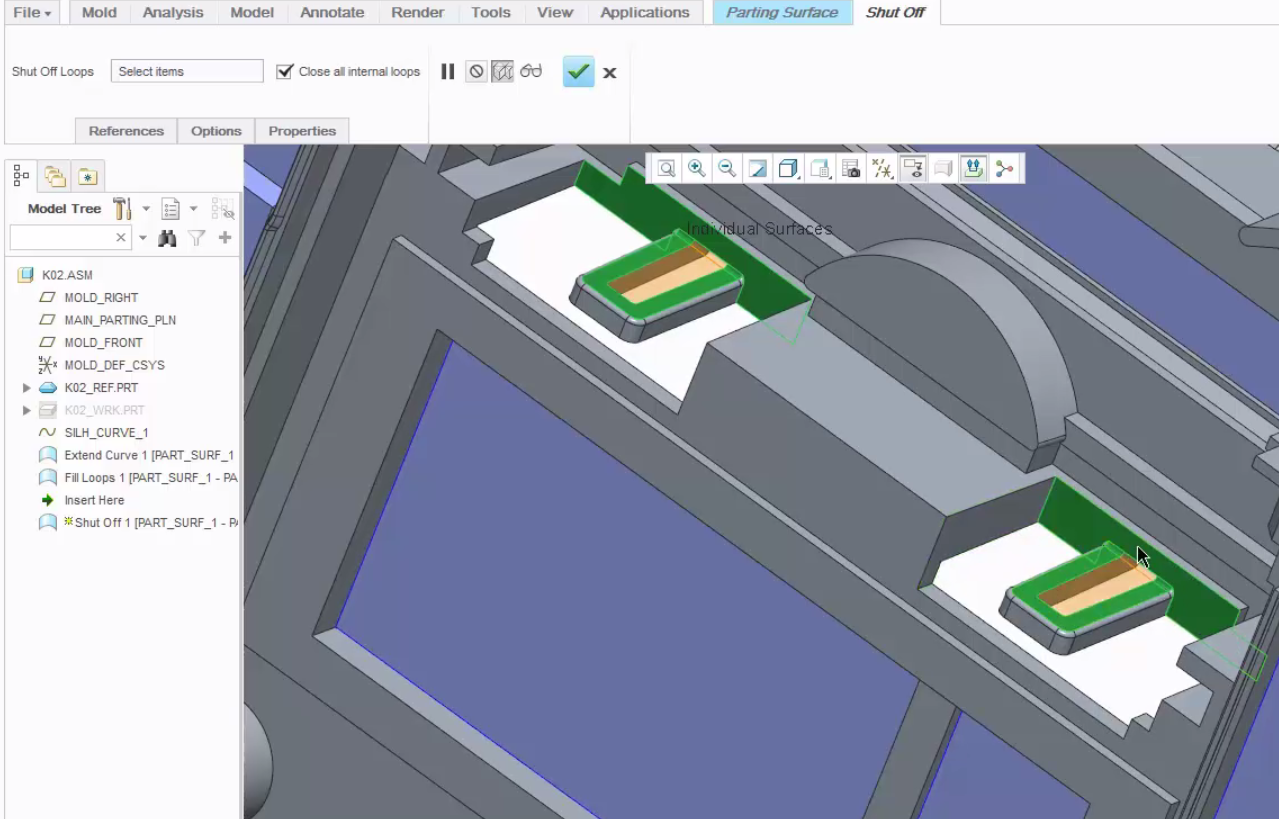
On the Shut Off menu bar, select the Close all internal loops check box. Then, click OK (check mark) to apply the changes.

Image: The holes are now capped (shown in orange).
To watch a demonstration of these steps, check out the video tutorial (“Parting surface – Shut Off”) on the PTC University Learning Exchange.
Stay tuned to our “Did You Know” blog series as we cover all of the exciting, new enhancements in PTC Creo 3.0.
Have some ideas about what PTC Creo product features you’d like to learn more about? Send me a message or leave a comment below and we’ll write up the best ideas from the community. Thanks for reading, looking forward to all of your feedback!
This thread is inactive and closed by the PTC Community Management Team. If you would like to provide a reply and re-open this thread, please notify the moderator and reference the thread. You may also use "Start a topic" button to ask a new question. Please be sure to include what version of the PTC product you are using so another community member knowledgeable about your version may be able to assist.
- Labels:
-
Surfacing


