Community Tip - Learn all about PTC Community Badges. Engage with PTC and see how many you can earn! X
- Community
- Creo+ and Creo Parametric
- 3D Part & Assembly Design
- Did You Know? PTC Creo 3.0 Enhancements: 3D Thickn...
- Subscribe to RSS Feed
- Mark Topic as New
- Mark Topic as Read
- Float this Topic for Current User
- Bookmark
- Subscribe
- Mute
- Printer Friendly Page
Did You Know? PTC Creo 3.0 Enhancements: 3D Thickness in PTC Creo Parametric
- Mark as New
- Bookmark
- Subscribe
- Mute
- Subscribe to RSS Feed
- Permalink
- Notify Moderator
Did You Know? PTC Creo 3.0 Enhancements: 3D Thickness in PTC Creo Parametric
It is now possible to perform a 3D thickness check in PTC Creo Parametric. Using this new function, designers can quickly determine the feasibility of a design before waiting for the design to be transferred to a Mold Design expert. In this post, Russell Hsu, Product Manager, will explain how to use this simple, time-saving feature.
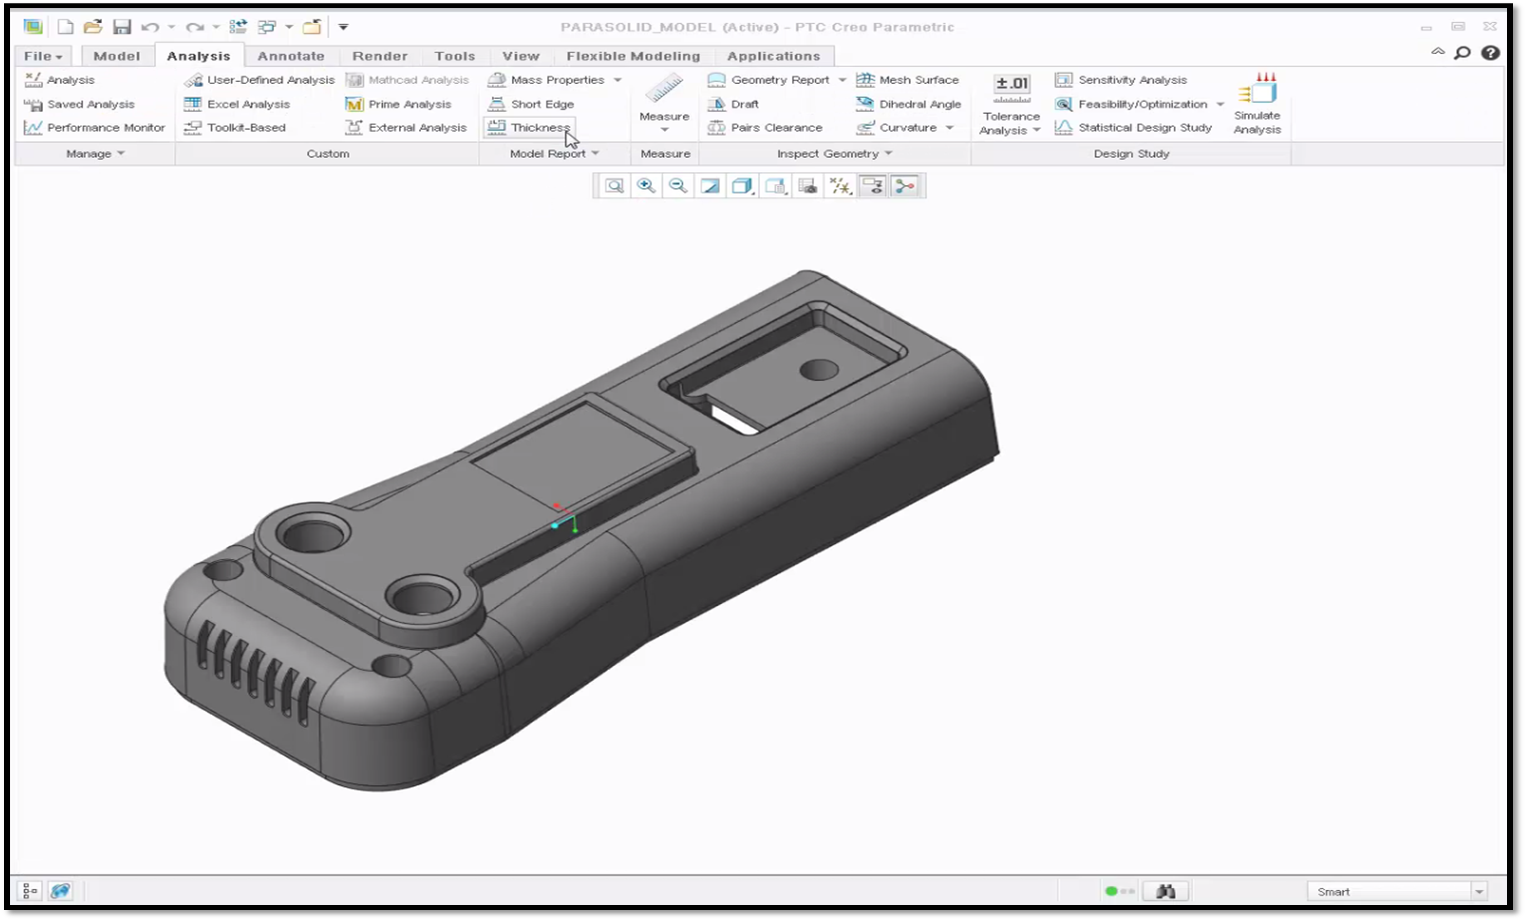
With PTC Creo Parametric, you can now build a 3D Thickness check directly into your design process. In a few simple steps, you can identify the areas on your model with critical thickness issues so that some necessary changes can be made before review. Simply open your model, navigate to the Analysis tab and select the Thickness function in the tool bar.

Select the Thickness feature located in the toolbar.
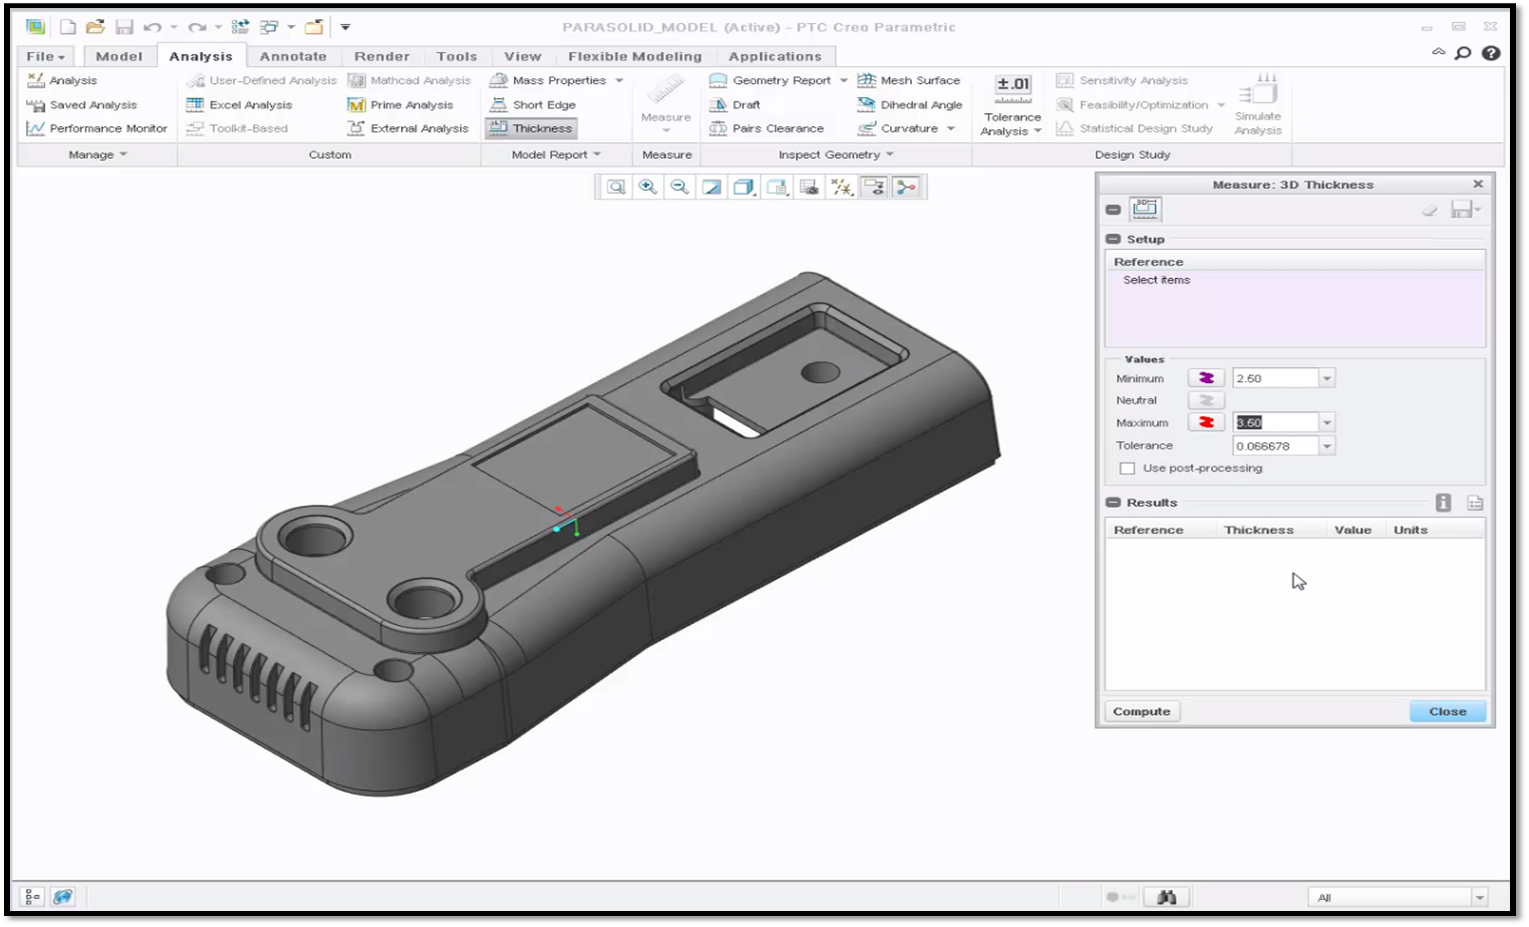
A separate window will open for you to enter the minimum thickness and maximum thickness for your model. The geometry is color coded based upon the minimum and maximum allowable thickness specified by the user. Click Compute to see where the thickness requirements are violated within the model.

Here, we assign minimum and maximum thickness values for our model.
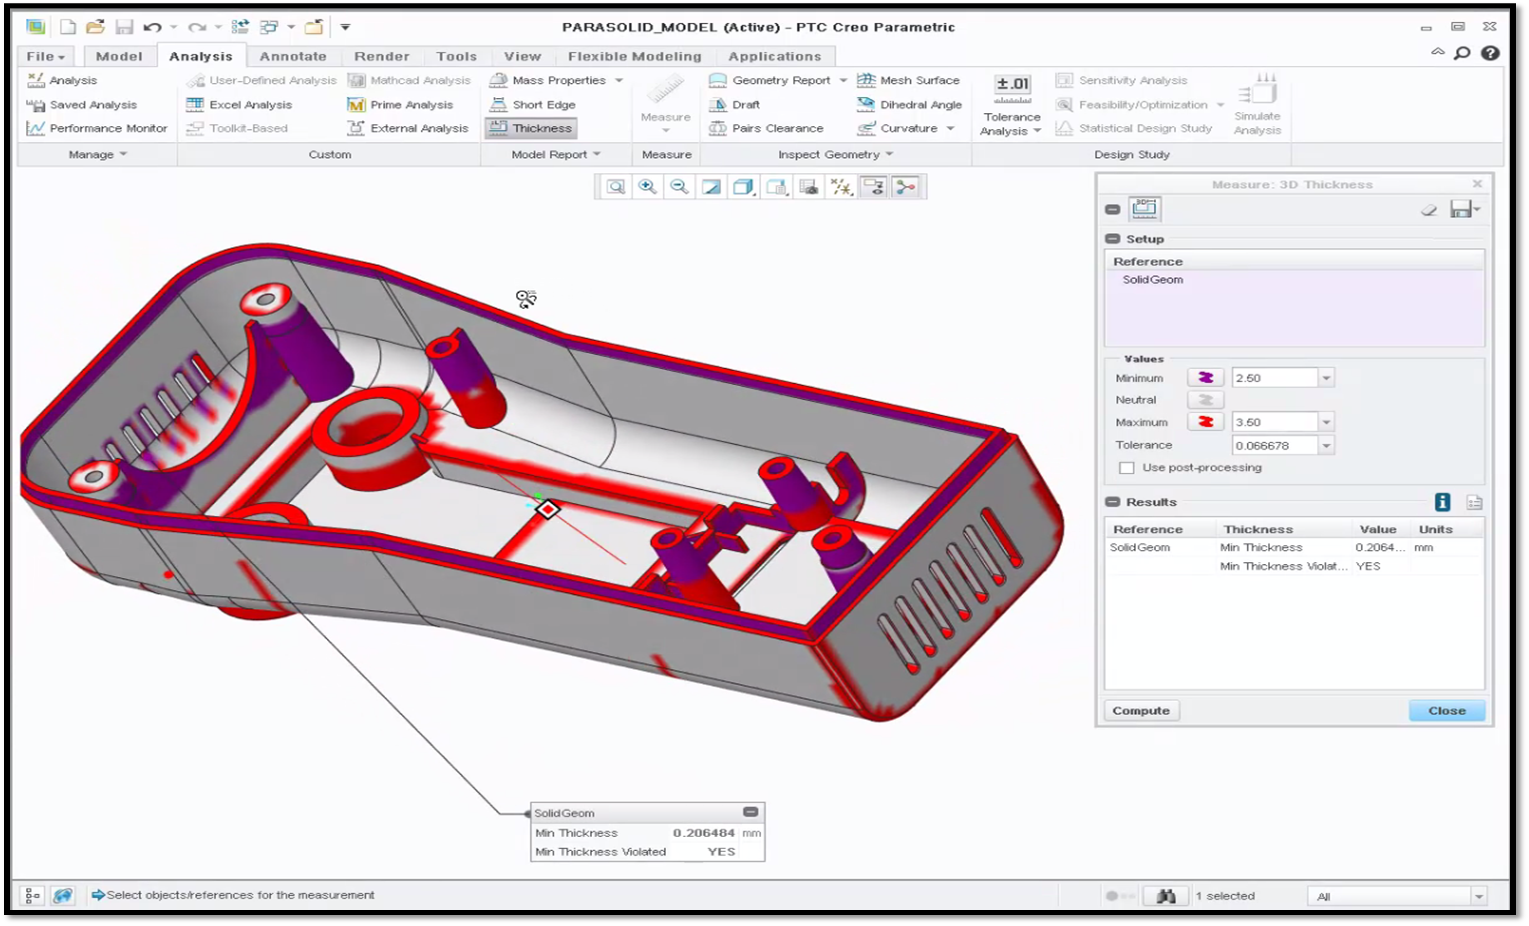
Notice that the areas where the thickness exceeds the minimum appear in purple, whereas the areas that exceed the maximum appear in red. The minimum thickness location is also displayed directly on the model. To see where other violations occur, simply rotate the model.

Rotating the model shows where the minimum and maximum thickness values were violated within the interior of the model.
To learn more about the library of new realistic materials, check out our video tutorial on the PTC Creo University Learning Exchange (“Check for 3D Thickness”).
Stay tuned to our “Did You Know” blog series as we cover all of the exciting, new enhancements in PTC Creo 3.0.
For more in-depth product feature explanations, visit our Tech Tips area.
Have some ideas about what PTC Creo product features you’d like to learn more about? Send me a message or leave a comment below and we’ll write up the best ideas from the community. Thanks for reading, looking forward to all of your feedback!
In case you missed it, check out our recent Did You Know posts covering PTC Creo 3.0 enhancements:
1) Did You Know? PTC Creo 3.0 Enhancements: Graphical Realism – Realistic Bump Mapping
2) Did You Know? New Engineering Notebook in PTC Creo, Powered by PTC Mathcad
3) PTC Creo 3.0 Enhancements: Graphical Realism - Realistic Appearances
This thread is inactive and closed by the PTC Community Management Team. If you would like to provide a reply and re-open this thread, please notify the moderator and reference the thread. You may also use "Start a topic" button to ask a new question. Please be sure to include what version of the PTC product you are using so another community member knowledgeable about your version may be able to assist.
- Labels:
-
General
- Mark as New
- Bookmark
- Subscribe
- Mute
- Subscribe to RSS Feed
- Permalink
- Notify Moderator
HI Brianna,
May I ask what the "enhancement" is with this functionality? Thickness check has been in the software since about Rev 12. Is it that the surfaces highlight?
Dean
- Mark as New
- Bookmark
- Subscribe
- Mute
- Subscribe to RSS Feed
- Permalink
- Notify Moderator
It is presented as new functionality, when it really isn't, like you said, However, this does look like at least a new thickness UI. I never really understood the old "from slices" / "to slices" workflow of the old one, and therefore never used it. This one looks more intuitive, but that judgement will have to wait until we are able to install Creo 3.
- Mark as New
- Bookmark
- Subscribe
- Mute
- Subscribe to RSS Feed
- Permalink
- Notify Moderator
3D Thickness is a new feature in Creo 3.0. It's not UI change of the existing one. The old Thickness check has been renamed Section Thickness and moved to dropdown menu under Model Report.


