Community Tip - Did you know you can set a signature that will be added to all your posts? Set it here! X
- Community
- Creo+ and Creo Parametric
- 3D Part & Assembly Design
- Did You Know? PTC Creo 3.0 Enhancements: Graphical...
- Subscribe to RSS Feed
- Mark Topic as New
- Mark Topic as Read
- Float this Topic for Current User
- Bookmark
- Subscribe
- Mute
- Printer Friendly Page
Did You Know? PTC Creo 3.0 Enhancements: Graphical Realism – Realistic Bump Mapping
- Mark as New
- Bookmark
- Subscribe
- Mute
- Subscribe to RSS Feed
- Permalink
- Notify Moderator
Did You Know? PTC Creo 3.0 Enhancements: Graphical Realism – Realistic Bump Mapping
PTC Creo 3.0 features significant improvements in graphical performance and capabilities. In our previous posts, we covered the new support for HDR images and realistic appearances. Today we will explore another exciting feature: realistic bump mapping. Paul Sagar, Director of Product Management, explains how to add a realistic look to your model using bump mapping in Shading with Reflection mode:
With PTC Creo 3.0 you can combine shading and reflections with detailed textures to make your model more realistic. When applying texture maps as a bump map you can see and control the result in the graphics area in real time. By beginning in Shading with Reflection mode you can visualize the effect of procedural bump maps such as Rough or Cast. You can then apply realistic textures and bump maps to the geometry. Begin by opening the model and assigning an appearance to it. Select the Render tab, open the Appearance Gallery, and select your appearance from the Library.
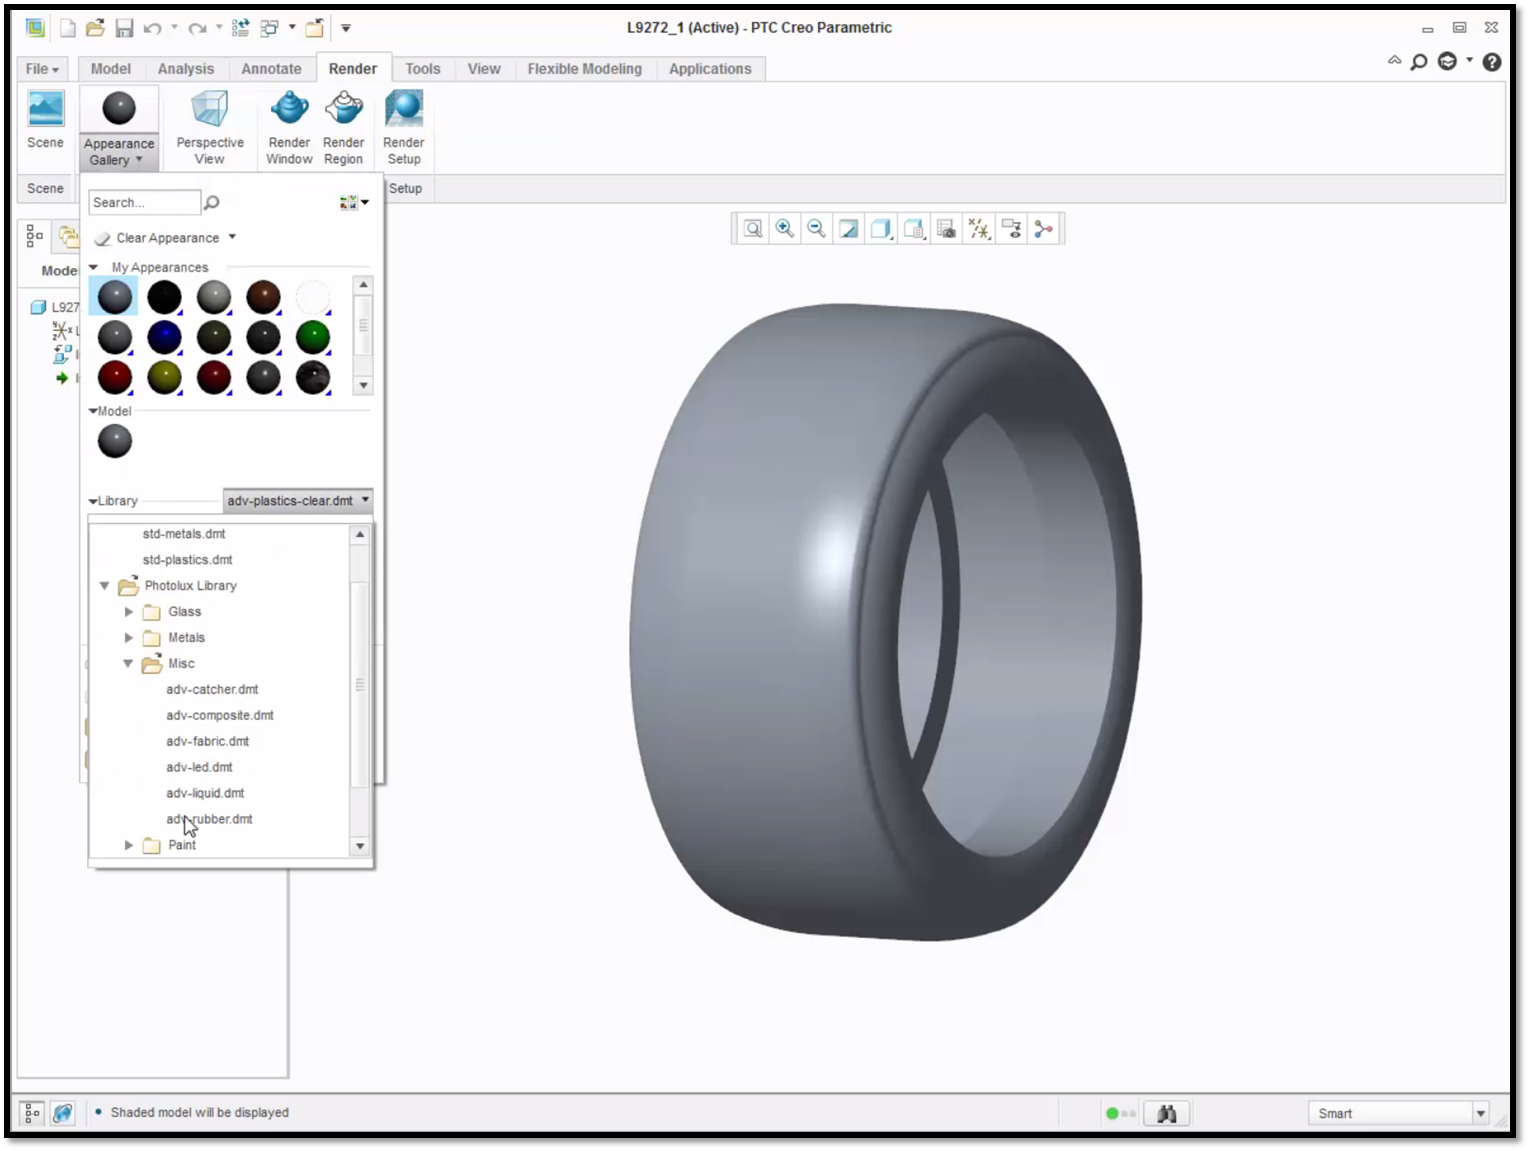
In this example, we applied the appearance of rubber for the tire.
Next, assign a new appearance with a texture map to the selected surfaces of your model. Select the Render tab, open the Model, and assign a New appearance to the selected surfaces using the Appearance Editor.
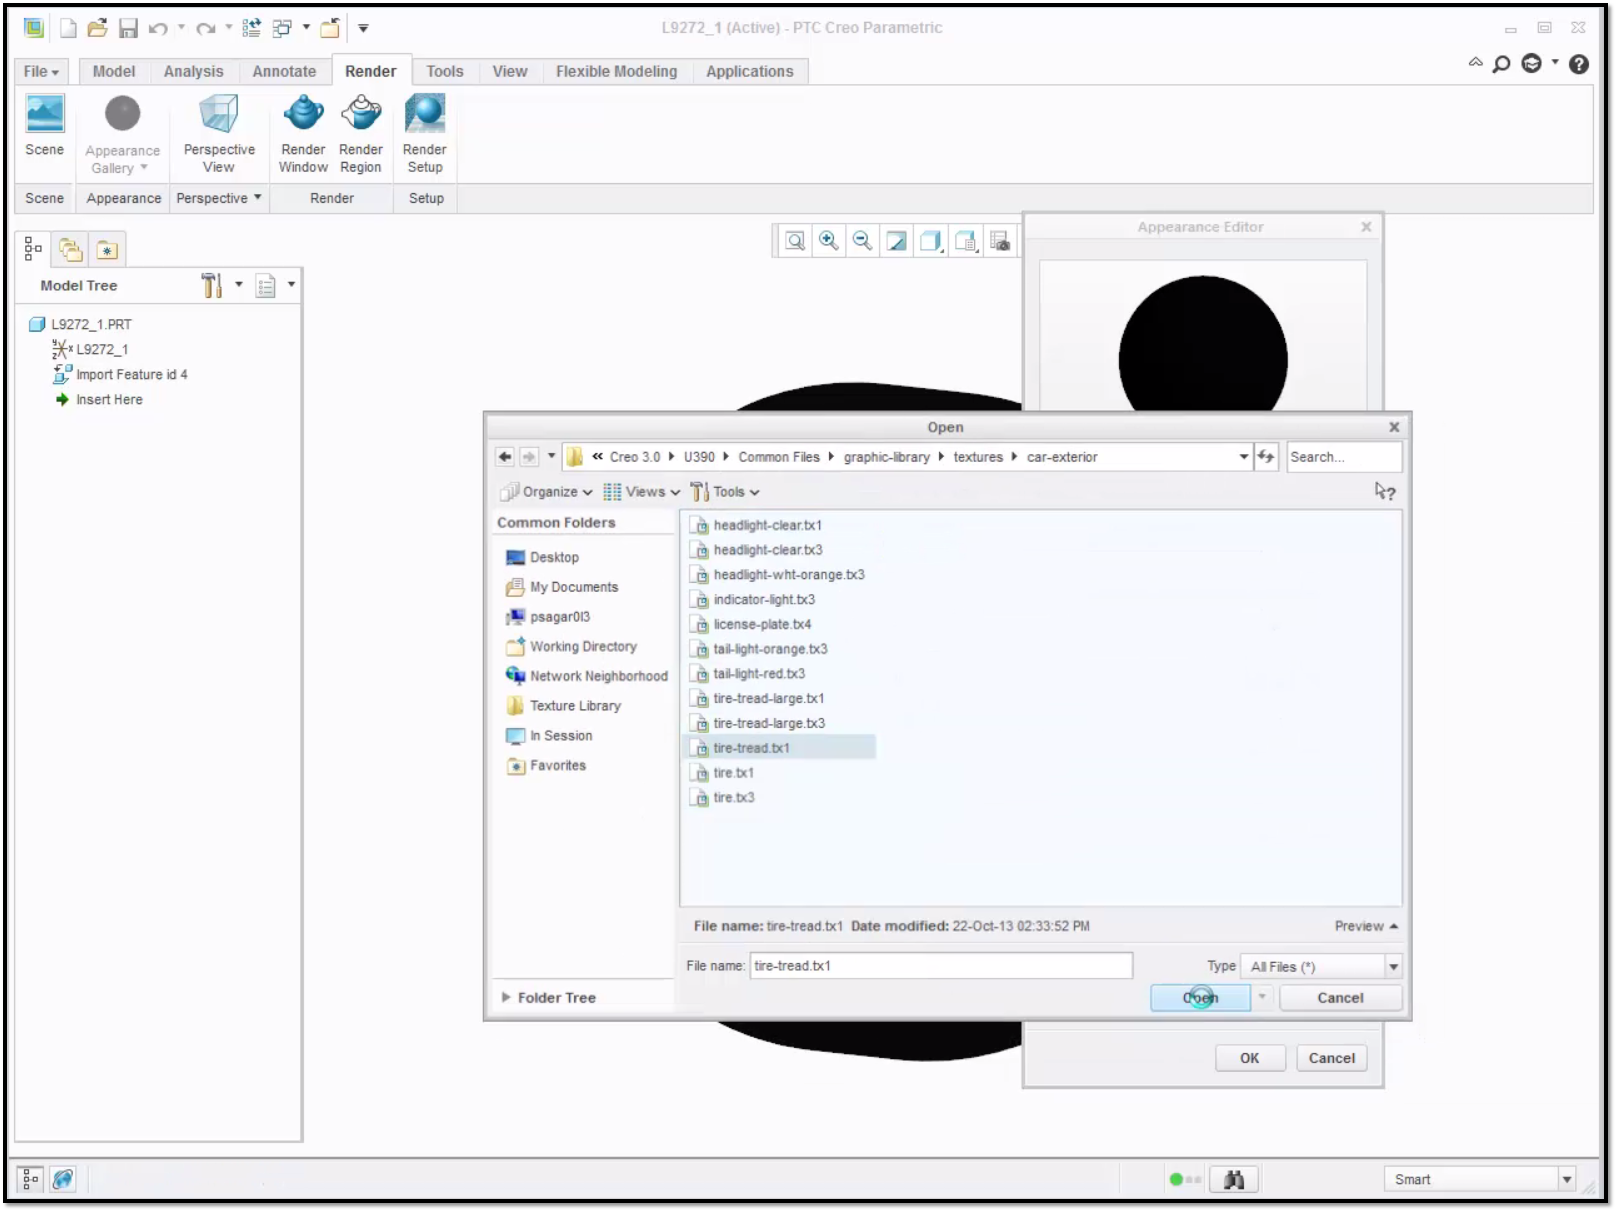
Here we assign a new appearance with a texture map of a tire tread to the selected surfaces of the tire.
You can make adjustments to the bump map that are visible on the model, such as changing the scale, mapping type, and height.
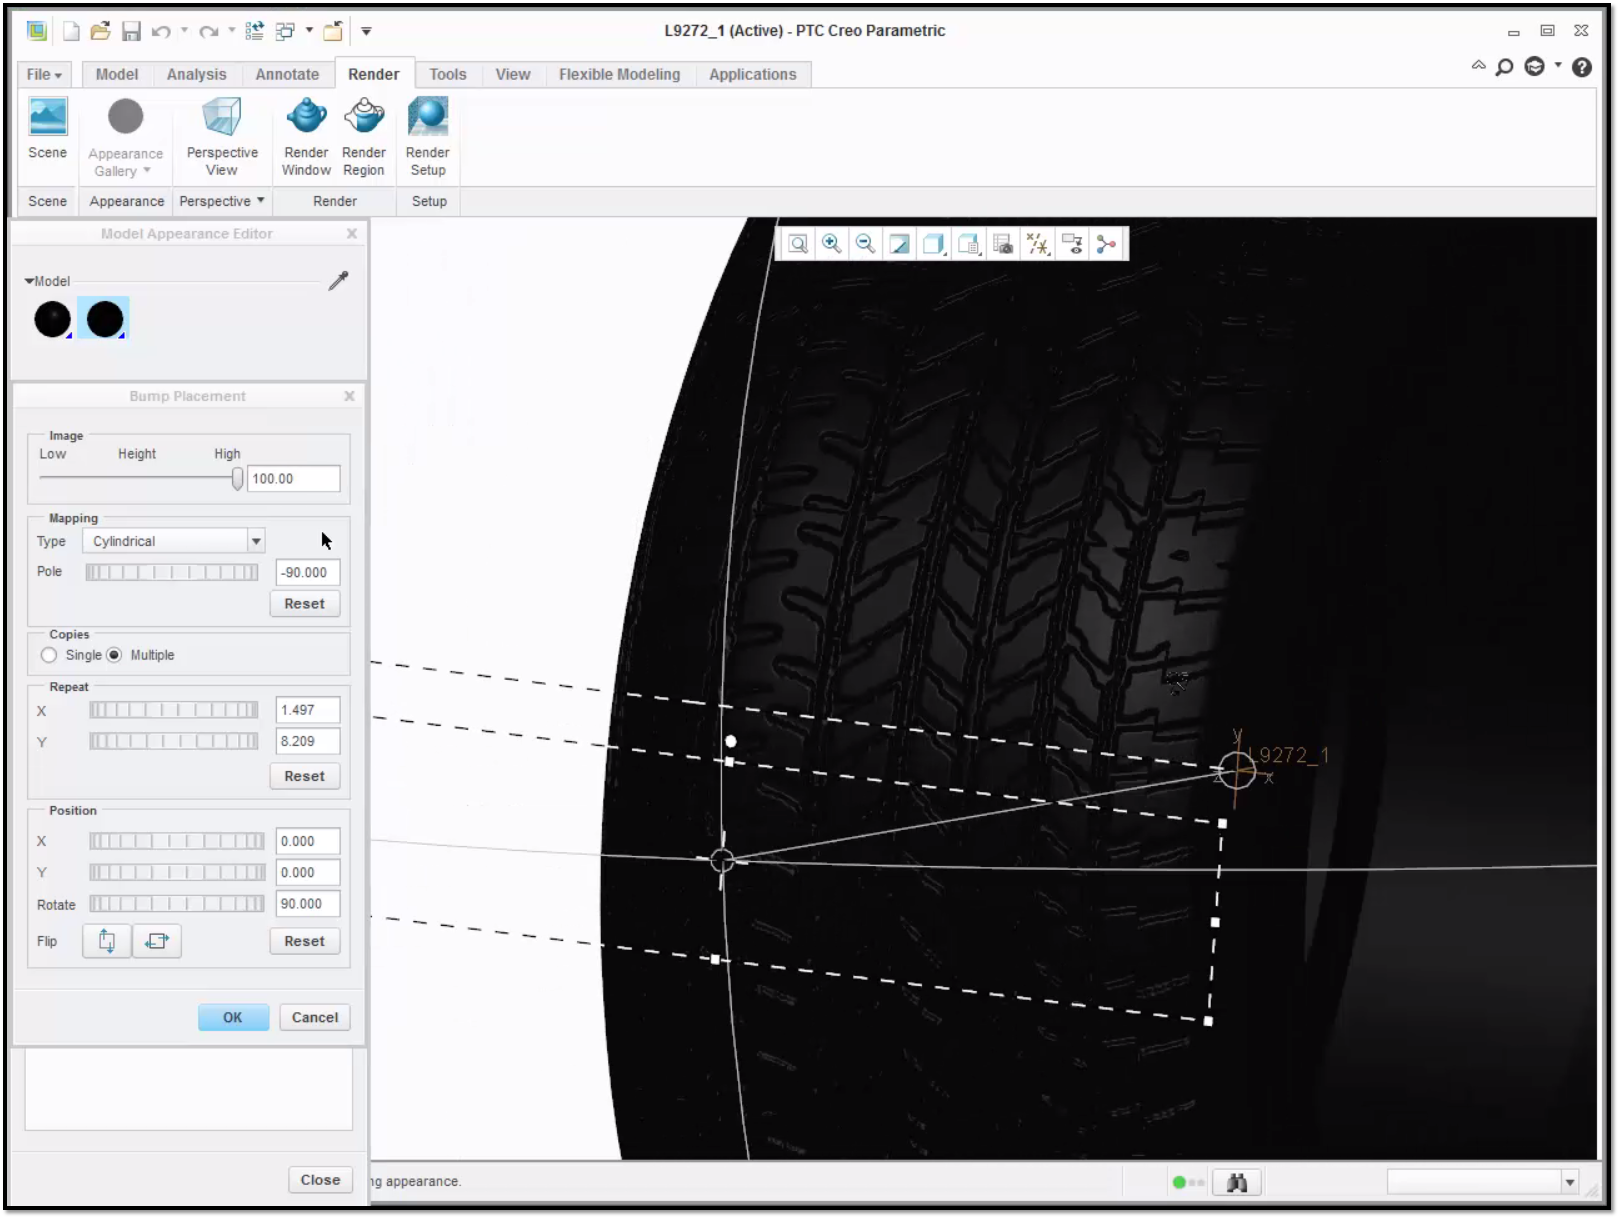
In this model the mapping type was changed to cylindrical mapping.
In the assembly you will see the model with the realistic bump mapping. If you select View, Shading with Reflections you see the model with the reflections.
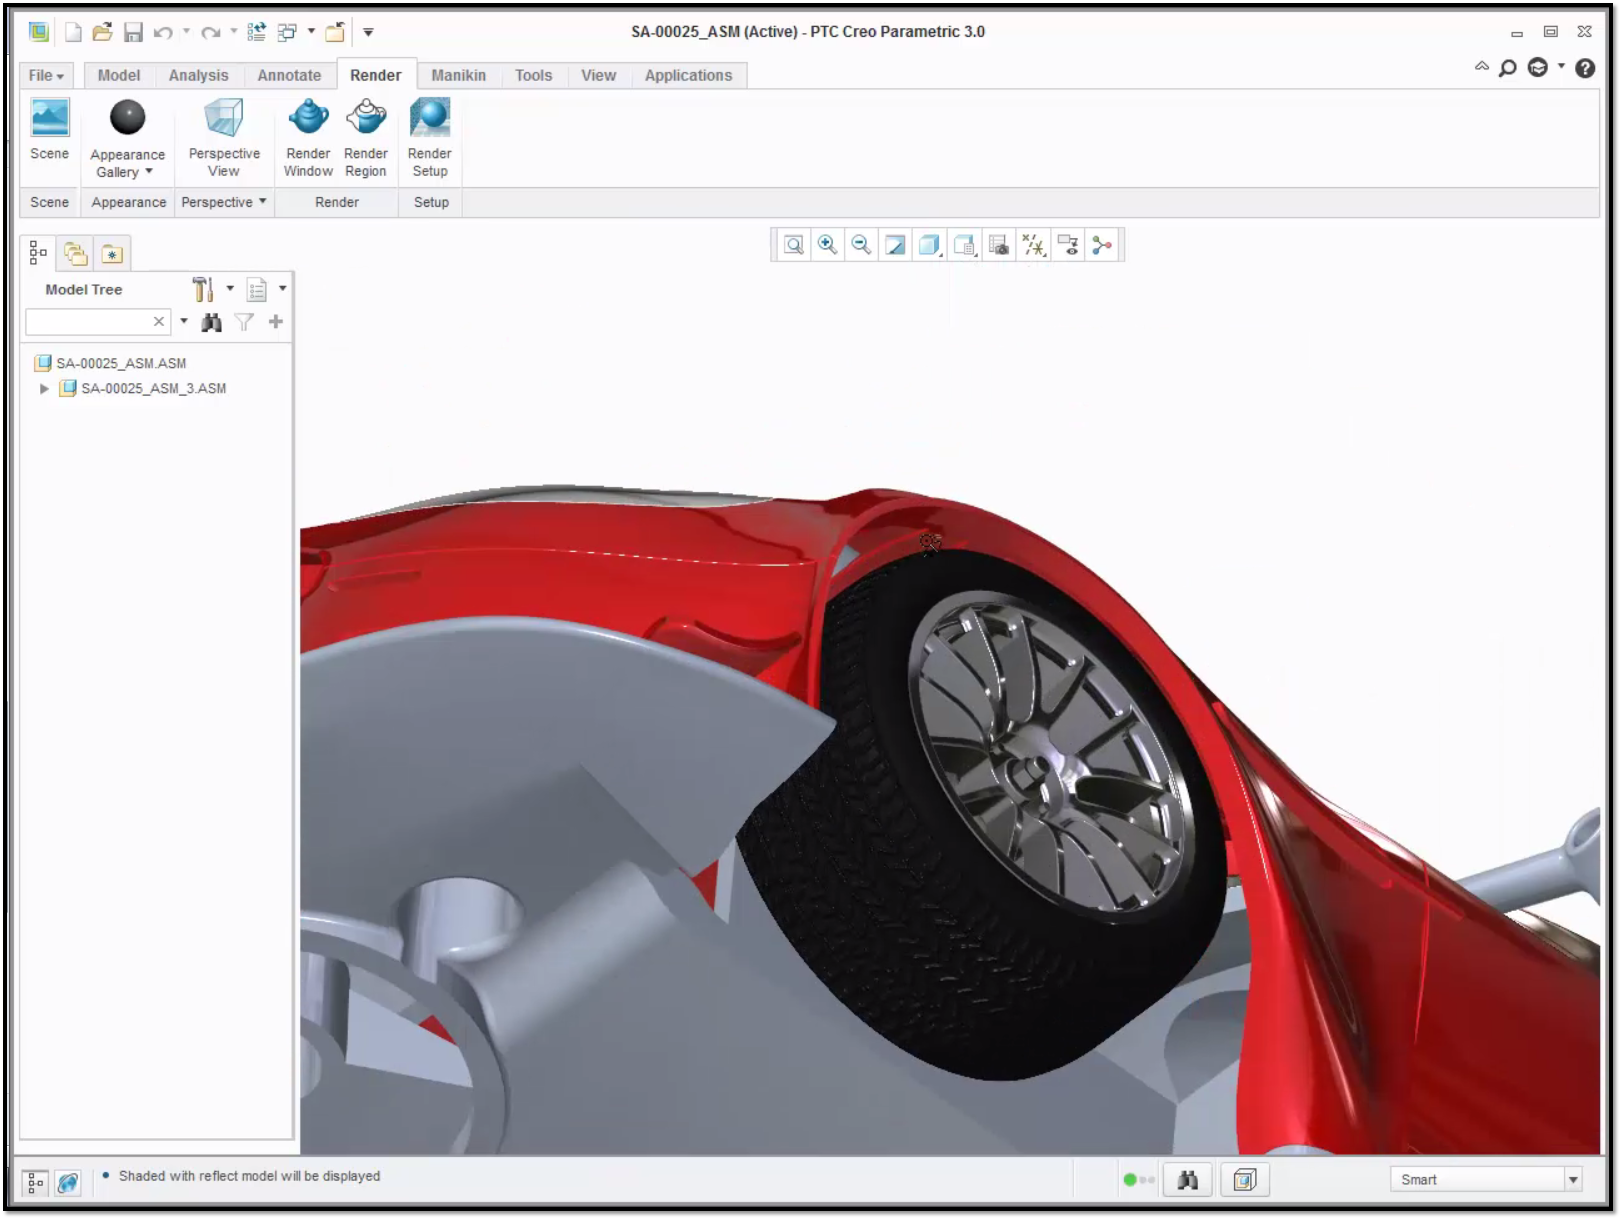
Here you can see the tire and the tread with reflections.
In addition to bump maps, you can also, alter the model by adding a rough procedural bump. Simply change the scale and size of the bump using the Model Appearance Editor to see the appearance on the model.

In this example you can see where a rough procedural bump added texture to the car body.
To learn more about the library of new realistic materials, check out our video tutorial on the PTC Creo University Learning Exchange (“Realistic Bump Mapping”)
Stay tuned to our “Did You Know” blog series as we cover all of the exciting, new enhancements in PTC Creo 3.0.
For more in-depth product feature explanations, visit our Tech Tips area.
Have some ideas about what PTC Creo product features you’d like to learn more about? Send me a message or leave a comment below and we’ll write up the best ideas from the community. Thanks for reading, looking forward to all of your feedback!
In case you missed it, check out our recent Did You Know posts covering PTC Creo 3.0 enhancements:
- Did You Know? New Engineering Notebook in PTC Creo, Powered by PTC Mathcad
- PTC Creo 3.0 Enhancements: Graphical Realism - Realistic Appearances
- PTC Creo 3.0 Enhancements: Graphical Realism – HDR Images
This thread is inactive and closed by the PTC Community Management Team. If you would like to provide a reply and re-open this thread, please notify the moderator and reference the thread. You may also use "Start a topic" button to ask a new question. Please be sure to include what version of the PTC product you are using so another community member knowledgeable about your version may be able to assist.
- Labels:
-
General
- Mark as New
- Bookmark
- Subscribe
- Mute
- Subscribe to RSS Feed
- Permalink
- Notify Moderator
hmm, i ask myself where is the option to open the bump placement?
when i rotate my model in the viewer, the bump behaves not right.
- Mark as New
- Bookmark
- Subscribe
- Mute
- Subscribe to RSS Feed
- Permalink
- Notify Moderator
Hi Heiko,
There are 3 main types of bump maps.
- Image – here you can choose an image and then define the exact placement and projection method, parametric, cylindrical, spherical or planar
- Rough, Cast, Cellular – We supply presets bump maps for rough, cast and cellular. These are calculated in 3D space and therefore have and need limited controls. You have the capability to alter the bump height, scale and rotate only
- Procedural image – this bump map is based upon view projection and therefore will change as you rotate the image, again there are controls to rotate and scale the image
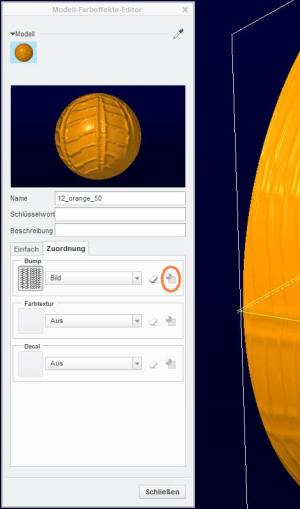
For image based bump and textures you can alter the projection and access the controls. To do this you first need to apply the texture to the model and then pick the particular surface group that you want to edit. Once done you will have an edit placement icon next to the image.
Hopefully this helps!
Bri
- Mark as New
- Bookmark
- Subscribe
- Mute
- Subscribe to RSS Feed
- Permalink
- Notify Moderator
Well, thanks for the info but it does not work. the edit button is greyed out.
what have i done wrong?
- Mark as New
- Bookmark
- Subscribe
- Mute
- Subscribe to RSS Feed
- Permalink
- Notify Moderator
Let's see if this helps. Try selecting the surface you want to edit the texture on. In the edit appearance dialog there is a color picker in the top corner. Select that, then select the appearance on the model to edit. The icon should now be available for editing.
- Mark as New
- Bookmark
- Subscribe
- Mute
- Subscribe to RSS Feed
- Permalink
- Notify Moderator
thank you very much, this helped!
now that i know it works, i am going to use it.
what i did was: using the color picker, clicking at the modell shown in the modell editor, deleting the bump picture, putting it in again, doing this a couple of times and voila! somehow it was editable then. and also, the bump was attached to the surface and not moving while changing the view.
there are some bugs in it obviously. maybe they fix it without talking about support/wrong system/wrong uncertified driver/pc and so on.
because that is not the problem..
thanks again!
- Mark as New
- Bookmark
- Subscribe
- Mute
- Subscribe to RSS Feed
- Permalink
- Notify Moderator
Graphical realism? Are you sure? PTC Wildfire and then Creo has had pretty much the same render capability for over a decade, it was behind the curve at launch and I'm afraid compared to the likes of Keyshot the results are very far from "Graphical Realism" these days - just take a look at the underside of that red car and ask yourself - could I be looking at a real car?
If the answer is yes, you probably spend too long looking at a Creo screen. Get Keyshot (or another dedicated renderer) and the Creo Plugin, they play nicely together.


