
Turn on suggestions
Auto-suggest helps you quickly narrow down your search results by suggesting possible matches as you type.
Showing results for
Please log in to access translation
Turn on suggestions
Auto-suggest helps you quickly narrow down your search results by suggesting possible matches as you type.
Showing results for
Community Tip - When posting, your subject should be specific and summarize your question. Here are some additional tips on asking a great question. X
- Community
- Creo+ and Creo Parametric
- 3D Part & Assembly Design
- Re: How can I split the surface of a finished mode...
Translate the entire conversation x
Please log in to access translation
Options
- Subscribe to RSS Feed
- Mark Topic as New
- Mark Topic as Read
- Float this Topic for Current User
- Bookmark
- Subscribe
- Mute
- Printer Friendly Page
How can I split the surface of a finished model (Creo Parametric 2.0)
Feb 08, 2014
07:35 PM
- Mark as New
- Bookmark
- Subscribe
- Mute
- Subscribe to RSS Feed
- Permalink
- Notify Moderator
Please log in to access translation
Feb 08, 2014
07:35 PM
How can I split the surface of a finished model (Creo Parametric 2.0)
I have created a pencile using the Creo 2.0. Now I want to give it the colour according to following image. 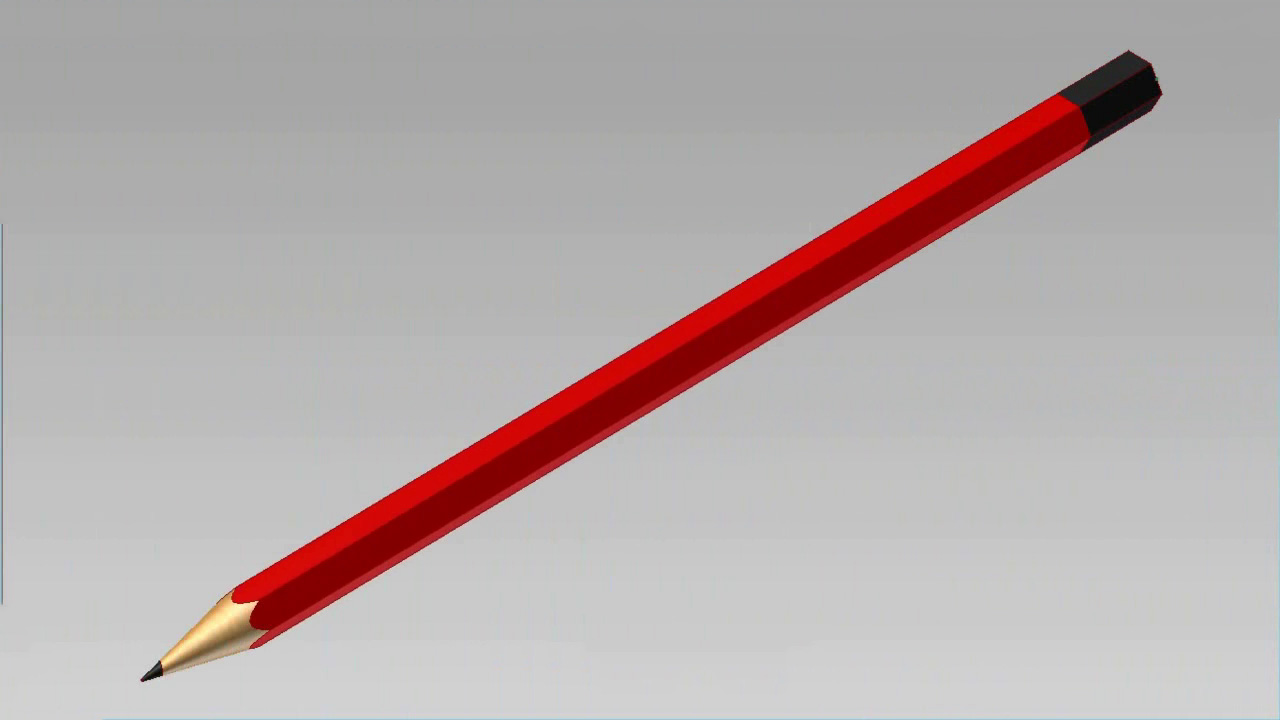
Is there any way to spit the surface of the part so that I can give it the unique colour I want.
Solved! Go to Solution.
ACCEPTED SOLUTION
Accepted Solutions
Feb 09, 2014
02:03 AM
- Mark as New
- Bookmark
- Subscribe
- Mute
- Subscribe to RSS Feed
- Permalink
- Notify Moderator
Please log in to access translation
Feb 09, 2014
02:03 AM
Basic Creo doesn't really give you that option if they are a contiguous surface. However, small offset will allow it.
Since this is a fairly simple model, I might suggest a decal to do what you want.
Otherwise, you just might have to make an assembly of it.
Now I know I say you "can't" but this is not always true. I have been able to split the color of a ball bearing somehow. I had to fool the system to do it.
Is is a solid model or a surface model? You can split surfaces at curves and keep both sides. But most of us don't work with surface quilts as final solid features for next level assemblies. Many implications as to why.
Welcome to the forum Nisheeth.
11 REPLIES 11
Feb 09, 2014
02:03 AM
- Mark as New
- Bookmark
- Subscribe
- Mute
- Subscribe to RSS Feed
- Permalink
- Notify Moderator
Please log in to access translation
Feb 09, 2014
02:03 AM
Basic Creo doesn't really give you that option if they are a contiguous surface. However, small offset will allow it.
Since this is a fairly simple model, I might suggest a decal to do what you want.
Otherwise, you just might have to make an assembly of it.
Now I know I say you "can't" but this is not always true. I have been able to split the color of a ball bearing somehow. I had to fool the system to do it.
Is is a solid model or a surface model? You can split surfaces at curves and keep both sides. But most of us don't work with surface quilts as final solid features for next level assemblies. Many implications as to why.
Welcome to the forum Nisheeth.
Feb 09, 2014
02:16 AM
- Mark as New
- Bookmark
- Subscribe
- Mute
- Subscribe to RSS Feed
- Permalink
- Notify Moderator
Please log in to access translation
Feb 09, 2014
04:32 AM
- Mark as New
- Bookmark
- Subscribe
- Mute
- Subscribe to RSS Feed
- Permalink
- Notify Moderator
Please log in to access translation
Feb 09, 2014
04:32 AM
Thanks for the reply. The model is a solid body.
Is there any tool to split a solid and make it multy body part.
Feb 09, 2014
11:05 AM
- Mark as New
- Bookmark
- Subscribe
- Mute
- Subscribe to RSS Feed
- Permalink
- Notify Moderator
Please log in to access translation
Feb 09, 2014
11:05 AM
I would definately make this an assembly as Tom suggested. I have attached the files for one I have created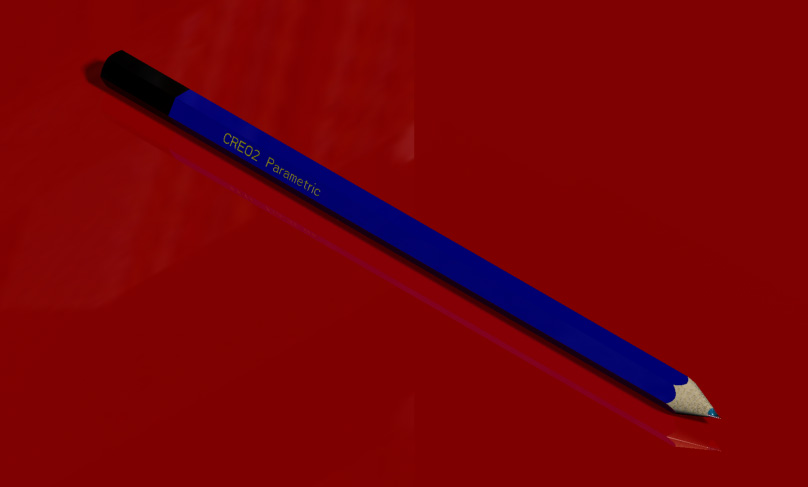
Feb 09, 2014
02:33 PM
- Mark as New
- Bookmark
- Subscribe
- Mute
- Subscribe to RSS Feed
- Permalink
- Notify Moderator
Please log in to access translation
Feb 09, 2014
02:33 PM
PTC has always had a policy of making joined solids a single solid in their parametric modelers. You can divide them with a space in between, but you cannot have 2 separate bodies touching each other. Makes composite work really tough to deal with.
Feb 13, 2014
12:43 PM
- Mark as New
- Bookmark
- Subscribe
- Mute
- Subscribe to RSS Feed
- Permalink
- Notify Moderator
Please log in to access translation
Feb 13, 2014
12:43 PM
Thanks for the reply all of you. I am quite new user of the software and there a lot of questions in my mind which I will ask time to time in future too.
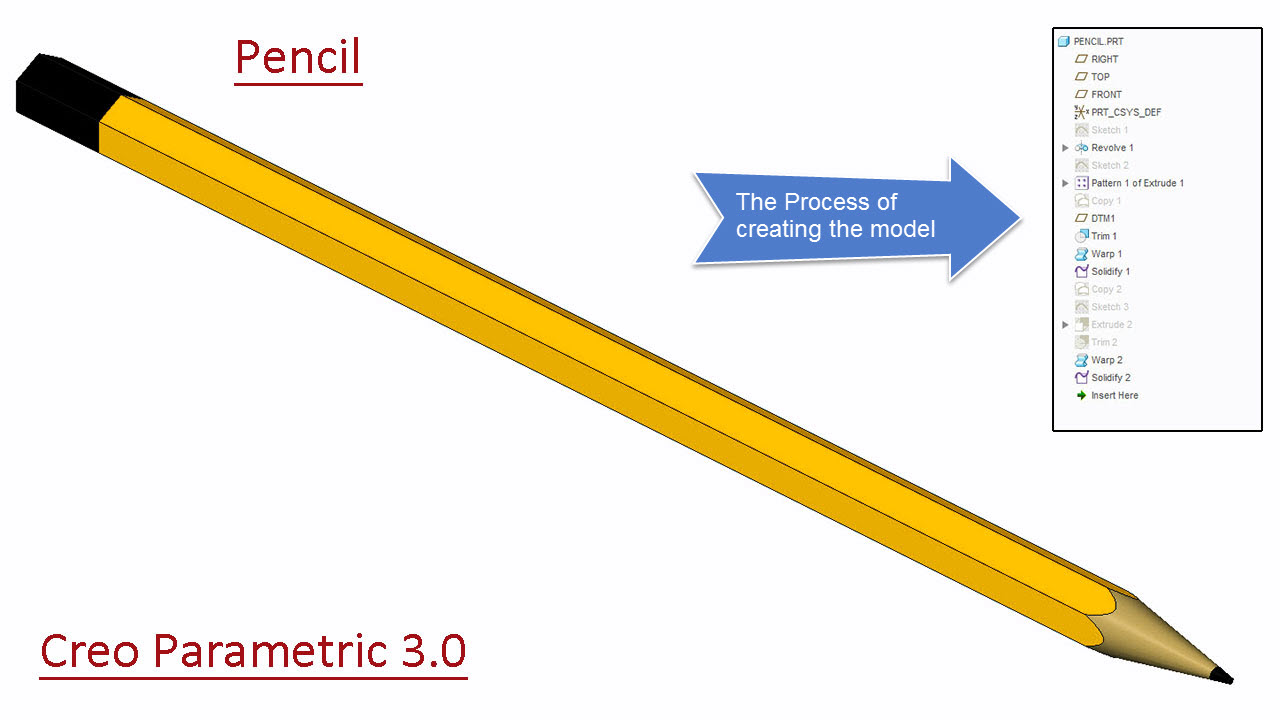
I found the new version Creo 2.0 very much improved in comparison to Wildfire 5.0 that I used in the past and created some of the models and their screencasts...
.
http://www.youtube.com/playlist?list=PLKWX3xUP3pPorULULn8Q5BbDXqBjK_ZXD
I created this pencil model in a different software earlier and trying to do the same it again with Creo 2.0 
Regards
Nisheeth.
Mar 31, 2014
06:31 PM
- Mark as New
- Bookmark
- Subscribe
- Mute
- Subscribe to RSS Feed
- Permalink
- Notify Moderator
Please log in to access translation
Mar 31, 2014
06:31 PM
I don´t do rendering, but when I need to do something like this, I have a small trick:
1 - Copy the sufaces
2 - Trim the desired area
3 - Apply a Warp feature to the quilt doing nothing (this is the trick)
4 - Apply Solidify
It works for me, try to see if it helps you.
Jose
Apr 01, 2014
07:33 PM
- Mark as New
- Bookmark
- Subscribe
- Mute
- Subscribe to RSS Feed
- Permalink
- Notify Moderator
Please log in to access translation
Apr 01, 2014
07:33 PM
The first action you did copy command that I am unable to do. When I select the top face of the part and choose select solid surface from the context menu nothing happen. Are doing this on solid body or on surface. Nisheeth.
Apr 02, 2014
03:43 AM
- Mark as New
- Bookmark
- Subscribe
- Mute
- Subscribe to RSS Feed
- Permalink
- Notify Moderator
Please log in to access translation
Apr 02, 2014
03:43 AM
Hi,
You don´t have to do exactly as I did.
This is done in solid geometry.
Press Alt+LMB on a surface to select it, then use use the "copy" command (Ctrl+C)+Paste (Ctrl+V). Before closing the "paste" dialog box hold down Control Key to select more surfaces.
As alternative you can use "Solid Surfaces" with the RMB, but this will select all surfaces that belong to the solid and you may not desire this.
Jose
Jun 18, 2015
02:48 PM
- Mark as New
- Bookmark
- Subscribe
- Mute
- Subscribe to RSS Feed
- Permalink
- Notify Moderator
Please log in to access translation
Jun 18, 2015
02:48 PM
In the past I could not follow the process that you described....but yesterday I was sitting and reading your answer and at that time I understood what you wanted to describe. Thanks a lot for the answer with your help I could do what I wanted.......
..
Sep 13, 2017
04:34 PM
- Mark as New
- Bookmark
- Subscribe
- Mute
- Subscribe to RSS Feed
- Permalink
- Notify Moderator
Please log in to access translation
Sep 13, 2017
04:34 PM
If this is a continous/single sketch then extrude cut using surface can help you out. Check this video.


