
Turn on suggestions
Auto-suggest helps you quickly narrow down your search results by suggesting possible matches as you type.
Showing results for
Please log in to access translation
Turn on suggestions
Auto-suggest helps you quickly narrow down your search results by suggesting possible matches as you type.
Showing results for
Community Tip - You can subscribe to a forum, label or individual post and receive email notifications when someone posts a new topic or reply. Learn more! X
- Community
- Creo+ and Creo Parametric
- 3D Part & Assembly Design
- Re: How to color an entire feature in a part (with...
Translate the entire conversation x
Please log in to access translation
Options
- Subscribe to RSS Feed
- Mark Topic as New
- Mark Topic as Read
- Float this Topic for Current User
- Bookmark
- Subscribe
- Mute
- Printer Friendly Page
How to color an entire feature in a part (without selecting surfaces induvidually)
Apr 23, 2013
05:14 AM
- Mark as New
- Bookmark
- Subscribe
- Mute
- Subscribe to RSS Feed
- Permalink
- Notify Moderator
Please log in to access translation
Apr 23, 2013
05:14 AM
How to color an entire feature in a part (without selecting surfaces induvidually)
Hi!
Is there by any change a way to color an entire feature in a part, without selecting every single surface?
In other words: Can I somehow query select all surfaces on a feature?
In the example below I want to select all surfaces of the box, without selecting them induvidually. Is it possible?
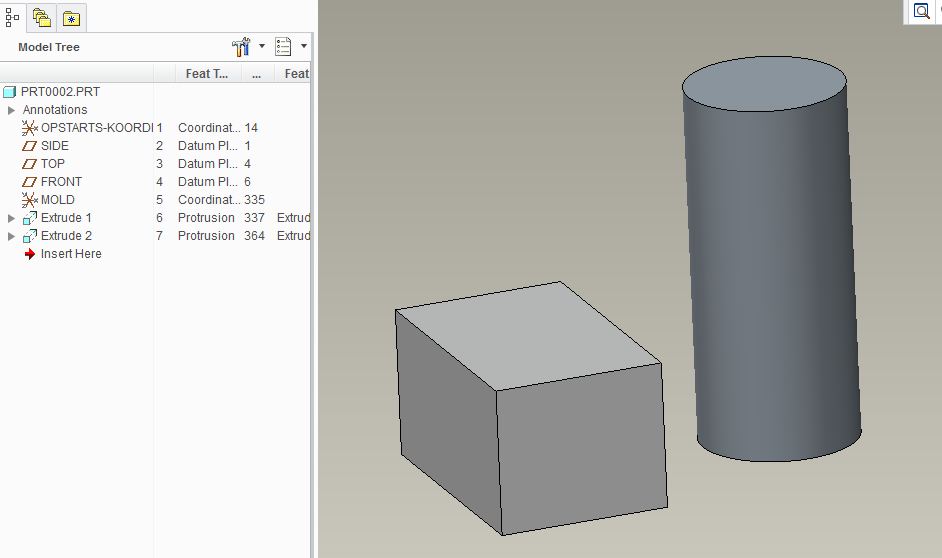
Best regards
Solved! Go to Solution.
ACCEPTED SOLUTION
Accepted Solutions
Apr 23, 2013
05:44 AM
- Mark as New
- Bookmark
- Subscribe
- Mute
- Subscribe to RSS Feed
- Permalink
- Notify Moderator
Please log in to access translation
Apr 23, 2013
05:44 AM
I would try Seed & Boundary or Solid Surfaces RMB.
Click on a surface (Left click), to select the entire feature.
Left click again on the same surface. That should select just the surface.
Press and hold <Shift> and left click an adjacent surface. Release all the buttons and all the surfaces should be highlighted, with the exception of the last one you clicked on.
Press and hold <Ctrl> and left click that final surface. Release the buttons and all the surfaces are selected.
It's far more complicated to describe it than to do it, especially once you have done it a couple of times!
An alternative, much simpler method is:
Click on a surface (Left click), to select the entire feature.
Left click again on the same surface. That should select just the surface.
Right click and select Solid Surfaces.
The only problem with this one is that it doesn't always seem to offer the Solid Surfaces option. There is probably a well-defined set of rules for when it is there and when it is not, but I don't know it.
Solid Surfaces: Very quick and easy
Seed and Boundary: Probably works more often
- I should have said - between the first left click and the second left click (to select the surface), you have to move the mouse a fraction of a millimetre, otherwise it doesn't register the second click.
This is all based on Wildfire 2, so later versions may vary. I doubt it, though.
Give them a try.
Cheers,
John
- Tags:
- seed & boundary
12 REPLIES 12
Apr 23, 2013
05:44 AM
- Mark as New
- Bookmark
- Subscribe
- Mute
- Subscribe to RSS Feed
- Permalink
- Notify Moderator
Please log in to access translation
Apr 23, 2013
05:44 AM
I would try Seed & Boundary or Solid Surfaces RMB.
Click on a surface (Left click), to select the entire feature.
Left click again on the same surface. That should select just the surface.
Press and hold <Shift> and left click an adjacent surface. Release all the buttons and all the surfaces should be highlighted, with the exception of the last one you clicked on.
Press and hold <Ctrl> and left click that final surface. Release the buttons and all the surfaces are selected.
It's far more complicated to describe it than to do it, especially once you have done it a couple of times!
An alternative, much simpler method is:
Click on a surface (Left click), to select the entire feature.
Left click again on the same surface. That should select just the surface.
Right click and select Solid Surfaces.
The only problem with this one is that it doesn't always seem to offer the Solid Surfaces option. There is probably a well-defined set of rules for when it is there and when it is not, but I don't know it.
Solid Surfaces: Very quick and easy
Seed and Boundary: Probably works more often
- I should have said - between the first left click and the second left click (to select the surface), you have to move the mouse a fraction of a millimetre, otherwise it doesn't register the second click.
This is all based on Wildfire 2, so later versions may vary. I doubt it, though.
Give them a try.
Cheers,
John
- Tags:
- seed & boundary
Apr 23, 2013
05:54 AM
- Mark as New
- Bookmark
- Subscribe
- Mute
- Subscribe to RSS Feed
- Permalink
- Notify Moderator
Please log in to access translation
Apr 23, 2013
05:54 AM
Thank you John.
The first method works great.
If the features intersect, it seems that there is no easy way though.
It would be great if you could select the feature in the model tree and apply color to that feature only, even if it intersects with other features. For example if the cylinder was placed halfway inside the box.
Apr 29, 2018
02:21 PM
- Mark as New
- Bookmark
- Subscribe
- Mute
- Subscribe to RSS Feed
- Permalink
- Notify Moderator
Please log in to access translation
Apr 29, 2018
02:21 PM
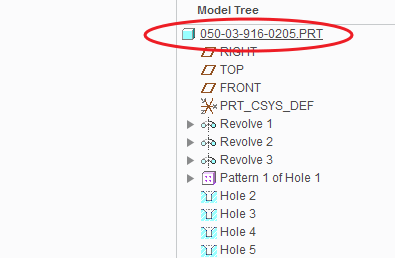
I have used the Find Tool to color a feature:
1) Rename the Feature since you cannot search for default feature names in the Find Tool
2) Ctrl-f to open the Find Tool
3) Look For: Surface
4) Look By: Feature
5) Attributes: Rule
6) Criteria: Comparison: is equal to; Value: (feature name defined in step 1)
7) Click Find Now button
😎 Select surfaces returned in items found list and click the >> button to select surfaces
9) Close the Find Tool
10) Color selected surfaces using Appearance tool
Jun 15, 2018
02:48 AM
- Mark as New
- Bookmark
- Subscribe
- Mute
- Subscribe to RSS Feed
- Permalink
- Notify Moderator
Please log in to access translation
Jun 15, 2018
02:48 AM
I wrote myself two mapkeys just for that. b1 mapkey is used for adding color to one feature and b2 for multiple features. Both mapkeys are in the attachment.
Oct 17, 2018
04:56 AM
- Mark as New
- Bookmark
- Subscribe
- Mute
- Subscribe to RSS Feed
- Permalink
- Notify Moderator
Please log in to access translation
Oct 17, 2018
04:56 AM
I found a easier way to do this, by using a layer.
Example:
1. Create a layer called "select" and add features by clicking on them in model tree or on the model. ok
2. Search for "Surface" by "Feature" with "Status" "Layer" with the value of "select". ctrl-a >> ok
3. Apply the appearance
This is almost like a saved search, and you don't have to rename the features.
You can of course make more layers with different names for different appearances and add more features to them as you go on.
It's also handy for clearing some of the appearances if you change your mind.
Apr 23, 2013
08:41 AM
- Mark as New
- Bookmark
- Subscribe
- Mute
- Subscribe to RSS Feed
- Permalink
- Notify Moderator
Please log in to access translation
Apr 23, 2013
08:41 AM
You should be able to select 'intent surfaces' of a feature. This won't get you the entire feature's surfaces, but will get you close. For example, all surfaces created by entities of the sketch of an extrude are on 'intent surface'. This option may not be available for assigning colors, however, I'm not sure.
Right click through the selections or use 'pick from list' in the RMB menu to find intent surfaces.
Seed and boundary is a very powerful tool. To elaborate, the first pick is your 'seed' and all the surfaces you select with shift held is your 'boundary'. Creo will start at your seed surface and select every adjacent surface until it reaches a boundary surface. Soif you select a complete boundary loop, you can easily get all the surfaces within it. Creo will remember your seed and boundary choices, so if the model changes and additional surfaces are inserted inside the boundary, they get grabbed as well upon regeneration. The flip side is that if the boundary gets broken with new surfaces, your seed and boundary will 'leak'.
That said, I'm not sure if that updating will work for color selection since that doesn't exist in the model tree anywhere and wouldn't have a means of getting updated. A surface copy, perhaps offset 0.0001, will and the resulting quilt can be colored differently from the rest of the model.
'Solid surfaces' gets all solids surfaces in the model, regardless of feature, so it's not going to accomplish what you want.
Apr 23, 2013
12:07 PM
- Mark as New
- Bookmark
- Subscribe
- Mute
- Subscribe to RSS Feed
- Permalink
- Notify Moderator
Please log in to access translation
Apr 23, 2013
12:07 PM
I've found the seed and boundary selection a real pain, it just doesn't seem to work well. Neither does "intent" surfaces".
What I do and it seems to work best is use the filter, to select "surfaces" by "feature" (ID). That seems to work GREAT.
Apr 23, 2013
01:04 PM
- Mark as New
- Bookmark
- Subscribe
- Mute
- Subscribe to RSS Feed
- Permalink
- Notify Moderator
Please log in to access translation
Apr 23, 2013
01:04 PM
It's actually easer than you would think, after selecting the color, just pick the top item in the "Model Tree" and that make the entire model that color.
Apr 23, 2013
03:57 PM
- Mark as New
- Bookmark
- Subscribe
- Mute
- Subscribe to RSS Feed
- Permalink
- Notify Moderator
Please log in to access translation
Apr 23, 2013
03:57 PM
Only do this after you've added all the features you intend to, new features, especially drilled holes, will still have the default part color. If you need to add more than one color to a part with lots of holes or tiny features, use the model tree to color the entire part with whatever color those holes need to be and then add the other colors by selecting surfaces.
Also make sure you're not in assembly, you'll just partially overwrite whatever the part colors are, and they won't back propogate. I don't remember if this holds true for "activating" a part in assembly mode, but I remember it being enough of a headache that it's just safer to open the part from the model tree and color it there.
Apr 23, 2013
06:09 PM
- Mark as New
- Bookmark
- Subscribe
- Mute
- Subscribe to RSS Feed
- Permalink
- Notify Moderator
Please log in to access translation
Apr 23, 2013
06:09 PM
Check this method out to answer a question already posted.
http://communities.ptc.com/message/200149#200149
Hey PTC nice job making answered posts difficult to find.
PTC should allow the feature selection Select Type to be use to paint surfaces that belong to a feature. SolidWorks can do this easily and even copy colors from one feature to another. ProE you have to use pick from model then use Seed and Bound or the Find Tool binoculars icon (CTRL+F)
With the finder tool you use build query to add one or more rules. You can then preview the results And Or Save the Query to a file to be loaded later so you don't have to manually add them 1 by 1.
Michael
Apr 24, 2013
02:09 AM
- Mark as New
- Bookmark
- Subscribe
- Mute
- Subscribe to RSS Feed
- Permalink
- Notify Moderator
Please log in to access translation
Apr 24, 2013
02:09 AM
Thank you all for your help.
There seems to be several solutions (workarounds)
I can't really get what I want with the seed and boundary. Maybe I just don't get how it excactly works.
The finder tools is very usefull and help me select the surfaces that I want.
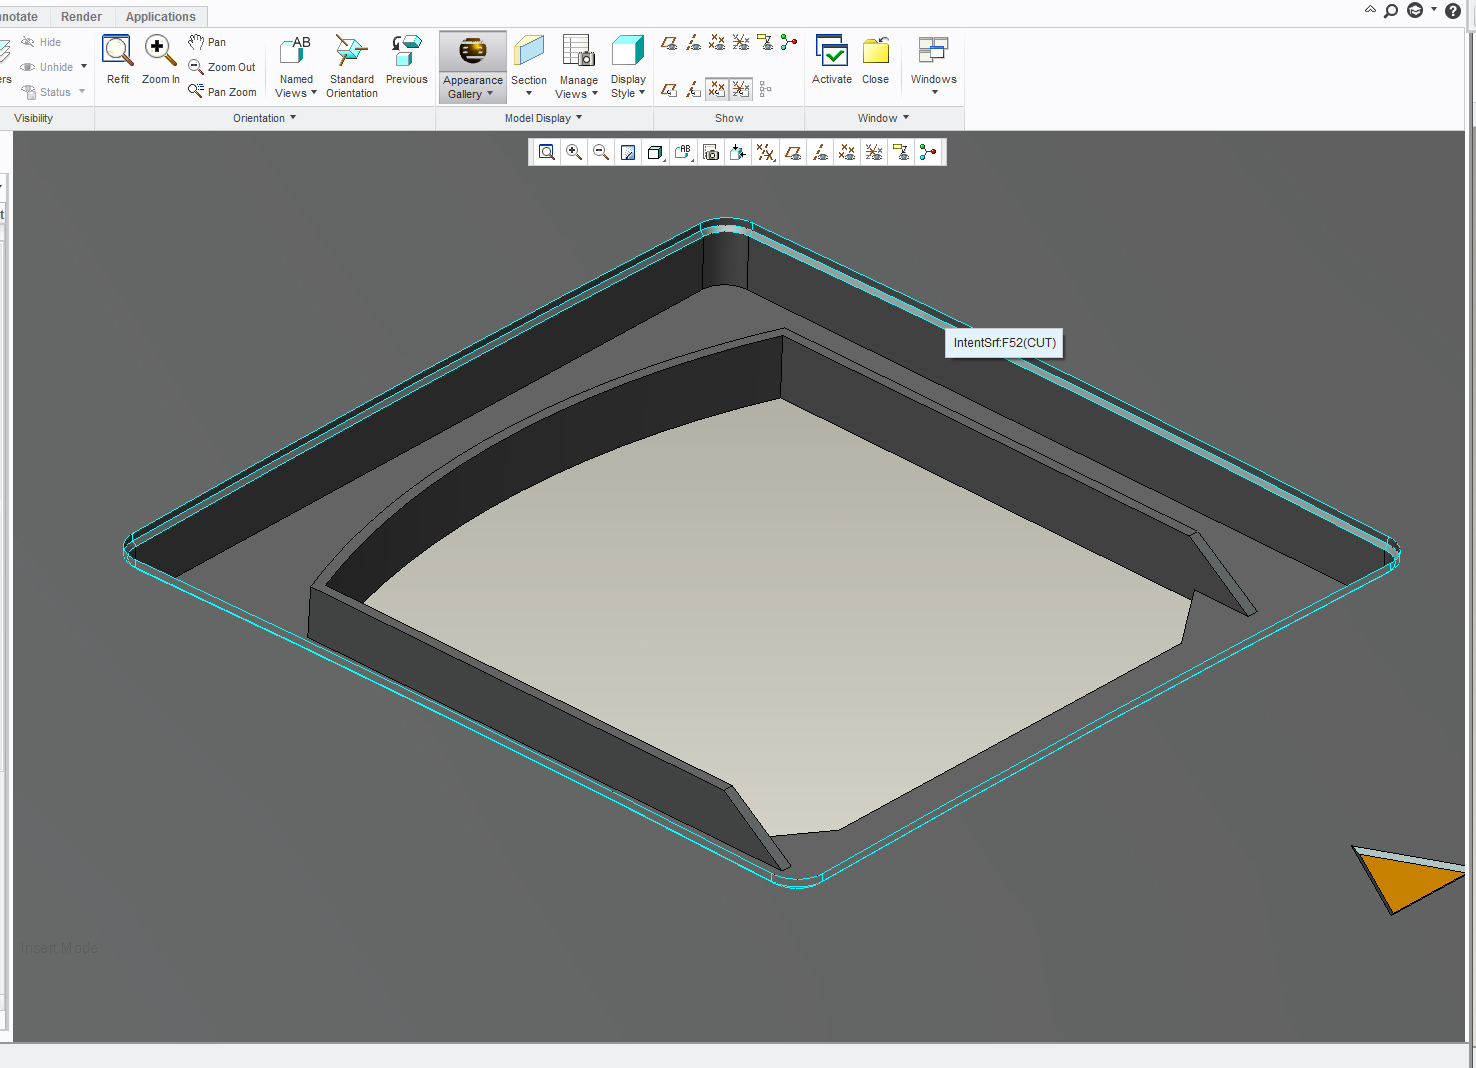
Finally, while fooling around trying your suggestions, I found out that I actually can query select what I want.
See picture below.
I click the colored sphere, hover over one of the wanted surfaces, query select untill all the surfaces in the cut are outlined and then left click. Voilá. All surfaces in the cut are colored.
Apr 26, 2013
06:30 AM
- Mark as New
- Bookmark
- Subscribe
- Mute
- Subscribe to RSS Feed
- Permalink
- Notify Moderator
Please log in to access translation
Apr 26, 2013
06:30 AM
Funny, intend surfaces was going to be next suggestion. I have never used them in the context of coloring thogh...


