Community Tip - Need to share some code when posting a question or reply? Make sure to use the "Insert code sample" menu option. Learn more! X
- Community
- Creo+ and Creo Parametric
- 3D Part & Assembly Design
- Re: How-to model a 3D Jack O' Lantern in CREO
- Subscribe to RSS Feed
- Mark Topic as New
- Mark Topic as Read
- Float this Topic for Current User
- Bookmark
- Subscribe
- Mute
- Printer Friendly Page
How-to model a 3D Jack O' Lantern in CREO
- Mark as New
- Bookmark
- Subscribe
- Mute
- Subscribe to RSS Feed
- Permalink
- Notify Moderator
How-to model a 3D Jack O' Lantern in CREO
- Create center axis, a plane at 18 degrees (360/10/2) and a horizontal sketch of a vertical pumpkin slice section which edge touch the 18 degrees plane. (you should mirror the slice on the front plane)
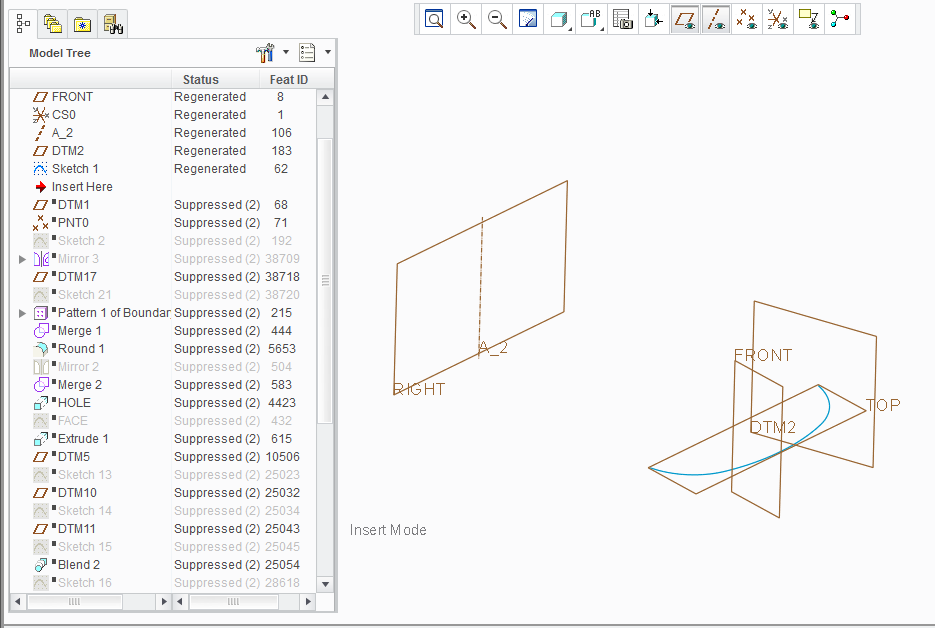
2. Create a vertical sketch representing the outer edge of the pumpkin on the 18-degrees plane. The end should touch the end of the earlier created horizontal line.
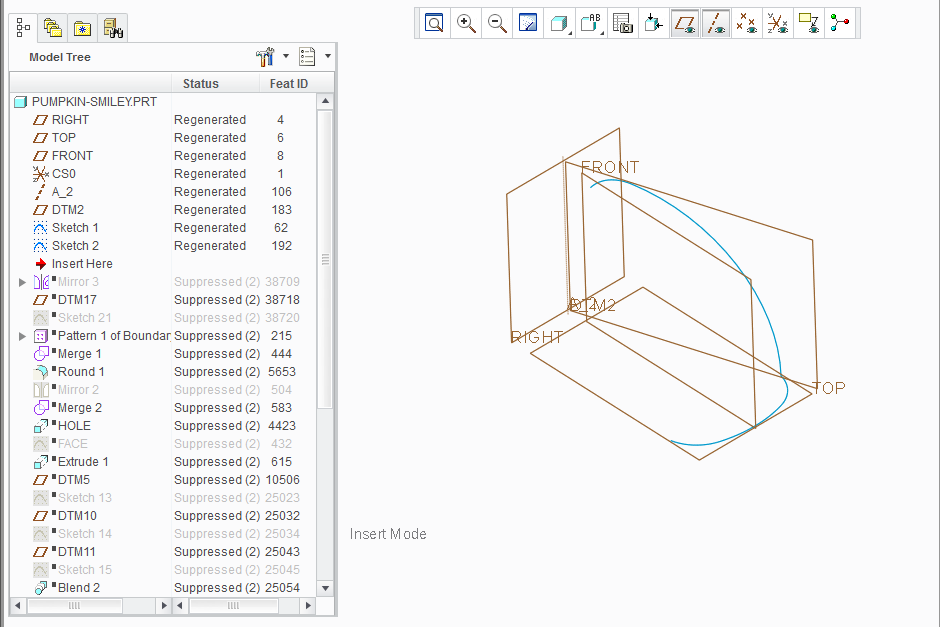
3. Mirror the vertical sketch on the front-plane. Close the loop by adding another horizontal plane and sketch touching the top-ends of the vertical lines.
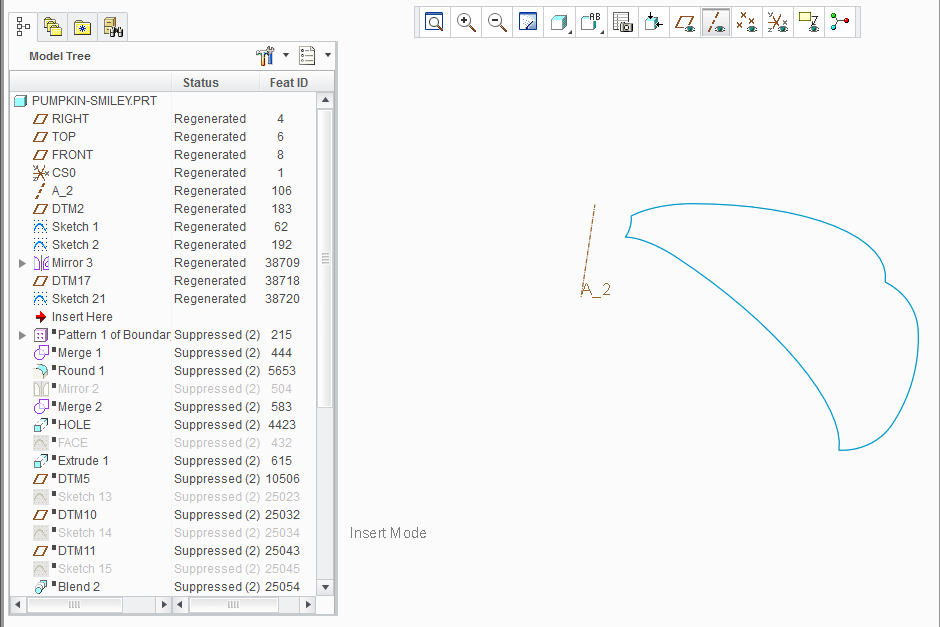
4. Create a boundary blend and make sure the lower horizontal line is tangent to the plane it was created on.

5. Pattern the boundary blend 10x around the center axis (divided by 360 degrees)
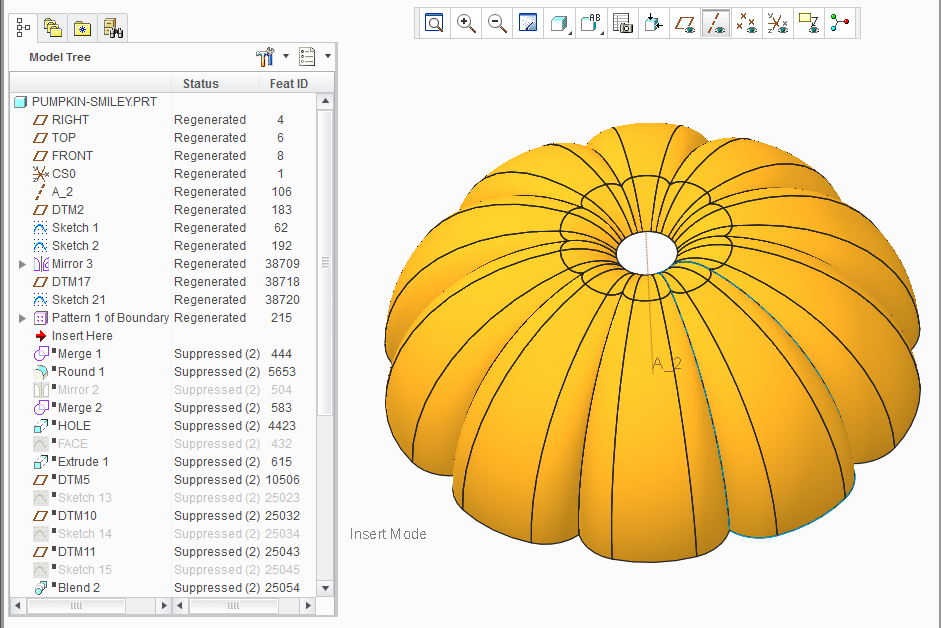
6. Merge the quilts, and rounds and mirror the whole around the top plane and merge again.
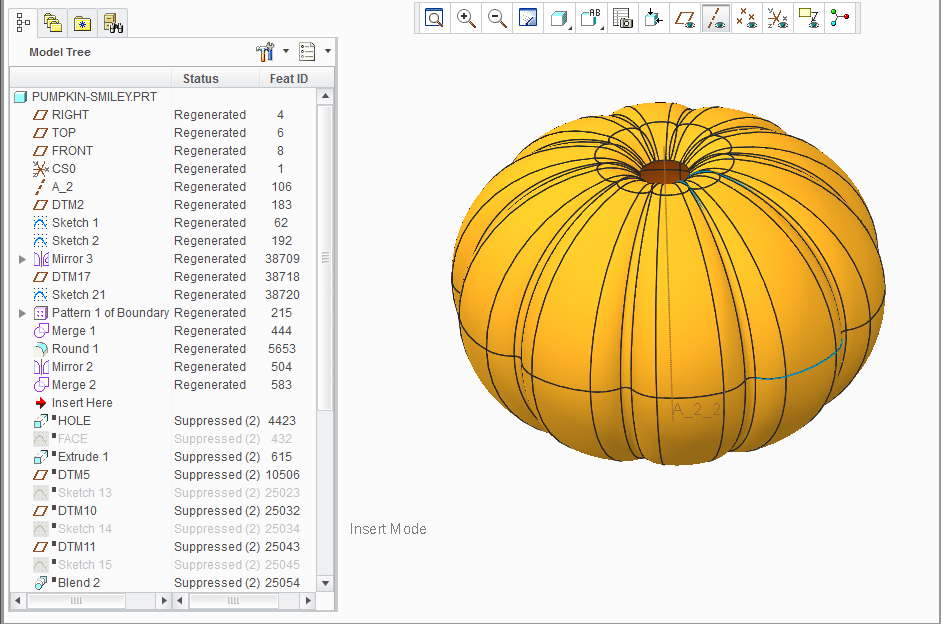
7. Add a hole in the bottom surface for the tea-light, by extruding a cut on the top-plane
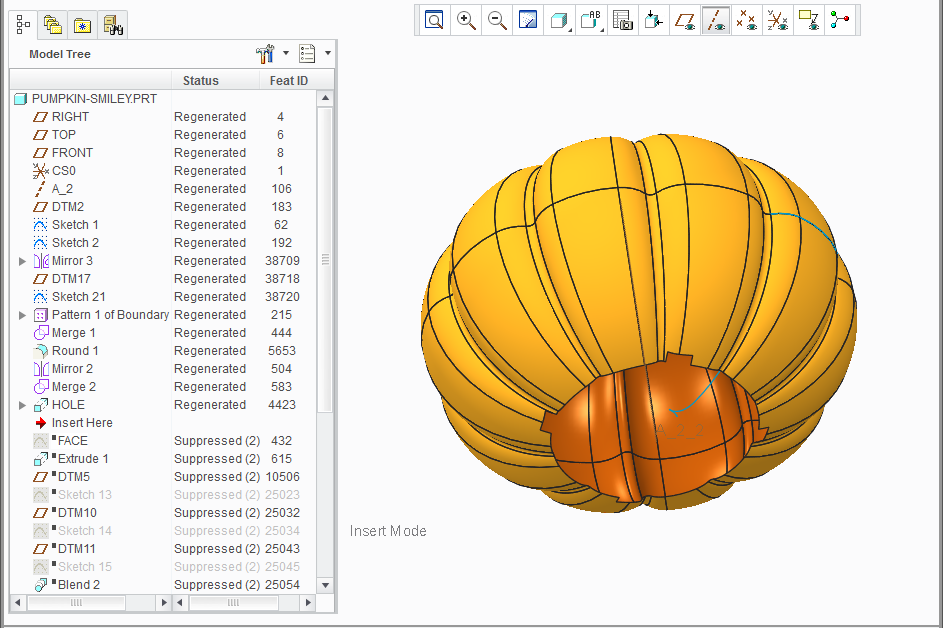
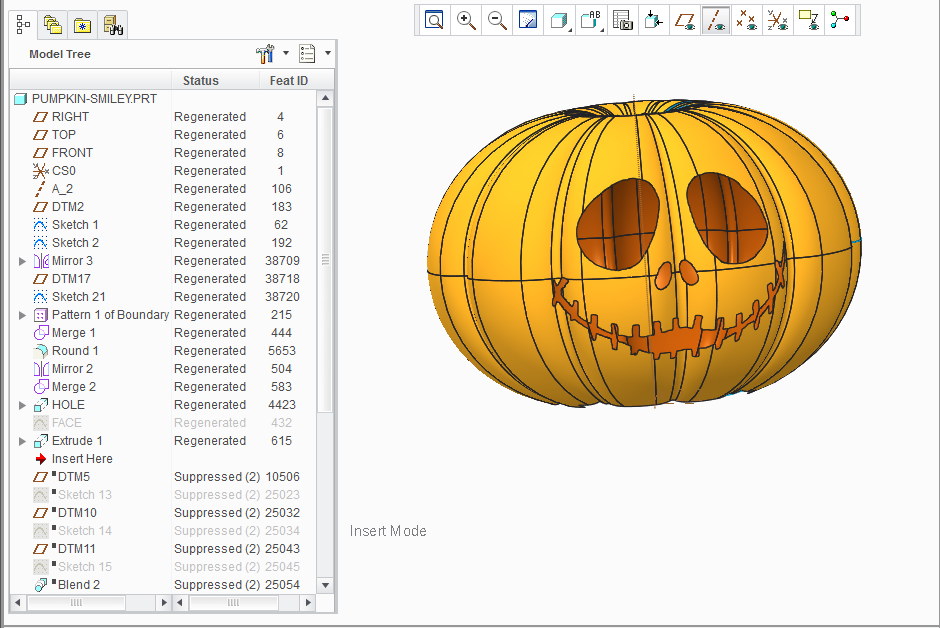
8. Create an extrude on the front plane of the cut-out face. In this case a “smiley” I imported in sketcher from a dxf file I created earlier with Adobe Illustrator using an image downloaded from google images.
9. Create three copies of the same sketch on slightly different offsets from the top-plane which will become the pumpkin-stem-base.
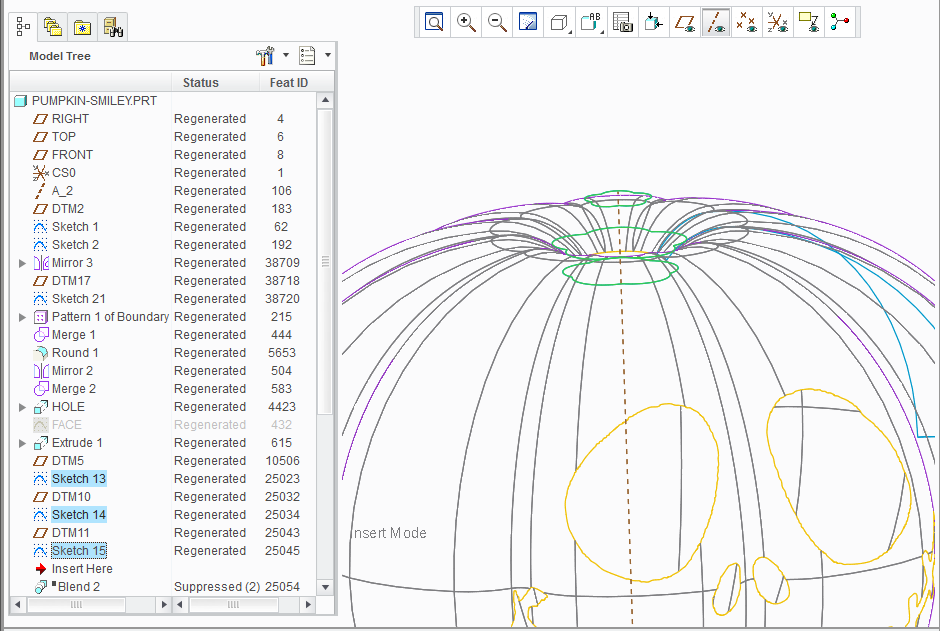
10. Use these sketches to create a solid blend
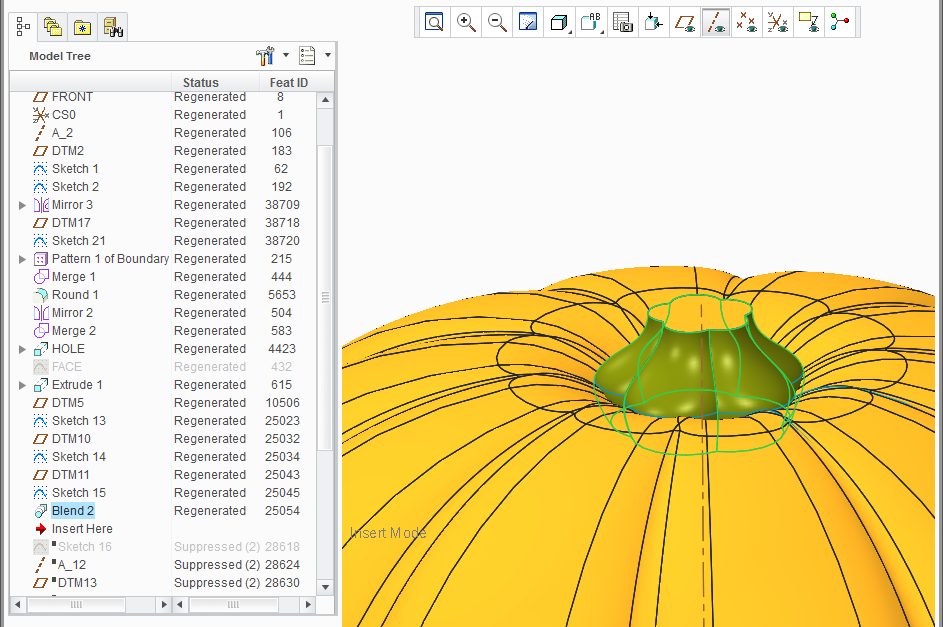
11. Create a curved line, or several lines on top of the stem-base by first creating new planes under different angles.
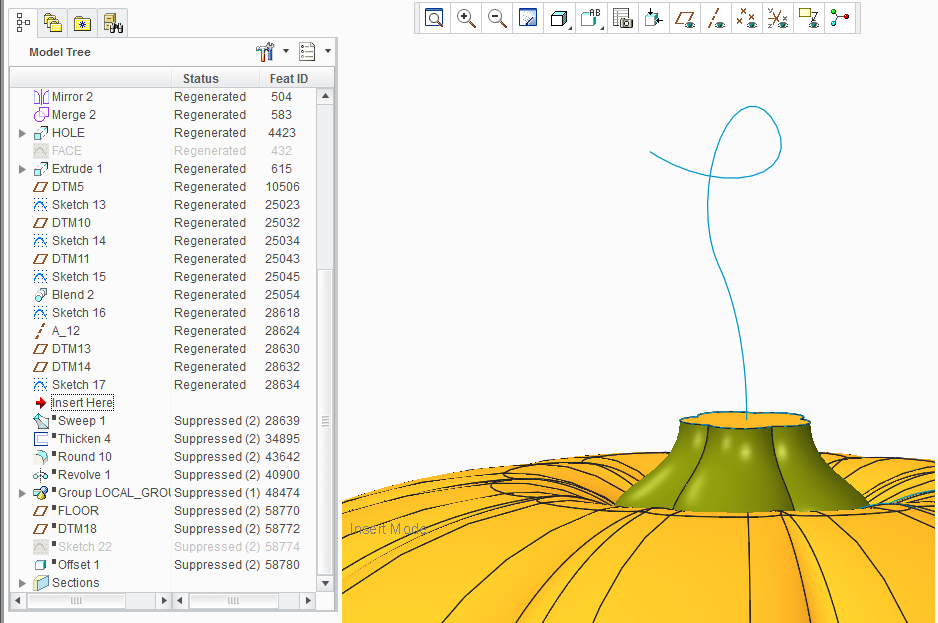
12. create a solid sweep using the same sketch as the top of the stem-base. I used a trajpar relation in the sketcher to have the stem diameter become smaller to the end of the trajectory.
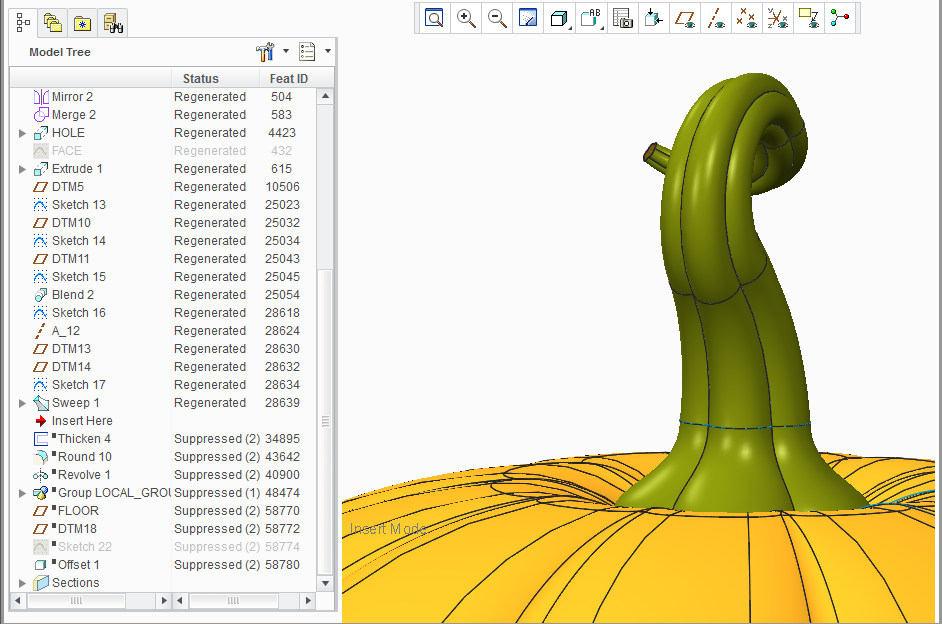
13. Thicken the surface model and add rounds between the stem and pumpkin.
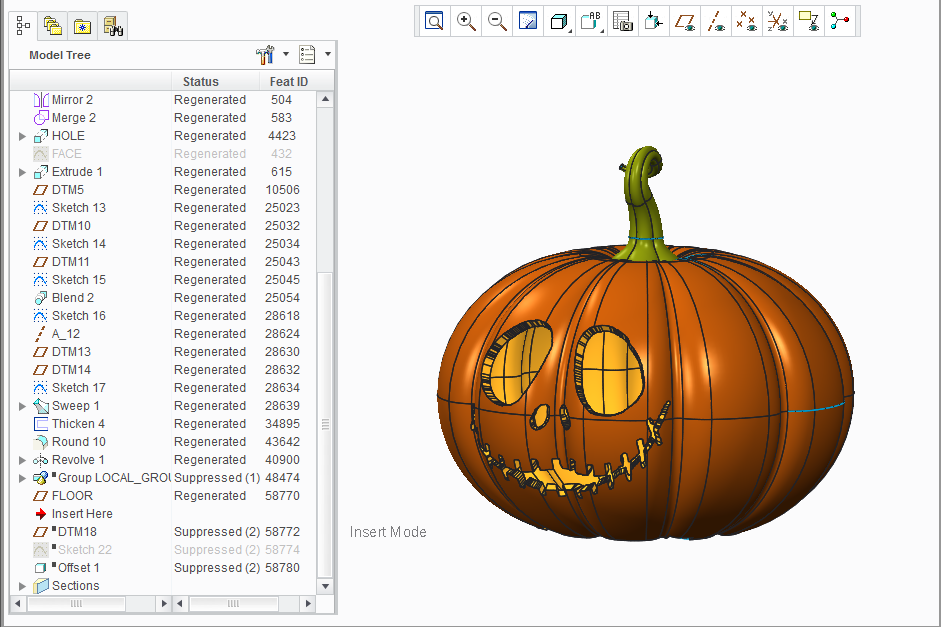
You can finish the model by adding some nice appearance colors and by hiding the sketch lines.
This thread is inactive and closed by the PTC Community Management Team. If you would like to provide a reply and re-open this thread, please notify the moderator and reference the thread. You may also use "Start a topic" button to ask a new question. Please be sure to include what version of the PTC product you are using so another community member knowledgeable about your version may be able to assist.
- Mark as New
- Bookmark
- Subscribe
- Mute
- Subscribe to RSS Feed
- Permalink
- Notify Moderator
Awsome tutorial BJ, thanks for sharing! Hopefully this resource provides others with some guidance on how to create their own jack-o-lantern.
I've featured this doc in this week's Member Showcase Roundup - 10/23/13.


