Community Tip - Need to share some code when posting a question or reply? Make sure to use the "Insert code sample" menu option. Learn more! X
- Community
- Creo+ and Creo Parametric
- 3D Part & Assembly Design
- How to stop a weld at mid point?
- Subscribe to RSS Feed
- Mark Topic as New
- Mark Topic as Read
- Float this Topic for Current User
- Bookmark
- Subscribe
- Mute
- Printer Friendly Page
How to stop a weld at mid point?
- Mark as New
- Bookmark
- Subscribe
- Mute
- Subscribe to RSS Feed
- Permalink
- Notify Moderator
How to stop a weld at mid point?
I am attempting to create welds in an assesmbly model for the first time and have found most of it pretty straight forward. However, I am running into troubles when I do not want the full length of a joint welded. For instance, I am wrapping a weld around a plate but only want it to continue 100 mm after the wrap. Is there any way to get a weld feature to stop at a midpoint, plane, or some other feature? I have attached a picture to hopefully clarify the question.
This thread is inactive and closed by the PTC Community Management Team. If you would like to provide a reply and re-open this thread, please notify the moderator and reference the thread. You may also use "Start a topic" button to ask a new question. Please be sure to include what version of the PTC product you are using so another community member knowledgeable about your version may be able to assist.
- Mark as New
- Bookmark
- Subscribe
- Mute
- Subscribe to RSS Feed
- Permalink
- Notify Moderator
Glen,
I see that you're doing fillet welds. The "end" points on fillet welds aren't as straight forward as the other types of welds.
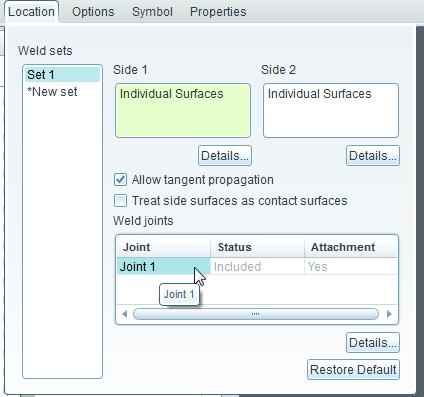
Select the surfs that you want, just like you did. Then, before you commit the weld, click back on the location tab. Once open, click on the Joint 1, which will NOT be highlighted by default:

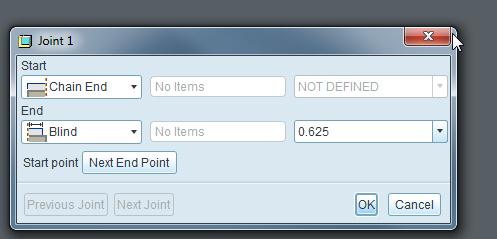
Now, click on details, and you will get the "ends" of the welds, and that looks something like this:

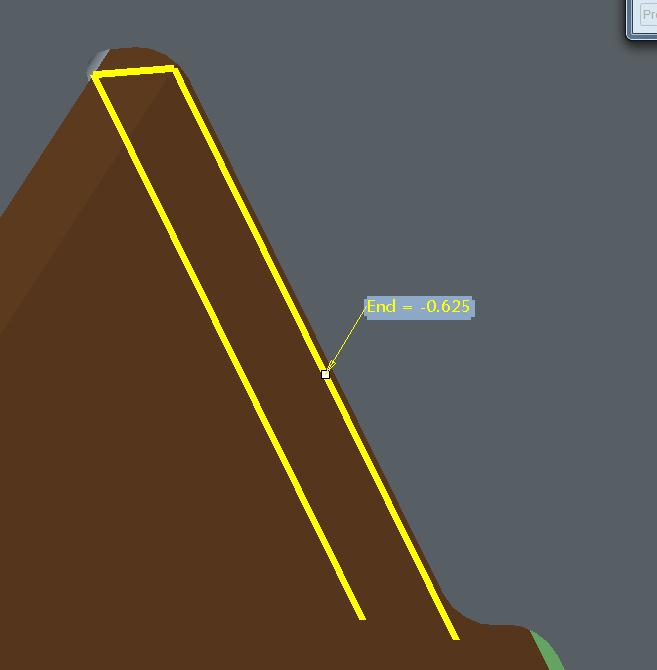
I have found that I have the best luck actually using the "blind" option, and just dragging the appropriate end point to the location I want, as opposed to using the "To Selected" option. Here's what the "trajectory" will look like after using the "blind" option on it:

And here is what the finished weld will look like, stopped at a point that I desiginate. This endpoint is also parametrically driven if you want to move it to another location:

Hope this helps!
Darrin Hiebert


