Community Tip - Your Friends List is a way to easily have access to the community members that you interact with the most! X
- Community
- Creo+ and Creo Parametric
- 3D Part & Assembly Design
- Re: Spinal Bend, loosing model data
- Subscribe to RSS Feed
- Mark Topic as New
- Mark Topic as Read
- Float this Topic for Current User
- Bookmark
- Subscribe
- Mute
- Printer Friendly Page
Spinal Bend, loosing model data
- Mark as New
- Bookmark
- Subscribe
- Mute
- Subscribe to RSS Feed
- Permalink
- Notify Moderator
Spinal Bend, loosing model data
Hi,
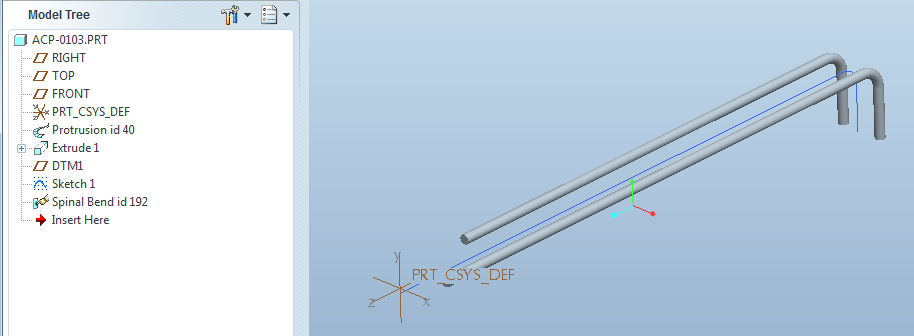
I am trying to bend a solid piece of wire using the spinal bend feature. I have my model drawn flat on the top plane, and need to bend the end down, to accomodate a hanging chain. When I complete the bend I loose the round that keeps my wire form one piece. Any ideas on how to correct?
Before:

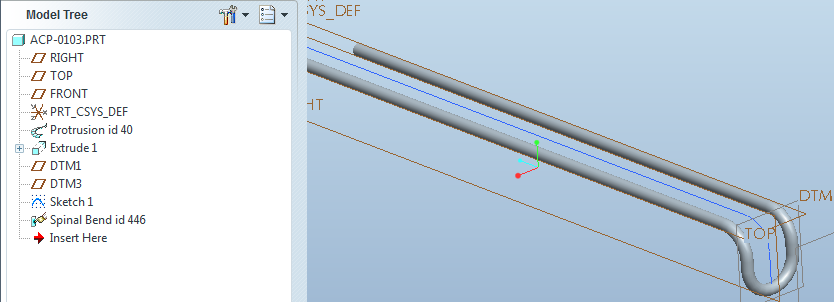
After:

As you can see I loose the radius portion of my piece. Any ideas on what to change to make it work?
I have 4 pieces that I need to do this to, so I am kind of stuck with my design right now.
Thanks for any help.
Matt
This thread is inactive and closed by the PTC Community Management Team. If you would like to provide a reply and re-open this thread, please notify the moderator and reference the thread. You may also use "Start a topic" button to ask a new question. Please be sure to include what version of the PTC product you are using so another community member knowledgeable about your version may be able to assist.
- Labels:
-
Surfacing
- Mark as New
- Bookmark
- Subscribe
- Mute
- Subscribe to RSS Feed
- Permalink
- Notify Moderator
Looks like your spinal bend "spine" curve isn't long enough, and as such the geometry is being cut off where the spine ends. Try making the spine longer than the part.
- Mark as New
- Bookmark
- Subscribe
- Mute
- Subscribe to RSS Feed
- Permalink
- Notify Moderator
Thanks Frank, I tried it and the legs of my wire just get longer..??
- Mark as New
- Bookmark
- Subscribe
- Mute
- Subscribe to RSS Feed
- Permalink
- Notify Moderator
Hmmm, attach the file and maybe I can get a look into it.
Also, I noticed that the start of the spine is not coincident with the end of the rod, so, that might be it also. Without the model it's hard to tell.
- Mark as New
- Bookmark
- Subscribe
- Mute
- Subscribe to RSS Feed
- Permalink
- Notify Moderator
Thanks for the help. I have only taken a couple Pro-E classes and we never got into some of the more advanced features. I found out about this option looking at youtube videos, so there is a chance I missed a step somewhere in the function.
Let me know if you come up with anything.
- Mark as New
- Bookmark
- Subscribe
- Mute
- Subscribe to RSS Feed
- Permalink
- Notify Moderator
It's been a while since I did one, they're not used often. Here's some things about them that they don't teach you:
1. You are required to define 2 planes whithin which the geometry is to be bent. This distance must be EXACTLY the length of your part, otherwise, you get what happened to you, OR if it's too long, a part with distorted geometry on the loop.
2. You CAN bend greater than 90deg (didn't test the limit), but the example you see in the embedded online help was scanned in from what looks like one of the old books (discontinued long ago in v20 I believe), and it's now WRONG as there is no longer a "tweak" menu.
3. I created a curve to make sure the length I got after the spinal bend equaled the length before the spinal bend. It did, and I didn't see any distortion.
I didn't look at your part, but if you follow what I did in my attached part, you should get yours to work.
Good luck!
- Mark as New
- Bookmark
- Subscribe
- Mute
- Subscribe to RSS Feed
- Permalink
- Notify Moderator
Oh, and just a FYI, your "student edition" parts can't be opened by us regular guys. ![]()
- Mark as New
- Bookmark
- Subscribe
- Mute
- Subscribe to RSS Feed
- Permalink
- Notify Moderator
Hi Frank,
I tried a couple of other things and still can't get it to bend properly. So what I did was change the length of my scetch curve to just short of the bend and then protrude the feature back on.
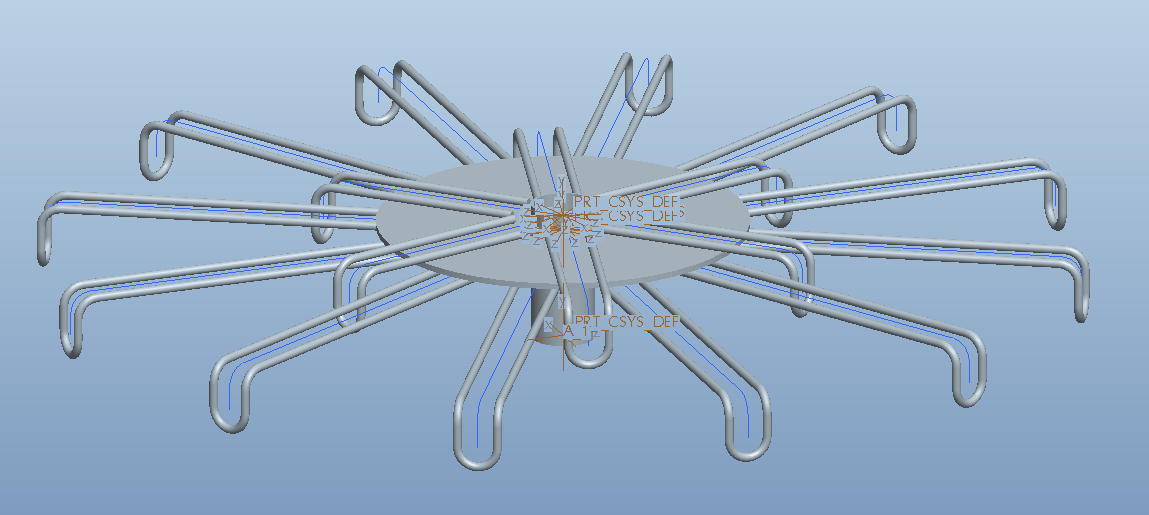
Thanks for all the help, can't get it, but my work around will do just fine for what I need. Here is what the final sub-assy looks like.
Matt

- Mark as New
- Bookmark
- Subscribe
- Mute
- Subscribe to RSS Feed
- Permalink
- Notify Moderator
Hmmm, PM me the dimensions. I'm using WF4, not Creo, but I could try it in Creo too. Like I said, the 2 planes defining the volume to bend must exactly equal the length of the part (to the tangency of the loop). Did you open the file I attached, or is it incompatible with your student version?
I managed to get this to work, so i'm not sure why your model is having issues:
- Mark as New
- Bookmark
- Subscribe
- Mute
- Subscribe to RSS Feed
- Permalink
- Notify Moderator
I kept messing with it over lunch and got it to work. I was choosing my bend plane, not my end plane. My confusion. So I have it working now and the parts look great.
Thanks again for all the help.
- Mark as New
- Bookmark
- Subscribe
- Mute
- Subscribe to RSS Feed
- Permalink
- Notify Moderator
Ahh, I figured that was it. Like I said, everything you want to bend has to be between the 2 planes. I got it to do something I didn't think it would, so that's good.
Glad you got it to work. That's the thing with CAD, it's not knowing the commands, it's knowing the work-arounds. Keep trying different things.
- Mark as New
- Bookmark
- Subscribe
- Mute
- Subscribe to RSS Feed
- Permalink
- Notify Moderator
Frank, one more question. Can I do a seconday spinal bend on just one feature of a model? I also tried to do a warp on just this area. All the warp funtions modified the entire part. Just can't seem to get one to work.
If not, no big deal, but just want a more realistic look to what final product will be.
Let me know, thanks.
Matt

- Mark as New
- Bookmark
- Subscribe
- Mute
- Subscribe to RSS Feed
- Permalink
- Notify Moderator
That's gonna be a little tougher. I'll have to look into that.
- Mark as New
- Bookmark
- Subscribe
- Mute
- Subscribe to RSS Feed
- Permalink
- Notify Moderator
Hi Frank, don't put too much effort into this. After I sent the reply last night I contiued playing with the warp and got the spline tool to move just the top feature. This will work for my presentation, and the flat model will be used for manufacturing so I should be all set.
If you do come up with another way, let me know, just for future knowledge.
Thanks

- Mark as New
- Bookmark
- Subscribe
- Mute
- Subscribe to RSS Feed
- Permalink
- Notify Moderator
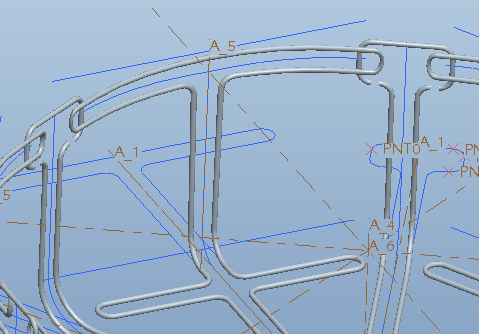
A "Warp" (bend, etc.) feature will distort the part, which is shown above in your vertical lines that are not parallel, and I'm sure the cross section is distorted and no longer circular as well. You can do multiple spinal bends, but they must be in the correct order. I'm also going to try and use quilts first, bend them individually, then make the solid.
- Mark as New
- Bookmark
- Subscribe
- Mute
- Subscribe to RSS Feed
- Permalink
- Notify Moderator
What about using Bend Solid instead?
- Mark as New
- Bookmark
- Subscribe
- Mute
- Subscribe to RSS Feed
- Permalink
- Notify Moderator
I haven't played with that, but I believe you can get the geometry you want without the distortion you experience using warp (which is why I don't use those commands) by using 2 spinal bends, in the proper sequence. Lay out your curves, and some datum planes, sweep only the section you want to bend into a cylinder (near axis A_5), and do a spinal bend on that. Then create the other sweep(s) required, and bend that and it should work. Me, I might not even go that route. If you need both a "flat pattern" and the "formed state", I'd lay out the curves as needed, and use a family table to sweep either in one shot, and use the instances for your drawing.


