- Community
- IoT & Connectivity
- IoT & Connectivity Tips
- Display Geolocation Data Using Google Maps Part 1
- Subscribe to RSS Feed
- Mark as New
- Mark as Read
- Bookmark
- Subscribe
- Printer Friendly Page
- Notify Moderator
Display Geolocation Data Using Google Maps Part 1
- GUIDE CONCEPT
- Step 1: Configure Google Maps Widget
- Step 2: Add Google Maps Widget to Mashup
- Step 3: Download Sample Entities
- Step 4: Add Markers to Google Maps Widgets
Add a Google Map to your UI that visually presents geographical data.
GUIDE CONCEPT
This project will introduce how to visually present geographical data in your application. Showing data on a map is a valuable feature for IoT application.
Following the steps in this guide, you will utilize the Google Maps Widget and explore it’s ability to show multiple Things.
We will teach you how to use Geological data to convey pertinent information in your UI.
YOU'LL LEARN HOW TO
- Download and import the Google Maps Widget extension
- Create a Mashup and add a Google Maps Widget
- Configure the Google Maps Widget to display the locations of multiple Things
NOTE: This guide's content aligns with ThingWorx 9.3. The estimated time to complete ALL 2 parts of this guide is 30 minutes.
Step 1: Configure Google Maps Widget
When you download the Google Maps Widget, it does not include an API key. Google allows some limited use of their map API without a key, however it is recommended that you obtain and add your own Google Maps API key or Client ID (for Google Maps API for Work licenses) to the Google Maps Widget.
The ThingWorx hosted server has already been configured with the Google Maps Widget, including an API key for evaluation use.
Refer to the Google Maps API documentation to obtain your own API key, then follow the steps below.
- Download the Google Maps widget from PTC Partner, IQNOX
NOTE: It is necessary to create an account on IQNOX, but the download is free
2. In the lower-left side of Composer, click Import/Export, then Import.

3. In the Import From File pop-up, under Import Option select Extension from the drop-down, then click Browse
4. Navigate to the .zip file you downloaded.

5. Click Import in the Import From File pop-up, then click Close after file is successfully imported.
6. In the ThingWorx Browse tab, in the System section, click on Subsystems, then PlatformSubsystem.

7. Click on the Configuration tab, then click the Edit button if you are not already in edit mode.
8. Scroll down to the Required string to connect with Google for Google widgets field where you enter the Google Maps JavaScript URL with your API key: https://maps.googleapis.com/maps/api/js?key=<Your API key>

9. Click Save
Step 2: Add Google Maps Widget to Mashup
- Click the Browse folder icon on the top left of ThingWorx Composer.
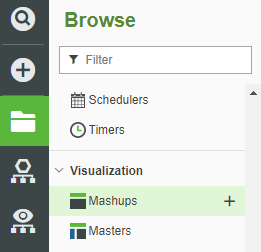
2. Select Mashups in the left-hand navigation, then click + New to create a new Mashup.

3. For Mashup Type select Responsive.

NOTE: A Responsive Mashup scales with a browser's screen size. In the steps below we will create 5 containers, one for each widget, to organize how the widgets are presented.
4. Click OK.
5. Enter a name for your Mashup.
6. If Project is not already set, click the + in the Project text box and select the PTCDefaultProject.
7. Click Save
8. Select the Design tab to display Mashup Builder.
9. Click the Widget tab on the top-left, then enter map inside the Filter Widgets field.
10. Drag-and-drop the Google Map widget onto the Mashup.

Step 3: Download Sample Entities
We have created a file with sample entities for this exercise.
- Download demoTractors.xml to your computer.
2. Click Import/Export in the lower left of Composer, then select Import

3. Click From File in the drop down, then Browse.
4. Browse to the demoTractors.xml file and click Open.
5. Click Import, then Close after entities are successfully imported.
Step 4: Add Markers to Google Maps Widgets
To display markers on the map you must bind an Info Table to the Widget's Data Property and specify which column has location information. In this example we will use the QueryImplementingThingsWithData Service to bind a group of Things created with the same Template.
- Click the + button in the Data tab on the right side of the Mashup Builder window

2. In the Add Data pop-up, click Thing Templates from the Entity Type drop down.

3. Select a Template from the list that has a Location property and was used to create Things. For this exercise, use the ConnectedTractor Template that was imported from the sample file downloaded in the prior step.

4. Enter query into the filter text box then click the arrow to the right of QueryImplementingThingsWithData.
5. Click the Execute on Load check box, then click Done. This will cause the QueryImplementingThingsWithData Service to execute as soon as Mashup is loaded.

6. Expand Returned Data if you do not see All Data then click and drag All Data onto the Google Maps Widget.
7. Click Data in the Select Binding Target pop-up.

8. In the Properties panel in the lower left, scroll to see the LocationField property and select Location, the name of the Property with location information.

Test Map Operation
- Click Save to save your Mashup.
2. Click View Mashup to see the Google Maps Widget displaying the locations of each Thing.
NOTE: The Google Maps Widget has built-in functionality that allows users to pan and resize the map as well as switch to satellite photo maps.
Click here to view Part 2 of this Guide.


