

What’s New in Import Data Doctor for Creo Elements/Pro 5.0
You can read the Desktop Tip of the Month here also authored by Mark Decraene and you can also read the Enterprise Product Focus of the Month here and the Enterprise Tip of the Month here authored by Jack Sullivan.
| PTC Technical Specialists Newsletter - May 2011 |
Product Focus : What’s New in Import Data Doctor for Creo Elements/Pro 5.0 |
|---|
With Creo Elements/Pro 5.0, PTC continues to improve on the functionality that was delivered in the all new Import Data Doctor that was released with Pro/ENGINEER Wildfire 4.0. There are several new enhancements that aid in the import and repair of models created in other CAD systems.
In this document we will discuss 2 of these enhancements:
- Using the 3D Import Wizard
- Using the new Troubleshooter interface
Using the 3D Import Wizard
The new 3D Import Wizard gives users the ability to access upon import all of the various settings for imported 3D data. These were typically accessed thru config.pro options in the past making it cumbersome to switch between settings upon import. The user also has the option of using predefined profiles that allow settings to be reused based on a stored set of configurations. These profiles are easily configured, stored, and retrieved. This will make it easy for someone that repeatedly receives data from a supplier or customer in the same format. Simply setup a profile for that supplier and when importing their data, from the wizard you can choose that stored profile and achieve consist results based on proven settings from that supplier’s data type.
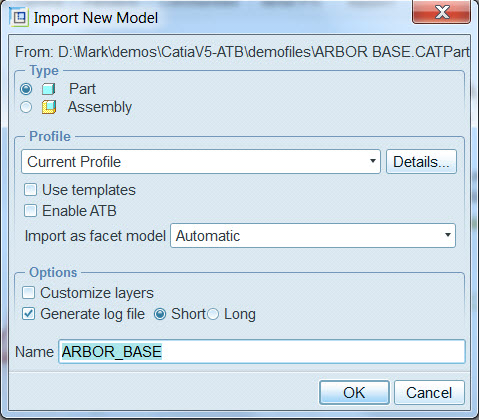
When opening an import file, the user will be presented with the Import New Model dialogue box. From here all settings as well as enabling of the ATB (Associative Topology Bus) can be applied. Choices can also be made for using a standard Start Part or Start Assembly upon import. This could only be accomplished in the past by starting a new file before importing the data and then using a Data Sharing feature to import the geometry.
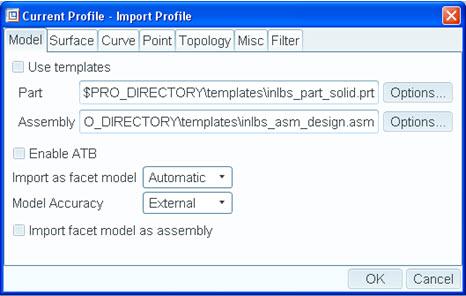
By choosing the Details button  from the Profile section, this will open a window where you can now access many of the options that were only available thru a config.pro file. You can set the options here on the fly if you have not taken the time to build specific profile. Notice also that you can provide a path to the desired start template parts and assemblies to the imported file if your imported models utilize a different start part / assembly than your designed models.
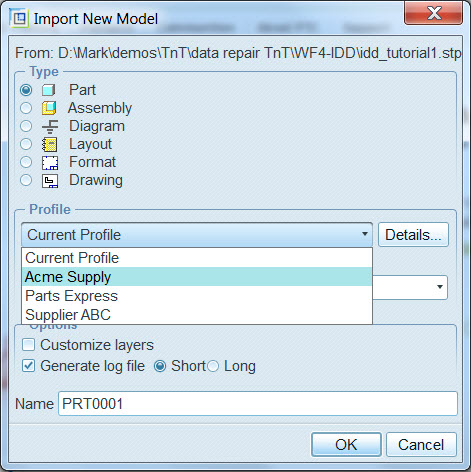
If a predefined set of Profiles exists, a user can simply access them from the Import New Model dialogue as shown below:
To build a profile, choose Tools from the main Pro/ENGINEER top tool bar. Then choose Data Exchange and Import Profile Editor from the flyout. This is where you can build profiles for specific types of files you may want to import. After you save them to a file, use the config.pro option intf_profile_dir to point to the folder the files are stored in. The next time you access the Profile pulldown menu, all of the saved profiles should appear.
Using the New Troubleshooter Interface
In Creo Elements/Pro 5.0, the Import DataDoctor has added the use of the Troubleshooter to help analyze and identify problem areas in imported geometry. The troubleshooter will expose problem areas in the model based an many selection criteria. To access the troubleshooter, perform the following steps after importing a file:
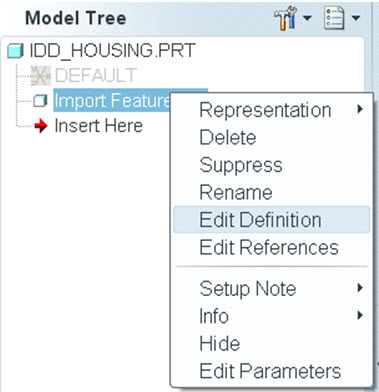
1. Select the Import Feature from the model tree. Then RMB Edit Definition.
2. From the Pro/ENGINEER toolbar on the right side, choose the  icon to enter the Import DataDoctor.
3. Select the  icon to enter the repair mode of operation.
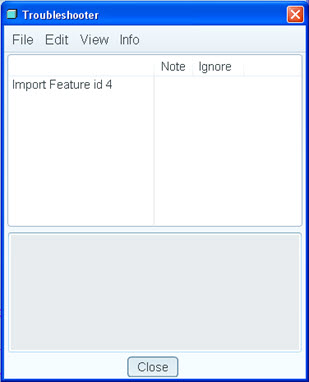
4. Choose Info > Geometry Checks from the top toolbar. This will open the Troubleshooter window.
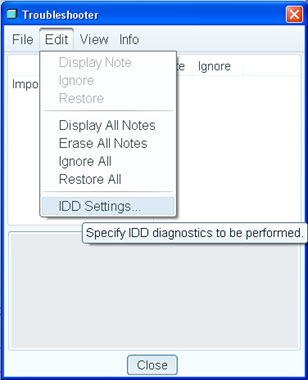
5. Choose Edit then IDD Settings from the Troubleshooter window. This will allow us to filter on the data we want the Troubleshooter to identify for us.
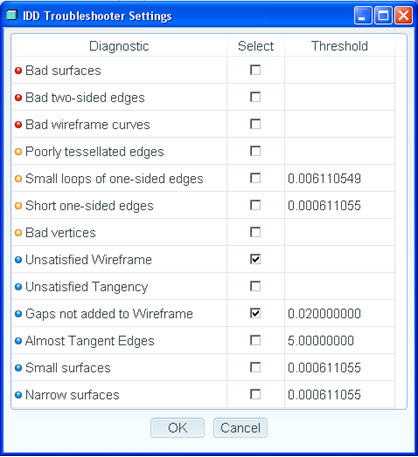
6. Check  any of the options you want to identify. In most cases you will want to check Unsatisfied Wireframe and Gaps not added to Wireframe. Also change the gap Threshold value to a value you that is reasonable for the model size you are working on as shown below. Choose
  from the Troubleshooter settings window. Note: These settings will remain active for the entire Pro/ENGINEER session unless changed.
7. Back in the Troubleshooter window choose View > Expand All. You can now see that items that the Troubleshooter has found based on the settings.
8. Select on the various Items listed and notice how the Troubleshooter highlights them in the graphics area as well as zooms into the specific item. Also notice the suggestions that are presented in the lower section of the Troubleshooter.
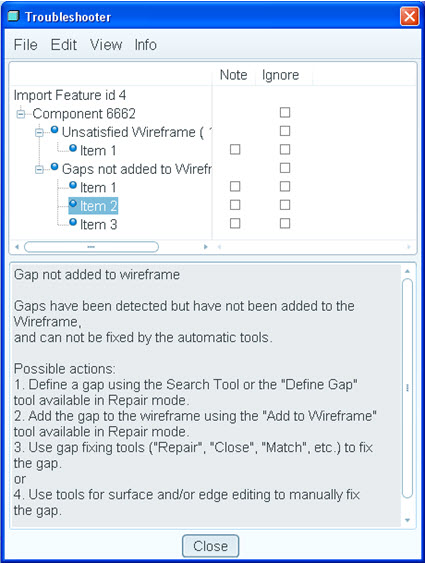
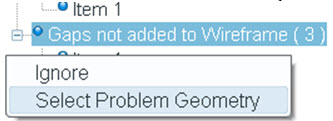
9. In our example we would select the line labeled Gaps not added to Wireframe (3). Then RMB and Select Problem Geometry.
10. Close the Troubleshooter and choose the Add to Wireframe Icon  .
.
11. Select the Repair Icon  to execute the repair.
12. From the dashboard select the option to Repair Tangency (new in Wildfire 5.0)

Every repair scenario is unique, but this is a fairly common workflow for using the new troubleshooter functionality.
This thread is inactive and closed by the PTC Community Management Team. If you would like to provide a reply and re-open this thread, please notify the moderator and reference the thread. You may also use "Start a topic" button to ask a new question. Please be sure to include what version of the PTC product you are using so another community member knowledgeable about your version may be able to assist.