Community Tip - Learn all about PTC Community Badges. Engage with PTC and see how many you can earn! X
- Community
- Creo+ and Creo Parametric
- 3D Part & Assembly Design
- Extruding/Blending a fuselage?
- Subscribe to RSS Feed
- Mark Topic as New
- Mark Topic as Read
- Float this Topic for Current User
- Bookmark
- Subscribe
- Mute
- Printer Friendly Page
Extruding/Blending a fuselage?
- Mark as New
- Bookmark
- Subscribe
- Mute
- Subscribe to RSS Feed
- Permalink
- Notify Moderator
Extruding/Blending a fuselage?
Hello everyone,
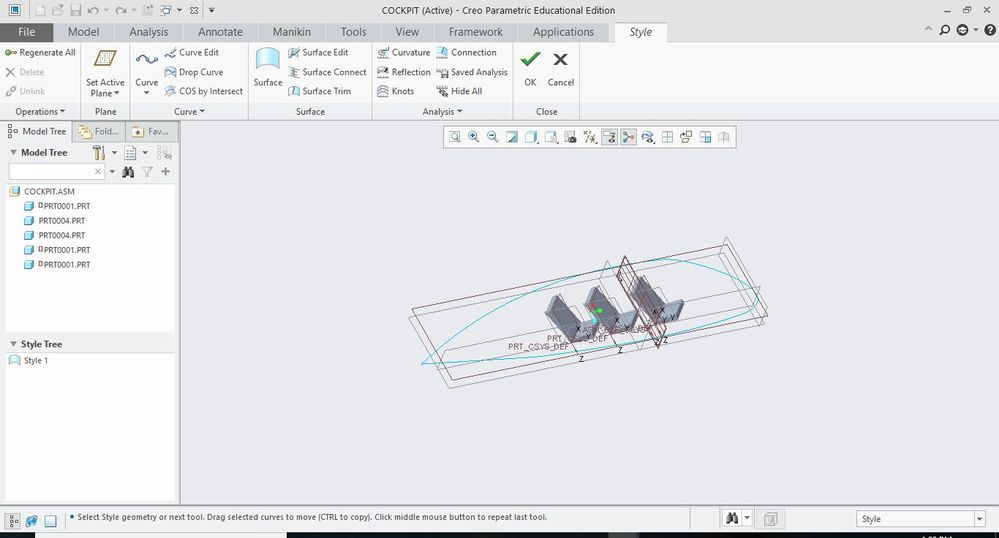
I am trying to figure out how to take my side view of my fuselage and make it into an extrude with circular sides. I have tried all of the blends but I'm new to creo and I don't know what to do. I just want it to look like an egg, basically.
Solved! Go to Solution.
- Labels:
-
General
Accepted Solutions
- Mark as New
- Bookmark
- Subscribe
- Mute
- Subscribe to RSS Feed
- Permalink
- Notify Moderator
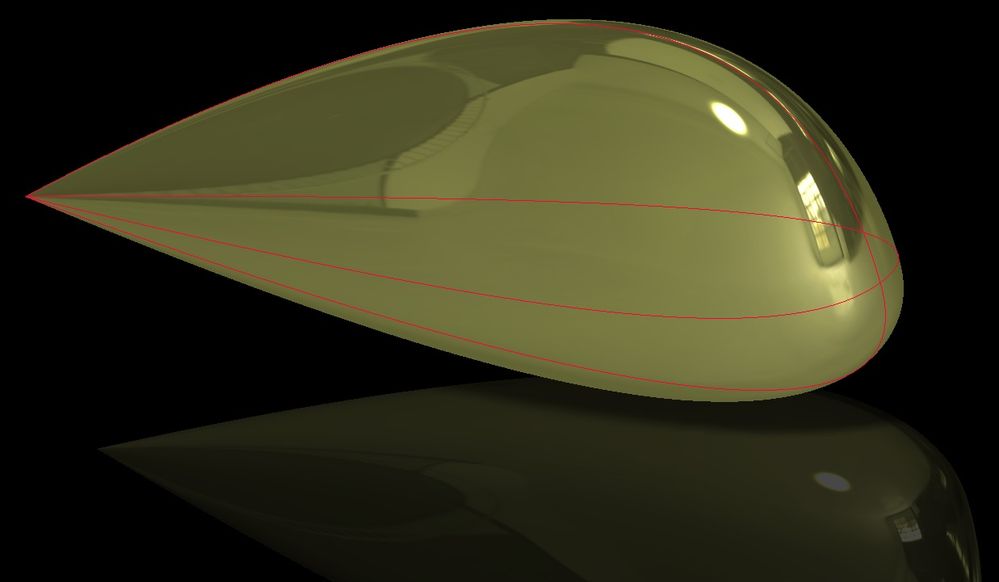
Are those green lines curves used to control the boundary blend? If so, you can see the ripple follows the curve. If so, get rid of the extra curves. The only curves I used are highlighted in red in my pic. too many curves cause the ripples, you only need 3 total for each quilt. Left, top, and right used for the top quilt, and I made sure the boundary edge conditions were normal to the top datum plane. For the bottom surf, similar, but I used the edges of the top surf instead of the L and R curves, and used curvature continuous (to the top quilt) for the edge conditions, then I merged it.
- Mark as New
- Bookmark
- Subscribe
- Mute
- Subscribe to RSS Feed
- Permalink
- Notify Moderator
Based on those 2 curves, it will never have anything "circular". It will need to be a boundary blend. I did it in 6 features. When you do a BB, you have to be careful what order you pick what curves in. I did the top half, set boundary conditions, then did the bottom half, set different boundary conditions, then merged them. Very smooth, if not exactly C2, surfaces.
- Mark as New
- Bookmark
- Subscribe
- Mute
- Subscribe to RSS Feed
- Permalink
- Notify Moderator
- Mark as New
- Bookmark
- Subscribe
- Mute
- Subscribe to RSS Feed
- Permalink
- Notify Moderator
I actually ended up using 4 longitudinal curves, top, left and right mirrored images of each other, and a bottom curve. I made the top half, then the bottom half and even though the shape was totally non-symmetrical from top to bottom and the curves were all pretty different from each other, it came out really smooth (almost C2).
I find that using a bunch of different sections leads to ripples, best to use as few curves as possible, that's why I'd recommend using longitudinal curves.
- Mark as New
- Bookmark
- Subscribe
- Mute
- Subscribe to RSS Feed
- Permalink
- Notify Moderator
Okay, I think I understand. Instead of using the top curve, replicate it with a few longitudinal curves and do the same for the bottom? That seems easy enough.
However, how do I get the front and end "caps" I can get the basic shape of the hull, but I don't know how to make the ends
- Mark as New
- Bookmark
- Subscribe
- Mute
- Subscribe to RSS Feed
- Permalink
- Notify Moderator
Query-select and use the entire curve, from the rounded front to the pointed back on the left curve, the top curve, and the right curve, then set the boundary conditions on the edges to be normal to the datum. Then make the bottom quilt in similar fashion, but set the boundary curves to curvature (to the upper quilt), or if it won't take that, to tangent. Not sure why your pic shows the quilt not exactly following your top curve.
For the curves, you could use a spline, or as I did a conic, or just query-select and get the chain of curves. The "details" tab will allow you to pick all different things. But to add a second or additional curve you must do an "add".
Edit: I get now why it isn't following the curve exactly. Depending on the shape, you do not need second direction curves. Just use 3 longitudinal curves, making sure they give you the shape you need at the points you want (i.e. might make those points in the splines used as the curves). But, as I said, beware, too many control points of any sort can/will cause ripples. Best to give it as few as possible for a smoother result.
- Mark as New
- Bookmark
- Subscribe
- Mute
- Subscribe to RSS Feed
- Permalink
- Notify Moderator
Okay, firstly, thanks so much for getting me this far. I've got something reasonable for the top half but I'm wondering if I can get the back part of the boundary blend a bit smoother? It's creating a harsh transition, but otherwise, I'm happy with what I have, given the time constraints (really need to move this along). Before I move on to doing the bottom half in a similar fashion, is there any way I can make the boundary blend smoother between the longitudinal curves? Attached is what I have right now.
Again, thanks so much!
- Mark as New
- Bookmark
- Subscribe
- Mute
- Subscribe to RSS Feed
- Permalink
- Notify Moderator
You're getting those lumpy sections because you're using the cross-sections I advised you not to use. 3 longitudinal curves for the top half, 3 for the bottom half, used only as the direction 1 curves, with nothing for the direction 2 curves.
- Mark as New
- Bookmark
- Subscribe
- Mute
- Subscribe to RSS Feed
- Permalink
- Notify Moderator
- Mark as New
- Bookmark
- Subscribe
- Mute
- Subscribe to RSS Feed
- Permalink
- Notify Moderator
I'm really sorry but I still don't get it. I tried to only have the curve on the very top and then do a boundary blend with longitudinal ellipses/curves but only two of the curves would do a boundary blend, so I decided to redo the entire sketch and try the boundary blend with the entire top curve and it worked a lot better, but the very top has some very annoying ripples I can't figure out how to get rid of. I only have three longitudinal curves and the top curve. Is that too many curves?
- Mark as New
- Bookmark
- Subscribe
- Mute
- Subscribe to RSS Feed
- Permalink
- Notify Moderator
I just realized I can't use ellipses for this and that's why it won't solve.
- Mark as New
- Bookmark
- Subscribe
- Mute
- Subscribe to RSS Feed
- Permalink
- Notify Moderator
It's not that you're using ellipses, it's that you're using the ENTIRE ellipse, and in the wrong direction.
In my picture I highlighted in red the curves I used for the Golden Teardrop. Note how non-symmetrical top-to-bottom the shape is, and how different the top and bottom curves are from each other, and from the mirrored left and right curves. I used conics, tangent at the front, as they typically give great surfaces.
- Mark as New
- Bookmark
- Subscribe
- Mute
- Subscribe to RSS Feed
- Permalink
- Notify Moderator
OH! Okay, sorry I thought I was supposed to use the entire curve but you did say to mirror it. I did just that for the top part and it's looking a lot nicer, but I have two weird ripples. Any idea how to get rid of them before I move on to the bottom half of my fuselage? Pic attached where you can see the two ripples. Could I somehow smooth the front with another command?
- Mark as New
- Bookmark
- Subscribe
- Mute
- Subscribe to RSS Feed
- Permalink
- Notify Moderator
Are those green lines curves used to control the boundary blend? If so, you can see the ripple follows the curve. If so, get rid of the extra curves. The only curves I used are highlighted in red in my pic. too many curves cause the ripples, you only need 3 total for each quilt. Left, top, and right used for the top quilt, and I made sure the boundary edge conditions were normal to the top datum plane. For the bottom surf, similar, but I used the edges of the top surf instead of the L and R curves, and used curvature continuous (to the top quilt) for the edge conditions, then I merged it.
- Mark as New
- Bookmark
- Subscribe
- Mute
- Subscribe to RSS Feed
- Permalink
- Notify Moderator
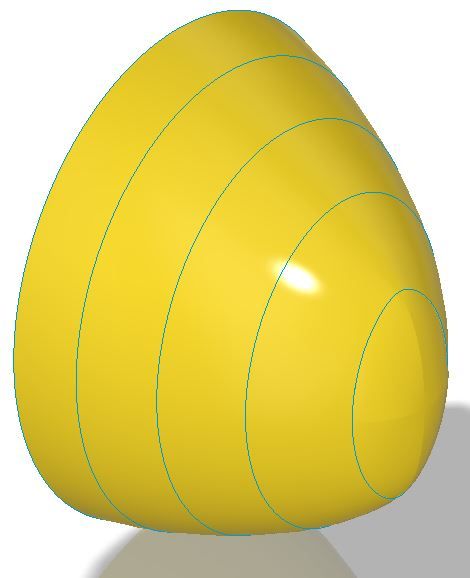
Thanks to your guidance I finally got what I wanted, no ripples, just a teardrop! Thanks so much!
- Mark as New
- Bookmark
- Subscribe
- Mute
- Subscribe to RSS Feed
- Permalink
- Notify Moderator
Great news, glad you got it! Hope it was a learning process for you.
How about a pic?
- Mark as New
- Bookmark
- Subscribe
- Mute
- Subscribe to RSS Feed
- Permalink
- Notify Moderator
Yep here it is! (It's not as smooth as your golden teardrop because I had to change the geometry. My dimensions weren't correct in the first curve!)
- Mark as New
- Bookmark
- Subscribe
- Mute
- Subscribe to RSS Feed
- Permalink
- Notify Moderator
Seems like your curves are made of multiple different element in a sketched curve? Also, be aware, arcs are constant radii, and by nature aren't as smooth as a spline or conic. If you didn't need that exact profile, try using a conic so you get one element per curve, and use the rho and angle to tweak it to get as close as you can, then it'll be much smoother. It tries to interpolate from each segment, and that gives you ripples.
Also, here's another way:
Do a revolved teardrop and then use the "warp" functionality to pull the shape to what you want symmetrical about a centerline. Warp gives amazingly smooth results, but you don't have quite the parametric control. I'm going to start using it more for Industrial Design.
- Mark as New
- Bookmark
- Subscribe
- Mute
- Subscribe to RSS Feed
- Permalink
- Notify Moderator
- Mark as New
- Bookmark
- Subscribe
- Mute
- Subscribe to RSS Feed
- Permalink
- Notify Moderator
Ah, ok. For fun, I was playing around with the Warp feature. Think I'm gonna be playing with that a lot more.....
- Mark as New
- Bookmark
- Subscribe
- Mute
- Subscribe to RSS Feed
- Permalink
- Notify Moderator
- Mark as New
- Bookmark
- Subscribe
- Mute
- Subscribe to RSS Feed
- Permalink
- Notify Moderator
WaRp, not wrAp. 😉
- Mark as New
- Bookmark
- Subscribe
- Mute
- Subscribe to RSS Feed
- Permalink
- Notify Moderator
Great work guys, @dmojay and @Patriot_1776.
I'm not very familiar with complex surface modelling at all.
It's a challenging problem that I find very difficult to solve. Don't know if there is a solution that doesn't leave some kind of cusp?
This is my best effort (creo file attached for you to analyse) ... it's only experimental and somewhat hacked together.

- Mark as New
- Bookmark
- Subscribe
- Mute
- Subscribe to RSS Feed
- Permalink
- Notify Moderator
Quick and dirty.
- Mark as New
- Bookmark
- Subscribe
- Mute
- Subscribe to RSS Feed
- Permalink
- Notify Moderator
Cool. Great title!


