Community Tip - Want the oppurtunity to discuss enhancements to PTC products? Join a working group! X
- Community
- Creo+ and Creo Parametric
- 3D Part & Assembly Design
- Re: How do you automatically show model or assembl...
- Subscribe to RSS Feed
- Mark Topic as New
- Mark Topic as Read
- Float this Topic for Current User
- Bookmark
- Subscribe
- Mute
- Printer Friendly Page
How do you automatically show model or assembly annotation feature note when creating new drawing?
- Mark as New
- Bookmark
- Subscribe
- Mute
- Subscribe to RSS Feed
- Permalink
- Notify Moderator
How do you automatically show model or assembly annotation feature note when creating new drawing?
Hi,
How do you automatically show model or assembly annotation feature note (General Notes) that won't be tied to a drawing view when creating new drawings?
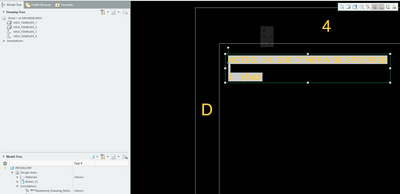
I basically want the note contained in the annotation shown in the image below to be automatically shown on the drawing format in the upper left corner as general notes when a user creates a new part or assembly drawing. Currently you have to change to the annotate tab, expand the feature tree, pick the annotation note, right click and click show for every drawing that's created.
Would there be a way to show this annotation at the format level or in a drawing template so that it's automatically shown when a new drawing created?
Thanks for any help you can provide,
Don A
- Mark as New
- Bookmark
- Subscribe
- Mute
- Subscribe to RSS Feed
- Permalink
- Notify Moderator
- Mark as New
- Bookmark
- Subscribe
- Mute
- Subscribe to RSS Feed
- Permalink
- Notify Moderator
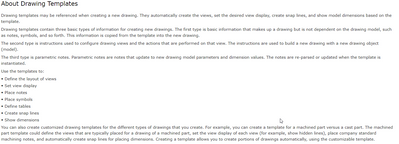
I have looked at using drawing templates. Haven't found a way to configure the drawing template to automatically pull the annotation from the model and place it on the drawing using a drawing template.
Can anyone point me to a help document that explains how to do it using templates?
Thanks
Don A
- Mark as New
- Bookmark
- Subscribe
- Mute
- Subscribe to RSS Feed
- Permalink
- Notify Moderator
Note: I need the solution to work when creating a drawing from a part or assembly file!
Don A
- Mark as New
- Bookmark
- Subscribe
- Mute
- Subscribe to RSS Feed
- Permalink
- Notify Moderator
I think you have two ways of doing this:
1. Create a mapkey that will display an annotation from the model in the drawing, so you don't have to go through all the clicks.
2. Put the note contents in the parameter (you'd probably need to add this parameter to the model template for consistency) and then create a note referencing the parameter value in model (or even in model template, if it's supposed to always be shown in every model) and in format/drawing template. And then you can still double-click the note displayed (in model or in drawing) and edit its text, which will essentially change the parameter value for that given part.
- Mark as New
- Bookmark
- Subscribe
- Mute
- Subscribe to RSS Feed
- Permalink
- Notify Moderator
Needing a way to do this automatically using a drawing template or drawing format.
Don't want to have to generate a mapkey for every drawing format and size that we use.
The general notes will be on every drawing located in the upper left corner.
- Mark as New
- Bookmark
- Subscribe
- Mute
- Subscribe to RSS Feed
- Permalink
- Notify Moderator
@Tdaugherty had a good suggestion; use a template.
Create an MS Word doc for all of your standard notes that will be used on drawings, this is under revision control and is the controlling object for the notes. This supports the maintenance of standard notes without using Creo.
Use this file (MS Word doc) to place the notes in a drawing template.
Use the template when creating a new drawing.
Update the templates upon revision of the notes.
Involute Development, LLC
Consulting Engineers
Specialists in Creo Parametric
- Mark as New
- Bookmark
- Subscribe
- Mute
- Subscribe to RSS Feed
- Permalink
- Notify Moderator
Will this show the model base definition annotation feature note?
Needing to show the note that's in the form of a model annotation that resides in the model.
We are currently needing to work in a dual environment where we have MBD and still have 2D drawing requirements.
- Mark as New
- Bookmark
- Subscribe
- Mute
- Subscribe to RSS Feed
- Permalink
- Notify Moderator
Ignoring the fact that you are implementing "MBD" and still using 2D drawings. Debate for another thread.....
Yes, I believe it is possible by using the Word doc as the source for the standard notes as well as the drawing template notes.
You can use the Word document to populate the same notes in a model using an annotation note.
Involute Development, LLC
Consulting Engineers
Specialists in Creo Parametric
- Mark as New
- Bookmark
- Subscribe
- Mute
- Subscribe to RSS Feed
- Permalink
- Notify Moderator
FYI,
I had submitted a help ticket with PTC and still needing to discuss this issue with them. Sorry for the slow response as I have been out of the office. Yes, I could use a mapkey but hoping PTC has an automatic way of showing a annotation feature note in a model on a drawing when it's created without showing all annotations of the model. Would like it driven from a drawing template or drawing format as we have many drawing formats and sizes we have to deal with.
Don A
- Mark as New
- Bookmark
- Subscribe
- Mute
- Subscribe to RSS Feed
- Permalink
- Notify Moderator
Well, one way I can think of doing this is:
1) make / revise your company templates or formats and include in them a callout for displaying a model parameter:
2) In your model, create a parameter (of type NOTE) and its value will be the ID of the model note that you are going to be displaying in your drawings.
(here I called this parameter GENERAL_NOTES)
3) now when you use the template to make the drawing of the model, the designated note will show up "automatically".
You / your users will have to designate which note will be shown by populating the value of the GENERAL_NOTES parameter in your (legacy) models.
If your start parts have this parameter with its value pointing to the included standard note, then this will be pretty much hands-off automatic for new models...
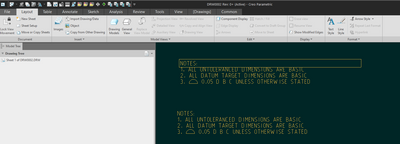
Hope that makes sense. Above example shows a template which has a table and a note showing how the result shows up.
I haven't tried it with a format, but I expect similar results.
PS. this is how my example note looks like in the part model:
- the GD&T feature control frame doesn't come through very well on the drawing.
So seems there will be limitations, but should work for basic text.
- Mark as New
- Bookmark
- Subscribe
- Mute
- Subscribe to RSS Feed
- Permalink
- Notify Moderator
Are you using a annotation feature in the model to show the note (attached to the features that the notes control)?
It needs to be an annotation feature due to Model Base Definition requirements and the need for automated inspection information extraction.
I still haven't found a way to have one or 2 annotation notes automatically displayed by drawing template or format.
Don A
- Mark as New
- Bookmark
- Subscribe
- Mute
- Subscribe to RSS Feed
- Permalink
- Notify Moderator
Yes, I'm using annotation features. The example I show uses a flat-to-screen note element but the method will work with notes with leaders and attached to model geometry. Here's the composite (redacted) screenshot of the model that is being shown on my example template / drawing:
To be clear, you understand what Note type parameters are? And you have tried to use them but they don't work for your application?
- Mark as New
- Bookmark
- Subscribe
- Mute
- Subscribe to RSS Feed
- Permalink
- Notify Moderator
FYI, I accpeted the solution by mistake and ask the admin to back it out.
Yes, I know what note type parameters are and they won't work for our needs.
For the annotation feature, how were you able to show it by default on all drawings?
Did you use a template or drawing format?
Are notes need to be annotation features for MBD so each note line can be linked to the individual features in the model for automated inspection requirements
I haven;t found a way to show the annotation feature in a drawing format or drawing template.
I can do it with drawing template but the process shows all model dimensions and all notes which we don't want the template to show.
Don A
- Mark as New
- Bookmark
- Subscribe
- Mute
- Subscribe to RSS Feed
- Permalink
- Notify Moderator
Hi @danders238, I wish I could help you find the answer, but I think we are misunderstanding each other.
The method I proposed seems to fit your requirements and works on my system.
The answers to your latest round of questions are already contained in my previous posts,
There is the notable problem with my proposed method in that GD&T symbols rendered properly in the model are not displayed correctly on the drawing.
That is most likely a bug that PTC needs to fix, but I'm out of other ideas to your continual ask of being able to automatically show 1 or 2 model notes on the new drawing.
By the way, how would you specify in the drawing format / template which of the notes from the model should be shown on the drawing?
(this is why I proposed using the note parameters to designate and display such "key" notes)
Good luck and let us know if you get the answer from PTC support.
- Mark as New
- Bookmark
- Subscribe
- Mute
- Subscribe to RSS Feed
- Permalink
- Notify Moderator
FYI, we are on Creo 8


