cancel
Showing results for 
Search instead for 
Did you mean: 
cancel
Showing results for 
Search instead for 
Did you mean: 

Community Tip - Did you get an answer that solved your problem? Please mark it as an Accepted Solution so others with the same problem can find the answer easily. X

Modelling cam tracks (CREO 6.0)

LH_10622630
4-Participant

Modelling cam tracks (CREO 6.0)

Hello all, I was wondering if anyone could give any advice on how to model a cam track from an old drawing.


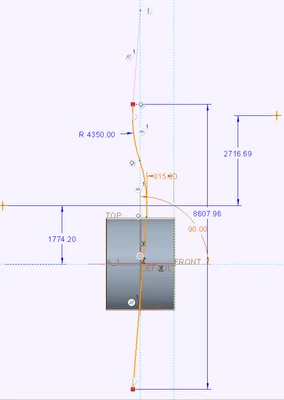
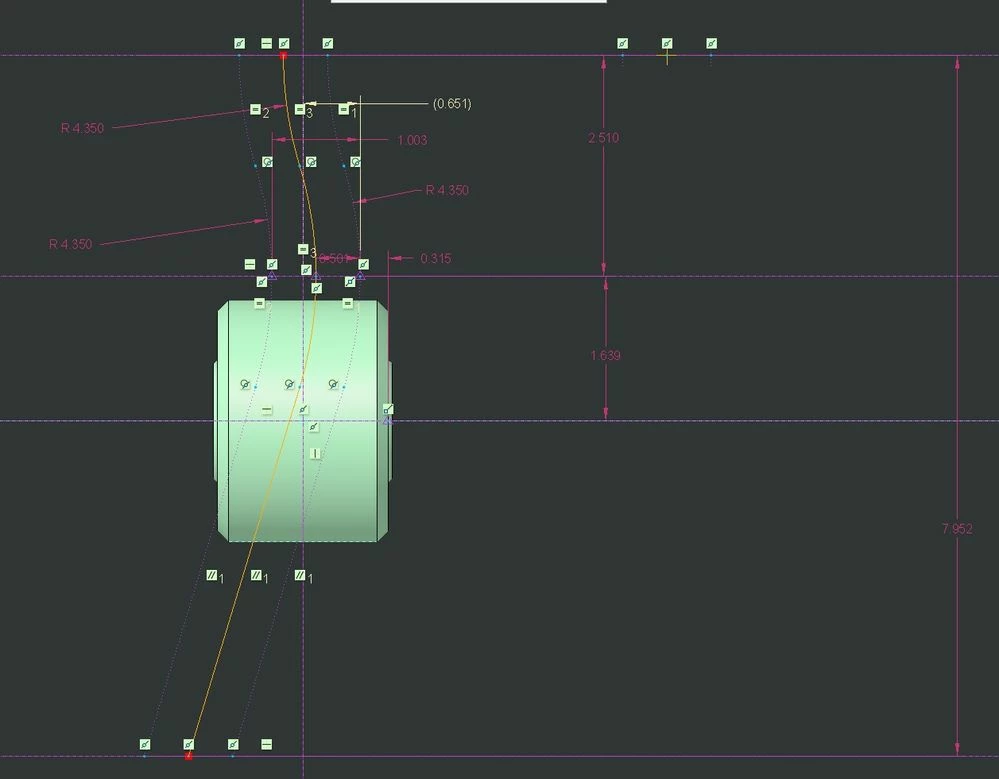
I have one idea so far; to draw the profile of the track on a plane and then project it on the outer face of the cam. Then cutting it with a sweep. Unsure if this will work for the whole track, definitely a misunderstanding on my part somewhere. If anyone has any tips, advice or just a better way to do it, I'm all ears. 
 

SKETCH.jpg

This is what I have so far.


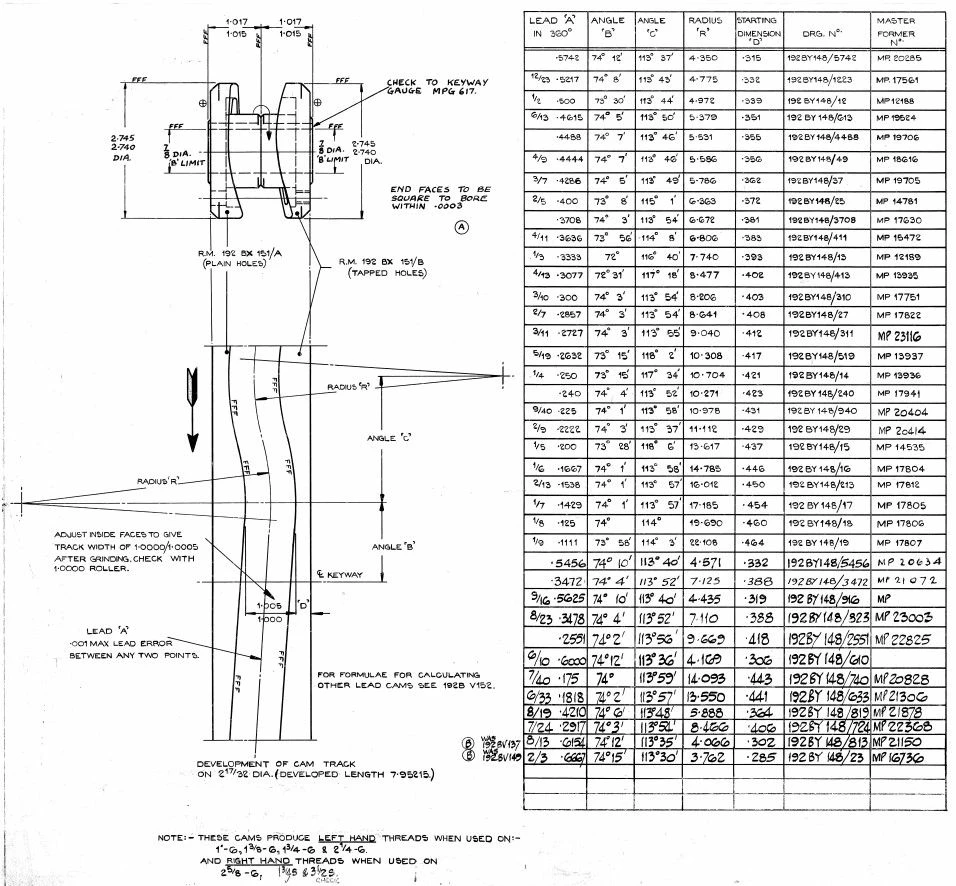
I'm also not entirely sure what "LEAD A" is or how the angles (B and C) relate to the shape in 3D. Perhaps it needs to be calculated to an arc?
 

Screenshot 2024-06-03.jpg

I have been using values from the first line,
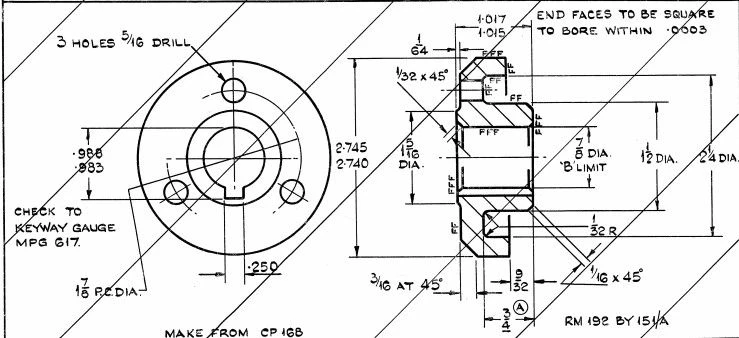
 

PART IMAGE.jpg

This is what it should look like in the end.


Thank you for any time you may put in to this!

ACCEPTED SOLUTION

Accepted Solutions

I would suggest starting with creating a parameter for each needed dimension (A, B, C, D, R) to make the other variations easier to create.  Angles would need to be in two parts (minutes & seconds) and converted in a relation (most accurate) or be converted from degrees/minutes to degrees.

Create cylinder

Measure circumference and save as feature.

Create relations for length of circumference, length of angle b, and length of angle c.

Create sketch of CL with relations to parameters and lengths.

Wrap sketch around cylinder.

Sweep a cut.

Here is my sketch:

kdirth_0-1717443310301.png


There is always more to learn in Creo.

View solution in original post

15 REPLIES 15
tbraxton
22-Sapphire I
(To:LH_10622630)

Projecting from a plane on a cylinder is not going to work for this. The drawing represents the developed surface of a cylinder into which the cam track is cut.  A clue to this is that the developed length of the cam track is given as a number explicitly in the flat view. You can visualize this by imagining wrapping a piece of paper around a cylinder. If you were to draw the cam track trajectory on the paper while it is flat that is what is shown in the first drawing. The angles B and C represent the subtended arc on the cylinder. Think of looking at the face of the cylinder where it is a circle and then you would measure the angle on the clock face (circle) to lay out B and C.


I believe lead A is a specification of tolerance on the track width, but I am not sure exactly what variation it describes. I would guess it is analogous to the lead angle on a thread.


Create a surface for the flat pattern and sketch a curve of the trajectory on the flat pattern and then wrap it around a cylinder of correct radius, you will then have the trajectory to cut the cam slot with a sweep.

========================================
Involute Development, LLC
Consulting Engineers
Specialists in Creo Parametric
TomU
23-Emerald IV
(To:LH_10622630)

I have spent hundreds of hours attempting to accurately model barrel cam profiles in Creo, and I've reached the conclusion that it's not possible without a true '3D Sweep' function.  The roller/cutter will interfere with material off axis from the center of the roller and no 2D sweep or surface offset will accurately capture this.  It's okay to document the intended motion of the follower in 2D, but the resulting 3D geometry in Creo will not accurately represent it.


Re: Barrel Cam - PTC Community

tbraxton
22-Sapphire I
(To:TomU)

Does the volume helical sweep function in Creo work for any non-trivial cam profiles cut on a cylinder?

========================================
Involute Development, LLC
Consulting Engineers
Specialists in Creo Parametric
TomU
23-Emerald IV
(To:tbraxton)

The volume helical sweep feature is only helical.  It will not work for a cam profile that starts and stops in the same spot (as far as I know.)

I would suggest starting with creating a parameter for each needed dimension (A, B, C, D, R) to make the other variations easier to create.  Angles would need to be in two parts (minutes & seconds) and converted in a relation (most accurate) or be converted from degrees/minutes to degrees.

Create cylinder

Measure circumference and save as feature.

Create relations for length of circumference, length of angle b, and length of angle c.

Create sketch of CL with relations to parameters and lengths.

Wrap sketch around cylinder.

Sweep a cut.

Here is my sketch:

kdirth_0-1717443310301.png


There is always more to learn in Creo.

I’ve tried creating it based on your description, but I think I’m doing something wrong because the part doesn’t look like it should.
Did the angles converted from minutes to decimals, then used the angle to get an arc length so on and so forth but for some reasons my values are different from yours.


I attached the part, hopefully someone can see what I’m doing wrong.


It’s true with involutes in cad, used to work for a thread grinding company and we spent hours in trying to convert the spline in a thread from to something that the machine could use as an interface for forming the thread grinding stone. In my opinion it wasn’t that it’s not accurate, it’s just that CNCs can’t get splines, they need points, but like with threads or gears a 3d model can be accurate enough to have a part done considering that the tool is done after a true involute and an operator will give corrections in the true involute system. Not impossible but very difficult hence not being used.


Thanks guys, definitely always more to learn.

You are close.  However, the ends of the curve need to meet tangent when they wrap around the cylinder.  If you look closely at my sketch, I have a construction line at the top, tangent to the arc and parallel to the bottom line and the two ends are matched vertically.  Also, you have the top end of the coincident to the center line thru the center point.


I am using 7.0, otherwise I would share the file.


There is always more to learn in Creo.

I think Ive sorted it out, seen that just after posting.

Now the wrap wont work.


I got Creo 9 too.

Here is a 7.0 model.


There is always more to learn in Creo.
kdirth
21-Topaz I
(To:kdirth)

Here is another way to create the geometry that may be closer to the desired shape using a thickened cut.

kdirth_0-1717524039223.png


There is always more to learn in Creo.

Adding a sketch CSYS on the center line of the cylinder will help.


There is always more to learn in Creo.
LH_10622630
4-Participant
(To:kdirth)

Hi, thanks for the help. All of these replies are getting me closer.


My values are similar to yours but where did you get the value R4350?

That is the radius, first line in that table, but still can’t create the part. Impossible.

tbraxton
22-Sapphire I
(To:LH_10622630)

Here is an example of where the developed surface of a cylinder is used to place features at specific locations on the surface in the flat pattern. You can see the dimensions of the developed length mapped to the clocking angle of the cylinder. Zero deg is the left end of the developed surface. This is a trivial explanation; this technique is used to document the location of features on the cylinder wall in a flat pattern format on 2D docs. It allows one to see all of the features on the cylinder in a single view on a drawing.


tbraxton_0-1717499294666.png


========================================
Involute Development, LLC
Consulting Engineers
Specialists in Creo Parametric

I want to thank you all for the amazing help. I learnt a lot from this one question.

Announcements
NEW Creo+ Topics: Real-time Collaboration


Top Tags