Community Tip - If community subscription notifications are filling up your inbox you can set up a daily digest and get all your notifications in a single email. X
- Community
- Creo+ and Creo Parametric
- 3D Part & Assembly Design
- Re: Planar bend error?
- Subscribe to RSS Feed
- Mark Topic as New
- Mark Topic as Read
- Float this Topic for Current User
- Bookmark
- Subscribe
- Mute
- Printer Friendly Page
Planar bend error?
- Mark as New
- Bookmark
- Subscribe
- Mute
- Subscribe to RSS Feed
- Permalink
- Notify Moderator
Planar bend error?
Having been trying to get creo to do a planar bend - it looks like there is an error in either the way I am doing things, or in the way Creo performs the bend:
for example
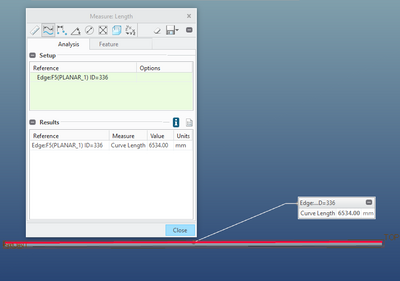
if the ID = 2080mm, then the circumference should be 6534.5mm.
If I create a flat strip 6534mm long, this should bend to an ID of 2080 with a small gap
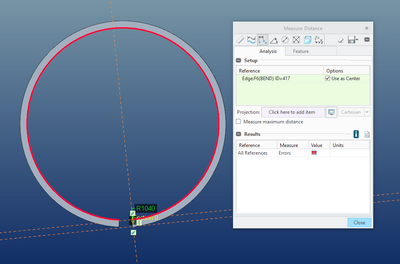
so why when the part is bent with a radius of 1040 do i end up with an ID circumference of 6387mm? and a 147mm gap when the bend line is on the end of the part?
why is Creo making the "blank" shorter than modeled.
i have tried several bend tables, but they make no difference.
also as a side point on a creo forum why cant creo files be uploaded????
- Mark as New
- Bookmark
- Subscribe
- Mute
- Subscribe to RSS Feed
- Permalink
- Notify Moderator
If you want to bend a strip of metal to a specific inner radius, the length of the unbent piece is *not* the circumference at the inner diameter. You have to calculate it at the mid plane of the strip. In other words, it's a function of the inner radius and thickness:
length = 2 * pi * ( inner radius + thickness / 2 )
- Mark as New
- Bookmark
- Subscribe
- Mute
- Subscribe to RSS Feed
- Permalink
- Notify Moderator
Hi Ken
i was thinking that too, but this also does not work.
if i drive the length by:
sd1=floor(PI*(2080+sd0))
sd1=length
sd0=width
then i cannot bend the strip by an internal rad of 1040 as there will be an overlap on the internal corners. the closest i can get is a rad of 1054
the closest i can get to an ID of 2080 is
sd1=floor(PI*(2080+(sd0*0.625))) which makes no sense!
- Mark as New
- Bookmark
- Subscribe
- Mute
- Subscribe to RSS Feed
- Permalink
- Notify Moderator
Sheet metal applies a bend allowance calculation when unbending. So depending on your y (or k) factor in your config, it will allow for the stretch of the material when bending. The factor changes based on material and manufacturing methods so it's not a number you can just ask a random stranger for.
That being said, for rolled parts (large radius bends) like you are showing, I usually use the centerlline circumference like Ken showed since the material is only "gently" stretched (LOL, sorry for the highly technical lingo) and generally falls within normal manufacturing tolerances.
Your manufacturing process is the biggest factor in determining the y (or k) factor.
Just in case someone wants to learn more about how we used to have to hand calculate sheet metal flat patterns, here's a link:
https://www.thefabricator.com/thefabricator/article/bending/the-basics-of-applying-bend-functions
- Mark as New
- Bookmark
- Subscribe
- Mute
- Subscribe to RSS Feed
- Permalink
- Notify Moderator
Yeah there's a lot of empirical knowledge that comes into play when you're forming sheet metal. Things like overbending to get materials like titanium or inconel to bend to the desired radius or angle, etc. (bend it further than the final shape so when released it springs back to the target angle). Back when we did punch die work there was a guy (long since retired) who could calculate all the steps needed to do things like a 8 stage progressive die, and it would work the first time. It's amazing when someone with hard-learned knowledge designs these types of things.
We do in fact make a lot of parts with large radius bends to them, and the middle plane calculations are sufficient for the tolerances we're dealing with. But I'll take a look at the calculation methods you linked to, and see if maybe I could improve things, or at least understand when a situation comes up where I will have to.
- Mark as New
- Bookmark
- Subscribe
- Mute
- Subscribe to RSS Feed
- Permalink
- Notify Moderator
The bulk of my experience was in press brake bending, not really sheet metal as such, usually steel plate.
Definitely not progressive die, that's like black magic, HAHA.
From a press brake standpoint, if you're using a v-block bottoming die (or open bottom die, I can't remember which, grey hair problems), I vaguely remember using a k factor of .447 (where .500 is the material centerline). The simple explanation is the material stretches as its bending and the conservation of mass dictates that the thickness of the material in the bend area (stretched area) will thin. The .447 is the empirical value that we determined for that manufacturing method and mild steel.
All that being said, if you are building in your own shop, you can figure out all this and provide your shop with flat layouts that are pretty accurate.
If you are sending parts out to multiple vendors and don't have complete control over the manufacturing methods, I would suggest that you don't provide flat layouts. Let the vendor calculate the flat. They should know their equipment and they better be able to figure out the flat they need to provide to make the finish part you bought. If you provide the flat and it doesn't meet the finish dimensions, whose fault is it and who pays for the rework/scrap.
- Mark as New
- Bookmark
- Subscribe
- Mute
- Subscribe to RSS Feed
- Permalink
- Notify Moderator
cheers Steve
takes me back to my apprenticeship days...
will have a read through
- Mark as New
- Bookmark
- Subscribe
- Mute
- Subscribe to RSS Feed
- Permalink
- Notify Moderator
In the real world, large radius bends don't stretch the material like a "small" radius bend does.
I *think* for a big rolled ring like that, you will need a k-factor of .5 which puts the bend line in the middle of the radius. It's been way too many years since I've done this all manually so I've forgotten most everything.
I found this in another conversation about bending http://www.cutterod.com/cutter_zone/General/bending.pdf (credit Ben Loosli in that post). It discusses manufacturing methods along with some suggested k-factors.


