Turn on suggestions
Auto-suggest helps you quickly narrow down your search results by suggesting possible matches as you type.
Showing results for
Please log in to access translation
Turn on suggestions
Auto-suggest helps you quickly narrow down your search results by suggesting possible matches as you type.
Showing results for
Community Tip - Need to share some code when posting a question or reply? Make sure to use the "Insert code sample" menu option. Learn more! X
- Community
- Creo+ and Creo Parametric
- 3D Part & Assembly Design
- different appearance in the same surface
Translate the entire conversation x
Please log in to access translation
Options
- Subscribe to RSS Feed
- Mark Topic as New
- Mark Topic as Read
- Float this Topic for Current User
- Bookmark
- Subscribe
- Mute
- Printer Friendly Page
different appearance in the same surface
Apr 29, 2015
05:24 AM
- Mark as New
- Bookmark
- Subscribe
- Mute
- Subscribe to RSS Feed
- Permalink
- Notify Moderator
Please log in to access translation
Apr 29, 2015
05:24 AM
different appearance in the same surface
Hello to everyone:
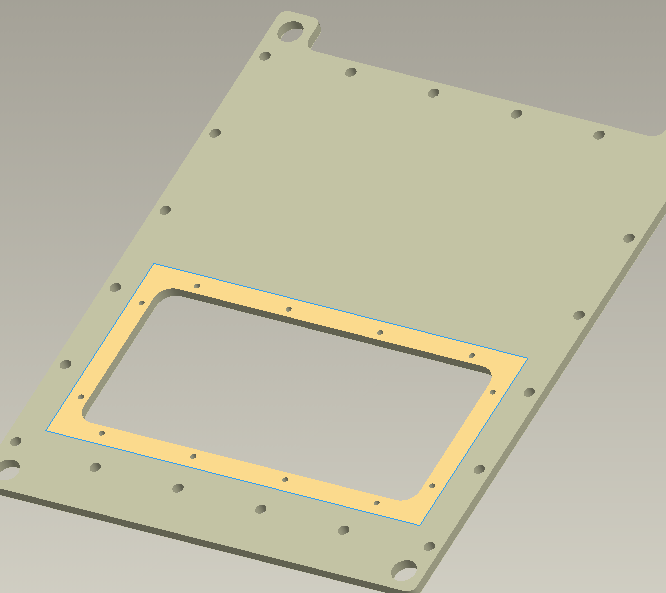
I would like to see the same surface with different colors. Can I do this?
Attached is an example
Thanks
This thread is inactive and closed by the PTC Community Management Team. If you would like to provide a reply and re-open this thread, please notify the moderator and reference the thread. You may also use "Start a topic" button to ask a new question. Please be sure to include what version of the PTC product you are using so another community member knowledgeable about your version may be able to assist.
Solved! Go to Solution.
Labels:
- Labels:
-
2D Drawing
ACCEPTED SOLUTION
Accepted Solutions
Apr 29, 2015
08:22 AM
- Mark as New
- Bookmark
- Subscribe
- Mute
- Subscribe to RSS Feed
- Permalink
- Notify Moderator
Please log in to access translation
Apr 29, 2015
08:22 AM
Nope. They have to be two separate, disconnected surfaces.
4 REPLIES 4
Apr 29, 2015
08:22 AM
- Mark as New
- Bookmark
- Subscribe
- Mute
- Subscribe to RSS Feed
- Permalink
- Notify Moderator
Please log in to access translation
Apr 29, 2015
08:22 AM
Nope. They have to be two separate, disconnected surfaces.
Apr 29, 2015
01:30 PM
- Mark as New
- Bookmark
- Subscribe
- Mute
- Subscribe to RSS Feed
- Permalink
- Notify Moderator
Please log in to access translation
Apr 29, 2015
01:30 PM
I've never done anything with them, but would it be possible to make a texture and apply it to the surface? Like the wood patterns, but with just two colors? I don't know enough about this stuff to know the mechanics of it, but it might be a method?
Apr 29, 2015
02:01 PM
- Mark as New
- Bookmark
- Subscribe
- Mute
- Subscribe to RSS Feed
- Permalink
- Notify Moderator
Please log in to access translation
Apr 29, 2015
02:01 PM
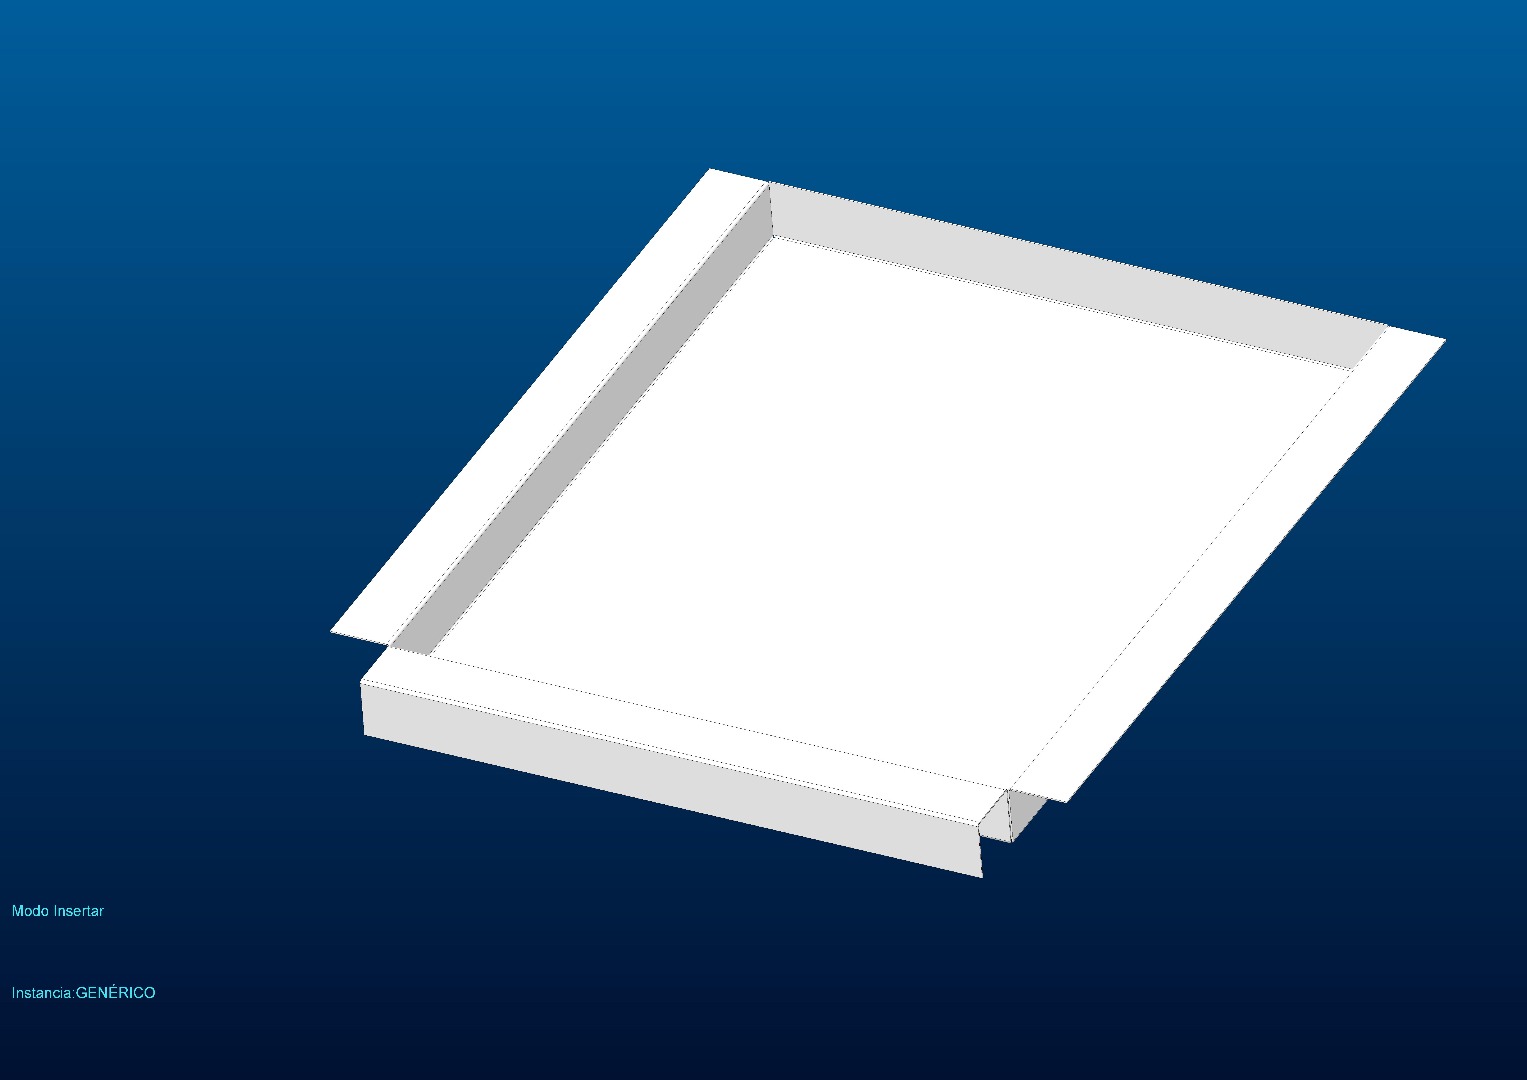
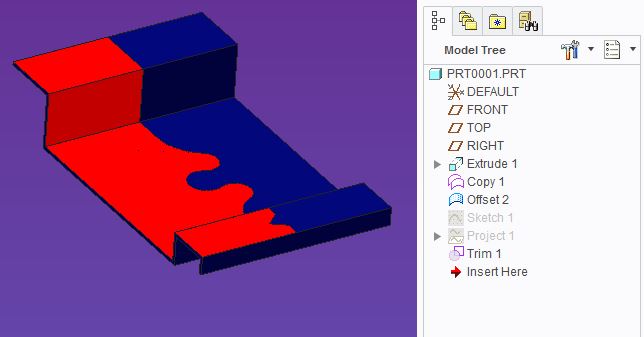
You can copy the surface you want a different color, offset a surface by a small amount (0.01), trim that surface to the shape you want and color it.
Where there is a will there is a way.
There is always more to learn in Creo.
Apr 29, 2015
04:30 PM
- Mark as New
- Bookmark
- Subscribe
- Mute
- Subscribe to RSS Feed
- Permalink
- Notify Moderator
Please log in to access translation
Apr 29, 2015
04:30 PM
Man this Jive interface is killing me. Cut & paste below.
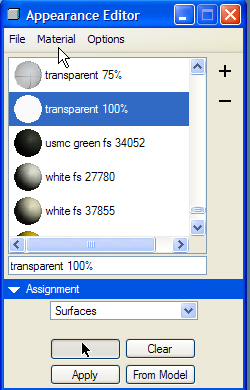
Step 1: Clear the Solid surface
Go to the Colors
Pick a 100% transparent color
Set category to surfaces
Pick on the surface of the model that will be split
Hit the Apply button
Step 2: Recreate Surfaces
The original surface is now transparent, the model is still solid and the top surface is still there.
Set the query filter to geometry
Pick on the “missing” surface
Use Edit > Copy (CTRL+C)
Use Edit > Paste (CTRL+C)
This initiates the surface copy dashboard
Use green check to finish new surface
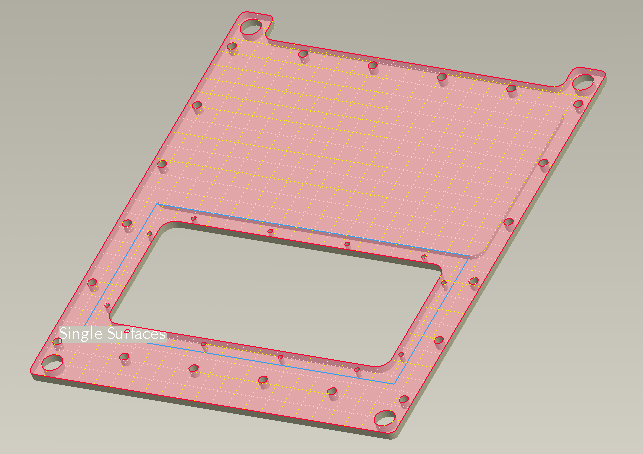
Set the query filter to quilts
Pick on the “new” surface
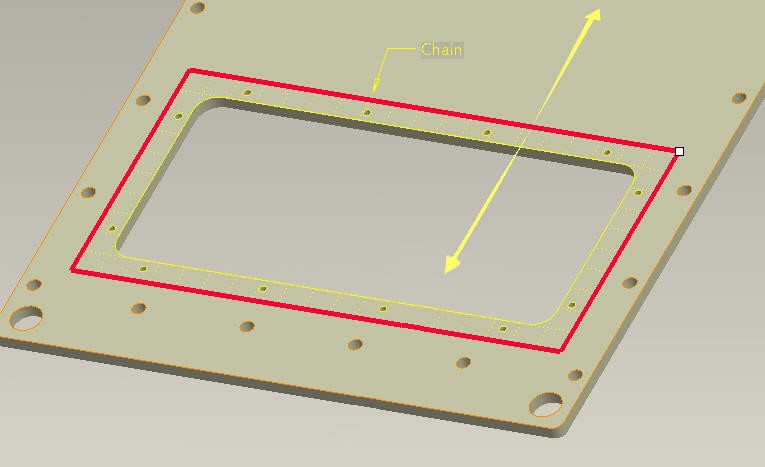
Use Edit > Trim
Create/use a sketch that is the color border
Yellow arrow and hatching indicate portion to keep
Use the switch direction button until arrow points both ways
Use green check to finish new surface trim
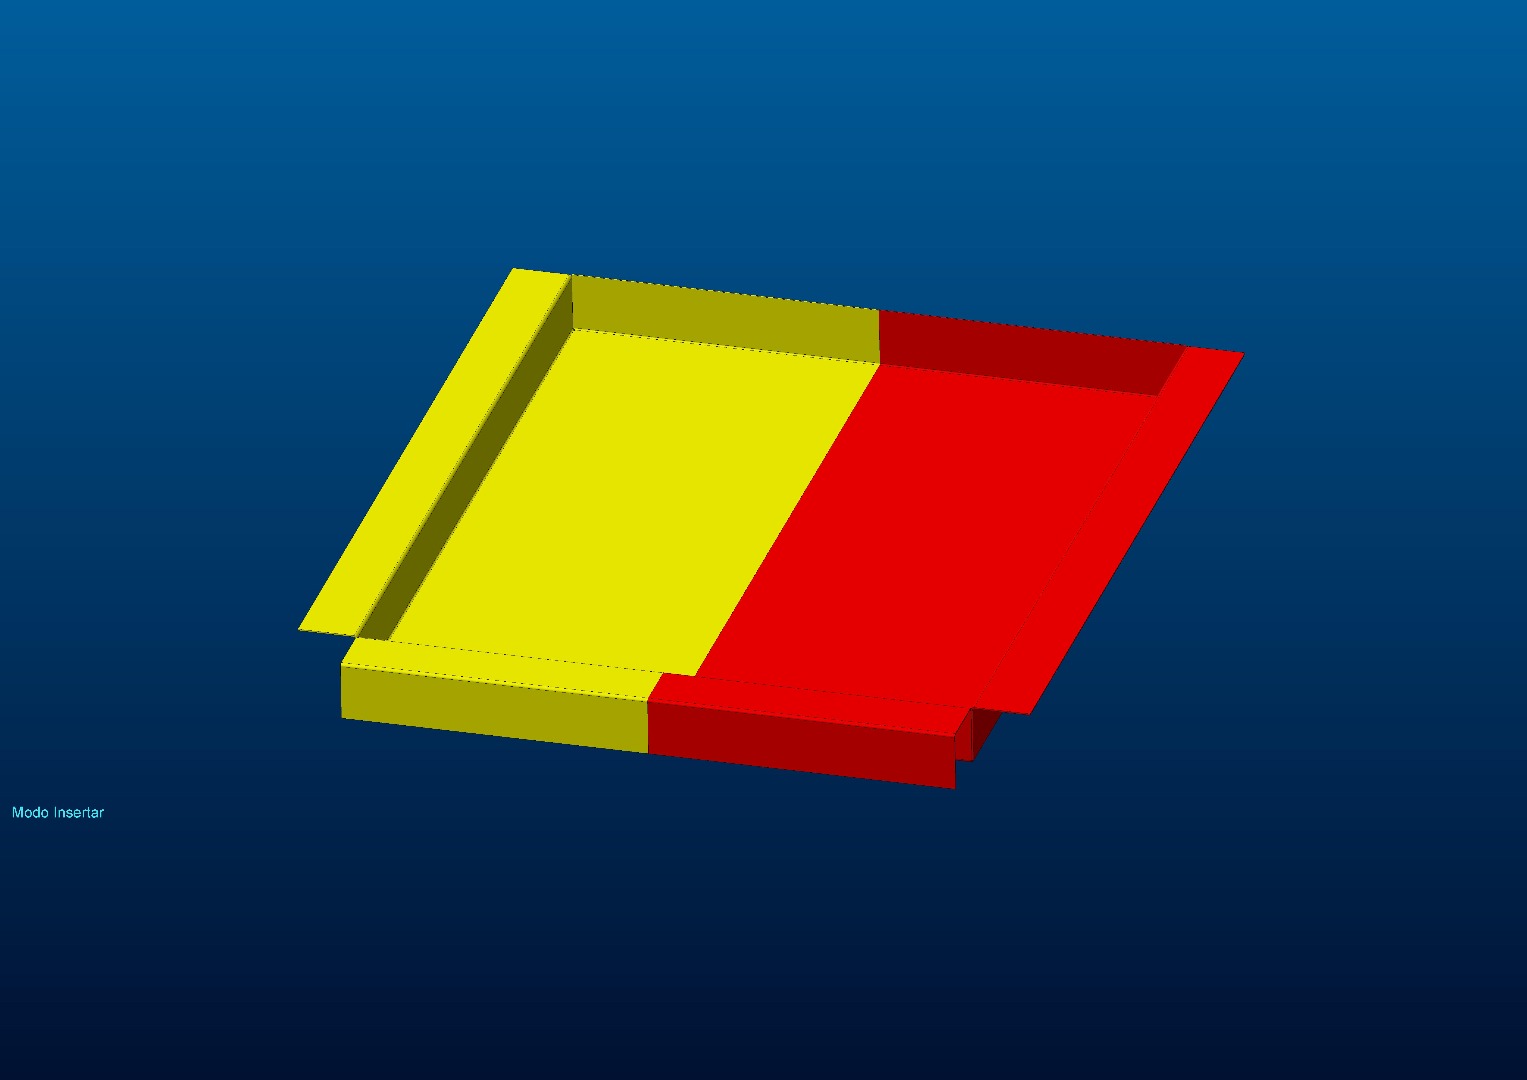
Step 3: Color the New Surfaces
Go to the Colors
Pick the desired color
Set category to surfaces
Pick on the desired half of the split surface
Pick “Both” prompt
Hit the Apply button
Repeat step. The only difference is to pick the other half of the trim surface
You may or may not need to change color of new surface
If it is the same as the original model color