Hi Steve...
It's like you're at the tip of an iceberg that extends down to the bottom of the ocean. 
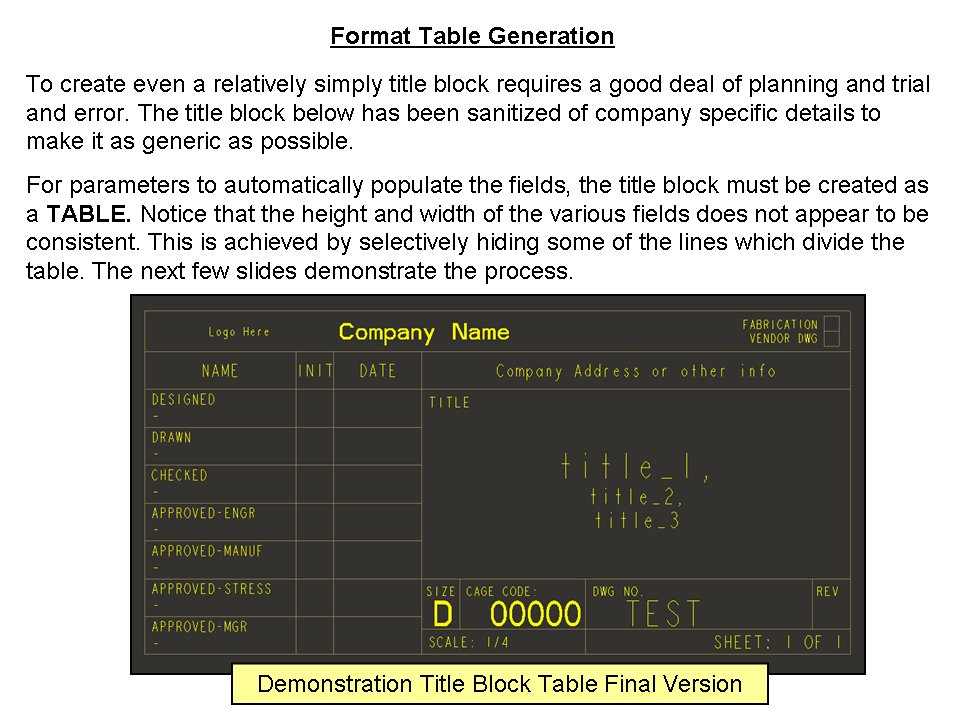
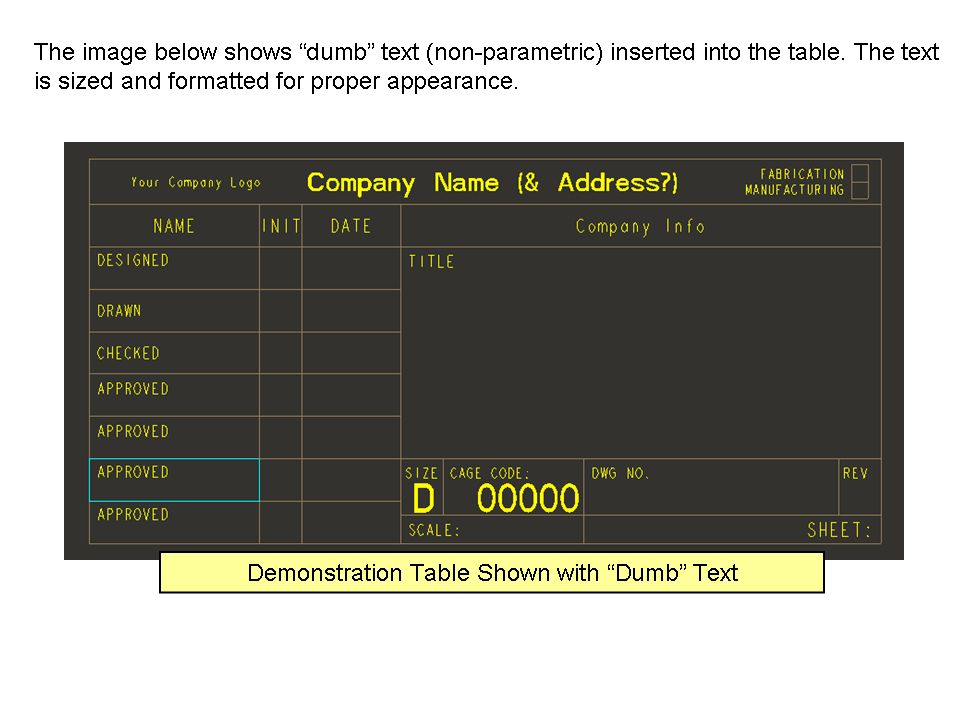
Title blocks are a monumental pain in the neck. You have to create them using TABLES, not just lines. The parameters you wish to automatically populate the title block MUST be contained in table cells of they will not work. The trick here is mimicing your "original" title block using tables.
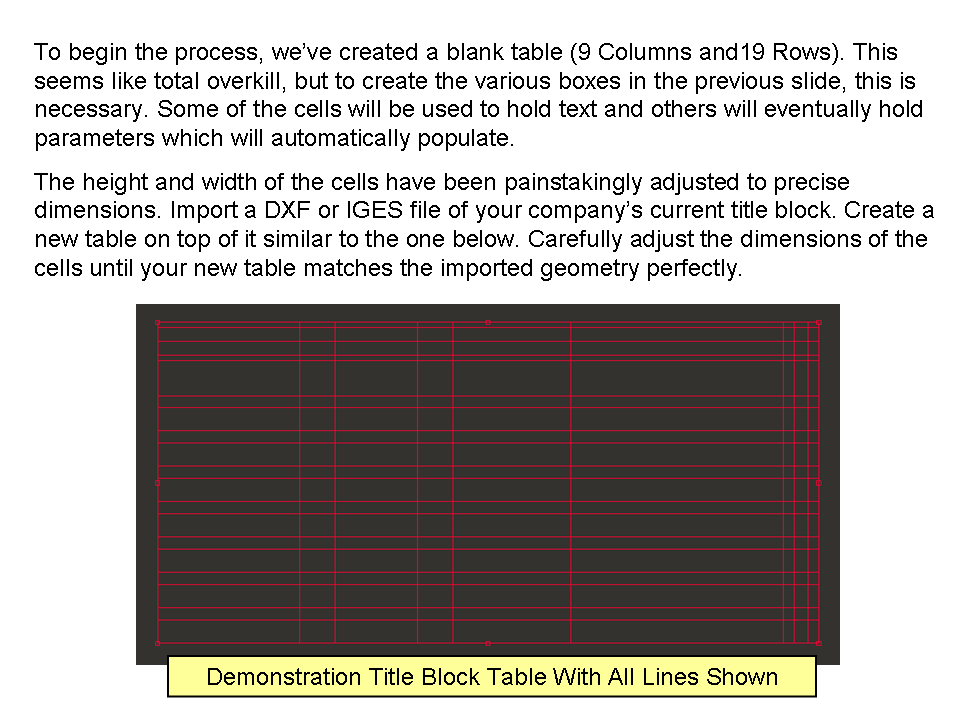
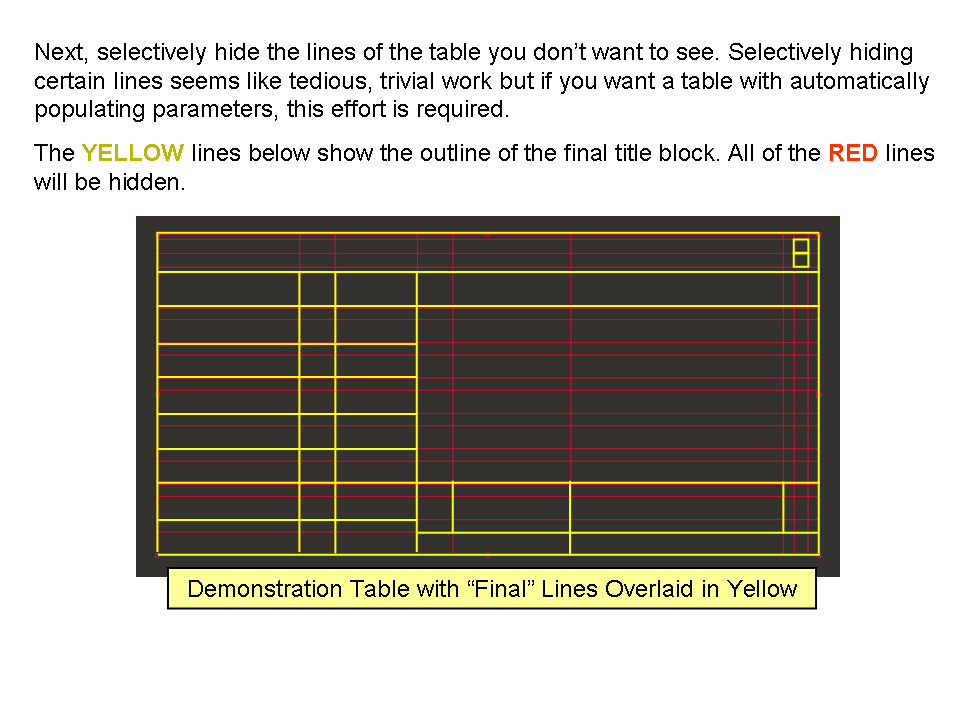
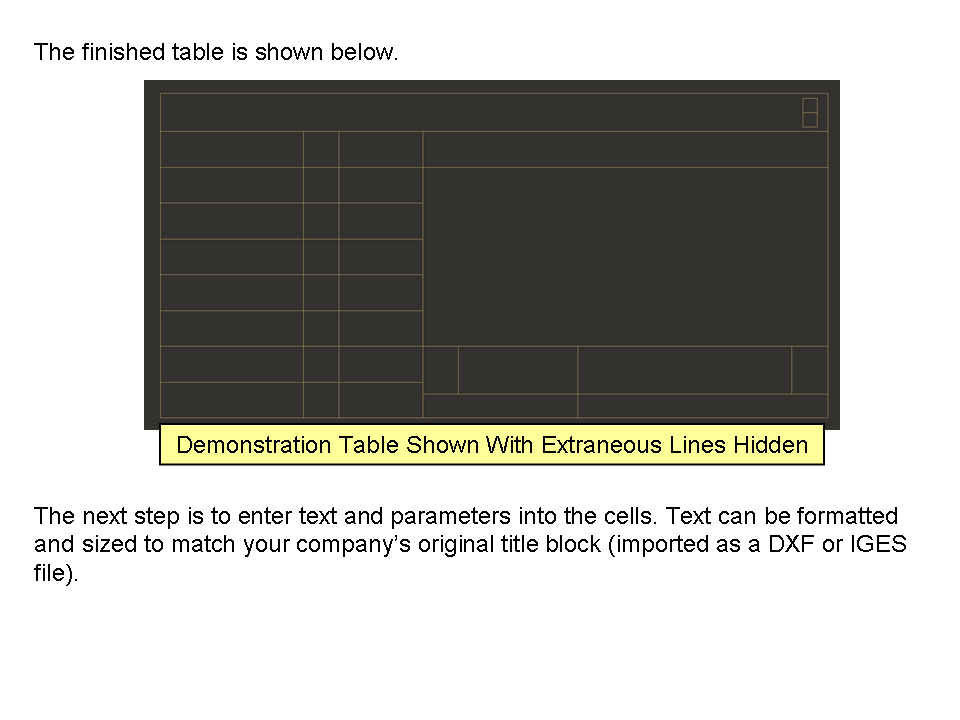
Most people create very simple tables... a few rows down and a few rows across. This limits the "look" of your title block. To really have complete control over your title block... and mimic the look of your original, you should export a DXF or IGES of your company's original title block. Use that to help you create a table in Creo to duplicate the look of your original artwork. The steps below give you a rough idea of what you're up against. After the slides we'll talk about mass, scale, revision level, and other issues. As always, click the images below to see a larger, more easy-to-read version...
The example above is only an example. The title block at my company actually uses a similar block to the one above but there are also OTHER tables on the drawing, too. We have about 4 different tables of information including a revision block, tolerance block, units of measure block, and other items. Not to mention we have several different bills of materials which also have to mesh seamlessly with the format to create a coherent look and feel to the drawings.
The task of creating templates, formats, and start parts is no small feat.
In your email, you mentioned several parameters you wanted in your models:
Title
Drawn By
Date Drawn
Mass
Material
Revision Level
Scale
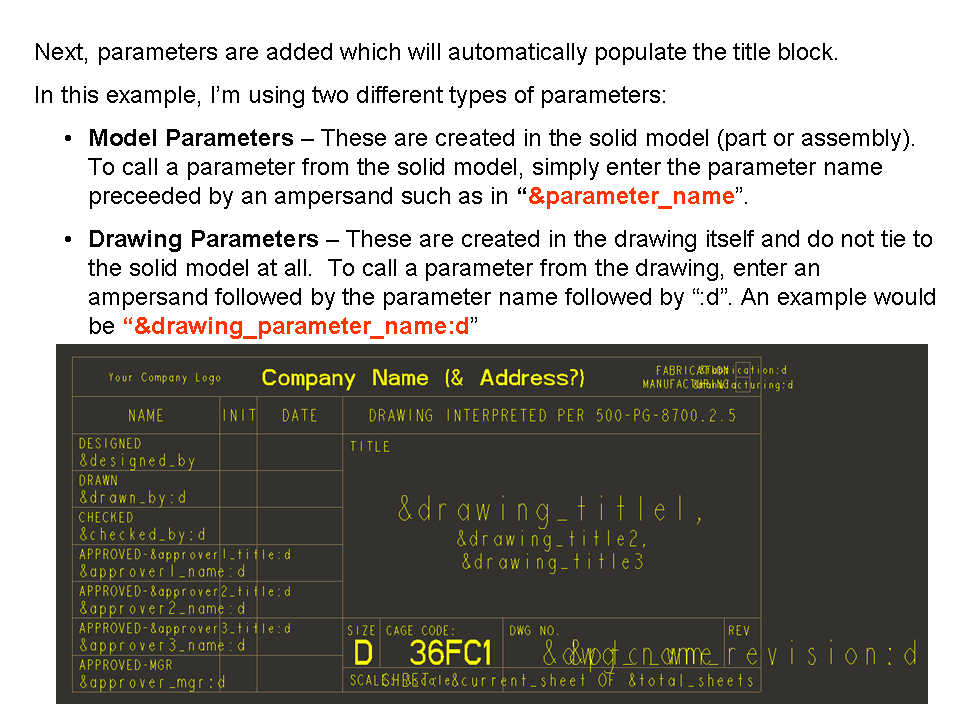
For Title, consider that sometimes you'll want more than one line of text for a title. Wrapping the words so they consume multiple lines can be done... but many companies break up their titles into separate parameters (as in my example above) to eliminate the need for word wrapping or special relations which automatically break the title into smaller chunks.
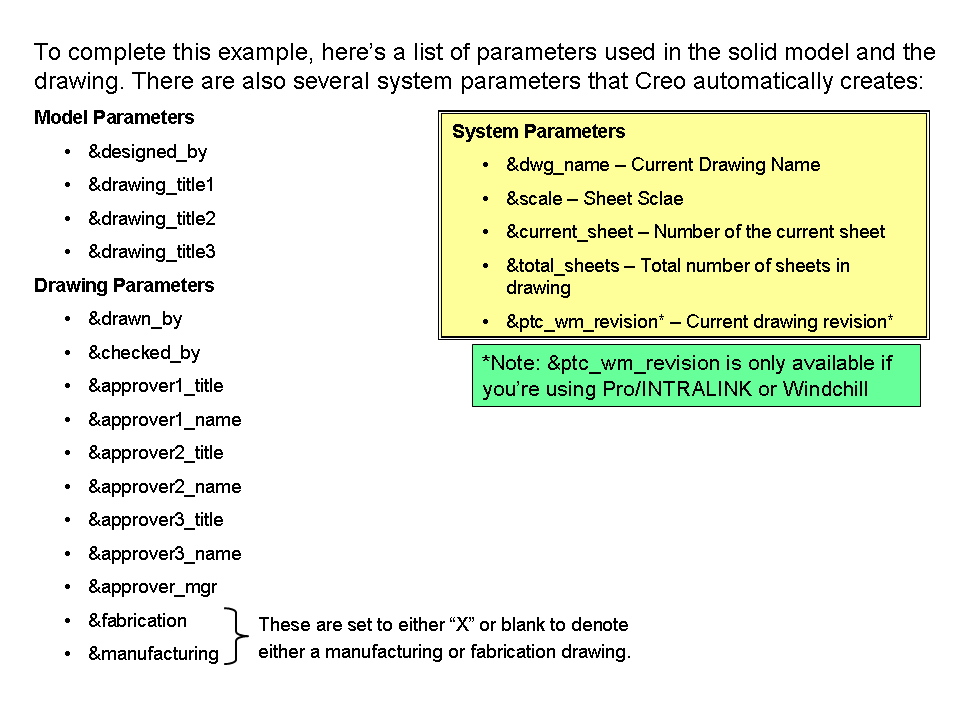
For Mass, if you've set the density correctly - OR if you've used a well-defined material file, you can use &pro_mp_mass, a system-created parameter which contains the mass of the current model. There are some tricks to using this and some caveats but just knowing the parameter name helps get you started.
Material can be set using your material file (which you'll likely have to create). There are a few ways to do this... but the best is to create a parameter within the material file called "material_name" and assign a string value to it. You can have Creo automatically report the name of the material file itself using &ptc_material_name... but this is often not as useful as you'd think. Making a separate string parameter to hold the name of the material and housing this variable inside the material file is much, much better. You can access parameters from within a material file using the syntax material_param("parameter_name"). This is beyond what I can cover in one email but if you want to know how this works, I'll do a separate email about it.
Revision Level is best controlled directly from PTC's Product Data Management software (Windchill or Pro/INTRALINK) if you have them. If not, you'll need to create this as a regular string parameter. However, consider NOT keeping this parameter in the solid model. Consider making this a drawing parameter. Often well-intentioned administrators make this a solid model parameter hoping to tie the model and the drawing revisions together. My personal preference is to keep it in the drawing only. Unless you have a PDM system, keeping the revisions straight is going to be a MONSTER task... and this extra parameter will just end up being a source of confusion.
Scale can automatically be reported on the drawing using the &scale parameter without having to add a new parameter to the model.
I'm going to answer question #2 in the next response. This one is getting rather long!
Thanks!
-Brian

