

Tutorial: Wave Washers w/ Radial Pattern
This challenge was presented here: Create wavy washer in Pro E 4.0
Geometry specifications used:
- 1" ID
- 1.25" OD
- .020" thick
- radial pin: .030" dia x .105" long, full R, both ends.
Features:
- Extrude cylinder for Wrap of sine wave.
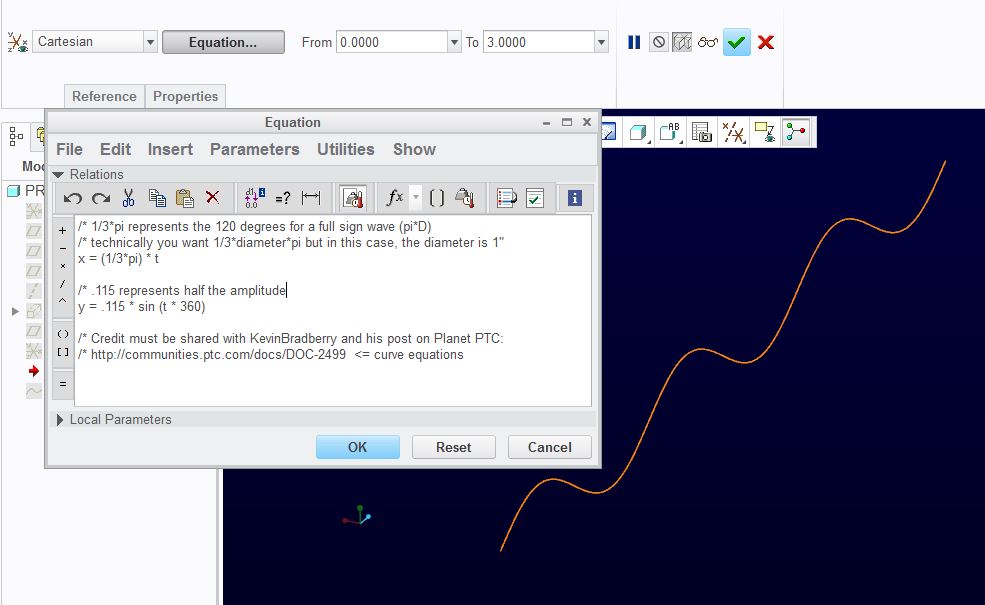
- Datum curve from Equation
- Sweep solid body and patterning quilt (surface) from Wrap
- Revolve for radial patterned features
The sine wave was generated with the following curve equation. Also be sure to link to the very helpful document by Kevin Bradberry here:
Equations for Curves (and more)
The video walks through the features. There may be some subtleties that will go by quickly so use the pause. Also check the resolution of the YouTube and open in full window. Here is the link if that helps: http://www.youtube.com/watch?v=V9qom4sncLc
I will walk through the video below with timeline notations:
To start with, the file is an empty file with my custom config. Nothing should be special due to these settings. I simply prefer this color scheme.
0:09) 1st you see the cylinder created so I have something to wrap the sine wave onto. It is obviously a surface feature but a solid will work.
0:22) Creation of the sine-wave datum curve. This uses the newly created CSYS CS1.
1:01) Using a plane tangent to the cylinder, which is coincident to the Sine-wave datum curve, Project the datum curve into the sketch.
1:09) (IMPORTANT) Create a CSYS in the sketch! This is used for wrapping. Without it, the curve doesn't project onto the cylinder directly.
1:17) Wrap the sketch onto the cylinder.
1:31) The datum curve equation made sure the length was correct (three times 1/3rd the circumference).
1:51) Sweep the solid profile of the wavy washer; 1/8" wide, .02" thick centered about the sweep origin and to the outside of the cylinder.
2:17) A special Sweep surface for patterning the radial feature. This is a line the same width as the feature centered in the washer.
2:44) You can see the radial pattern here.
2:50) This pattern is "curve" based so this is the sketch for the pattern. Its diameter is 1.1"
2:51) The revolve feature for the pattern.
2:54) The section for the revolve feature.
3:12) Pattern definitions:
- "Curve" ...pattern type.
- "50 pattern members" ...equally distributed.
- "pattern sketch" ...intersect at the surface feature's inside edge.
- "use alternate origin" ...makes sure the pattern will follow without offset.
- "follow surface shape" ...be sure to pick the quilt to get the complete face. I could not select the whole face without creating this surface 1st.
- "follow surface direction"
- "follow curve direction"
4:16) Hide construction features.
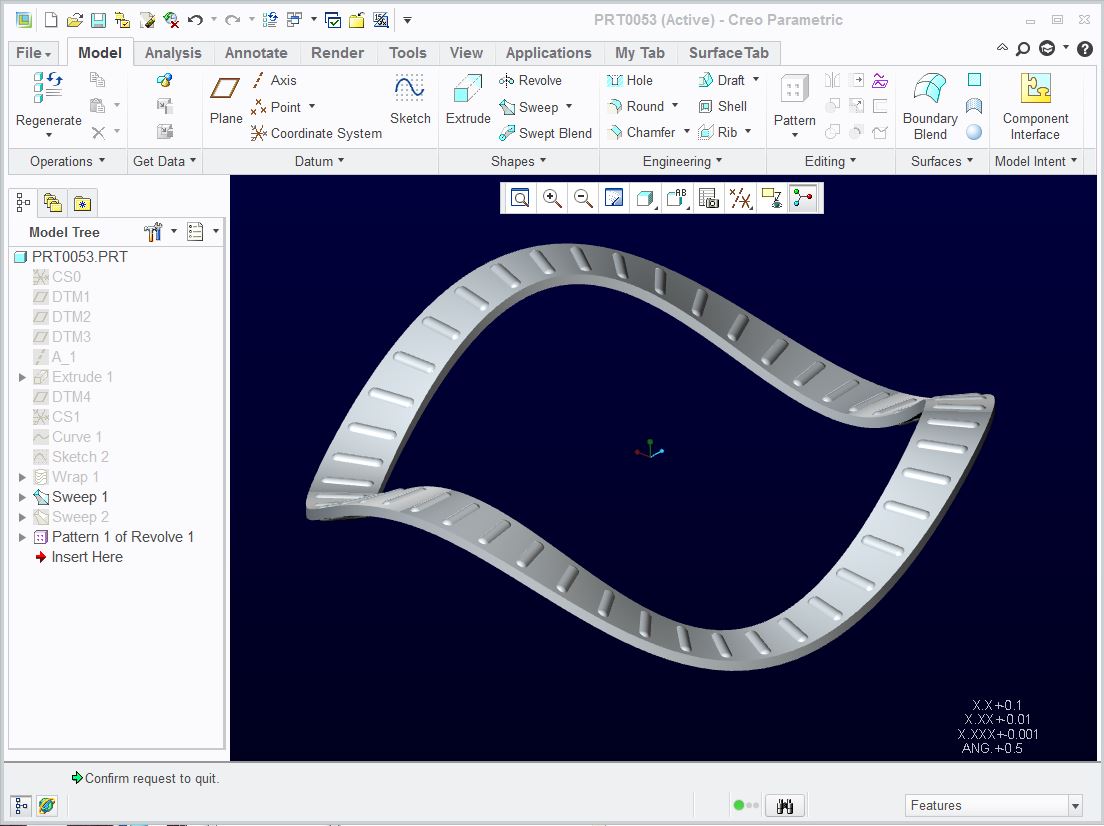
4:38) Completed part!
The attached file is Creo 2.0.
Please feel free to clarify or comment on this document. I know there are likely a few simplifications that could be considered.
Enjoy!
This thread is inactive and closed by the PTC Community Management Team. If you would like to provide a reply and re-open this thread, please notify the moderator and reference the thread. You may also use "Start a topic" button to ask a new question. Please be sure to include what version of the PTC product you are using so another community member knowledgeable about your version may be able to assist.