cancel
Showing results for 
Search instead for 
Did you mean: 
cancel
Showing results for 
Search instead for 
Did you mean: 

Community Tip - You can Bookmark boards, posts or articles that you'd like to access again easily! X

Visualizing geometric tolerances in 3d view.
gfraulini
17-Peridot

Visualizing geometric tolerances in 3d view.

Cattura.JPG Cattura2.JPG

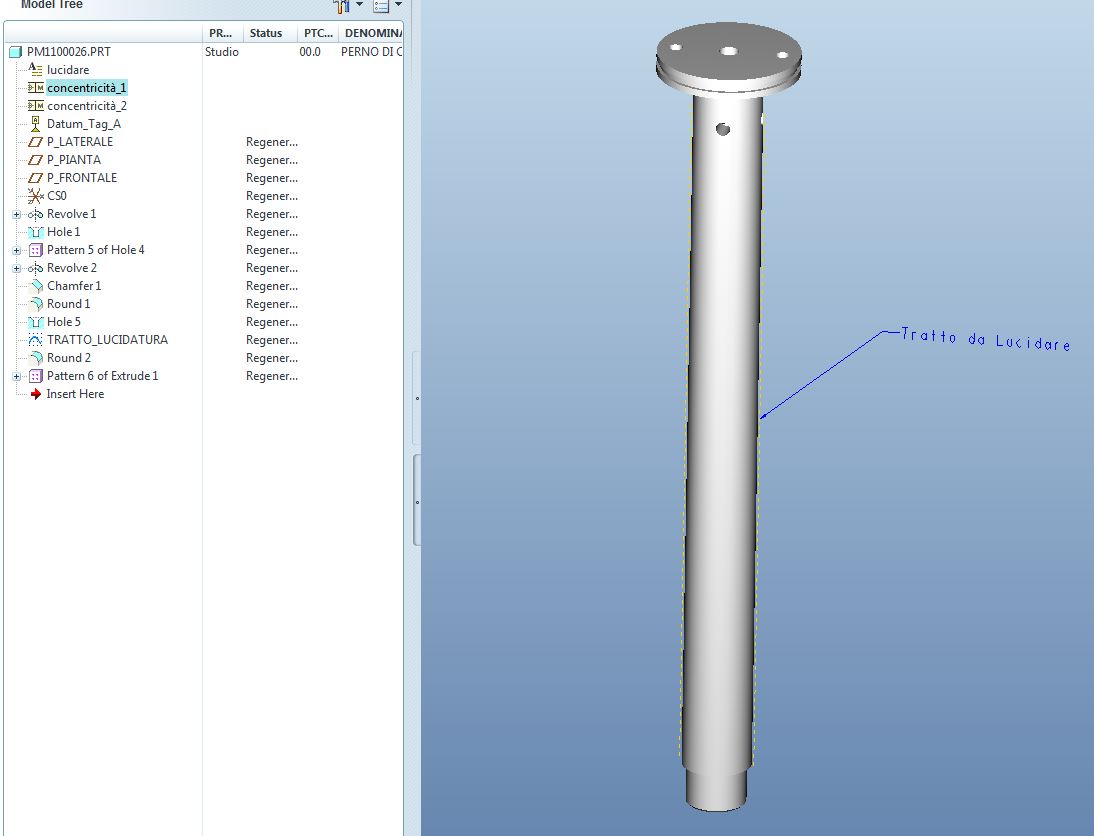
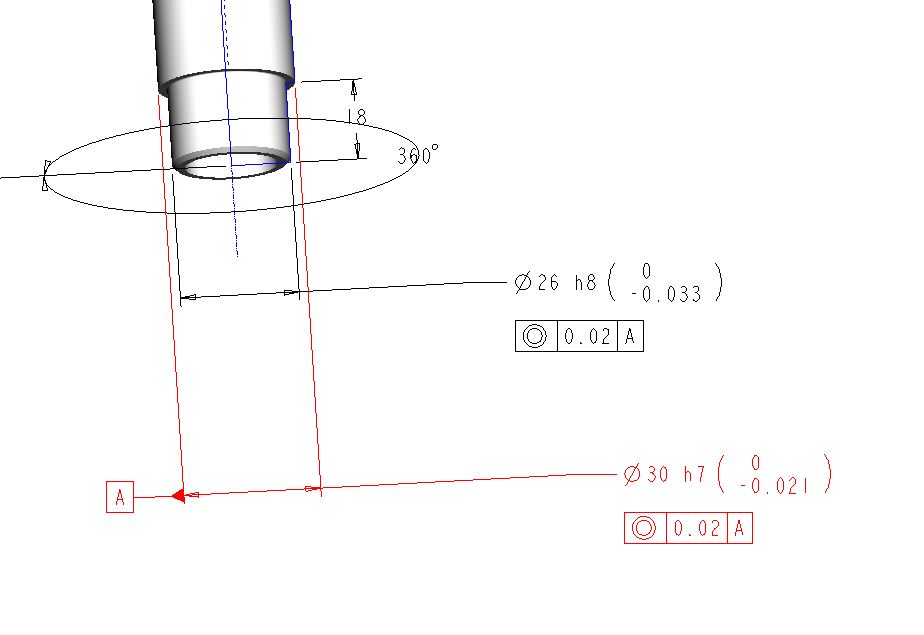
In this part I have set some gtol attached in the dimensions.
But, as you can see in the 1st picture, they are not visualized normally, but only if I edit the feature where there are the dimensions they are referred.
This because I have created Gtol on a dimension.

If I created the gtol "with leader", in the 3d view it would be visualized.

  1. Is there a manner to visualize the gtol of each kind?
  2. Is there a manner to visualize the gtol on the dimensions if I select them in the model tree?

Thanks.
Regards.


This thread is inactive and closed by the PTC Community Management Team. If you would like to provide a reply and re-open this thread, please notify the moderator and reference the thread. You may also use "Start a topic" button to ask a new question. Please be sure to include what version of the PTC product you are using so another community member knowledgeable about your version may be able to assist.
ACCEPTED SOLUTION

Accepted Solutions

Not a problem. You are wanting to show annotation. Annotation has a quick access graphics toolbar button.

I am assuming you are using Creo, not Wildfire.

Be careful, however. I have had it happened that once a dimension and GTOL is shown in the model, it does not want to show in the drawing again.

View solution in original post

7 REPLIES 7

Hello Giulio Fraulini,

Could you please check gtol with annotation feature in model itself rather than adding gtol in drawing.

Thanks and Regards,

Naveen Kumar Gongu.

Are you asking how to show the annotation in the 3D model?

Maybe I've not been much clear.

I have the "Annotation element display" (near the datum display buttons) setted as active.

When I put some geometric tolerance, those which are attached on other dimensions (as the previous pictures) are not visualized in the 3d view as instead happens when the gtol is attached on a edge or surface.

Cattura.JPG

The only way is to edit that feature/dimension where I've attached the gtol, then also in 3d, the dimensions are visualized and with those also the gtol.

Giulio, as hard as I try to understand, I am not able to visualize what you would like to accomplish.

Is the second picture attached above a drawing or a model? It looks like a model and you are editing the feature from the model tree, and the dimension with the GTOL is available for edit in the graphics window.

When you say "3D view", I am not certain if you mean drawing view or the model graphics window.

Please be patient with me and we can figure this out.

Please answer:

Do you want this to be a drawing with a view that shows the dimension with the GTOL?

Do you want to dimension a 3D orientation in a drawing view?

If this is not correct, please correct these assumptions.

Is the second picture attached above a drawing or a model?

Is the model (I've put the background white).

It looks like a model and you are editing the feature from the model tree, and the dimension with the GTOL is available for edit in the graphics window.

Yes, the model is normally as in the 1st picture, and you can see the tolerance only if you edit the feature where there is the dimension to which I've attached the gtol.

When you say "3D view", I am not certain if you mean drawing view or the model graphics window.

I mean model graphics window.

Please answer:

Do you want this to be a drawing with a view that shows the dimension with the GTOL?

Do you want to dimension a 3D orientation in a drawing view?

I want to see all the gtol on the piece when I open it in 3d (not in drawing).

This for me is important because often happens that elapses a lot of time between the concept (only parts or assemblies) and the production (the drawings). So, you can immediately put every tolerance you need in the design you are now doing without the necessity of revise the design after weeks.

In this optic I'm better if I have all gtol clearly visualized.

Not a problem. You are wanting to show annotation. Annotation has a quick access graphics toolbar button.

I am assuming you are using Creo, not Wildfire.

Be careful, however. I have had it happened that once a dimension and GTOL is shown in the model, it does not want to show in the drawing again.

Thanks Antonius,
I use WF5 and the procedure is not the same: there is not the button "show annotation" as there is in drawing environment. In WF5 you have to do "driving annotation AE" as you can see in this video.

http://communities.ptc.com/blogs/vpalffy/2011/02/28/create-driving-dimension

Bye

Announcements
NEW Creo+ Topics: Real-time Collaboration


Top Tags