
8-Gravel
August 25, 2025
Solved

Cycling through hatched components in Assembly drawing - Creo 11.0

  • August 25, 2025
  • 2 replies
  • 1943 views

Hello,

In Creo 4.0 I was able to cycle through different hatched components in an assembly drawing with the "Next" and "Previous" function in the Mod XHatch menu.
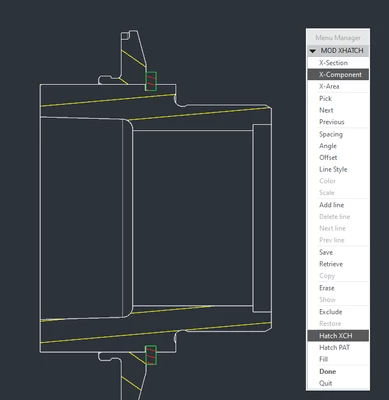
EK_10544941_0-1756128989712.png

However, in Creo 11.0 I cannot find this functionality in the "Edit Hatching" menues, How can I cycle between hatched components in an easy way? 
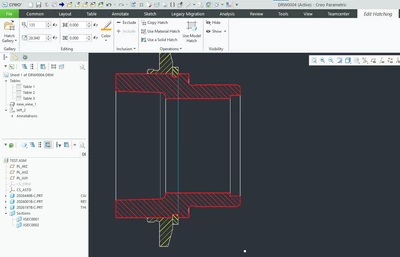
EK_10544941_2-1756129520403.png


Best regards,
Erik


Best answer by MartinHanak

Hi,

please replay uploaded video.

2 replies

kdirth
21-Topaz I
21-Topaz I
August 25, 2025

I tried it out in Creo+ (12.0), I usually use 7.0, and found that selecting on the screen seems to be the only way to change.  However, this also gives the basic modification tools needed in the mini tool bar.

kdirth_0-1756131063312.png


There is always more to learn.
23-Emerald III
August 25, 2025

I agree, I didn't see a way to cycle thru each one in Creo+ (Creo 12) either, but since you don't have to go to the "pick" option on the menu the selection on screen is much quicker, so that's a plus.

I'm not sure I will like it when I actually have to use it like that, but at least they did provide an relatively quick way to getting to each x-section.

24-Ruby III
August 26, 2025

Hi,

please replay uploaded video.

8-Gravel
August 27, 2025

Many thanks to you all for the response. The video was very helpful, thank you for that Martin.

I also found that I could select the part in the Assembly Model tree and cycle through the components / hatchings with the Up and Down keys.