16-Pearl
October 7, 2022
Solved

Sweep with 2 trajectories

  • October 7, 2022
  • 13 replies
  • 4452 views

All,


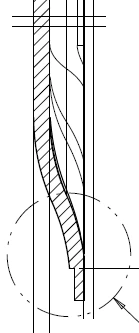
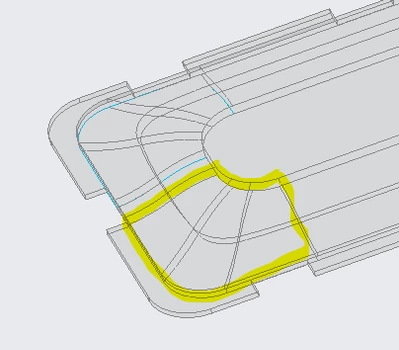
I am looking to recreate a part in Creo from another CAD tool. I don't use sweeps too much. I would like 1 sketch to sweep around - end points connected respectively to 2 trajectories. The sketch is basically 2 radii with a wall thickness being swept around. It is a plastic part.


What is the best tool for doing this? Swept Blend? Blend? Other?


Thanks,


WayneF
 

Screenshot 2022-10-07 104014.png

Screenshot 2022-10-07 105155.png

Best answer by wfalco

Screenshot 2022-10-13 080917.png


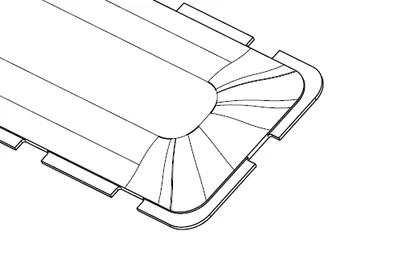
What I tried and it worked fine was to create 2 cross sections and one path section to create a boundary blend in the corners. I mirrored to all corners, joined all with extruded surfaces, thickened to solid and added perimeter lip and cuts. I then was able to do what my original intent was - created a surface from the inside surface, close it, merge and finally solidify.


I got the idea of using the boundary blend from a few users here in the community. Thank you!

13 replies

tbraxton
22-Sapphire II
October 7, 2022

There are multiple ways to do this. It depends on your modeling workflow. Are you using surfaces to make the cavity surface or building the solid from the start? Your workflow will determine which tools are appropriate.


The obvious option is a sweep with multiple trajectories from your description but looking at your pictures would guide me to use rounds in the corners of the geometry shown rather than sweep around them. You can see isoparm lines in your images that are indicative of suboptimal modeling. 


These isoparms should probably not exist in t model and should be avoided.

tbraxton_0-1665155394422.png


wfalco16-PearlAuthor
16-Pearl
October 7, 2022

TB


I am not sure what the best method is. I guess I was going to go with solid from the start?


The sweep you mention is a simple sweep? Can multiple trajectories be used? Not a blend or swept blend? I did use simple sweep first but it did not come out right. You may have triggered an idea though, in mentioning using radii? 


I do agree about the suboptimal modeling. This is one reason I am redoing this.


Much thanks. I will follow up.


Wayne

tbraxton
22-Sapphire II
October 7, 2022

Creo 7 model enclosed for reference.


I would use the master model merge method for this product to develop the outer surfaces in the master first. 


For a molded part I would model the cavity surface first and then offset it to get the core side. You can solidify using merge features once the cavity and core quilts are built.. The one caveat is to check that you can offset the cavity geometry to the thickness needed as you go along.


This is a simple approach to make a shape very close to your reference. I think your sweep trajectories may complicate this (in the corners), but the approach is still valid. I have simplified the trajectories relative to your images, but you can mimic this method to get what you need.


If you can deviate from the reference model to correct suboptimal geometry it will be pretty straightforward. If you cannot deviate, then you will need to do something additional in the corners.


Two sweeps (constant section two trajectories) and a boundary blend for the corner with C1 continuity across boundaries.

tbraxton_0-1665157875105.png


kdirth
21-Topaz I
October 7, 2022

I only have 7.0, so here is a screen shot of my tree and result.  No need for sweep.

kdirth_0-1665168127565.png

  • Sketched perimeter
  • fill for top
  • extrude surface for sides up to perimeter side end point
  • mirror
  • extrude and mirror ends
  • Project sketch to trim sides and ends
  • tangent boundary blends for corner and mirror
  • merge
There is always more to learn.
wfalco16-PearlAuthor
16-Pearl
October 7, 2022

hmmmmm. cool. Thank you. I will see what I can do.

wfalco16-PearlAuthorAnswer
16-Pearl
October 13, 2022

Screenshot 2022-10-13 080917.png


What I tried and it worked fine was to create 2 cross sections and one path section to create a boundary blend in the corners. I mirrored to all corners, joined all with extruded surfaces, thickened to solid and added perimeter lip and cuts. I then was able to do what my original intent was - created a surface from the inside surface, close it, merge and finally solidify.


I got the idea of using the boundary blend from a few users here in the community. Thank you!