Hi Dipika, Parnaz,
sorry for the late reply - was stuck in project work the last two weeks.
Checking and testing the functionality today I found that there is a slight change based on the new renderers. Before 1.10 you had to extract the *.pvi files from the *.pvz file - now this is not required anymore. Before you had to set the complete relative path as value in the binding to the sequence property of the model widget, now you only need the base filename (the complete path works as well - it truncates it to the base name).
Based on this info you can assign the Figure in two ways:
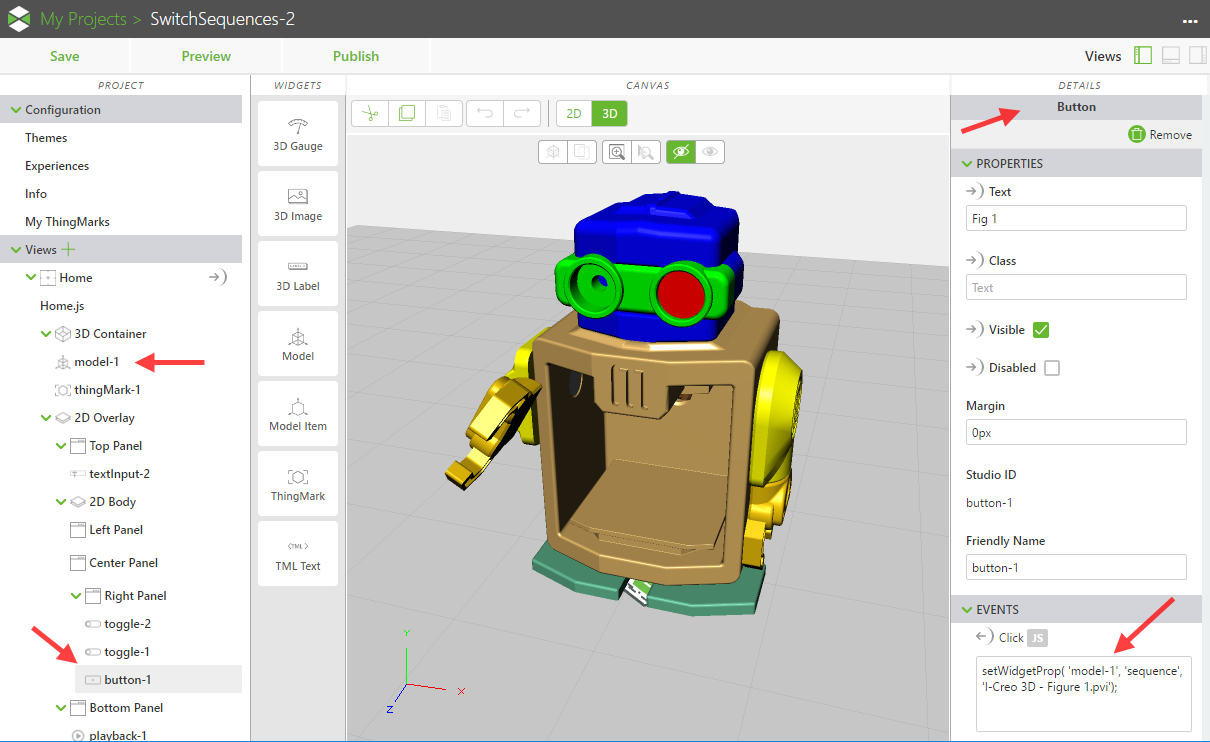
- Via Javascript: e.g. use a Button widget and add the following line to the Click Event handler:
setWidgetProp( 'model-1', 'sequence', 'Figure 1.pvi'); |
where:
- model-1 is the ID of the model widget. You have to adjust it to your experience design.
- sequence is the property name. This is always the same in this case.
- Figure 1.pvi is the value of the property. You should use one of the values that you see in the dropdown for Sequence URL
Here is a screenshot of this event handler:
2. Alternatively you can use connection bindings (with or without filters). Here is a slick example of a dropdown with a hardcoded value set, that it gets from a application parameter.
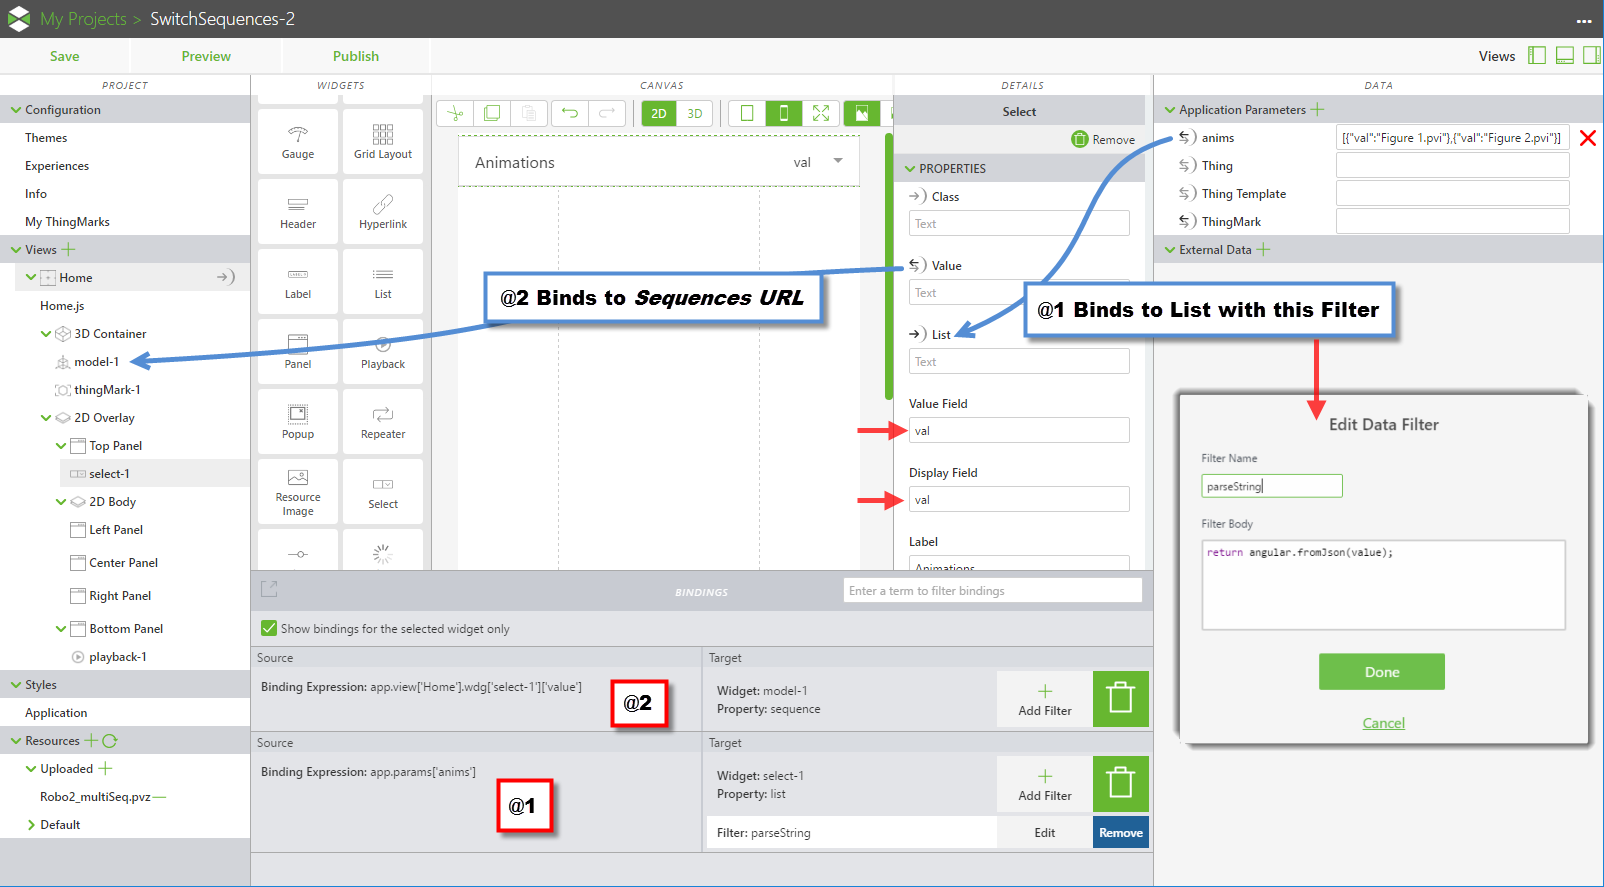
The app param value is a JSON formatted array. You have to use double-dashes (" not ' !) in it. In this example it is:
[{"val":"Figure 1.pvi"},{"val":"Figure 2.pvi"}] |
The object attribute name val must be specified in the Value Field and Display Field properties of the Select widget.
The app param is then bound to the List property of the Select widget. This binding has a filter on it with the following expression:
return angular.fromJson(value); |
Finally you bind the Value property of the Select widget to the Sequence URL property of the Model widget and that's it.
Have fun!

