

How to Set the Windchill Project Folder for new CAD Files
Here's another frequent question related to the use of Creo Parametric and Windchill.
- When we check CAD files into Windchill, they go to the top level directory.
- We then have to move them to the CAD directory.
- Is there a way to get them to always go into the CAD directory?
When you create new CAD files in your local workspace, their "home" or folder location in the team project is defined when the CAD file is Checked In. By default, it is always set to the root (top level) folder of the project. You can change this during the Check In process or change your workspace preferences to define a different project folder.
Setting the Folder Location During Check In
Locate the new items in your local workspace as shown below and initiate a Check In.

On the Check In page, use the Select All button to check mark all the new CAD files and then pick the Set Location (folder) icon in the toolbar. This will open the Set Location window allowing you to choose any folder in the team project you have access to.
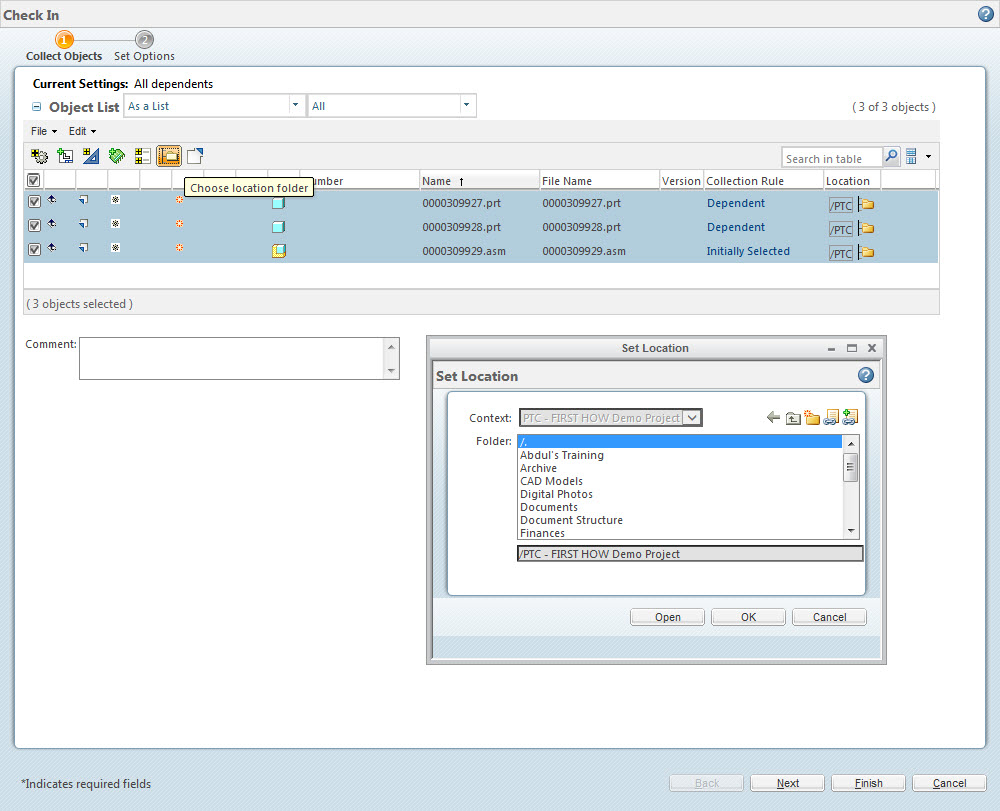
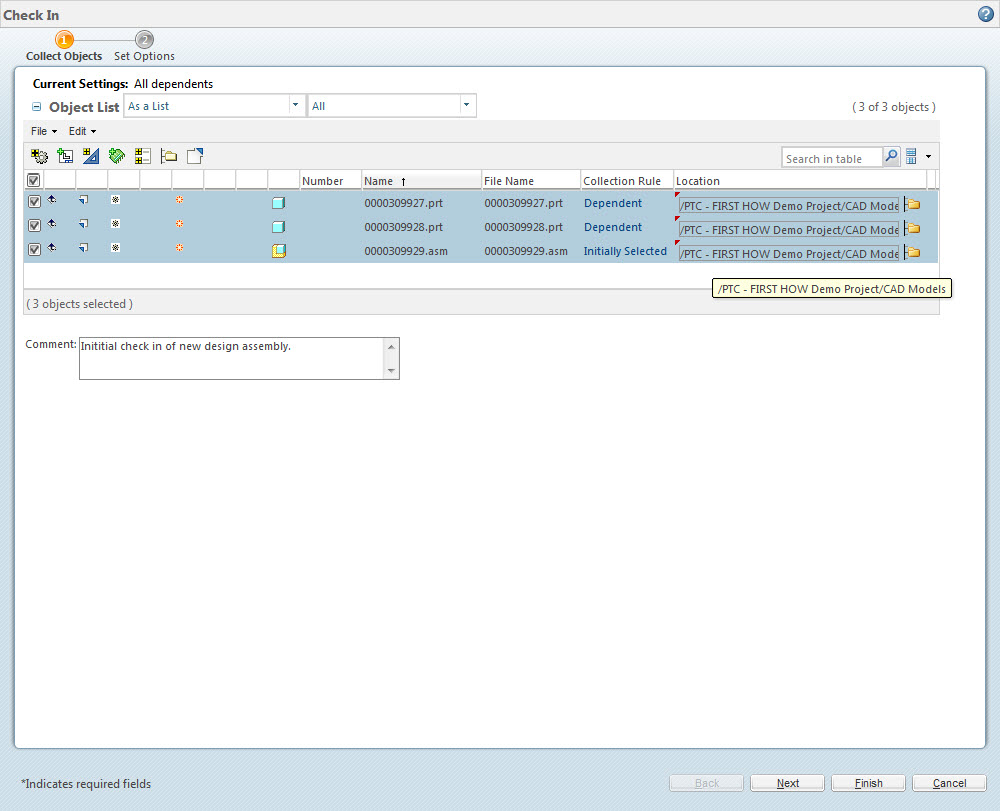
Once the Set Location window is confirmed, you'll see the full path to location of you new CAD files in the Check In window.
Setting the Default Windchill Project Folder Location as a Workspace Preference
Pick the Workspace link at the top of the Workspace window in the Creo Browser.
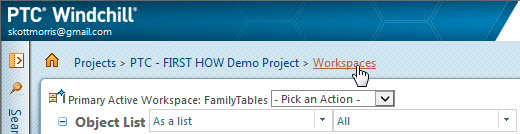
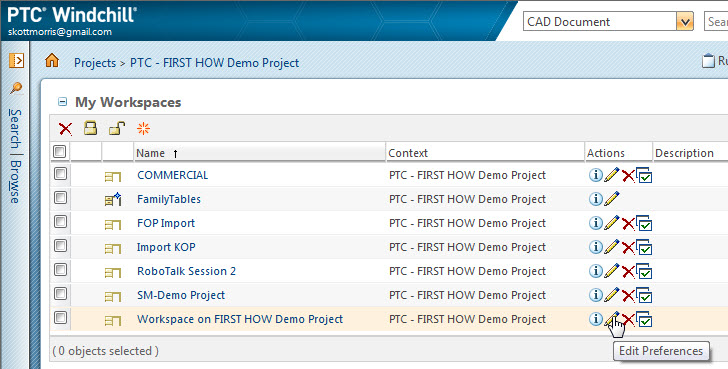
This will bring you to a list of your workspace(s). Just pick the Edit (pencil) button next to the workspace preferences you'd like to change.
Just like the previous example, you can now set the default folder for all new CAD files using the Set Location (folder) icon.
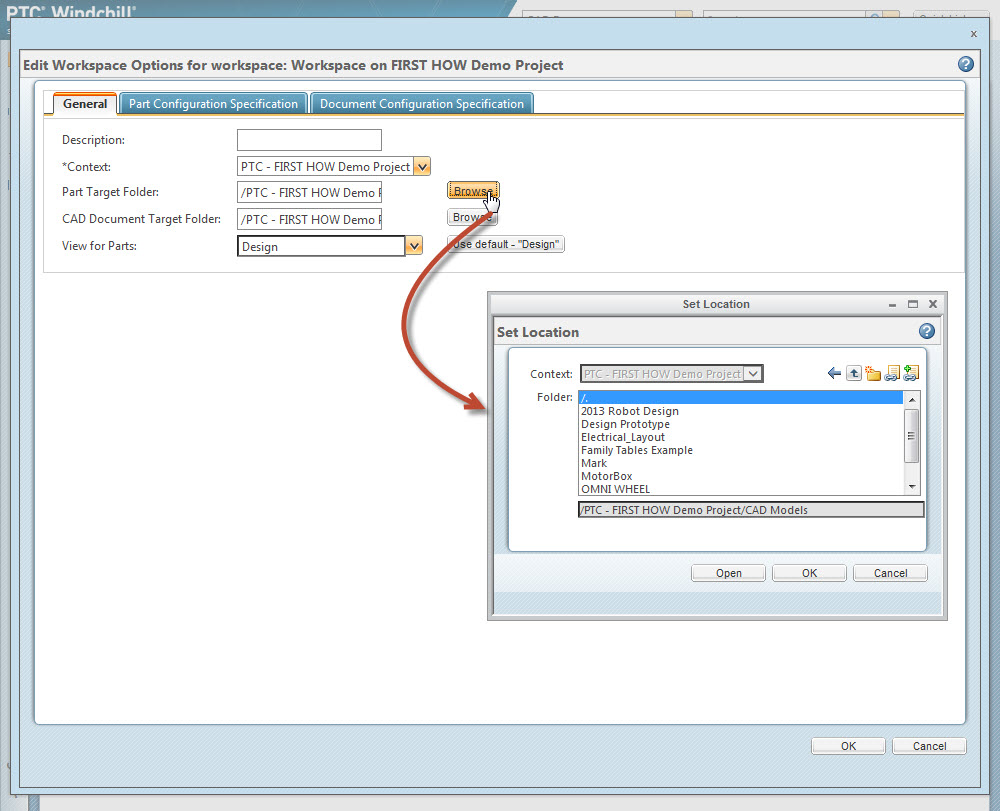
All that's left is picking OK to confirm the changes and you're good to go. The folder selected here will now be the default folder for all new CAD files created in this workspace.