

1-Visitor
January 7, 2015
Solved

Apperance Gallery not working!!
  • January 7, 2015
  • 8 replies
  • 4315 views

color+wrong+creo.jpg

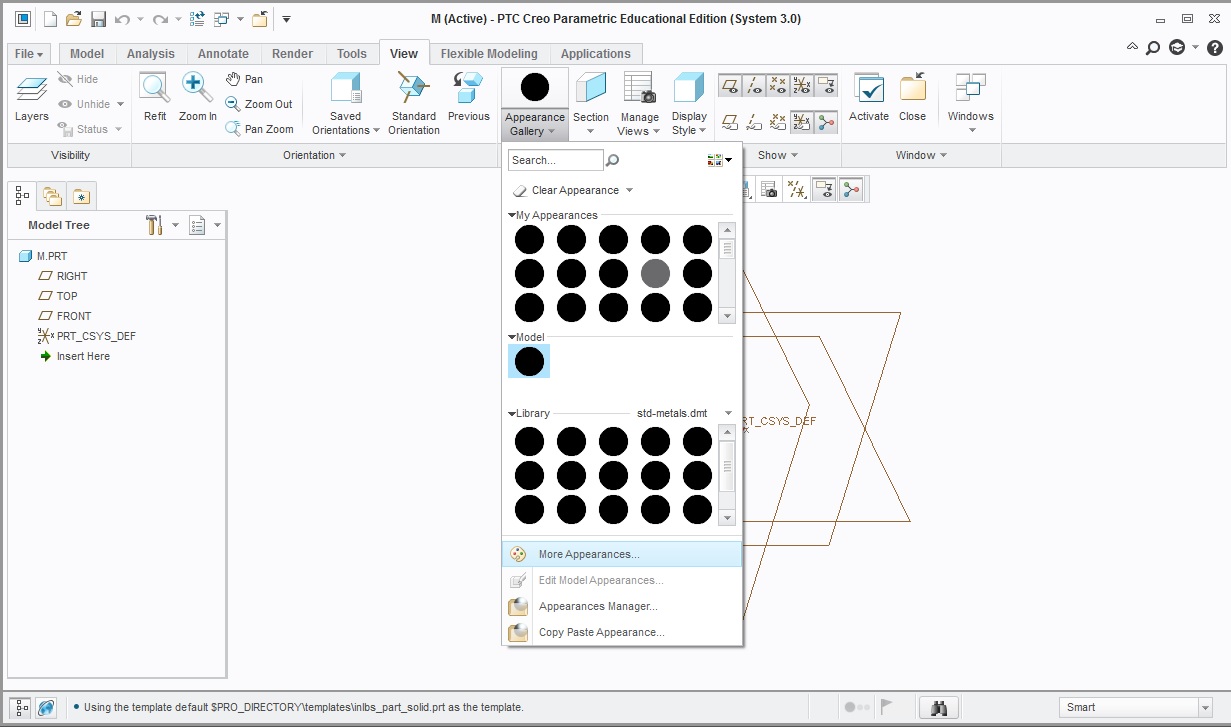
I don't know how to get colors in creo parametric MO10. This is the education model and I cannnot edit color in the appearance gallery.


This thread is inactive and closed by the PTC Community Management Team. If you would like to provide a reply and re-open this thread, please notify the moderator and reference the thread. You may also use "Start a topic" button to ask a new question. Please be sure to include what version of the PTC product you are using so another community member knowledgeable about your version may be able to assist.
Best answer by Mahesh_Sharma

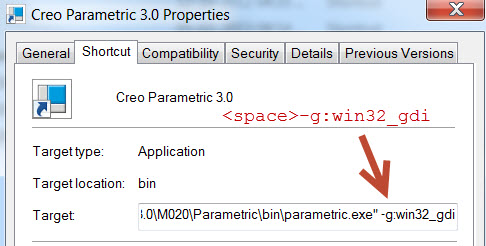
Ok, let's try second option:

1. Select PTC Creo Parametric 3.0 shortcut icon on desktop > Right Click and select properties

2. Move the cursor at the end in Target path > Add a empty space followed by -g:win32_gdi

3. Apply and close

icon.jpg

8 replies

Mahesh_Sharma
22-Sapphire I
January 7, 2015

Christina,

This seems to be due to graphics.

Add config option graphics win32_gdi in config file and test this.

1-Visitor
January 7, 2015

How exactly do I do this? I am new to this program

Mahesh_Sharma
22-Sapphire I
January 7, 2015

1. Open config.pro in text editor from install location of Creo 3.0 (default is C:\Program files\PTC\Creo 3.0\M010\common files\text\)

2. Add graphics win32_gdi > Save and close the file

3. Launch Creo 3.0 and test.

1-Visitor
January 7, 2015

I am in there in the folder but where do I get config file and how do I add it in. Is it already somwhere in my computer. How do I create a new text editor?

1-Visitor
January 7, 2015

Also I can't even open config.pro. I have windows and says it can't open unless I use other installed programs. Should I open with creo parametric.

Mahesh_Sharma
22-Sapphire I
January 7, 2015

Ok, let's try second option:

1. Select PTC Creo Parametric 3.0 shortcut icon on desktop > Right Click and select properties

2. Move the cursor at the end in Target path > Add a empty space followed by -g:win32_gdi

3. Apply and close

icon.jpg

1-Visitor
January 7, 2015

Yea it works!! Thanks so much.